Designing your own home is an exciting, yet challenging endeavor. The quality of the design determines not only the appearance of your future home but also its functionality, reliability, and cost-effectiveness in construction and operation. Modern technology offers ample opportunities for creating architectural and construction drawings yourself, even if you're not a professional architect. However, before you begin, it's important to decide whether to draw your house plan by hand or using computer programs, and which tools and programs are best suited for the job.
- Why is it important to have a house plan?
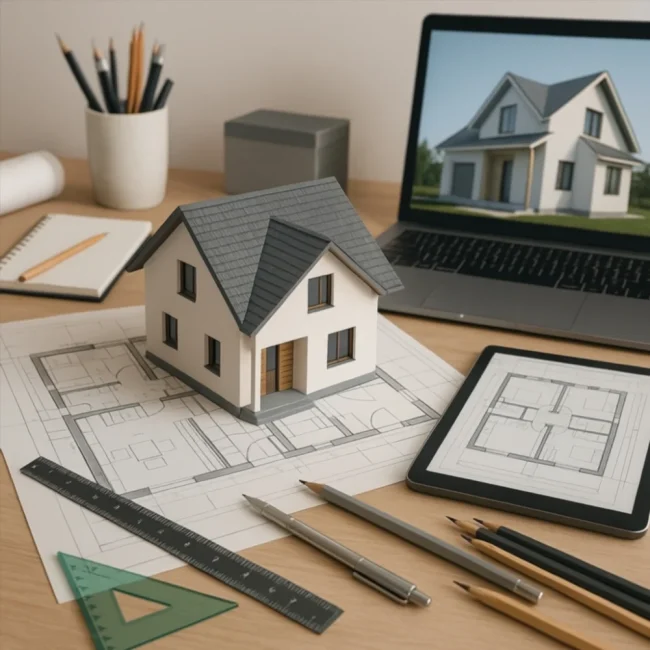
- Methods of house design: by hand and with the help of technology
- Hand-drawn project
- Tools required:
- Pros:
- Cons:
- Project using programs
- Popular home design software
- SketchUp
- Sweet Home 3D
- AutoCAD
- HomeByMe
- Floorplanner
- ArchiCAD
- How to choose the right design tool
- Stages of creating a house project
- Collection of initial data
- Creating a sketch
- Development of floor plans
- Engineering systems
- Exterior and facades
- Creating a 3D model
- Calculation and documentation
- Practical tips for beginners
- Conclusion
Why is it important to have a house plan?
Before we discuss design methods and tools, it's worth remembering why a project is needed in the first place:
- Correct zoningThe project helps to optimally arrange residential, utility, technical, and auxiliary spaces.
- Budget controlDesign allows you to calculate the volume of materials and anticipate costs.
- Compliance with regulationsA well-designed project complies with building codes and standards (SNiP, SP, GOST).
- Possibility of obtaining permitsWithout a project, it is impossible to obtain a construction permit in some regions.
- Making work easier for buildersThe project becomes working documentation for builders, electricians, plumbers, and other specialists.
Methods of house design: by hand and with the help of technology
There are two main approaches to creating a house design:
Hand-drawn project
This is a classic method using paper, pencil, and drawing tools. It's suitable for initial sketches, diagrams, and plans, as well as for creative people who think visually.
Tools required:
- Graph paper or Whatman paper— the basis for drawings.
- Pencils of different hardness— for sketches and elaboration of details.
- Rulers, squares, templates, compasses— for precise geometric constructions.
- Erasers, ink, mascara— for final finishing and contrasting lines.
Pros:
- Simplicity and accessibility.
- Creative approach.
- Quickly make changes.
Cons:
- Lack of 3D scaling.
- There are no automatic calculations.
- Difficulties with subsequent digitalization.
A hand-drawn sketch can be used as a starting point, especially at the ideation stage. However, for the final drawing, it's best to switch to digital format.
Project using programs
Modern technologies allow not only to draw but also to model a house in three-dimensional space. Below, we'll look at the most popular programs for drawing a house plan.
Popular home design software
SketchUp
SketchUp is a powerful and intuitive 3D editor widely used by both professionals and beginners. It's ideal for architectural modeling.
Peculiarities:
- Simplicity of interface.
- Fast construction of volumetric models.
- Lots of free add-ons and libraries.
- Possibility of visualization of interior and exterior.
Cons:
- The free version has limited functionality.
- It takes time to master 3D navigation.
Sweet Home 3D
This is a free program that allows you to design a house plan and visualize it in 3D.
Advantages:
- Russian language support.
- Easy to learn.
- Drag and drop furniture and walls according to the template.
- Import textures and models.
Flaws:
- Primitive interface.
- Less precision and functionality compared to professional CAD systems.
AutoCAD
AutoCAD is the standard in the world of drafting and CAD (computer-aided design). It is used by architects and engineers worldwide.
Advantages:
- High accuracy.
- Working with 2D and 3D.
- Flexible customization of layers and objects.
- Support of GOST standards.
Flaws:
- Difficulty for beginners.
- High cost of license.
AutoCAD is good for creating accurate architectural and construction drawings, but it requires a learning curve.
HomeByMe
An intuitive online service designed for users without construction experience.
Pros:
- Online access without installing programs.
- Database of ready-made furniture and finishing.
- Convenient interface for room planning.
Cons:
- There are no precision engineering tools.
- Limited functionality in the free version.
Floorplanner
Another online tool for designing floor plans.
Advantages:
- User-friendly interface.
- Possibility of export to PDF and image.
- Simple 3D visualization.
Flaws:
- Limitations in the free version.
- No advanced construction calculations.
ArchiCAD
This is a professional BIM platform for architects. It can be used to design houses, calculate structures, heating and ventilation systems, and much more.
Pros:
- Wide functionality for complex design.
- Built-in libraries of architectural elements.
- Support for collaboration.
Cons:
- High price.
- Steep learning curve.
How to choose the right design tool
The choice of tool depends on several factors:
- Purpose of design:
- For a sketch, paper or simple programs will do.
- For working documentation, it is better to use CAD or BIM programs.
- User skills:
- A beginner will find it easier to use SketchUp, Sweet Home 3D or HomeByMe.
- For professionals - ArchiCAD, AutoCAD, Revit.
- Financial opportunities:
- Free programs will help you save money.
- Paid solutions will provide more accuracy and flexibility.
- Availability of equipment:
- To work in AutoCAD and ArchiCAD you will need a powerful computer.
- Online services are suitable for weak devices.
Stages of creating a house project
Regardless of the tool chosen, design takes place in several logical stages:
Collection of initial data
It is necessary to study:
- Land plot for development (relief, soil, lighting).
- Neighboring buildings.
- Regulatory restrictions (indents, height, area).
Creating a sketch
A general plan is drawn up, showing the placement of rooms, entrances, and windows. It's important to consider:
- Zoning.
- Ergonomics and logistics of movement.
- Orientation of the house in relation to the cardinal points.
Development of floor plans
At this stage, dimensions, placement of stairs, bathrooms, windows, and doors are entered.
Engineering systems
It is being thought out:
- Water supply and sewerage.
- Electricity supply.
- Heating and ventilation.
Exterior and facades
The visual design of the house's exterior is being created. The following is being considered:
- Roof shape.
- Facade materials.
- Color solutions.
Creating a 3D model
This helps:
- Imagine the house in volume.
- Assess the proportions and appearance.
- Find architectural errors.
Calculation and documentation
At the final stage, a set of construction documentation is formed, including:
- Floor plans.
- Sections and facades.
- Estimates and specifications.
Practical tips for beginners
- Start simple: Don't aim for complex volumes if this is your first project.
- Explore analogs: View plans of houses that have already been built.
- Plan for yourself: the project should be convenient for you.
- Leave room for communication: Don't forget about technical niches.
- Use layers in programs: this makes it easier to separate walls, furniture and communications.
- Save your project regularly: especially important when working online or with volumetric models.
Conclusion
Designing a house is not only a technical process, but also a creative one. With modern tools, even someone without architectural training can create a functional and aesthetically pleasing home. The key is choosing the right tool: from a pencil and graph paper to advanced CAD software. Each tool has its advantages, and the choice depends on your goals, budget, and skills. By approaching the design process with care and interest, you will create a home that will be comfortable to live in for many years to come.