Landscaping a property is a task that requires a comprehensive approach. This is especially challenging when the property is located below roadway level. This terrain can not only complicate construction but also create a host of problems down the road: from foundation flooding and waterlogging to the destruction of paths, loss of topsoil, and even the inability to conduct normal business activities. In this article, we'll explore the challenges that low-lying property owners face and the measures they can take to ensure reliable water protection and develop the area efficiently and safely.
- Why the area below the road is a problem
- Stage 1. Geodetic survey and site analysis
- Stage 2. Raising the site level
- Stage 3. Installation of the drainage system
- Stage 4. Installation of storm sewers
- Stage 5. Retaining walls and ebbs
- Stage 6. Organizing access to the site
- Step 7: Using the terrain to your advantage
- Stage 8. Protecting the foundation and buildings
- Stage 9. Coordination and legal nuances
- Conclusion
Why the area below the road is a problem
The difference in elevation between the road and the property may seem insignificant at first glance. However, during seasonal precipitation or snowmelt, this very difference plays a key role in water redistribution. Due to the natural laws of gravity, all moisture from the road and shoulder will flow to the lower point—your property.
Main risks:
- Flooding of the territoryduring rains or floods.
- Destruction of the foundationbuildings due to excess soil moisture.
- Stagnation of water and waterlogging— especially on clay soils.
- Soil leachingand slope erosion, if any.
- Difficulties with planting and gardeningdue to waterlogged soil.
- Difficult access to the site, especially in winter or after heavy rains.
That's why, when designing a house and landscaping a yard, it's important to consider this feature from the very beginning and take a series of measures to drain, protect, and level the terrain.
Stage 1. Geodetic survey and site analysis
Before starting any work, it is necessary to accurately determine the slopes, water flow directions, groundwater levels, and soil composition. This is done usinggeodetic surveyAndengineering and geological surveys.
What you need to find out:
- Level differencebetween the road, the fence and the center of the site.
- Direction of natural water flow.
- Groundwater level.
- Soil type— permeability is especially important (clay, loam, sand, etc.).
The data obtained will allow for the competent design of a drainage system and the selection of appropriate methods for protecting the area.
Stage 2. Raising the site level
The most radical and at the same time effective way isbackfilling of the siteto road level or even slightly higher. For this, a mixture of sand, crushed stone, construction soil, and topsoil is used.
Stages of work:
- Site planningwith relief leveling.
- Laying geotextiles- prevents layers from mixing.
- Layered backfill with sand and crushed stonewith mandatory compaction.
- Filling of the fertile soil layeron top of the technical embankment.
Disadvantages of this method:
- High cost (especially with large volumes of backfill).
- The need to install retaining walls along the boundaries of a site if it borders other sites or a road.
However, raising the level is a major solution that will avoid problems for decades to come.
Stage 3. Installation of the drainage system
If it is impossible or too expensive to raise the level of the site, you should take care ofwater disposalDrainage is a must for any site, especially one located in a lowland.
Drainage system options:
- Surface drainage— a system of storm drains, gutters and canals through which water flows away from the site.
- Deep drainage— pipes laid in trenches at a slope, wrapped in geotextile, and filled with crushed stone. They collect water from deep below and drain it into a storm drain or drainage well.
- Linear drainage along a fence or driveway, especially if the road is higher and water flows off the asphalt.
For optimal protection it is recommendedcombined drainage— connection of surface and deep systems.
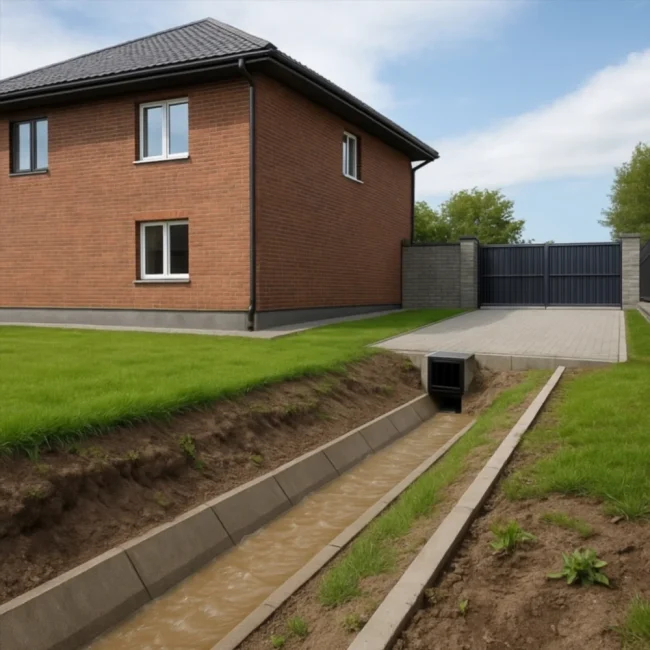
Stage 4. Installation of storm sewers
Storm sewerA drainage system is a system of pipes, water inlets, and stormwater catch basins that drain water away from buildings and paths. It is especially useful for paved courtyards, patios, terraces, and roofs.
Important elements:
- Storm drainsat gates, entrances, along the fence.
- Rainwater inletsunder the roof gutters.
- Branch into a drainage wellor a ditch outside the site.
When planning storm drainage, the regional climate, average rainfall, and catchment area are taken into account.
Stage 5. Retaining walls and ebbs
If the site is bordered on one side by a road or a neighboring higher site, it may be necessary to installretaining walls, which will hold the soil and prevent it from sliding.
Materials:
- Concrete.
- Gabions.
- Brick or rubble.
- Reinforced concrete blocks.
They are definitely laid downwater drainage holesand drainage systems behind the walls. Also, along the roads, it is possible to installlow tides, which drain water directly into the storm drain, preventing it from flowing onto the site.
Stage 6. Organizing access to the site
The low elevation of the site often complicates vehicle access. The access road can be washed away, eroded, or form a "puddling pool at the entrance."
Solutions:
- Raise the entry level and installreinforced concrete slabs or paving.
- Organizestorm drain right in front of the gate.
- Raise the fence level or makestepped entrancewith a slope.
If you are planning to build a house, it is important thatfoundation markwas above the road level - this protects against water penetration and facilitates further use of the building.
Step 7: Using the terrain to your advantage
Sometimes it is impossible to change the slope radically. In this case, you canplay up the relief with landscape solutions:
- Devicedry streamsto drain water.
- Creationcascading terraceswith drainage channels.
- Planting moisture-loving plants in lowlands.
- Turning depressions intodecorative ponds.
This approach will not only solve the problem, but also create an original and functional landscape.
Stage 8. Protecting the foundation and buildings
Even if the general drainage system is working, it is important to ensurelocal protection of building foundations.
What to do:
- Dowide blind areaaround the house (at least 60 cm), preferably with a slope away from the wall.
- Mandatory devicefoundation waterproofing.
- Connecting roof gutters to storm drains.
- Arrangementdrainage pipe around the perimeter of the house.
These measures will protect the building even in the event of temporary flooding or heavy rain.
Stage 9. Coordination and legal nuances
If the site is located indense developmentand the road level under the control of the municipality, any changes concerning the height, drainage and runoff,it is necessary to coordinate.
Important points:
- It is not allowed to direct water runoff onto a neighboring property.
- Violation of the site level without taking into account common utility networks can lead to conflicts.
- In a number of regions there arebuilding codeson drainage and stormwater organization.
Conclusion
A site below road level isn't a death sentence, but a challenge that can be successfully addressed. The key is to approach the issue wisely, starting with a terrain and soil analysis and then building a comprehensive protection system: from drainage to raising the ground level. With the right approach, even a low-lying site can be transformed into a dry, beautiful, and comfortable place to live.
I'll generate an image now.