No one wants to be left without a washing machine, refrigerator, or oven when they need it most. However, half of the common problems can be diagnosed at home—quickly, safely, and inexpensively. If initial checks don't improve the situation, or complex components need replacing, you can contact a home appliance repair service center—saving you time and frustration.
Below is a simple diagnostic system for home use: what to look for first, what telltale signs, and when to stop. Take note: a proper inspection often solves the problem without a screwdriver—just identify the weak spot and fix it.
- A universal algorithm: where to start and how not to cause harm
- Safety and preparation
- Quick Checklist
- Diagnosis by symptoms: washing machine, refrigerator, oven
- Washing machine: doesn't fill with water, doesn't spin, shakes
- Refrigerator: doesn't freeze, runs non-stop, makes noise
- Oven: Doesn't heat, grill malfunctions, smells burnt
- Electrical and Electronics: How to Measure and Understand Error Codes
- How to read error codes and why you need to
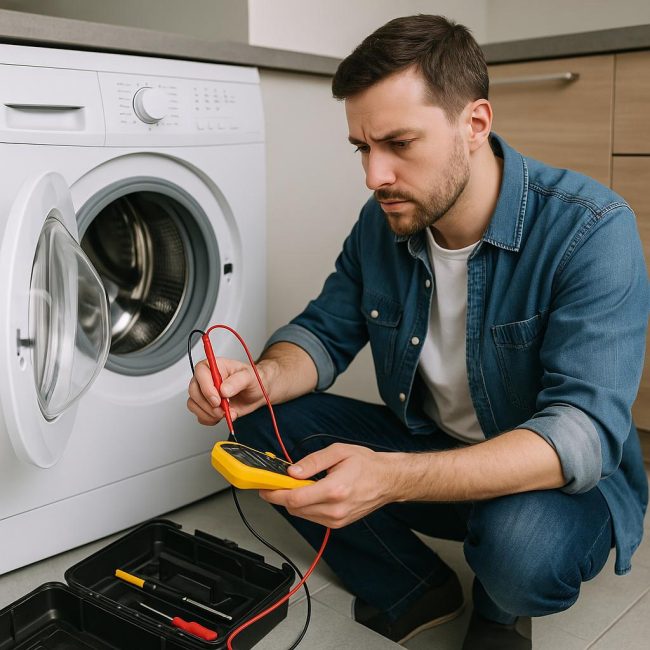
- Multimeter: What and how to measure without risk
- When to Stop: The Limits of Reasonable Self-Diagnosis
A universal algorithm: where to start and how not to cause harm
Safety and preparation
Before disassembling the case or accessing the service codes, disconnect the power to the appliance. Unplug it from the wall outlet, turn off the water supply to any appliances (washing machine, dishwasher), and wait 2-3 minutes for the capacitors in the power supply to discharge. Work in good lighting, and keep your phone handy—it's useful for taking photos of the wires and connectors to ensure a smooth reassembly.
Useful tools:
- Multimeter with voltage and resistance measurement modes.
- Phillips/slotted screwdrivers, Torx; thin tweezers.
- A flashlight, isopropyl alcohol, and dry wipes. Have a container ready for the screws—small parts are the main source of chaos during self-diagnosis.
Quick Checklist
Go from simple to complex. In 7 out of 10 cases, the problem is found in the first steps:
1) Connection and power supply. Test the outlet with a different load (a table lamp), inspect the plug and cable for kinks and melting. For extension cords and surge protectors, test directly into the wall outlet.
2) Reset and "cold boot." Completely disconnect the device from power for 5-10 minutes. This often "cure[s] frozen relays and controllers.
3) Doors, hatches, and latches. Most devices won't start if the closing sensor isn't triggered. Check the washing machine seal, the door latch, and the oven door microswitches.
4) Filters and air. Vacuum cleaners, dryers, and ovens love clean air. Clogged filters and grilles cause the appliance to overheat and trigger the protection system.
5) Water and drain. Washing machine/dishwasher: hoses are free of kinks, inlet filter screens are clean, drain filter is free of debris, pump impeller rotates freely.
6) Settings and modes. An incorrectly selected program is a common cause of "strange" behavior. Reset the settings to factory defaults, check the child lock and delayed start timer.
7) Noise and odor. Record video/audio and smell the air around the power supply. A characteristic sweet odor indicates overheating of the electronics.
If the symptom persists after this, move on to testing the specific device. The more precisely you describe the symptom (won't turn on at all, makes noise, flashes a code, doesn't heat up), the faster you'll narrow down your search.
Diagnosis by symptoms: washing machine, refrigerator, oven
Washing machine: doesn't fill with water, doesn't spin, shakes
The water isn't filling. Check the faucet pressure, the inlet strainers, and the proper operation of the inlet valve (you'll often hear a distinctive "click" sound, but no water flows). Make sure the hose isn't kinked and the program isn't set to "rinse without filling." If you hear a humming sound, the valve is powered; check for a blockage. If there's complete silence, check the valve's power supply with a multimeter; the control module may be interfering with the command, or the Aquastop protection device may be engaged.
It's not spinning. The first problem is the laundry distribution and the pump. Excessive vibration and an empty drum prevent the machine from spinning. Clean the drain filter and check the pump impeller: a thread or hair could be clogging it. If the machine "balances" the drum and constantly drops speed, check the shock absorbers, counterweights, and belt. The tachogenerator sensor on the motor can also cause a similar problem if it malfunctions.
The washer shakes and rattles loudly. Make sure you removed the shipping bolts during installation. Check the surface for levelness, and adjust the feet for levelness. Foreign objects in the drum (coins, bra wires) will indicate this by a metallic clanking and scratching sound. Shine a flashlight through the drum openings.
Refrigerator: doesn't freeze, runs non-stop, makes noise
It's not cooling. First, check the door seal—a gap is allowing warm air and condensation to leak in. Check to see if the evaporator chamber is frozen; a solid "coat" is blocking the airflow. Turn it off for 8-12 hours to completely defrost, then turn it back on and observe. If the compressor starts and then shuts off quickly, there may be a problem with the starting relay, thermal protection, or electrical system. When NTC temperature sensors fail, they often mislead the controller, preventing it from turning on cooling in a timely manner.
It runs nonstop. Check to see if the condenser (the radiator at the back) is clogged with dust—a simple brush cleaning will reduce the temperature and the load on the compressor. Make sure there's no hot food inside and the "Super Freeze" mode isn't on. If the motor is constantly hot and the surface behind the refrigerator is smoking with dust, clean it immediately and let the appliance cool down.
Noise. Cracking plastic during cooling is normal. The hum and vibration will go away if you move the unit 5-7 cm away from the wall and level the feet. The clinking sound of bottles in the refrigerator is often mistaken for a "compressor malfunction"—sort the contents.
Oven: Doesn't heat, grill malfunctions, smells burnt
It's not heating. Make sure the correct mode is selected: top/bottom, convection. Visually inspect the heating elements for damage—dark marks and bulges indicate a rupture. If the heating indicator is on but the temperature isn't rising, check the temperature sensor (thermostat/thermocouple). A relay in the control module is often the culprit: you can hear clicking sounds, but there's no contact.
The grill is malfunctioning. Grease and carbon deposits on the heating element and reflectors cause localized overheating and a thermal protection shutdown. A deep cleaning and inspection of the convection fan will solve the problem. If heavy smoking occurs, inspect the door seal and ventilation ducts.
Burning smell. New molds, detergent residue, and grease on heating elements can smell even at low temperatures. Preheat the oven to 220°C (425°F) for 30 minutes, then open a window. If the smell persists and smoke is visible from the control panel, disconnect the oven and inspect the wiring; the terminals may be burnt.
Don't ignore these signals:
- Frequent tripping of circuit breakers in the panel precisely when the device is turned on.
- The smell of melted plastic, sparks, local overheating of the plug or socket.
- Alternating jumps in lighting brightness with the start-up of equipment.
Electrical and Electronics: How to Measure and Understand Error Codes
How to read error codes and why you need to
Modern appliances don't keep silent—error codes save hours of diagnostics. Find the model and revision identification plate (on the door edge, rear panel, or inside the hatch), and download the manufacturer's manual for your specific appliance. The same "E04" code means different things for different brands.
Approach:
- Record the code: photo of the display, sequence of flashes.
- Repeat the situation: the same error in the same mode - a hint on the node.
- Compare it with the checklist in the manual: it usually lists probable causes from simple to complex.
For example, for washing machines, "no drain" errors are often traced to the filter, pump, or water level sensor. For refrigerators, "AL" or "t°" errors indicate a sensor or a broken fan circuit. Ovens often display "F" errors, indicating overheating, a heating element, or a thermal fuse.
Don't be afraid of temporarily "clean" errors after a reboot—if the cause remains, the code will return. Your goal is to eliminate the root cause, not simply reset the power supply.
Multimeter: What and how to measure without risk
A multimeter is a home diagnostics best friend, provided you exercise caution. Work on de-energized equipment, except when measuring voltage at the outlet or power input, and only if you are confident in your actions.
Three practical dimensions:
- Heating element resistance. Heating elements typically have tens of ohms. Infinity on the screen indicates an open circuit, while almost zero indicates an interturn short circuit or measurement error (remove the wires and measure directly at the contacts).
- Check the integrity of the fuses and thermal fuses. In the "continuity" mode, the device will beep if the circuit is intact. If there's no sound, the element has burned out. Look for the cause of the overheating, rather than replacing it blindly.
- Voltage at the valves and motors. With the mode enabled, carefully measure for 220 V (or 12/24 V, depending on the device). If the module "gives a command" but the actuator remains silent, replace the unit. If there is no "command," check the module logic and the sensors that are blocking the start.
A useful tip: take photos of the pinout before removing the terminals. Mark the wires with colored stickers. Before closing the case, make sure the cables aren't pinched by sharp edges—this is a common cause of repeated failures.
If the device has a pulsed power supply, take a closer look at the electrolytic capacitors: swelling or leaks are a sign they need to be replaced. However, soldering on circuit boards requires skill and tools; it's best not to experiment without confidence.
When to Stop: The Limits of Reasonable Self-Diagnosis
Self-diagnosis is appropriate as long as you're dealing with accessible components without hidden wiring or dense electronics. Any work involving gas, sealed refrigerator circuits, complex soldering, or tampering with live power circuits is dangerous.
Assess the risks and costs:
- Equipment age and residual value. Replacing an expensive control module in a ten-figure refrigerator is sometimes pointless—it's cheaper to find a replacement.
- Spare parts availability. If the required component is not included in the supply chain or is only available with the complete unit, look for repairs with warranty diagnostics.
- Safety signs: Plastic melting, the machine gun firing, sparking—immediately unplug and do not plug back in until inspected by a technician.
A clear "stop" criterion is the lack of a consistent result after the basic steps. If the symptom is intermittent, disappearing and returning periodically, the cause may be cracked board traces, partially broken cables, or network sags. Identifying such defects requires experience and measurements under load.
Consider logistics: when ordering a part, don't buy the "cheapest alternative" without verified compatibility. Compare part numbers, check revisions, and check if calibration is available for your model. A common mistake is replacing an apparently identical sensor that produces different resistance values at the same temperature, rendering the device "blind."
Finally, consider preventative maintenance. Cleaning filters once a month, airing after washing, descaling, loading the drum correctly, properly ventilating the refrigerator and oven, and using a separate power supply for high-power appliances will reduce the likelihood of sudden breakdowns and protect electronics from surges and overheating. And remember: a calm, step-by-step diagnosis saves money just as much as discounts.