If a snowdrift is forming inside the freezer, the food smells like a refrigerator, and the door is hard to close, it's time to defrost. The process isn't complicated, but there are plenty of nuances: from preparing the food to starting the compressor correctly. If you don't want to mess around and risk your appliance, you can call a technician—for example, Fridgemaster can quickly help in the Tushino area.
- When and why to defrost: signs, frequency, preparation
- Step-by-step instructions: from stopping to starting
- Preparation and shutdown
- We speed up the process without risk
- Maintenance of drainage and sealant
- Washing and drying
- Launching and loading correctly
- Common mistakes: what you risk and how to avoid them
- Useful life hacks and prevention for the future
When and why to defrost: signs, frequency, preparation
Thick ice buildup isn't just a cosmetic issue. Ice eats up storage space, interferes with air circulation, and forces the compressor to work longer. This ultimately increases your electricity bill and wears out the motor faster. It's important to know when to defrost and how to prepare.
Signs that you can no longer pull:
- The “fur coat” on the walls is thicker than 5–7 mm, especially in the freezer.
- Water appears on the shelves and puddles appear under the drawers.
- The door springs, the seal sticks to the ice.
- The refrigerator has become noisier and takes longer to turn off.
The frequency depends on the type of system:
- Drip (static) - once every 3-4 months, or as it freezes.
- No Frost is a scheduled shutdown once or twice a year for hygiene and odor prevention. Internal evaporators defrost automatically, but dirty drains and clogged ducts also require maintenance.
Preparation saves time and stress. Plan ahead of time what to freeze and what to cook. Place valuable items in a cooler with cold packs or in a pan with an ice pack and take them out to the balcony during cooler months. Clear the countertop—that's where the racks and drawers will be. Cover the floor in front of the refrigerator with old towels or plastic wrap to prevent water from seeping under the baseboards. Check the drain tray on the back of the compressor—it should be empty, otherwise water may splash out when it starts.
Another point that's often forgotten: before defrosting, set the thermostat to neutral (or turn off the SuperFreeze/SuperCool button, if enabled) and be sure to unplug the refrigerator. This will prevent the compressor from starting up accidentally while defrosting.
Step-by-step instructions: from stopping to starting
Defrosting isn't just a matter of "turning it off and waiting." Following the correct steps preserves the plastic, seals, and insulation.
Preparation and shutdown
Unplug the refrigerator. Remove all food and containers. Remove shelves and drawers—it's best to wash them separately with room temperature water. Leave the doors wide open. Place rags under the bottom edge of the cabinet; if there's a drainage hole in the refrigerator compartment, place a low tray underneath.
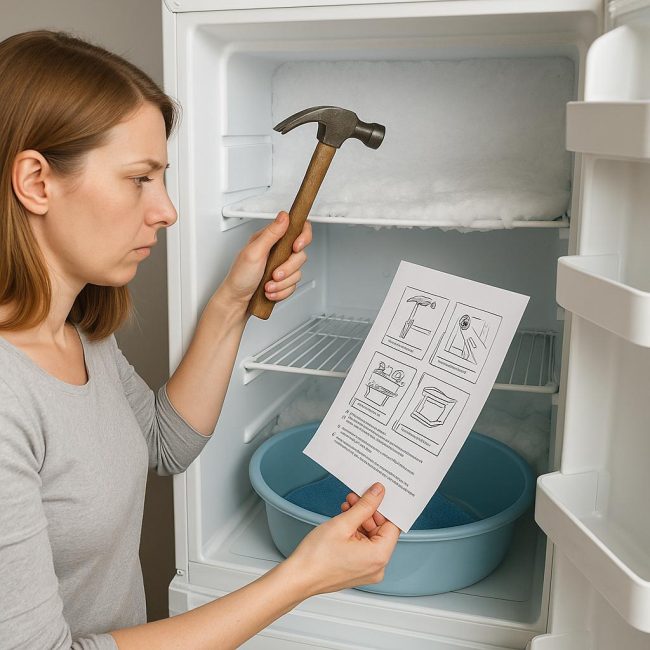
Immediately assess where the ice is melting faster. If a solid block has accumulated in the freezer, don't try to break it off—the plastic and evaporator are close together. Your goal is to let the ice melt naturally and safely speed up the process.
We speed up the process without risk
You can gently accelerate melting without thermal shock or mechanical damage:
- Place a wide bowl of warm (not boiling) water (40–50°C) in the freezer compartment and close the door for a couple of minutes to allow the steam to help loosen the ice. Change the water as it cools.
- Point a small room fan toward the open space—the air flow will speed up heat exchange.
- Place damp, hot towels on the shelves and bottom; change them frequently, but do not pour boiling water on plastic or metal.
What you shouldn't do: use a hair dryer or steam generator on high, a heating pad with boiling water, or a hot pan against the plastic, and especially don't use knives, screwdrivers, or spatulas with the blades pressed against the plastic. One careless move and you'll puncture the evaporator. Repairing such damage is more expensive than a new refrigerator.
Maintenance of drainage and sealant
While the ice is melting, take care of the drainage. Locate the drain hole on the back wall of the refrigerator compartment. It often gets clogged with crumbs and slime, which is what causes water to pool under the drawers. Clean it with a soft cotton swab and flush with 50–100 ml of warm water using a syringe without a needle or a special bulb syringe. From the outside, check the tube leading to the compressor tray: it should fit tightly and not be kinked.
Wipe the door seal with a solution of 1 tablespoon of baking soda per 1 liter of warm water. Baking soda removes odor and greasy residue without damaging the rubber. Use a soft brush to clean any crevices. If the rubber is hard and dry, apply a small amount of silicone lubricant for household seals (not automotive grade with solvents) after washing. This will help the door close more tightly and reduce frost buildup.
Washing and drying
Once the ice has melted, clean the inner tube and its components. A solution of baking soda (1 tablespoon per 1 liter of water) or 9% vinegar diluted 1:3 will work. Vinegar quickly neutralizes odors, but don't use it too often on the tires—alternate with baking soda. Abrasive powders and hard sponges leave scratches, which trap odors and dirt.
Rinse glass shelves with room-temperature water, especially if they are cold—a sudden change in temperature can crack the glass. Allow all parts to air dry completely. Wipe the inside of the compartments dry with a microfiber cloth, paying attention to the corners and drainage area—residual moisture will accelerate re-freezing.
Launching and loading correctly
Replace the shelves and drawers, close the doors, and wait 20–30 minutes for the plastic to reach room temperature. Plug in the refrigerator and set it to the standard settings: +3–+5°C in the refrigerator compartment and -18°C in the freezer. Don't set the refrigerator to maximum cold right away, as this will cause the compressor to go into a prolonged, pointless cycle.
Load food in batches, starting with those that need to be kept strictly cold. Cool warm foods to room temperature—hot pans will "kill" the temperature, and the ice will quickly return. If you have a thermometer, check: in a refrigerator, the target temperature of 4°C is usually reached in 2–4 hours, and in a freezer, in 6–12 hours, depending on the model and load size.
Common mistakes: what you risk and how to avoid them
Defrosting mistakes can be costly, from spilled water under the laminate to a malfunctioning evaporator. Here's a list of common defrosting mistakes and what to do instead:
- Chipping off ice with a knife, screwdriver, or spatula. Risk: evaporator tube puncture, refrigerant leak, costly repairs. Correct method: warm water, steam, a fan; wait for the ice to come off on its own.
- Boiling water and a hair dryer. Risk: plastic deformation, insulation peeling, microcracks, torn seals. The correct method: water up to 50°C, no shock temperatures.
- Washing with abrasives and bleach. Risk: scratches, persistent odor, corrosion of metal parts. The right way: baking soda, diluted vinegar, mild, non-abrasive kitchen cleaners.
- Running the unit at maximum speed immediately after assembly. Risks include compressor overheating, ice buildup on the back panel, and temperature fluctuations. Correct: Use standard settings and allow the unit to reach its normal operating temperature.
- Keeping doors closed during defrosting can cause musty odors and mold in hard-to-reach areas. Correct: Keep doors open; when using warm water, close them briefly to allow steam to escape.
- Ignoring the drainage. Risk: water under the boxes, repeated puddles, ice buildup around the drain. Correct procedure: clean the drain regularly, flushing with a syringe without a needle.
- A fully loaded freezer compartment after defrosting. Risks: poor circulation, localized warm spots, accelerated frost formation. Correct: leave air gaps, do not press food against the back wall.
- Defrosting a No Frost unit with the rear panel open and picking at the ice around the fan. Risk: Damage to sensors, wiring, and the evaporator. Correct procedure: Allow the system to defrost for 8–12 hours with the power off, clean the drain, check the ventilation ducts, and do not access the panels without experience.
Remember electrical safety: only work with equipment unplugged from the outlet, do not place containers with water on the top cover above the control unit, and do not allow moisture to come into contact with the outlet or power cord.
Useful life hacks and prevention for the future
Defrosting is a great time to tidy up and extend the life of your appliance. Organize your food into containers so you can quickly find what you need and reduce spills. Label your frozen food with the freezing date—you'll have to open the door less often to find the right package, and the temperature will be more stable. A packet of activated charcoal or a special absorber will eliminate odors—place it on a shelf in the far corner and change it every 1-2 months.
Keep an eye on the seal: it needs to be kept clean and lightly lubricated every six months. Test it with a piece of paper: if the jammed piece of paper comes out easily, the door is "breathing" and the hinges need adjusting or the rubber needs replacing. Leveling the frame also helps: a tilted frame will impair the door seal and encourage frost formation.
Allow air to circulate. Don't place the unit too close to a wall—leave a 5–7 cm gap for heat dissipation, especially for models with a rear condenser. Vacuum the grille and the area behind it once a month—dust heats the compressor and increases energy consumption. If there's an open area underneath where the radiator is located, gently brush it with a soft brush.
Temperature discipline works wonders. Maintain a temperature of 4°C in the refrigerator and -18°C in the freezer—it's a balance between safety and economy. A thermometer inside is inexpensive and helps you get a true picture, especially in summer. Avoid placing hot pots and uncovered soups in the freezer—condensation will settle on the walls and turn into a new "fur coat."
Plan your defrosting. For drip systems, once a season is sufficient, while for No Frost systems, a thorough cleaning twice a year is sufficient. If you have a large family and the door opens every 5 minutes, reorganize the shelves: frequently used items should be closer, less frequently used items should be further away. This will keep the door open less, and the frost will be thinner.
There's a reason to contact a service center if your appliance behaves strangely after defrosting: the freezer doesn't reach -18°C within 24 hours, the compressor doesn't turn off, an oil stain appears under the casing, frost only forms in one corner, strange clicking sounds are heard, and the interior smells like burning plastic. In such cases, DIY experiments are risky—diagnosis and repair by a specialist are better.