An outdoor shower isn't just a comfort feature; it's also an essential part of country living, especially during the hottest months. Many owners of summer cottages and private homes install an outdoor shower to quickly refresh themselves after gardening, before entering the house, or simply for pleasure. Despite the simplicity of the design, choosing the right materials and organizing the water supply plays a key role. In this article, we'll look at how to build an outdoor shower yourself—from concept to implementation.
- Why do you need an outdoor shower and what are its advantages?
- Types of summer showers: choosing the right one
- Stationary shower
- Mobile (portable) shower
- Shower with heated water
- What you need to build a summer shower: a list of materials
- Selecting a location for installation
- Step-by-step instructions: how to build a DIY outdoor shower
- Step 1. Marking and preparing the base
- Step 2. Foundation construction
- Step 3. Assembling the frame
- Step 4. Wall paneling and door installation
- Step 5: Installing the tank and water supply system
- Step 6. Floor and drainage installation
- Step 7. Finishing work
- Additional improvements
- — Water heating
- — Insulation
- - Sealed and windproof
- — Decor
- Care and maintenance tips
- Possible mistakes during construction
- Conclusion
Why do you need an outdoor shower and what are its advantages?
An outdoor shower on your property serves several purposes at once:
- Provides hygiene after working in the garden or on the surrounding area.
- Serves as a great way to cool down in hot weather.
- Allows you to save water and electricity, especially in comparison with a permanent bathtub.
- Can be additionally equipped with heating functions and a rainwater collection system.
Moreover, such a shower can easily be integrated into the overall landscape design of the site – it can be made of wood, metal, polycarbonate, or even use a hedge.
Types of summer showers: choosing the right one
Before starting construction, it is important to determine which type of outdoor shower will be optimal:
Stationary shower
This type of structure is installed on a foundation and connected to a permanent water supply. It is most often used in homes with permanent residences.
Advantages:Durability, insulation and water heating possible.
Flaws:high cost and complexity of installation.
Mobile (portable) shower
Consisting of a simple frame and a water tank, this shower can be installed anywhere and doesn't require a solid foundation.
Advantages:simplicity, accessibility.
Flaws:limited service life, less stable in windy weather.
Shower with heated water
A solar-heated or electric-heated container is used. This is convenient in regions with unstable weather.
Advantages:comfort in any weather.
Flaws:requires connection to the power grid and compliance with safety precautions.
What you need to build a summer shower: a list of materials
To build a shower you will need:
- Frame elements (wood, metal profile, PVC pipes).
- Sheathing (corrugated sheets, polycarbonate, boards, awnings).
- Water tank (50–200 liters, preferably with a lid).
- Shower head or watering can.
- Tap or valve.
- Pallet (wooden deck, concrete slab, plastic container).
- Waterproofing materials.
- Self-tapping screws, anchors, corners, fasteners.
- Level, screwdriver, saw or grinder, hammer.
Selecting a location for installation
The correct placement of the shower plays an important role:
- Sunny side— for natural heating of water.
- Slope in the ground- facilitates water drainage.
- Distance from a residential building- reduces humidity around the foundation.
- Access to water supply- convenient when connecting a hose or pumping station.
- Privacy- for comfort during use.
If the plot is large, it makes sense to provide a shower near the garden or recreation area so that you don’t have to walk across the entire yard.
Step-by-step instructions: how to build a DIY outdoor shower
Step 1.Marking and preparation of the base
Mark out the perimeter of the future shower. The optimal shower enclosure size is 100x100 or 120x120 cm. Remove the top layer of soil from the chosen location and level the surface.
Step 2.Foundation device
For lightweight construction the following are suitable:
- concrete blocks;
- brickwork;
- screw piles;
- dense wooden flooring with moisture-resistant impregnation.
It is advisable to make a drainage system: fill the area with gravel or arrange a sewer system (drainage into a pit, drainage well).
Step 3.Installation of the frame
The frame can be constructed from timber beams (50x50 or 100x100 mm) or metal profiles. All elements are joined to form a rectangular structure with vertical posts and crossbars. Height: 2 to 2.5 m.
Be sure to reinforce the top part, as the water tank will be placed on it - it can weigh up to 200 kg.
Step 4.Wall paneling and door installation
Materials for cladding:
- moisture-resistant plywood;
- polycarbonate;
- boards;
- corrugated sheet;
- thick fabric or tarpaulin (in budget options).
Install the door on hinges or install a curtain. Make sure there's enough light and air inside.
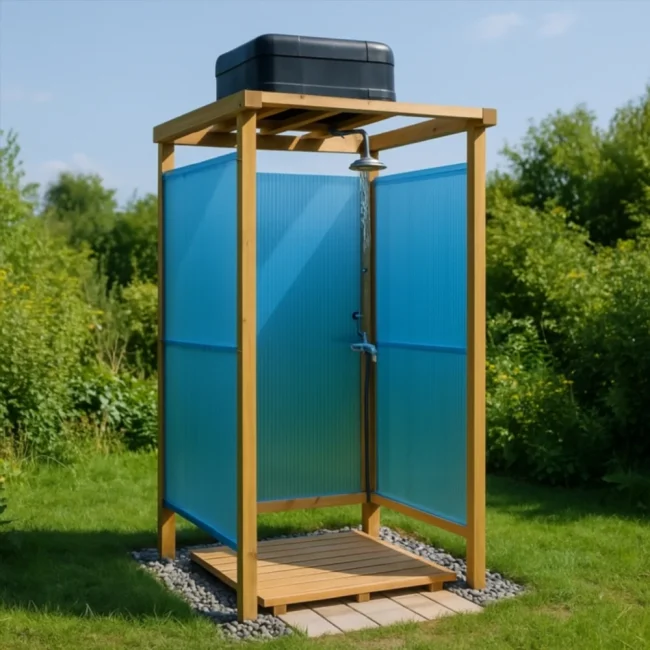
Step 5.Installation of a tank and water supply system
The tank is placed on the roof or a special platform. Options:
- plastic container with a tap;
- heated metal tank;
- Black barrel for solar heating.
A hose, showerhead, or automatic faucet can be connected to the tank. Pumps can be used to supply water from a well or borehole.
Step 6.Floor and drainage installation
The floor can be made from:
- wooden flooring with gaps;
- plastic tray with a grate;
- concrete platform with a slope towards the drain.
To drain water, make a drain towards the drainage pit, lay out gravel and sand, and use a pipe or hose as a drain.
Step 7.Finishing work
Check the stability of the structure. Treat the wood with a wood preservative. If desired, install coat hooks, shelves, and lighting (if electricity is available).
Additional improvements
—Water heating
In sunny regions, a black plastic tank that heats naturally is sufficient. In cooler climates, a heating element or water heater will do.
—Insulation
To extend the life of the shower, you can line the inside of the cabin with insulation and moisture-resistant film.
—Sealed and windproof
Use seals, weatherstripping and caulking at joints to prevent leaks and drafts.
—Decor
Decorate the exterior: panel it with wood, paint it, and add greenery.
Care and maintenance tips
- Clean the tank and watering can regularly to remove any deposits.
- In the fall, drain the water to avoid freezing.
- In the spring, check the fasteners and condition of the materials.
- Do not use chemical cleaners if water runs into the soil near plants.
Possible mistakes during construction
- Incorrect choice of location (in the shade, without drainage).
- Weak frame - may not support the weight of the tank.
- Lack of drainage will lead to waterlogging of the area.
- Lack of ventilation - mold and dampness may form.
Conclusion
An outdoor shower at your dacha isn't a luxury, but a useful and easy-to-implement solution. Even with minimal investment, you can create a comfortable and aesthetically pleasing area for water activities. Carefully selected materials and thoughtful design will ensure comfort and safety throughout the warm season. And with a little imagination, even a simple shower can become a beautiful addition to your property.