Lately I've often come across the question of whether it's possible to install an air conditioner yourself - the answer is yes, if you know how to work with technology and comply with legal regulations! You can use it on a private home any wall for mounting the outdoor unitFor installing an air conditioner in an apartment you need to obtain permission from the organization servicing the building.
If you're interested, this article will detail the nuances of legally installing air conditioning equipment in apartments and private homes. I'll also show examples of split-system connection diagrams. I'll also provide detailed installation instructions—from site preparation and tool selection to initial startup, along with recommendations for air conditioner operation.
At the end of the article, I will point out mistakes made when doing the work yourself and answer frequently asked questions.
- The difference between installing an air conditioner in an apartment and a private house
- Norms, laws, permits
- Air conditioner connection diagram
- What tools and materials are needed?
- Preparing for installation
- Step-by-step installation instructions
- Tips for use and care
- Air conditioner installation errors
- Answers to frequently asked questions
- Video about installing an air conditioner
The difference between installing an air conditioner in an apartment and a private house
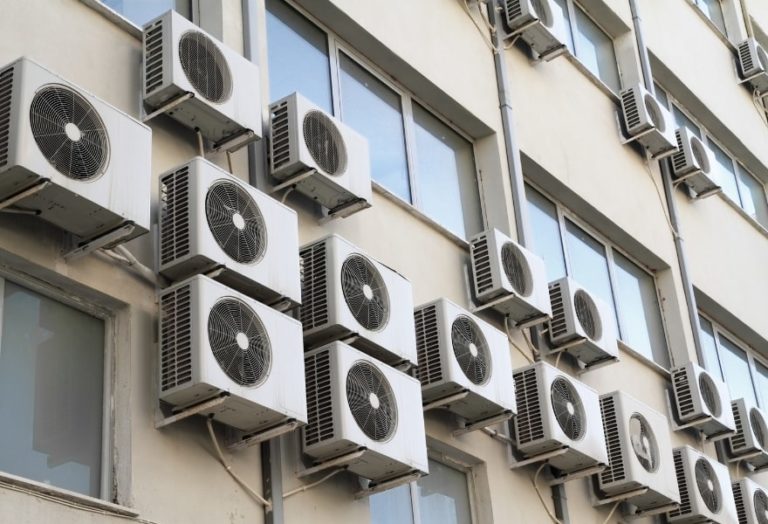
The main difficulty is installing the outdoor air conditioner unit on the building's facade. From a technical perspective the list of works is the same in a private house and an apartmentIn the second option, labor costs increase due to installation at height.
Legally, it makes a big difference where you install your air conditioning equipment. For a private homeowner, there are no restrictions. You can install the outdoor unit yourself on any wall of the building.
An apartment building is the common property of all residents and is owned by a service organization. Installing air conditioning equipment in an apartment yourself requires permission.
Norms, laws, permits
There are no specific laws regarding the installation of air conditioners, but without a legal solution, it is impossible to arbitrarily attach an outdoor unit to a façade. In Article No. 246 of the Civil Code An apartment building is designated as common property of the homeowners.
The architectural structure is owned by the maintenance organization. Installing an air conditioner on the façade is considered a building renovation, according to Article No. 25, paragraph 1 of the Housing Code of the Russian FederationBy decree No. 170, paragraph 3.5.8 It is stated that without the permission of the service organization and the consent of the neighbors, it is forbidden to install a split-system system on an apartment building without permission.
The limitations are related to the occurrence of the following problems:
- The outdoor unit makes noise with its compressor and fan, causing discomfort to neighbors.
- Condensation flowing from the drainage pipe damages the façade. Water spills onto balconies and windows on lower floors, sidewalks, and flower beds.
- The outdoor unit is capable of blocking neighbors' view from the window.
- Drilling into the façade for pipes, fasteners, and wiring weakens the load-bearing capacity of the building wall. This increases the risk of cracks and fires involving electrical wiring and equipment. The increased number of heavy outdoor units on each floor increases the load on the building's foundation.
In reality, strict rules apply to residents of apartment buildings that have architectural significance or are located in historic city sites. In other cases, claims are generally not made if a split-system installation is carried out without a permit.
Modern new buildings are designed with embedded structures for attaching external modules. You can install equipment without permits.
Another question is whether an apartment building is classified as a historical landmark or an ordinary building. To find out, it's best to contact local authorities. Individual regions have the right to establish their own regulations.
For example, obtaining permits in Moscow canceled the installation of climate control equipment on March 21, 2011.However, individual government entities may make exceptions to the rules. Permission is required when:
If you risk installing an air conditioner in your apartment without permission, no one will force you to dismantle the unit without a court order. According to Article No. 330 , the actions will be considered arbitrary. However, to avoid wasted time and stress, it's wise to consult with local authorities before installing a split system.
Air conditioner connection diagram
The term "air conditioner" refers to three types of climate control equipment. The connection diagram depends on the number of component units. See more details. What types of air conditioners are there?.
Window And floor the air conditioner is completed one monoblockThe first type of equipment is mounted in a window frame. The floor-standing monoblock is portable and can be moved between rooms.

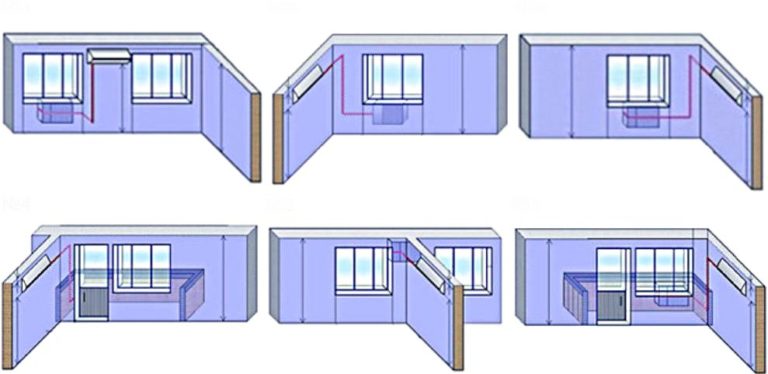
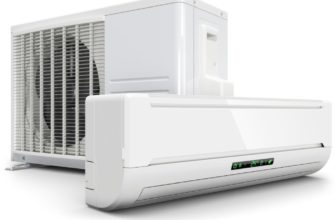
The split system consists of external and outdoor unitThis type of equipment is the most popular among apartment and homeowners. The air conditioner connection diagram is determined based on the layout of the living space, the apartment's location in a multi-story building, and the owner's preferences. Six common options are:
- The indoor unit is on the left wall, the outdoor unit is under the only window in the room.
- The internal module is on the wall between two windows, the external one is under the left window opening.
- The indoor unit is on the right wall, the outdoor unit is under the only window in the room.
- The internal module is on the left wall, the external one is on the left near the balcony.
- The indoor unit is on the right wall, the outdoor unit is on the right near the balcony.
- The internal module is on the right wall, the external one is in the area of the balcony railing.
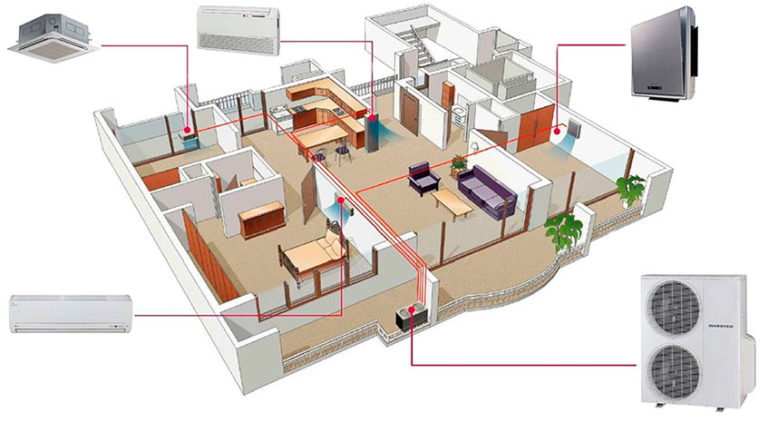
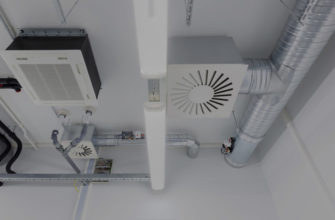
From split multi-split system It features a larger number of indoor modules. The outdoor unit installation is similar to a split system. The indoor modules are distributed among the rooms. Multi-split systems are less popular for residential applications. These air conditioning systems are used in public buildings.
What tools and materials are needed?
To install the blocks yourself, you'll need marking tools: a tape measure, a level, a pencil, or a marker. Every homeowner has a simple set. Installation tools will have to be purchased or rented if they're not readily available.
To install a split system yourself, prepare:
- A hammer drill with a drilling function for creating through holes for piping and electrical cables. Utilities will connect the outdoor and indoor modules.
- Electric drill with a set of drill bits, plastic dowels, screws and anchors.
- A pipe cutter is used to cut copper tubing to length. Using an angle grinder is not recommended due to the formation of chips and scale, which can contaminate the system.
- A rimmer for removing burrs from pipe cuts. Files and sandpaper are not recommended because they can create chips and scale.
- Device for flaring copper pipes.
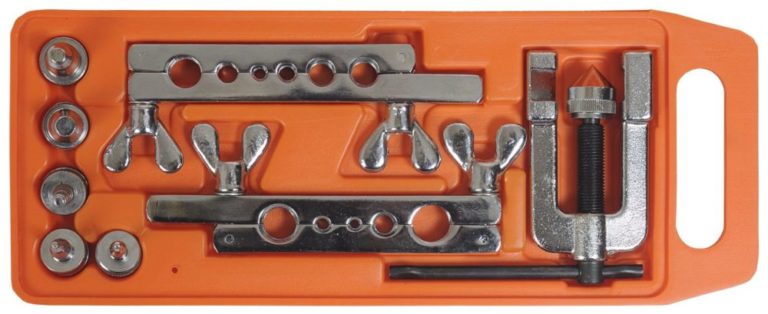
Before adding freon, air conditioner installers bleed the system with a vacuum pump. Professional equipment is expensive, and cheap tools are useless. If the pipeline length does not exceed 6 meters, vacuum testing may be unnecessary.
The split system comes with an outdoor and indoor unit. Some manufacturers supply mounting hardware. You'll need to purchase the remaining installation materials yourself.

You will need:
- thick-walled seamless copper pipes used in the refrigeration industry;
- copper multi-core cable with 4 wires with a cross-section of 2-2.5 cm2;
- rubber insulation for copper pipes;
- corrugated hose for drainage;
- plastic box for laying communications;
- L-shaped brackets for hanging the outdoor unit, if the manufacturer did not provide them in the kit.
The length of the pipes, wires, insulation, and ducting corresponds to the route parameters with a slight allowance. The pipe diameter will be specified by the manufacturer for the specific split system model.

Preparing for installation
Once you've purchased your air conditioner, consider where to install the units. Choosing the right layout isn't a complete solution. Determine the installation locations for the outdoor and indoor units according to these guidelines:
- Do not allow the height difference between the indoor and outdoor modules to be more than 5-7 meters.
- It is advisable not to exceed 6 meters in length of the pipeline.
For each type of air conditioner, the manufacturer specifies the maximum and minimum pipe lengths. If the pipe length is longer than 6 meters, additional refrigerant will be required. If the distance between the outdoor and indoor units is 1 meter, do not exceed 5 meters in pipe length.
Parameters for the indoor unit:
- the minimum gap between the top cover and the ceiling is 15 centimeters;
- the minimum distance between the side wall of the module and the corner wall of the room is 30 centimeters;
- The minimum distance from the front panel with air supply holes to the obstacle is 1.5 meters.
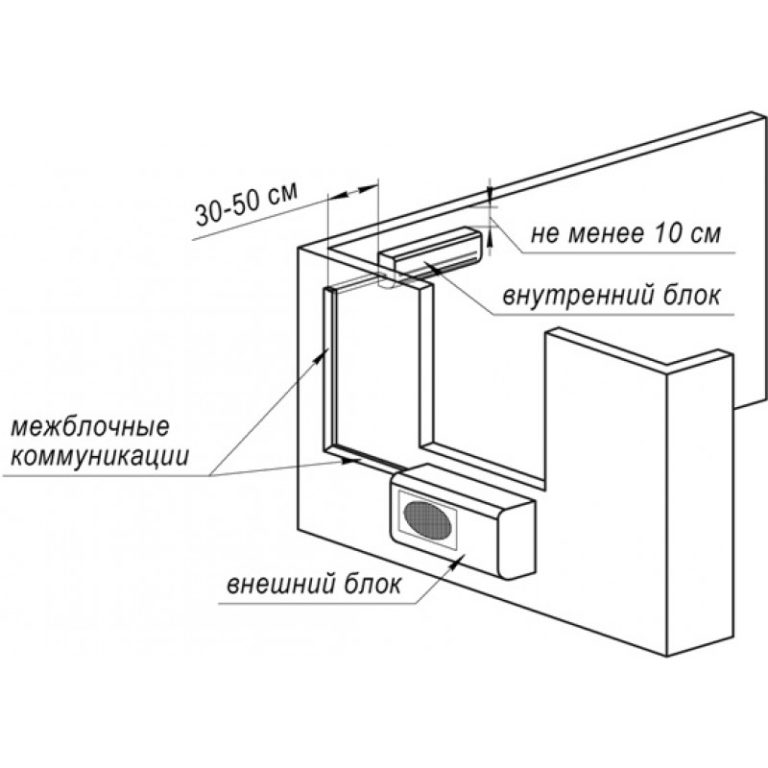
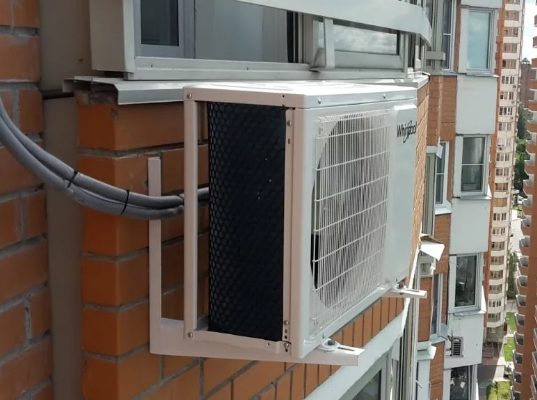
Parameters for the outdoor unit:
- the minimum gap between the rear wall of the equipment and the building facade is 10 cm;
- on the first floor of an apartment building, the maximum height distance from the ground is to prevent snow and dirt from getting into the fan;
- distance from the gas main – at least 1 meter;
- The distance from the nearest obstacle to the unit fan is at least 1 meter.
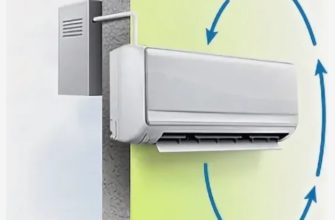
In an apartment building, mount the outdoor unit on the wall of your apartment. Position the indoor unit so that air doesn't blow into areas where people rest or frequently spend time.
Step-by-step installation instructions
After selecting a location for the split-system modules and preparing the materials, begin installation. This step-by-step guide describes the basic steps for installing air conditioners yourself.
Depending on the brand of HVAC equipment, installation may require specific considerations. Before beginning work, please consult the manufacturer's documentation.
To install the air conditioner correctly, follow these steps yourself:
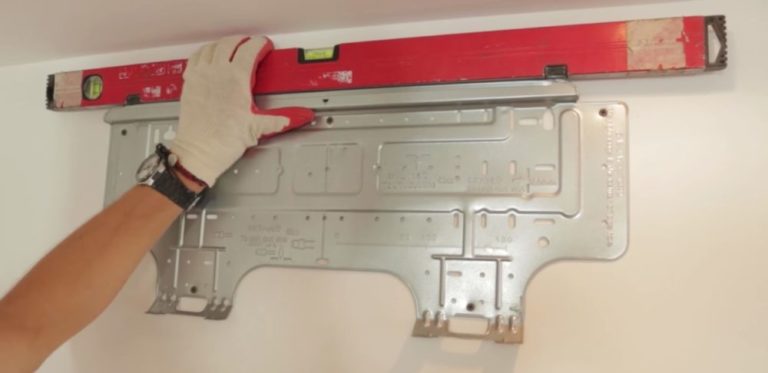
- Begin installing the split system yourself by hanging the indoor unit on the wall. Mark the mounting locations at the pre-selected location. A mounting plate is included with the indoor unit. Place it against the wall and level it. Mark the locations where you need to drill holes. After drilling the holes, insert plastic anchors. Secure the mounting plate with screws. Double-check the horizontal alignment with a level.
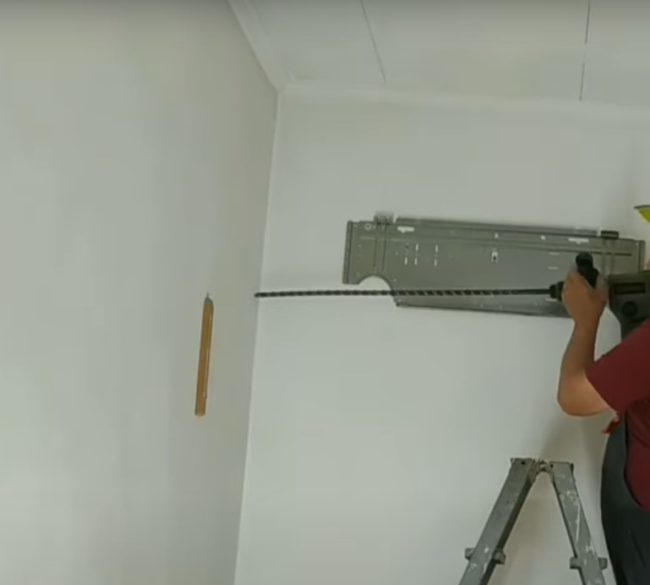
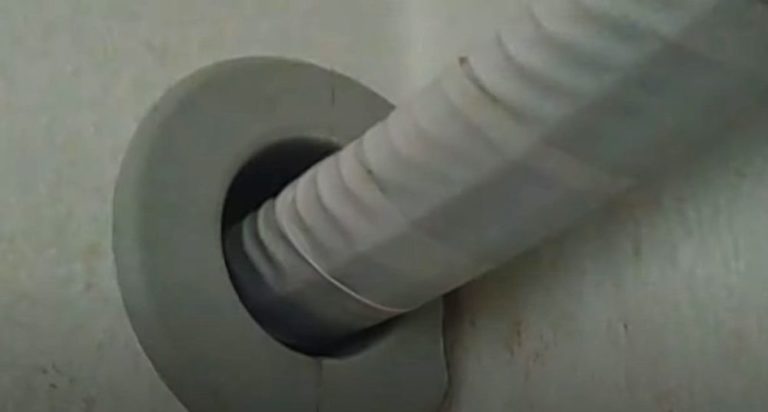
- To route utility lines, use a hammer drill to drill a through hole in the corner wall. Create a slight slope from the room side to the outside to prevent condensation from the drain hose from flowing through the indoor unit into the room.
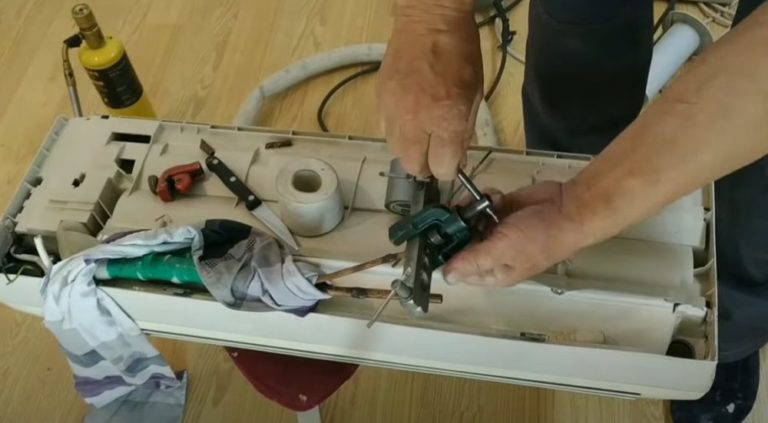
- Proper installation of the air conditioner's indoor unit begins with preparing the copper tubes coming out of the module for soldering. The edges may have burrs, kinks, or uneven cuts. These defects are more common in used split systems. To remove any damage, trim the tube ends with a pipe cutter.
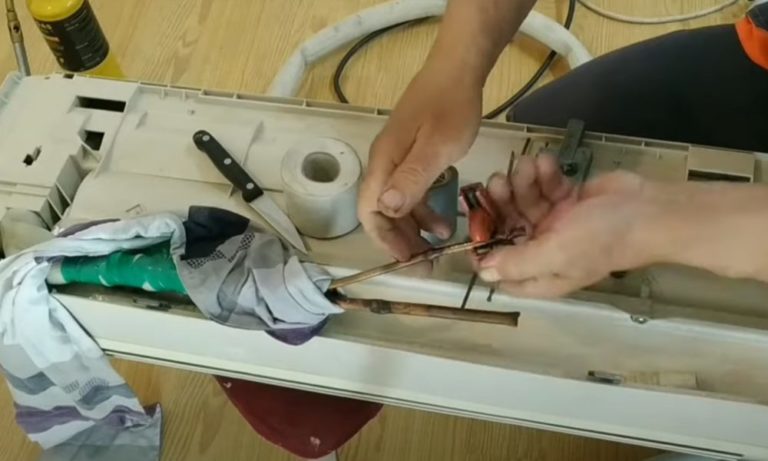
- After cutting the tubing, remove any burrs with a reamer and flare the ends. The resulting flanges are convenient for making a strong solder joint between the copper tubing connecting the internal and external modules.
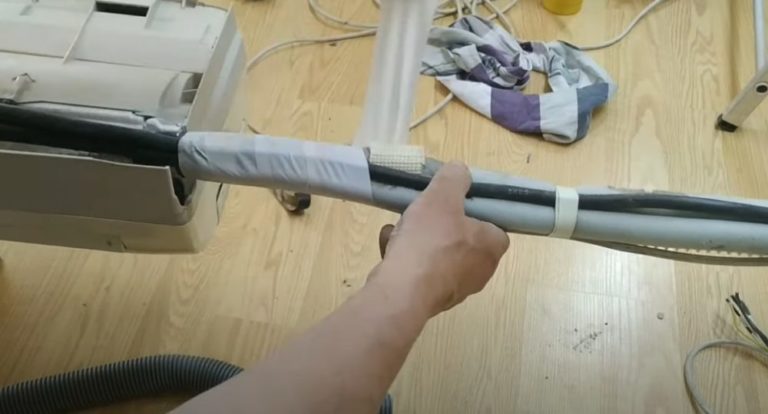
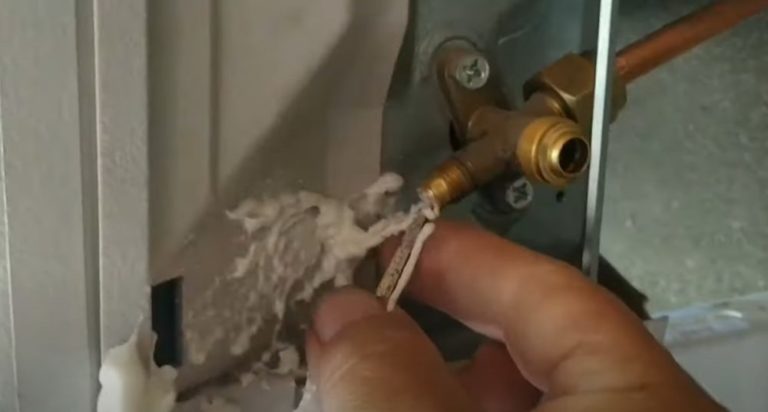
- Insert new copper tubes into the flared ends. Use a gas torch to solder the joints. First, heat the joint around the entire circumference. When the copper is hot, apply solder. While soldering, wrap the tubes on the unit side with a damp cloth. Copper has high thermal conductivity. Heating the tube with a torch can cause it to heat up along its entire length, causing damage to the air conditioner unit components.
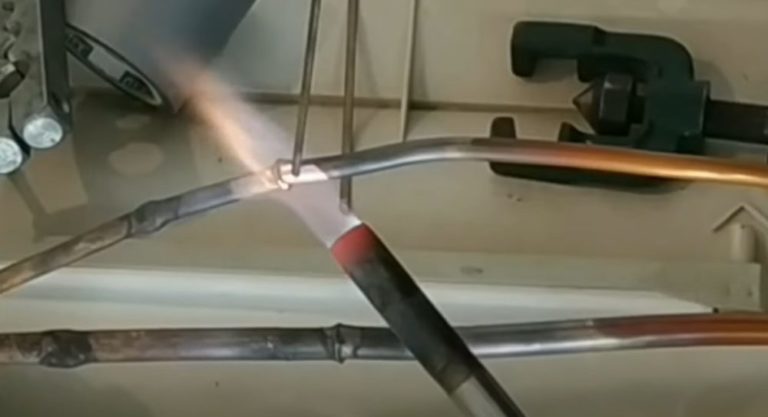
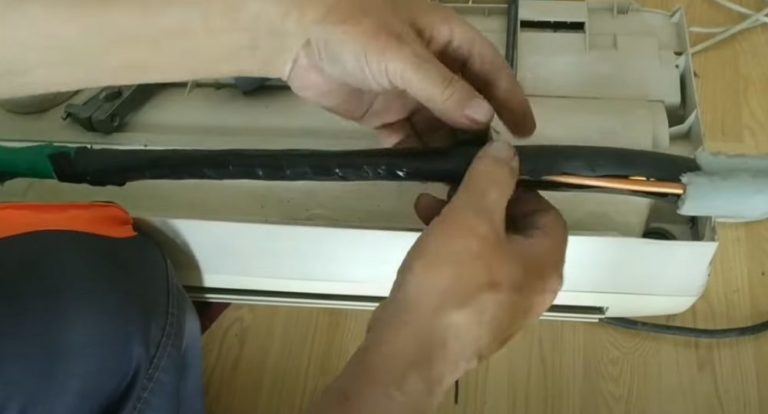
- After soldering, allow the joints to cool naturally. Remove any wet rags from the pipes. Wrap any exposed areas with insulation to prevent condensation from forming during operation.
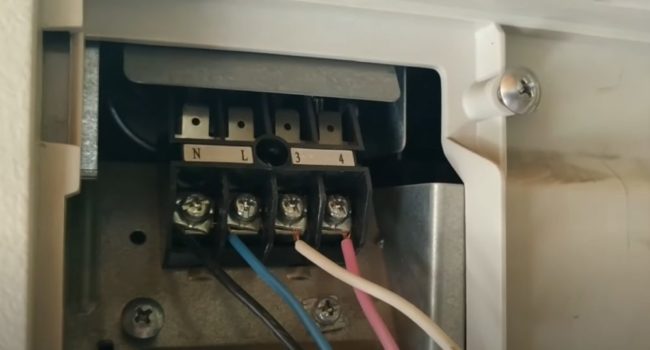
- Remove the decorative cover from the unit. Locate the electrical cable connection. Connect the wires using the existing terminal blocks. Replace the decorative cover. It is held to the unit with latches and screws.
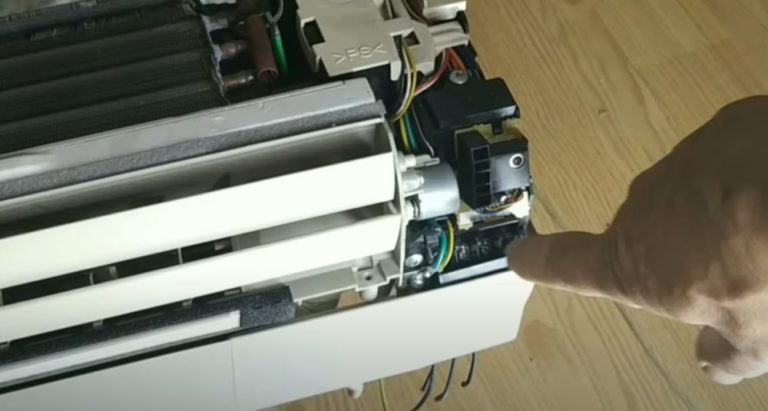
- On the back of the housing, there's a cutout on the side for a window to accommodate the pipe outlet. Remove the cutout with pliers.
- Connect the drain hose to the condensate drain pipe.
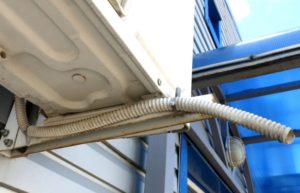
- Place the utility lines into the cutout on the housing. There should be five elements: drainage, power cable, connections to the outdoor unit, and two insulated copper tubes.
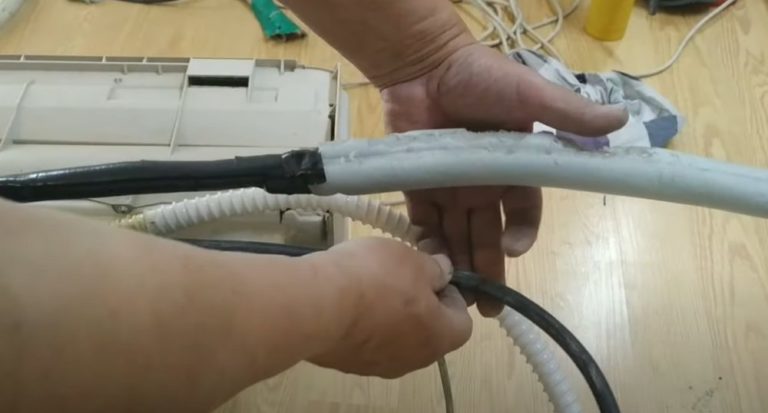
- Bundle the wiring coming out of the enclosure with electrical tape. Wrap it tightly along the entire length with PTFE tape. Leave some loose ends for connecting to the external unit.
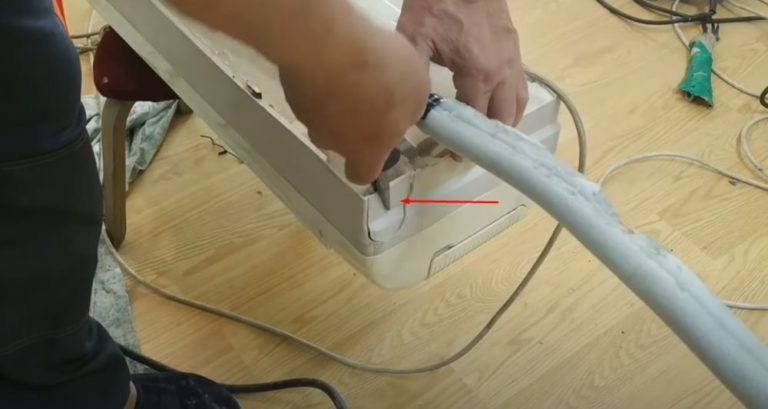
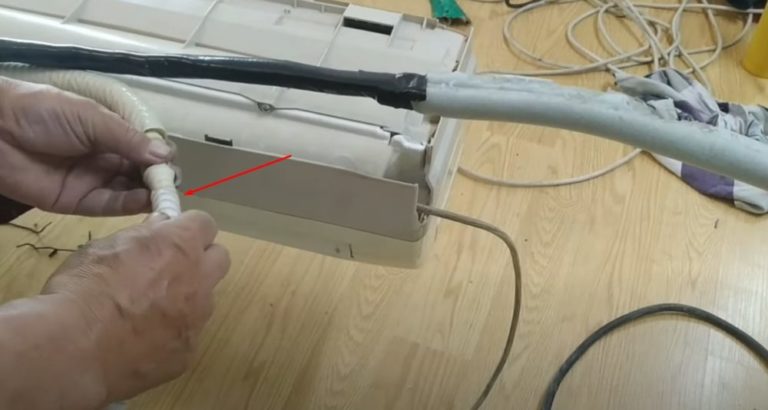
- Route the wiring harness to the outdoor unit through the opening in the side wall. Hang the indoor unit on the pre-installed mounting plate.
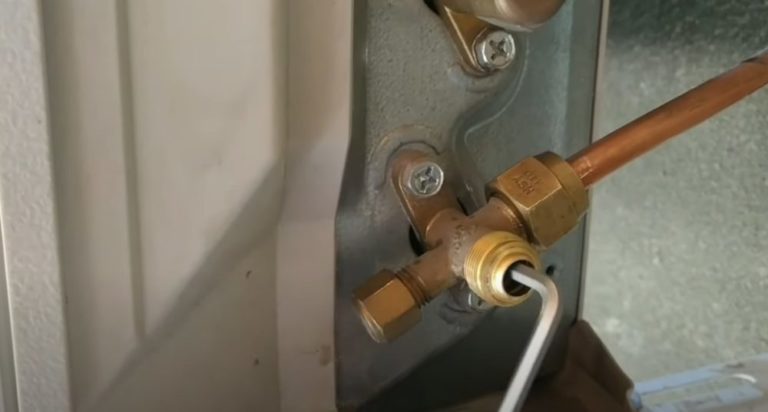
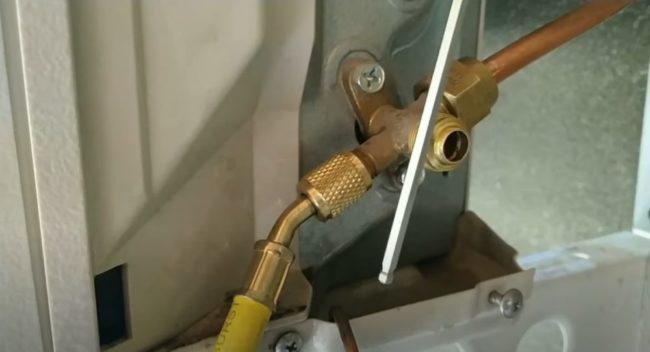
- From the street side, begin connecting the outdoor unit. Secure the module to the building facade using anchors and L-shaped brackets. Solder sections of tubing with nuts to the copper pipes coming out of the room. Connect the pipes to the valves mounted on the side of the outdoor unit. Tighten the nuts securely to prevent freon leaks. Connect the thin pipe to the top valve, and the thick pipe to the bottom valve.
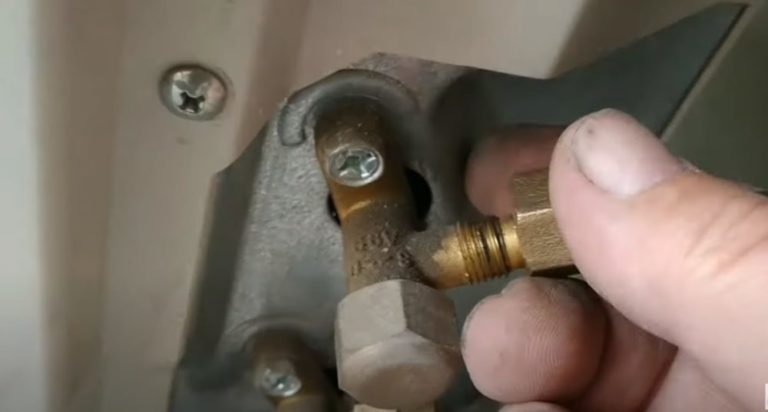
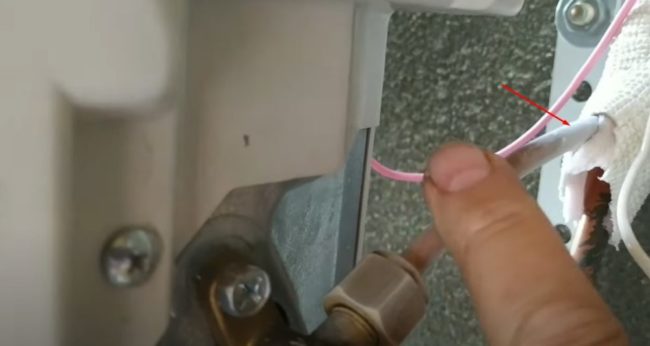
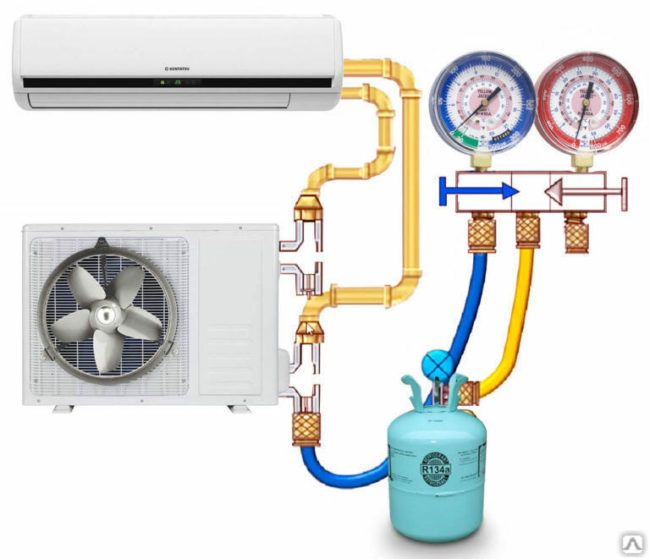
- A used outdoor unit, whether from the factory or properly removed, is charged with freon. To check for refrigerant, unscrew the cap on the bottom valve. Insert an Allen key and turn the valve slightly counterclockwise. If gas is present, you will hear a hissing sound.
- To purge the system, unscrew the plug on the end of the top valve. Insert a hex key into the hole. Turn it slightly counterclockwise to open the valve. Locate the filler nipple. It's located on the side of the bottom valve. Unscrew the plug from the filler nipple. Take a nail, file, or any thin rod. Press the nipple inside the nipple. Purge the system until all the air is released and freon begins to flow.
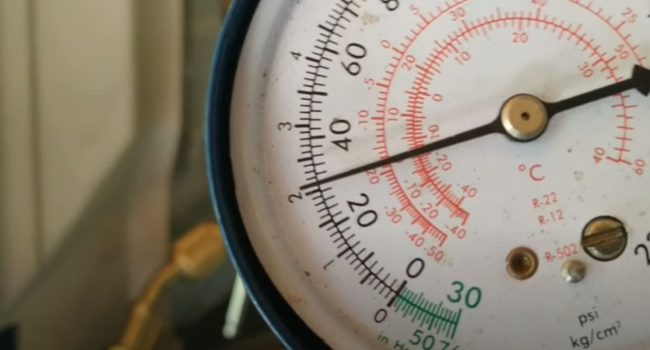
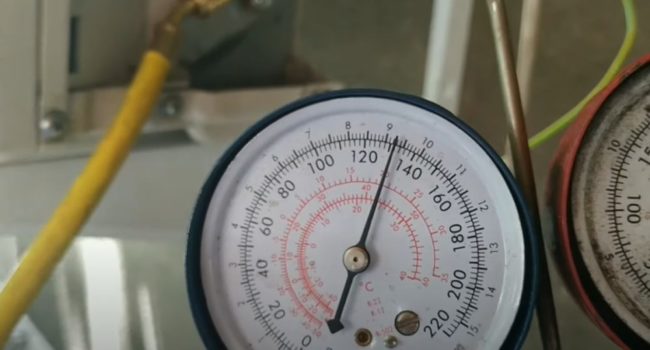
- Once all the air has been bled, connect a pressure gauge to the filler nipple. Apply full freon pressure by fully opening the top valve with an Allen key. The gauge should read 2.1. Without closing the valve, leave the system open for 2 hours to check for leaks. If the gauge reading hasn't changed after 2 hours, the pipeline is fine. Close the valves, but leave the gauge in place.
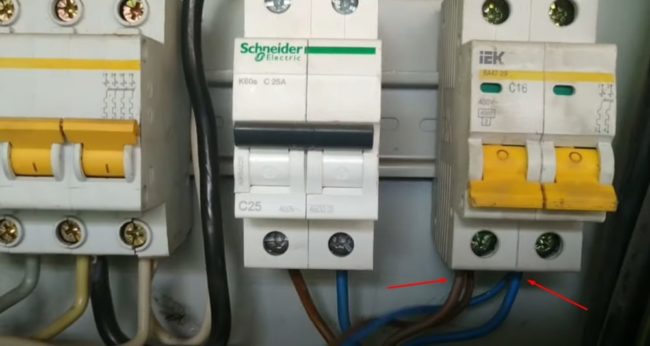
- Connect the cable connecting to the indoor unit to the terminal blocks of the outdoor unit. The other wire is the power supply. For safe operation, connect the air conditioner to the circuit breaker in the electrical panel.
- Turn on the circuit breaker to supply power to the air conditioner. Open the supply and return valves with a key. As the air conditioner starts operating, the pressure in the system will begin to increase, which will be visible on the pressure gauge. A thin layer of frost will form on the thin copper pipe near the upper supply valve, indicating the arrival of cold air.
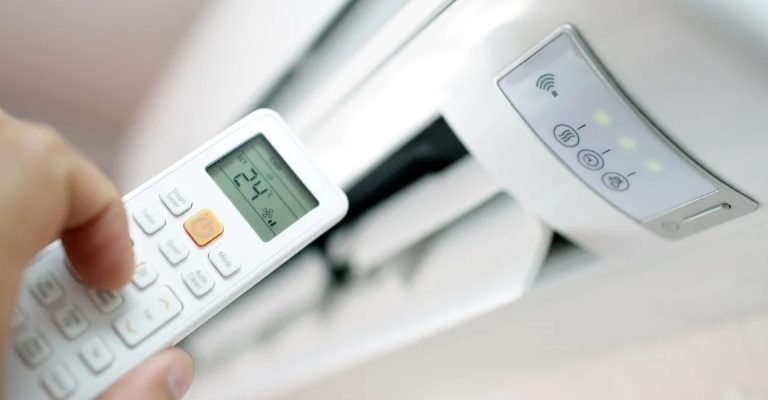
- Close the plugs on both ends of the valves. Proceed to adjusting the indoor unit. Set the desired temperature on the remote control. The split system will reach operating mode in approximately 20-30 minutes. The exact time depends on the type of air conditioner. Check the supply air temperature with a digital thermometer.

Test the air conditioner for several hours, allowing it to cycle through the cycles from start to stop. If your homemade unit is working properly, remove the pressure gauge, close the filler cap, and enjoy the cool air.
Tips for use and care
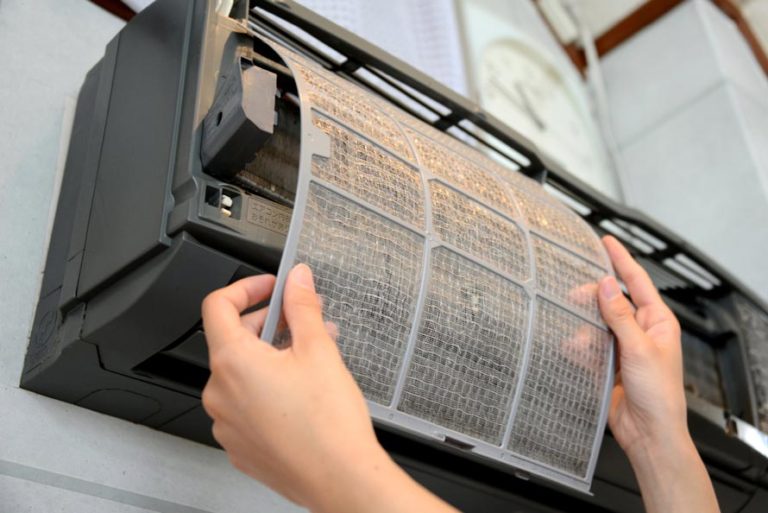
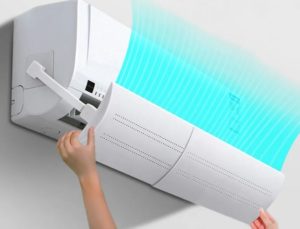
When a split system is installed correctly, it will function properly, but it still requires maintenance. Clean the radiator filters and drain pipe to remove any accumulated dirt. Rinse the filter elements under running water.
Remove the drain hose and blow it out. Brush dust from the fan blades with a soft brush. You can use a vacuum cleaner to remove dust from the outdoor and indoor units. Replace the remote control battery promptly if switching modes becomes difficult.
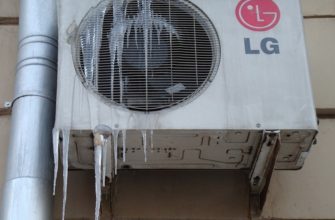
The air conditioner periodically requires refilling with freon. A low refrigerant level will be indicated by the copper pipes near the outdoor unit. The pipes will begin to become coated with a thick layer of frost, gradually forming ice deposits. The indoor unit will no longer maintain the user-set temperature.
To refill the system yourself, you'll need a can of freon and an adapter with a pressure gauge. Inject the refrigerant through the fitting on the bottom valve. Adjust the pressure to the value specified by the split system manufacturer in the accompanying documentation. If you're hesitant to refill the system yourself, contact a service center.
Air conditioner installation errors
Air conditioning equipment is complex. To ensure successful DIY installation, avoid these common mistakes:
- The resulting kinks in the tubes increase the load on the compressor.
- Condensation accumulates in areas with large sags in the pipeline.
- Installing an outdoor unit on a glazed balcony results in improper air circulation.
- If the indoor unit is installed unevenly or the slope of the drainage pipe towards the outside is not maintained, condensate begins to flow into the room.
- Connecting a welding machine near an air conditioner will cause the compressor to fail.
When installing your own air conditioning system, choose a split system with an automatic defrost function. Without this feature, the outdoor unit may freeze up in heating mode.
Answers to frequently asked questions
Installing air conditioning equipment yourself is possible if you have the skills and tools.
For this work, you'll need a tool to drill a hole in the wall for the utility lines. You'll also need copper pipes, insulation, cable, and a drain hose. To check the freon pressure in the system, you'll need an adapter with a pressure gauge.
An air conditioner installed without permission can only be removed or fined by a court order. The building's maintenance company has no right to remove the equipment without permission.
Air conditioning equipment cannot be installed in apartment buildings unless permission has been obtained from local authorities.
The external module must not be installed on a glazed balcony, closer than 1 m to a gas main, or close to the ground.
