To install heating radiators yourself, you first need to understand the installation requirements for different types of radiators (aluminum, steel, bimetallic, etc.), determine the tools and materials needed, study the installation rules, piping diagrams, and other aspects of this seemingly simple task.
How to take into account all the nuances of installing heating batteries of certain models and avoid making mistakes – all of this will be discussed below.
Installing heating radiators is a highly demanding task for developers. Its successful completion depends on many factors, from the type of heating system and the thermal calculations for the building's rooms to the correct choice of radiator type and connection diagrams.
There are many options for installing heating radiators.
This depends on the type of coolant pipeline connection, the piping of heating devices, and even the material of the enclosing structures.
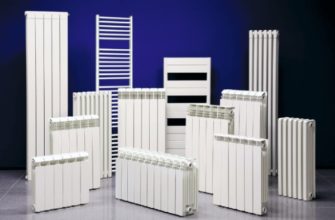
The modern heating equipment market in Russia offers a wide range of heating radiators of various classes, designs, and sizes. In each specific case, whether replacing old radiators or connecting radiators in a new building, installation instructions must be strictly followed, based on regulatory documentation—SNiP (Building Codes and Regulations). With the right skills, a homeowner can easily install a heating system for an apartment or private home themselves.
- Installation Features of Different Types of Radiators
- Aluminum
- Steel
- Bimetallic
- Cast iron
- Copper
- Plastic
- Materials and tools required for installation
- Tools and accessories
- Materials
- Brackets
- Mayevsky crane or automatic air vent
- Plugs
- Shut-off valves
- How to install a heating battery
- Rules for hanging heating devices
- Installation dimensions of the heating device
- Installation of underfloor heating devices
- Heating radiator piping diagrams
- Single-pipe
- Double-pipe
- Collector (radial)
- Features of connecting batteries in apartments
- Assembly of sectional heating batteries
- Step-by-step instructions for installing a bimetallic battery
- Features of connecting a heating radiator to polypropylene pipes
- First launch
Installation Features of Different Types of Radiators
Space heating devices are divided into several types based on the material they are made of, each with its own installation requirements. Let's list them:
- aluminum;
- steel;
- bimetallic;
- cast iron;
- copper;
- plastic.
Aluminum
Aluminum heating radiators are considered budget models. The housings of these water heaters are manufactured using extrusion, which involves forcing molten metal into a mold under pressure. This results in lightweight, one-piece structures with internal flow channels. The surfaces of the radiators undergo anodic oxidation, which creates a durable protective film on the aluminum.
The peculiarities of installing heating batteries include the difficulty of connecting aluminum pipes to a heating network consisting of steel pipes.
The fact is that direct contact of aluminum with steel leads to the occurrence of destructive processes in the non-ferrous metal.
To prevent this, the appliances are connected by screwing on special adapters to the coolant pipes. Shut-off valves with bronze fittings are also used.
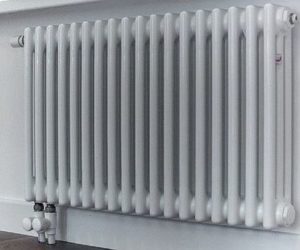
Steel
Steel heating units, while offering the same heat transfer properties as their cast iron counterparts, weigh significantly less and heat up twice as fast. They come in two types: monolithic panels and sectional tubular radiators.
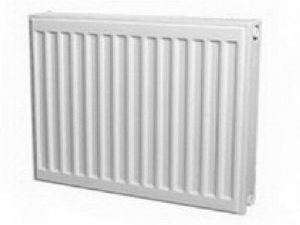
Tubular models are designed to mimic cast iron radiators. They also consist of sections. A key feature of installing steel heating radiators is the ability to increase or decrease the number of registers in a single unit, and replace a cracked or clogged element with a new segment.
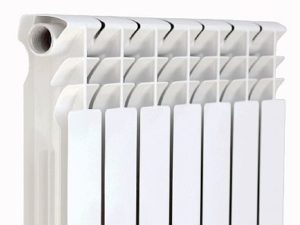
Bimetallic
The name of the product indicates that the structure of the case is represented by two metals. The base bimetallic radiator is a steel tubular frame, where two horizontal tubes (collectors) are connected to each other by vertical channels.
The entire structure is wrapped like candy in an aluminum casing. This radiator design was chosen to maximize the aluminum's superior thermal properties while preventing its contact with aggressive coolants.
Bimetallic radiators can be installed by a DIYer, following all instructions. These instructions are typically supplied by almost all manufacturers with their products. Due to their ease of installation, bimetallic radiators are most often used to replace old heating radiators without changing the location of the hot water supply lines. Couplings or adapters allow the radiator to be connected to the heating circuit pipe without welding.
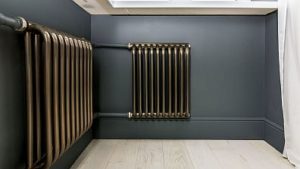
Cast iron
The first heating radiators were made of cast iron. Today, this metal remains popular in the production of heating appliances. Modern cast iron radiators feature stylish designs and complement the luxurious interiors of mansions and entertainment venues.
In Russia, the production of cast iron radiators in their traditional form has been preserved. They are inexpensive and easy to operate. They are installed in industrial settings and public spaces for various purposes, where the appearance of the appliances is unimportant.
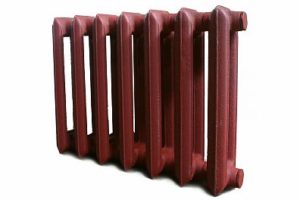
Thanks to its sectional design, the radiator can be assembled from a variable number of registers, starting from two. Sections can be removed or added to the radiator. This allows for adjustments to the performance of heating devices or for repairs.
Copper
Copper is a precious metal that is an excellent conductor of thermal energy. Copper heat exchangers are unmatched in efficiency among radiators made from other materials. The minimum service life of copper units is 30 years.
The copper inner surface of the manifolds and vertical tubes repels water impurities in the coolant, thereby maintaining the cleanliness of the water lines. The non-ferrous metal is completely impervious to corrosion.
The installation of copper heaters requires careful attention to the method of attaching the radiator to the heating system pipes. Special fittings, elbows, and adapters are used to avoid direct contact between the copper and iron. A special set of fittings is used for connecting to polypropylene pipes.
Plastic
Plastic radiators are a new addition to the Russian heating market. These are trial models with a maximum heating capacity of 80°C.0 C. There is also a limitation on the maximum pressure of the coolant in the heating system.

It should not exceed 3 atm. The devices are designed for use with plastic pipes in autonomous heating systems of private homes, country cottages, and summer houses. The radiators are available in a wide range of colors, allowing you to add a uniquely beautiful touch to your interior.
Materials and tools required for installation
Proper installation of heating radiators by a homeowner requires specialized tools and certain consumables. The type and size of these tools and consumables depend on the chosen heating appliance model, the connection method, and so on. In any case, installing radiators will require the necessary tools and materials.
Tools and accessories
Since all batteries, except for floor-standing devices, are attached to the walls, you will need the following:
- hammer drill;
- drill-screwdriver;
- welding machine for polypropylene pipes;
- hammer;
- level;
- tape measure and ruler;
- marker;
- spanner and pipe wrench;
- socket wrench for assembling sections.
- cord or winding for threaded connections;
- sealant.
Materials
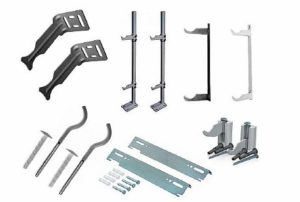
Manufacturers typically supply mounting kits for their heating radiators, both for assembling and connecting the radiators and for hanging them on walls. These kits include the minimum installation kit, consisting of:
- Kronshteinov.
- Mayevsky crane or automatic air vent.
- Plugs.
- Shut-off valves.
Brackets
These may be included with the radiators. If not, the necessary fasteners can be purchased at your local hardware store.
There are many different designs and shapes of radiator supports, but they all share a high load-bearing capacity and transfer the load from the radiator's weight to the wall. Brackets can be rigidly fixed or have adjustable mechanisms for both length and height.
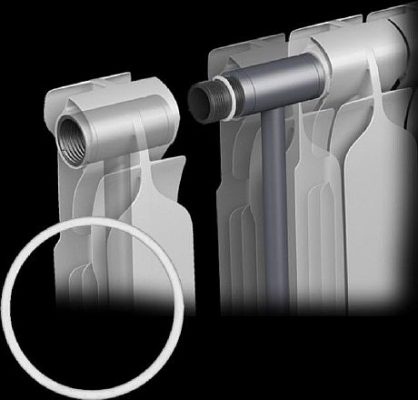
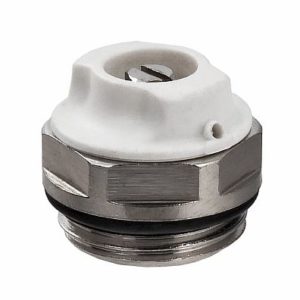
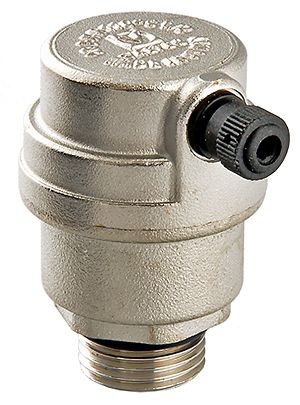
Mayevsky crane or automatic air vent
As the coolant passes through the heating system, trapped air enters the radiators. This typically occurs when the heating system is turned on at the end of the warm season. If left unchecked, air pockets will restrict the flow of hot water in the radiator's upper manifold, causing it to remain cold.
Originally, regular water taps were installed at the top of radiators. Releasing air through them resulted in a large amount of water being released. All modern radiators are equipped with Mayevsky taps or have air vents screwed into them.
A Mayevsky tap is a small device that is screwed into a free hole on one side of the upper manifold. If the diameter of the tap differs from the threaded inlet of the manifold, special adapters are used. A sealant is wound onto the device's threads. Using a wrench, carefully tighten the tap until it stops.
Air is released by loosening the screw or handle. The airflow direction is changed by turning the ring. Air is released until a continuous stream of water appears. In apartment buildings, it is important to bleed air from the radiators on the upper floors.
The automatic air vent operates on the principle of a float. The float, under air pressure, pushes the valve, which opens until the air lock is completely removed from the radiator.
According to experts, automatic air vents are quite sensitive devices and do not tolerate contaminated coolant. Over time, an automatic air vent installed in a central heating system begins to leak. Therefore, it is recommended to use them in autonomous heating systems in private homes that use clean coolant.
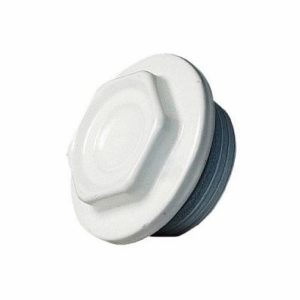
Plugs
The versatility of side-connected radiators lies in their four outlets—two each on the lower and upper manifolds. Two of these outlets, depending on the connection diagram, are occupied by the supply and return pipes.
A Mayevsky valve or automatic air vent is installed in the third hole. This leaves a fourth hole, which is sealed with a threaded plug. It is screwed into the manifold hole using a wrench with a thread-tight sealing material (tow, sealing cord, or tape) wrapped around the thread.
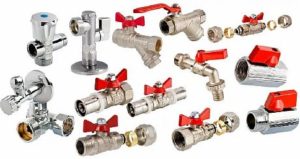
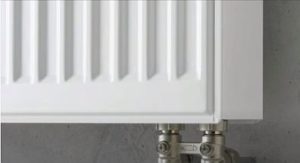
Shut-off valves
Shut-off valves for heating radiators are three types of taps.
BallThey are used in two extreme positions: "closed" or "open." They are installed at the inlet and outlet of the radiator. A rotating metal ball with a through hole serves as the shutoff valve. By turning it with the outer lever, the coolant flow is fully opened or closed.
StockThis is a traditional flow control system using a sliding stem aligned with the rotating head. Unlike a ball valve, a stem valve controls the flow rate of hot water, thereby regulating the radiator's heating level.
Check valveA check valve shuts off the flow of coolant in a specific section of the heating system. They are rarely used in centralized heating systems. They are most often used in particularly complex stand-alone heating systems.
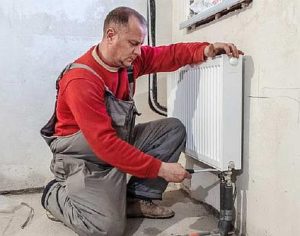
How to install a heating battery
There are two ways to install radiators for space heating. In the wall-mounted version, the radiators are hung on brackets. The shape and design of the radiator supports can vary, but the main thing is that they are securely attached to the wall and can support the weight of the heating appliance.
Anchor bolts serve as fasteners for brackets. They are used in concrete, brick, or other masonry materials (cinder blocks, foam blocks, etc.). There are supports that serve as both anchor bolts and brackets.
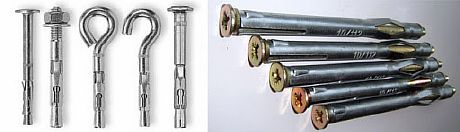
There are standards that determine the number of supports for sectional radiators. For cast iron radiators, brackets are installed between every 6 sections. For panel radiators, the manufacturer provides for wall mounting on the rear side.

Rules for hanging heating devices
Heating products are installed strictly in specific areas of the premises – these are:
- window sills;
- long distances between windows;
- blank walls in corner rooms;
- bathrooms, storage rooms and other utility rooms, adjacent walls of which are external enclosures;
- interfloor landings of stairwells and foyers of entrances.
Installation dimensions of the heating device
The gaps between the radiator and the enclosing structures when installing the device are made on the basis of standard installation dimensions.
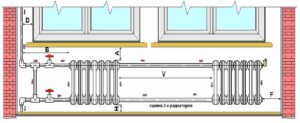
The letters in the photo indicate the installation dimensions. The table below shows the maximum values for these parameters.
| Litera | Size | Standard |
| A | 50 mm | SNiP 3.05.01-85 p. 3.20 |
| B | Up to 400 mm | — «- p. 3.24 |
| C | 300, 350, 400, 500, 600 and 800 mm | GOST 8690-94 p. 4.1 |
| D | From 100 mm to 150 mm | SNiP 3.05.01-85 p. 3.24 |
| F | From 100 mm | 2 SNiP 41-01-2003 p. 6.5 |
| L | 25 – 60 mm | SNiP 3.05.01-85 p. 3.20 |
| H | From 60 mm to 100 mm | SNiP 3.05.01-85 p. 3.20 |
| V | No more than 1500 mm | SNiP 2.04.05-91* p. 3.52 |
Installation of underfloor heating devices
It's worth noting that, in addition to wall-mounted units, there are also floor-standing radiators. These are typically tall cast-iron radiators with decorative trim, as well as low-profile units installed under panoramic windows.
In some cases, the legs of these products are secured to the floor to prevent them from accidentally shifting.
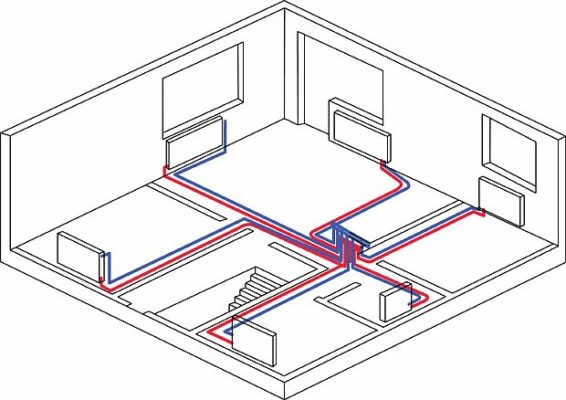
Heating radiator piping diagrams
There are three main battery connection schemes: one-pipe, two-pipe and collector (beam) systems.
Single-pipe
This implies a straight-line hot water supply pipe supply through all radiators installed on the same level (floor) in turn.
The attractiveness of this method of constructing heating devices lies in the significant savings in pipelines.
The coolant passes through all the radiators sequentially, losing a certain amount of thermal energy each time. As a result, the coolant reaches the last appliance from the first consumer much colder than its initial state. A one-way heating system is inefficient and is no longer used.
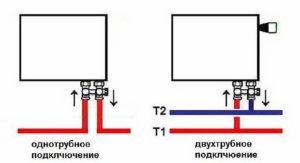
Double-pipe
The system involves a parallel connection, where the coolant enters through one pipe and exits through another. This is the most popular connection option today.
The following types of connections are based on it:
- lateral;
- diagonal;
- lower (upper);
- saddle.
LateralThe most popular and most functional is the side connection. The coolant enters from the top, passes through the entire radiator, and cools down. Both valves (supply and return) are located on the same side of the radiator. This design ensures zero heat loss.
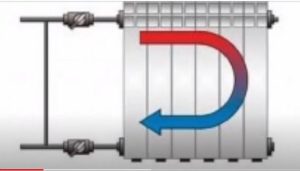
DiagonalThis type of connection involves the coolant entering from the top of one side of the unit. After passing through all the cavities of the radiator, it exits at the bottom of the opposite end of the panel. The advantage of this connection method is that heat loss is no more than 5%.

Lower (upper). With this connection scheme, the supply and return pipes enter from the bottom on the same side. The advantage of this method is that the supply pipes can be placed under the baseboard or under the floor covering.
The disadvantage of this option is significant heat loss of 15–20%. The top connection differs in that the inlet and outlet pipes are located at the top of the radiator, not at the bottom.
SaddleThe saddle connection method differs from the previous connection method in that the lower radiator pipes are located on opposite sides of the radiator. This arrangement of the coolant inlet and outlet allows it to pass through all cavities of the unit as completely as possible.
Collector (radial)
Radial heating pipe routing is also a two-pipe radiator connection system, but with individual supply and return lines for each heating device. This is accomplished through two manifolds, one of which distributes the coolant supply pipes, and the other connects the return pipes.
Features of connecting batteries in apartments
When a newly constructed building is handed over to the client, the entire heating system must be approved by the receiving management company and comply with SNiP (Building Codes and Regulations). Typically, a single heat meter is installed for all apartments in a building. The rate for consumed heat energy determines the monetary cost per square meter of usable space.
When replacing old heating batteries with new ones, homeowners often make the mistake of not coordinating the installation of new devices with their heating company. In these cases, residents, seeking maximum heating efficiency, install heating panels and radiators that are disproportionately large.
If such violations are detected, the management company or heat supply company will, through the courts, collect a fine and force the dismantling or reinstallation of heating devices that meet SNiP requirements.
To avoid any problems, the apartment owner should coordinate the installation of new radiators with the above-mentioned organizations during the design stage. To do this, they must submit a request in the appropriate form and attach a wiring diagram for the new radiators.
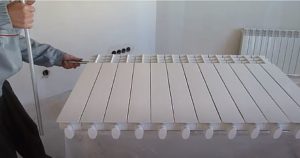
Assembly of sectional heating batteries
Sectional space heating units are convenient because they can be assembled from any number of registers. Sections can be added or removed, thereby adjusting the unit's heat output. If a section fails, it can be removed and replaced with a new register. Sectional heating units are assembled as follows.
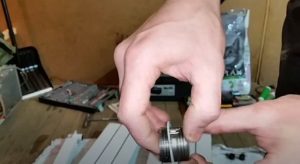
- To assemble a sectional radiator, you will need externally threaded fittings (nipples), a plug, two ball valves, and a Mayevsky valve. The section assembly process is as follows.
- A factory-assembled battery is placed on a work table or pallet, to which additional sections need to be connected.
- Paronite rings are placed on two nipples (fittings).
- The nipples have two threads facing in opposite directions. They are screwed slightly into the radiator holes on one side.
- One or more assembled sections are moved towards the main battery so that the free ends of the fittings enter the second holes.
- A special key is inserted through the hole in the first block and the nipple is gently turned until it clicks. The click indicates that the threads of the two parts are correctly aligned.
- By turning the key, the nipple is pulled into the first section block.
- By inserting the key from the side of the second block, the sections are finally pulled together into a single structure.
All twisting should be done slowly, without applying excessive force. During assembly, it's essential to ensure that the parts being joined fit together smoothly.
Step-by-step instructions for installing a bimetallic battery
This step-by-step guide provides recommendations for the proper installation of a bimetallic radiator on a wall made of MDF panels with diagonal connections to polypropylene pipes. Before installing the sectional radiator panel, you need to prepare the following tools and materials:
- bimetallic battery assembly;
- brackets – 4 pcs.;
- plug;
- Mayevsky crane;
- shut-off valves – 2 pcs.;
- drill-screwdriver;
- laser level;
- roulette;
- level;
- marker;
- masking tape.
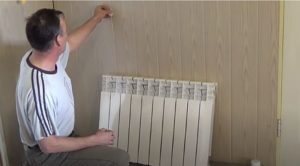
After preparation, proceed directly to hanging the radiator, performing the following steps.
- Using a tape measure, measure the distance between the joints of the outer sections.
- Mark the locations of the brackets on the wall. To do this, use a marker to mark the locations of the proposed bracket mountings along the sections previously glued to the wall.
- When marking, the distance from the floor and windowsill to the appliance should be at least 100 mm. On a blank wall, the radiator should be located at an equal distance from the door and the corner of the room.
- The gap between the radiator and the wall must be at least 30 mm. This distance is ensured by the shape of the mounting surface on the bracket.
- Based on the standard center-to-center dimension, measure this distance down for the lower brackets.
- The laser level beam is directed at the wall alternately for the upper and lower markings.
- Make preliminary markings for the screws by placing the brackets on the wall.
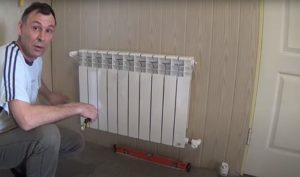
- Using a screwdriver, first screw in the lower supports, then the upper ones. The brackets have longitudinal slots for screws, allowing you to level the installed radiator.
- The battery is first placed on the lower supports and then hung on the upper brackets.
- By placing a level on the top surface of the device, check its horizontal alignment. This is adjusted by slightly moving the sides of the radiator up and down using the longitudinal grooves in the brackets.
- A nut is screwed into one of the upper holes, a shut-off valve is screwed into it, and a second valve is installed on the opposite side below.
- Installing shut-off valves for a diagonal battery connection diagram
- The landing nut and Mayevsky valve are screwed sequentially into the free upper hole, the lower passage is closed by screwing in the plug.

Features of connecting a heating radiator to polypropylene pipes
Once the radiator has been hung and piping completed, it is connected to the polypropylene supply and return pipes. This requires a welding machine for plastic pipes and a set of wrenches. The diagram for connecting a metal radiator to polymer pipes is shown in the figure below.
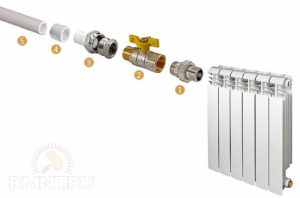
- 1 – coupling;
- 2 – ball valve;
- 3- transition coupling from metal to polypropylene;
- 4 – connecting polypropylene ring;
- 5 – polypropylene pipe of the heating system.
First, weld the ring to the transition sleeve using a welding machine, then connect the ring to the supply pipe. All other connections are tightened with a wrench. For connections to metal pipes, use couplings, washers, and through nuts.
First launch
When starting up a heating system for the first time, there's a risk of unexpected leaks at the joints. To avoid problems like flooding laminate or parquet floors, cover the floor with plastic sheeting and prepare containers to collect the water.
After starting the heating system, tactilely monitor the temperature of the radiator surfaces for a long time, probing the joints to detect moisture. Gradually loosen the screws or handles of the Mayevsky valves to release the air accumulated in the upper manifolds.
Stop bleeding until a continuous stream of coolant appears. Repeat this process periodically until uniform heating is achieved across the entire surface of the heating element. If leaks occur, stop the system, drain the water, and reseal the connections. Restart the heating system.


I want to tell you, colleagues, that I've never encountered such a competent presentation of work. Moreover, even if you rely on the knowledge in this article, the installation process doesn't seem all that complicated. Few people know so many nuances and explain why installation should be done this way, and not just the way the client wants it. Perhaps I'll expand my vocabulary with a few of your sentences.
This is quite an interesting guide. We don't have any specialists in our town who install heating radiators, so we have to do it ourselves. There aren't many good guides online, but I immediately liked this article; it really helps me get my bearings.
I'm thinking of settling on an aluminum radiator.
Thank you for the excellent, comprehensive and detailed review of heating radiator installation.