Linoleum is one of the most common floor coverings, due to its durability, long life, ease of installation, wide variety of colors, and affordability.
However, the material cannot be called warm, and if the base is also made of concrete, then walking on such a floor will be completely uncomfortable.

One option for arranging such a combination would be to install a “warm floor” under the linoleum.
- Installation of underfloor heating under linoleum on a concrete base
- Which linoleum should I choose for underfloor heating?
- Concrete floor installation
- Installation of heated water floors under linoleum
- We are installing infrared underfloor heating on concrete.
- Sequence of installation of infrared floor under linoleum.
- Electric cable underfloor heating under linoleum
- Heating mats
- Video materials
Installation of underfloor heating under linoleum on a concrete base
Despite all its positive aspects, linoleum isn't the best finishing material. It has superior thermal insulation properties, but it can also change shape and color when heated. The main disadvantage is the release of harmful substances under the influence of high temperatures.
But if you're specifically looking for linoleum, you need to choose both the flooring model and the heating method wisely. Furthermore, it's essential to strictly adhere to installation guidelines and temperature control—heating should be uniform and smooth.
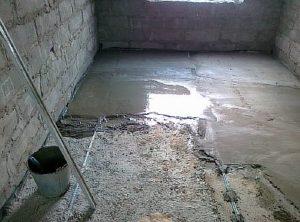
The concrete base also has its own requirements: it must be smooth and level (with a tolerance of 0.2 cm per 2 m2), thoroughly cleaned, and primed. Waterproofing is also required, and a compensating tape made of foamed polyethylene must be applied along the entire surface of the walls.
For your information! Most linoleum brands have an insulating layer, eliminating the need for an additional underlay. However, some of these materials retain heat from the heating device.
Since linoleum cannot be heated above 30 degrees, the system must be equipped with a sensor and thermostat to regulate the temperature.
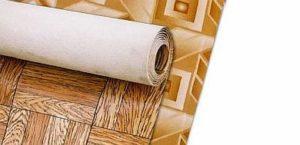
Which linoleum should I choose for underfloor heating?
Despite their apparent similarity, linoleum on the market has different characteristics. It can vary in thickness, composition, structure, and, if it has a reinforced backing, the material from which it is made can also vary.
When choosing a floor covering, you should read the manufacturer's label. This information includes information about the product's composition, its heat tolerance, and its maximum temperature. Linoleum should have:
- high thermal conductivity;
- good resistance to fading;
- resistance to deformation.

Main types of linoleum:
- Alkyd linoleum is definitely not suitable for installation over underfloor heating. It has a glyphthalic polymer backing. This type conducts heat poorly and can change size over time.
- Collodoxylin linoleum, which has a nitrocellulose base, is also not recommended for heated systems due to its high flammability. This is despite the fact that it contains boric acid, a flame retardant that partially reduces the risk of fire.
- Rubber is not recommended for use on heated floors. It has thermal insulating properties, but when heated, its structure changes and deteriorates.
- Polyvinyl chloride (PVC) is the most ideal option for installation over underfloor heating; it's durable, hygienic, and environmentally friendly. A natural option, marmolium, is more expensive because it consists of safe components: jute fabric, natural dyes, etc. The basic rule for use is that PVC can be heated to temperatures up to 30 degrees Celsius, while products made from natural materials can be heated to temperatures up to 27 degrees Celsius.
 When choosing PVC for underfloor heating, experts advise against choosing a household grade, and instead opt for a commercial or semi-commercial model—they are more durable.
In this case, a heat-insulating underlayment is not required, as it will reduce the system's efficiency. Generally, it is recommended to install the product without a backing or with a small fabric underlayment.
Vinyl linoleum laid on a cable-heated floor may immediately emit an unpleasant odor, but it will go away after a while.
Important! When purchasing material, pay attention to the manufacturer's markings, which indicate whether it can be used with underfloor heating.
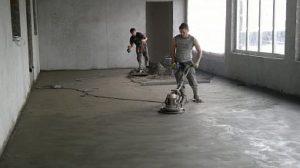
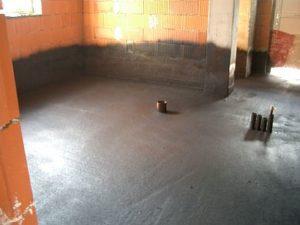
Concrete floor installation
You can immediately begin installing underfloor heating under linoleum if you have a concrete subfloor. If you don't have one, or if you only have a wooden floor or just soil, you'll need to install the concrete floor itself.
The process of making a concrete floor is as follows:
- It is necessary to dismantle the old floor, if there is one.
- Level the base - the soil is leveled with a shovel.
- Create a cushion - it consists of crushed stone, small bricks or bituminous slate, which is compacted, the cushion layer is no more than 50 mm.

- Lay an insulating layer — 20 to 50 mm thick foam plastic is laid. In addition to acting as formwork, it will also compensate for the expansion of the concrete floor as it heats up. A 10 cm layer of sand is added on top.
Next, a second layer of insulation made of extruded polystyrene foam is laid, although other materials can be used. The boards must be at least 50 mm thick. The sheets are equipped with snap-on fasteners, simplifying installation and allowing for a gap-free covering.
To ensure a level surface, use a level. A waterproofing underlayment is not required, as the material has increased moisture resistance.
For your information! Polystyrene foam tolerates temperature changes well, is environmentally friendly, moisture-resistant, durable and resistant to loads.
- Prepare and pour the concrete mix. The mixture is made from 1 part cement, 2 parts sand, and 3 parts screenings. The mixture should be of medium consistency, not too thick, but not too runny. To lighten the mix and reduce the load on the floors, filler is added.
Watch the video
Before pouring concrete, beacons are installed along the walls of the room, and a string is stretched along them. This will serve as a guide for installing the marker rods.
Watch the video
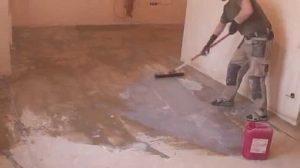
The surface is moistened and filled with mortar, which is leveled with a leveling screed. The floor's horizontality is checked using a spirit level. The marks are then removed, and the voids are filled with the mortar.
Important to know! The standard concrete foundation is 10 mm thick and weighs 20 kg, so it can only be installed on the ground floor or if there is a solid floor.
Installation of heated water floors under linoleum
A great combination of hydronic underfloor heating and a concrete base, although a linoleum finish isn't a good option in this case. If desired, such a material can be installed, but it must be high-quality and not too thick.
The process of installing underfloor heating on concrete under linoleum is as follows:
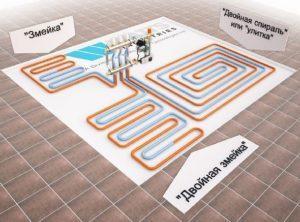
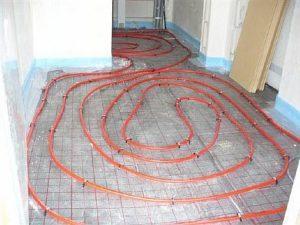
- Think about the layout pattern - snail or snake.
- To purchase the necessary building materials, this is:
- polyethylene film with a thickness of 150 microns;
- polystyrene (plate thickness 20 mm), preferably with bosses;
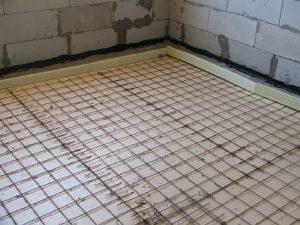
- reinforcing mesh;
- damper tape;
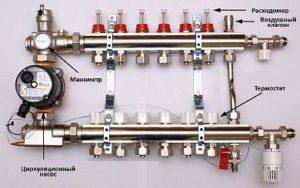
- collectors, input and output;
- cross-linked polyethylene pipe.

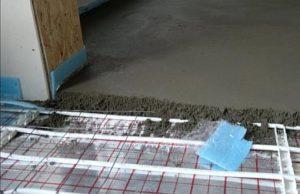
- Apply waterproofing. A waterproofing underlay made of polyethylene film is laid on the prepared concrete base, and the strips are taped in place.
- Lay down a layer of thermal insulation—polystyrene sheets with studs. The studs are used to easily secure the underfloor heating pipes. The sheets are secured to the surface using fasteners.
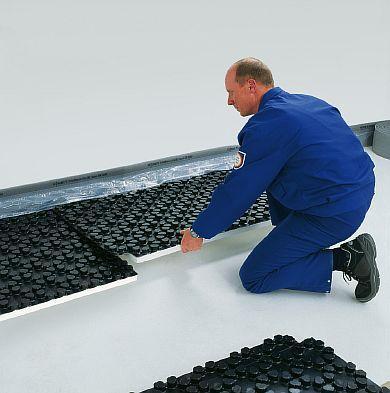
If the slabs are smooth, then a reinforced mesh is installed on them, to which the pipes will be attached.
- Install the manifold. It's attached to the wall, and pipes will be connected to it later.
- Apply damper tape. It is applied to the walls where they meet the floor, along the entire perimeter.
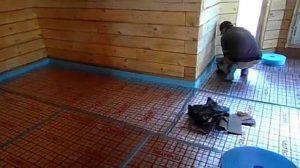
- Install the heating elements. Pipes are laid at intervals of 10 to 30 cm; the heat output of the structure depends on the size. The average consumption of polyethylene pipe is 5 meters per 1 m² of area. The pipes are positioned between the studs and secured with them. If there are no studs on the slab, the pipes are attached to a reinforcing mesh or secured with clips pre-installed on the concrete floor.
- Connect and test the heating unit. The pipes are connected to the manifold, one end to the inlet and the other to the outlet, and the mixing unit is attached to the manifold cabinet. The system is filled with water and pressure tested.

- Lay the reinforcing mesh. It's placed over the polystyrene sheets with the pipes installed. The purpose is to reinforce the concrete screed, which will house the underfloor heating.

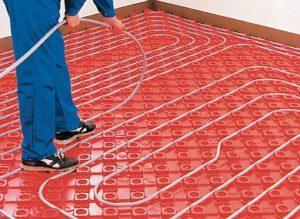
- Pour a concrete screed. It should be at least 40 mm thick and completely cover the pipes. Allow the concrete to dry before laying the flooring; this will take at least a month.
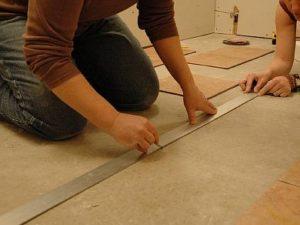
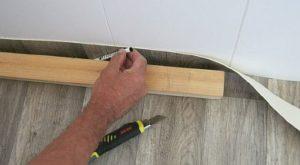
- Install the linoleum underlayment. Plywood sheets are used and laid over the entire surface.

- Lay the final floor covering. Linoleum is laid over the plywood covering the entire floor. Allow the material to dry before installing the baseboards.

Important! Underfloor heating can only be turned on after the concrete has completely hardened.
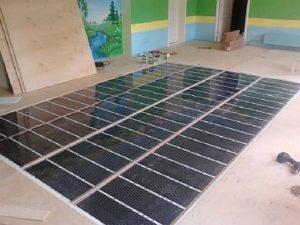
We are installing infrared underfloor heating on concrete.
Infrared film is the most suitable option for installation under linoleum. The main requirement is a perfectly level concrete base to avoid damaging the film.
For your information! For an infrared film floor to be effective, heat transfer must be one-sided. This is possible with different thermal conductivities of the materials on either side of the heating elements. The top layer must have a higher thermal capacity than the bottom layer. If this condition is met, the infrared film's efficiency will be 97%.
If you decide to install a heated film system on a concrete floor under linoleum, you need to stock up on the required amount of film and additional materials that will be needed during the process of constructing the heated pie.
Depending on the room's area, the number of packages of underfloor heating purchased includes: the thermal film itself, electrical wiring, bitumen insulation, a set of clamps, and installation instructions.
In addition, to install a film heated floor you will need:
- polyethylene film;
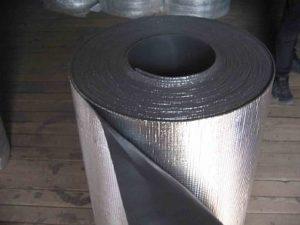
- heat-reflective coating;
- tape, knife, screwdriver, scissors;
- thermostat.
When installing an infrared system on a concrete base, it's important to select the right linoleum. It should be made from natural materials, durable, waterproof, static-resistant, and non-toxic when heated. IR film is not compatible with products with a synthetic base.
Sequence of installation of infrared floor under linoleum.
Step-by-step installation of a warm infrared floor looks like this:
- Preparing the concrete base. The surface is checked for cracks and irregularities. If any irregularities are detected, a thin layer of self-leveling mixture is poured onto the base.
- Determine the location of the film and mounting cabinet. To do this, mark the floor, remembering not to place the film under heavy furniture.
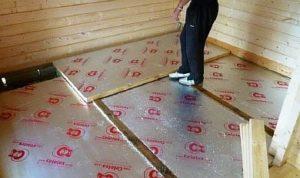
- Heat-reflective layer covering. Izolon or another product with a foil layer on a polyester base can be used as a heat reflector. The material is spread on the concrete floor and secured with double-sided tape, which is also used to attach the sheets to each other. The entire room should be covered with the heat-reflective layer, otherwise heat will be wasted.
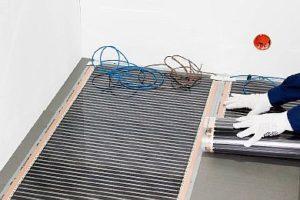
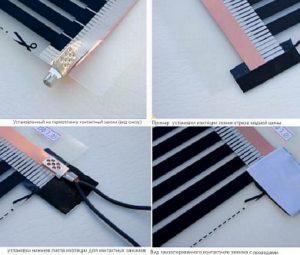
- Laying the thermal film. The film, pre-cut into strips of the required size, is laid with the copper plates facing down. The cut areas of the busbar should be insulated with bitumen, which is sold in the underfloor heating kit. This is essential; the silver contacts must be well insulated along the entire cut, including where the clamps for future wire attachment will be installed.
The recommended distance between the film and walls is 200 mm, with a 30-50 mm gap between strips. Overlapping installation is not recommended. If possible, place the contacts as close to the wall where the thermostat will be mounted.
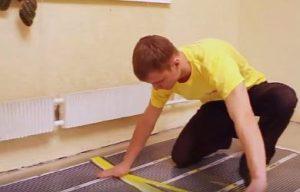
- Fixing the thermal film. The laid strips of film are secured to the heat-reflecting layer with tape. The strips are also secured to each other, preventing them from shifting later during installation of the cake.
- Installing contact clips. The clips are installed where the copper busbar and electrical wires meet. They should be positioned so that one side is inside the film and the other is outside. Then, the contact is tightly compressed using pliers.
- Connecting the thermal film. To connect the system, insert a bare wire or several wires into the clip, depending on the design of the contact clamps. The contact is compressed to secure the wire in the clip. After this, all contacts are insulated. One layer of bitumen insulation is applied over the connection area, and another underneath. The insulation strips must also be tightly glued together.
Important! Silver contacts must be securely insulated throughout the entire cut area and at the wire connections to the copper busbar.
- Connecting the thermostat. The temperature control device is often sold together with the thermostat. The device is installed under the thermal film and secured with an insulator to the graphite strip of the heating element. To ensure a level floor surface, a special recess is made in the heat-reflecting layer for the sensor, wire, and clamps. After routing the wires through the prepared grooves, they are secured with tape.
A thermostat panel is mounted on the designated section of the wall. Wires are connected to it according to the diagram and instructions provided by the manufacturer with the underfloor heating system.
After this, the system is tested. The temperature should not exceed 27 degrees Celsius. The heating of each strip is checked individually.

- Laying a protective layer under linoleum. Since linoleum is considered a fairly rigid flooring, it is necessary to install an additional protective layer for the heating elements. A polyethylene film is spread over the heating element, and a protective material, such as 0.8 cm thick plywood sheets, is laid on top. These are screwed to the subfloor carefully to avoid damaging the film. For this purpose, special gaps are provided between the heating elements or along the edges of the film. The standard distance between fasteners is 150 mm. A gap (0.1 mm) should also be left between the walls and the plywood, which will be filled with a moisture-resistant sealant. Once the sealant has dried, the dust is removed with a vacuum cleaner, and the plywood is primed.
- Flooring installation. The linoleum is rolled out onto plywood and left to cure for several days. Afterward, the baseboards are installed.
Note: To minimize the number of strips of thermal film, lay them lengthwise across the room.
Electric cable underfloor heating under linoleum
Heating cable wires are produced in coils and packaged in polyethylene or boxes. Heating cables can be shielded or unshielded, and single-core or dual-core.
Shielded cable is suitable for electric underfloor heating. When purchasing, please read the information on the packaging:
- about power;
- cable length;
- operating voltage.
The cable and its power rating should be selected based on the room's area and installation pitch. With a 15 cm pitch, an average of 25 cm is required per loop. The number of turns and the total length of the heating cable are calculated based on the area of the room where the underfloor heating will be installed.
The length of the wire running to the wall containing the thermostat is added to the resulting figure. When calculating the area of the heated floor, the required clearance from the walls (5 or 10 cm) must be subtracted from the resulting figure, as well as the areas occupied by furniture, as the cable will not be placed underneath.
The standard cable thickness is 5–6 mm, so it is laid in a layer of concrete screed.
The process of installing a cable floor on a concrete floor under linoleum looks like this:
- Prepare the concrete base. It must be clean and level. Remove debris with a brush or vacuum cleaner.
- Mark out the area. Mark the areas where furniture will be placed and where cables will not be installed. Additionally, heating elements should be placed 5 cm from walls and 10 cm from heating devices.
- Lay a layer of thermal insulation. It's essential to install the insulation over the entire floor surface, especially if the space below is cold. If the space below is warm, a thin layer of insulation is sufficient only under the heating elements. Secure the insulation to the concrete base with foil tape.
- Install the reinforcing mesh. The mesh is necessary to strengthen the structure, and the cable will also be mounted to it. Instead of mesh, you can use mounting tape with hooks to secure the cable. Roll it out according to the heating system installation diagram.
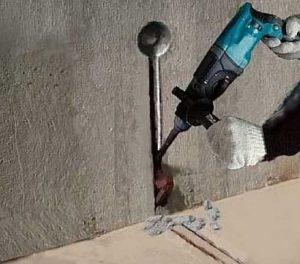
- Attach the thermostat. Punch holes in the wall where the junction box will be installed, and create channels for the wires. Mount the thermostat, then connect the temperature sensor.
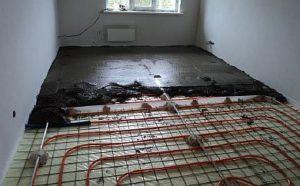
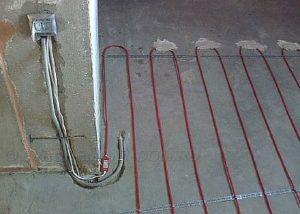
- Laying the heating cable. Cable installation begins with connecting the end of the heating element to the thermostat. It is secured to the reinforcing mesh or tape using the provided hooks. From there, the cable is laid out over the entire area. Distribute the cable evenly, avoiding any overlaps. When laying the heating element, strictly adhere to the planned spacing.
Cable bends must be made so as to avoid kinks and strain on the wire. All connecting joints must be located on the floor. The cable is secured with mounting tape or attached to the installed reinforcing mesh. The other end of the heating wire is also routed to the thermostat.
- Connect the system. The first end of the cable is already connected to the sensor; the second end needs to be secured. The temperature sensor is placed in a corrugated pipe, which is secured between the two cable coils in the middle. The sensor is positioned 55–65 cm from the wall. Mounting tape is also used for fastening. The end of the corrugated pipe is wrapped with electrical tape to prevent solution from seeping inside. The wire from the sensor should be extended to the thermostat and connected according to the diagram.
Before pouring the concrete screed, the floor should be tested for proper operation. To do this, set the thermostat to 26 degrees Celsius and turn on the system. One minute of operation is enough to determine whether the floor is heating properly.
Please note! If necessary, the sensor can be replaced without opening the flooring. Simply insert a new sensor into the pipe.
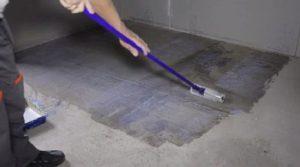
- Pour a concrete screed. After testing the system, pour a cement-sand screed; this solution can be replaced with a self-leveling floor. The screed layer should be at least 5 cm thick. Pour the solution carefully to avoid damaging or displacing the heating elements. Install the flooring only after the solution has fully hardened.
- Lay the linoleum. The roll of flooring is unrolled over the entire area of the room. Let the linoleum dry for several days before attaching it and installing the baseboards.
 At this point, the installation of cable underfloor heating on a concrete base under linoleum is complete, and the floor is ready for use.
Heating mats
Heating mats are a type of cable flooring. They are easier to install because the cable is already secured to a special fiberglass mesh at a predetermined pitch. Furthermore, the cable used in these mats is thinner. This system can be installed dry, without the need for a concrete screed.
The installation process is as follows:
- a layer of hydro and thermal insulation is placed on the concrete floor, which has been cleaned in advance;
- Next, heating mats are laid;
- then sheets of plywood or gypsum fiberboard;
- linoleum is laid on top.
When using linoleum, which is designed for underfloor heating, the system can be installed on any type of concrete floor. Experts recommend choosing underfloor heating installation methods with a concrete screed during major renovations or when finishing new spaces. However, if you decide to install underfloor heating while renovating your apartment, it's best to choose a different approach. choice of infrared heated floors.
Installing a heated flooring system on a concrete base under linoleum is not difficult in itself. However, effective system operation is only possible if all installation guidelines are followed. Furthermore, the correct choice of material also impacts the system's service life. Therefore, if you're unsure of your ability to install it yourself, it's best to entrust the job to professionals.
Video materials
Video - Laying Linoleum


