To create a warm and comfortable atmosphere in a modern home, advanced homeowners often choose to install underfloor heating systems. The installation process itself is simple, but until recently, owners of wooden houses were unable to install underfloor heating for purely technical reasons.
Today, thanks to the advent of modern technology, installing heated floors on wood surfaces is commonplace. Hydronic underfloor heating systems can be easily installed on wood floors, as can electric heating systems.
- Types of heated floors on a wooden base and installation features
- Water-heated floor
- Electric underfloor heating
- Installation of water-heated floors on a wooden floor
- Tools and material calculation
- Preparing the base
- Installation of floor covering
- Installing electric underfloor heating on a wooden floor
- Cable floor heating
- Heating mats
- Infrared film floor
- Video instructions
Types of heated floors on a wooden base and installation features
When installing underfloor heating on a wooden subfloor, you need to determine its type. Heating systems come in two types: hydronic and electric.
Watch the video: Which heated floors are best to choose?
Water-heated floor
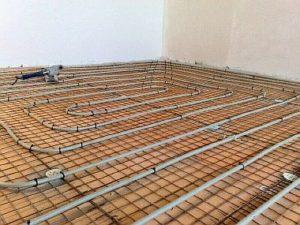
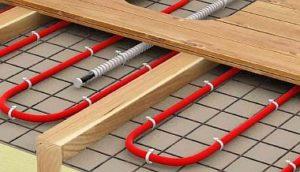 The water system circuit is a structure of pipes through which a heated coolant flows. The heating elements are fixed to the base and then connected to the central heating unit or a separate boiler equipped with a pump.
Hydronic underfloor heating is more popular for installation on wooden floors, as it provides uniform heating across the surface compared to electric systems. However, hydronic heating will have a weaker heating output and is more prone to leaks.
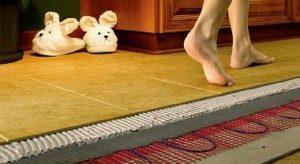
Electric underfloor heating
Electric floor - the current-carrying part can be cable, film or in the form of heating mats.
- Cable heaters are sold in bundles and have varying heating rates and heat output. Power ratings range from 120 to 180 W/m2.
- Heating mats are a cable-based type of flooring, in which the heating elements (cable) are already laid on the mat at a specific pitch.
- Infrared film - contacts are located along its edge, and the power range for different models is from 150 to 220 W/m2.
Electric systems are easier to install, especially with film-based flooring. Furthermore, they are smaller and often require no flooring removal.
They have a shorter heat-up time and a special thermostat that allows you to set the desired temperature in each room. Electric heaters have a long service life—up to 50 years.
 However, there are some disadvantages to installing electric floors on a wooden base:
- risk of fire;
- high electricity costs.
In addition, before installation, the wiring must be checked to ensure it is suitable for the increased load.
Regardless of the type of underfloor heating, it can be installed on a wooden surface. The main thing is to install it correctly and follow the operating instructions.
Installation of water-heated floors on a wooden floor
Correct installation of the water circuit on a wooden floor ensures optimal distribution of warm air flows in the room.
Cool air is located at the top, and warm air is located at the bottom. This heat distribution pattern is considered the most favorable. The absence of convective air flow provides an additional advantage to this type of heating.
Video about installing underfloor heating on a wooden floor
Tools and material calculation
To begin installing a water-heated floor, you need to prepare your tools and materials. Let's determine what you'll need:
- level;
- adjustable wrenches and spanners;
- screwdrivers and a screwdriver;
- scissors for cutting metal-plastic pipes;
- roulette;
- welding device;
- plastic pipes;
- waterproofing film;
- thermal insulation material;
- fastenings;
- connection equipment: couplings, adapters, mixers, manifolds.
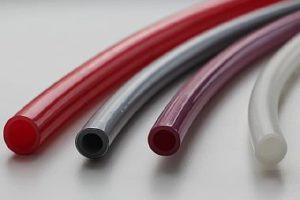 Pipes for these structures can be made from the following materials: plastic, metal, and metal-plastic. They can also be seamless or welded.
Find out what it could be Pipe consumption for underfloor heating calculated per m2.
It is necessary to decide on the pattern of laying the underfloor heating pipes - in the form of a snake or a snail.
The number of pipes is calculated based on the size of the room to be heated. Enough insulation and moisture protection material, pipe underlay, and finishing coating are required to completely cover the heated room.
The size of the heating circuit for a hydronic underfloor heating system is calculated based on the installation pitch and layout. When hydronic underfloor heating is the sole heating source, the pipe pitch ranges from 100 to 150 mm, and if it is used as a supplemental heating system, the pitch is 300 mm.
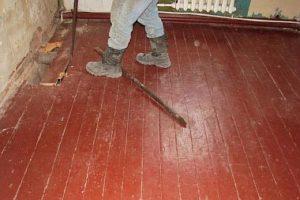
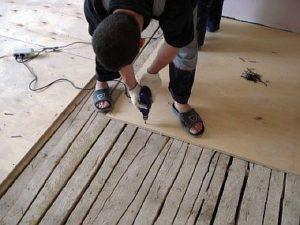
Preparing the base
Initially, it is necessary to assess the condition of the existing foundation.
The assessment is:
- visual inspection - the boards should be placed as close to each other as possible;
- it is necessary to cut the surface from the boards to determine the condition of the wood structure;
- removal of rotten elements;
- All cracks need to be sealed. If any are found, they are filled with a heat-insulating product or a special grouting mixture.
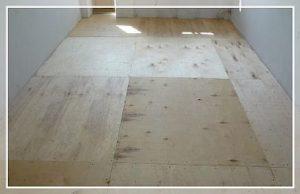
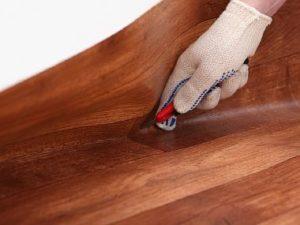
The old plank floor should be planed to create a smooth and uniform surface. Unevenness on the wooden surface should be no more than 2 mm. Particular attention should be paid to the base for underfloor heating due to the lack of an underlayment.
If the wood surface is too old and beyond repair, it must be removed and replaced with a new covering. Removal is necessary when:
- lack of insulation;
- The presence of a large distance between the joists. It should not be more than 50-60 cm.
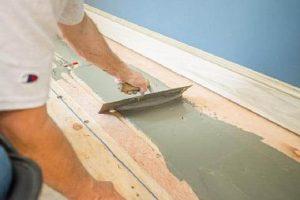
Installation of floor covering
In buildings with old wooden floors, it is not permissible to pour a heavy concrete screed, therefore, the deck method is used as the main method of laying.
The flooring system is a multi-layered pie:
- The base must be level, without cracks or protruding boards. All boards must be securely fastened and not sag.

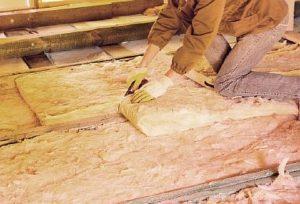
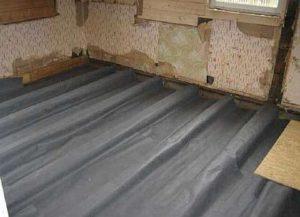
- A thermal insulation layer is required to retain heat, preventing it from being wasted. It must be moisture- and fire-resistant, and compatible with all building materials used in the structure. It's best if the product provides sound insulation and is minimally thick.
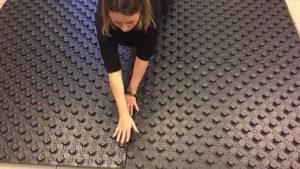
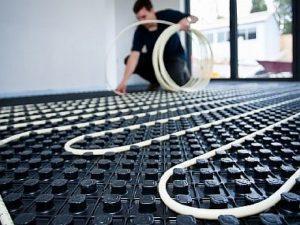
- Pipe underlayment is laid over the insulation. Polystyrene mats with studs designed to secure the pipes can be used. They are equipped with special locks that secure the slabs together. These mats can be plain or with an insulating backing, eliminating the need for pre-insulation.
A substrate made from sheets of lumber with grooves cut into them for the heating elements is acceptable. This product is manufactured industrially. It is also possible to make a homemade substrate from slats and beams.
- The heating element is then installed into the existing grooves or provided brackets, and the pipes are mounted. To create a good heat shield, the element is placed within an aluminum profile. This profile can be replaced with foil, which should be wrapped around each pipe. It's also a good idea to place a layer of foil on top of the contour.
Before installing the "pie", the system should be connected to the central heating or to an installed boiler.
Important! Test the device for proper operation, heating, and leakage before applying the next layer.
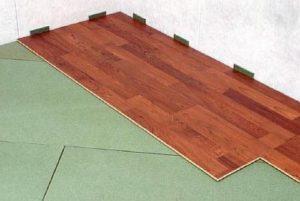
- The choice of underlayment for the flooring depends on the finishing material being laid on top. When installing tiles, linoleum, or carpet, moisture-resistant drywall should be used. If pipes are installed on polystyrene mats, gypsum fiber boards are laid in two layers. However, when using laminate flooring over wood, a moisture-absorbing underlayment is required, such as cardboard or foamed polyethylene.
Drywall can be covered with plywood or chipboard sheets. Glass-magnesium boards are an excellent option; they are good conductors of heat, which is a plus for our design.
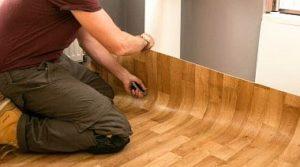
- Finishing floor covering - the flooring product is laid on the equipped underlay.
The installation of the water-based flooring on the wooden base is complete. After hydraulic and other tests have been completed at certain stages of the installation, it can begin operation.
Installing electric underfloor heating on a wooden floor
As mentioned earlier, electric floors come in cable, infrared, and heating mat types. Before choosing a model, it's important to consider the installation principles of each system in more detail.
Find out which electric underfloor heating is best to choose and why
Cable floor heating
This type of flooring consists of a cable that is installed according to a specific pattern.
Before you begin installing a cable-based underfloor heating system on a plank surface, you should first prepare the tools and building materials you will need:
- heating cable;
- thermostat;
- insulation and foil;
- corrugated pipe;
- mounting tape;
- plywood;
- a measuring device to check the network;
- fasteners;
- set of working tools: pliers, screwdriver, scissors, tape measure.
When calculating the cable size required for installing a cable system, keep in mind that heating elements are placed throughout the entire area, excluding areas where heavy furniture is located. The layout is either a serpentine or a spiral.
The process of installing a cable system:
- The base is prepared by leveling the surface and sweeping away debris. If any cracks are found, they are filled with a special wood filler. Foam is not recommended for use as it is a thermal insulator.
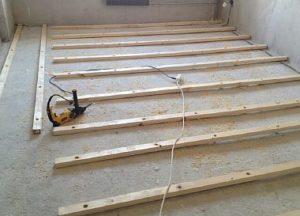
- Wooden joists are laid and fixed to the subfloor with self-tapping screws.
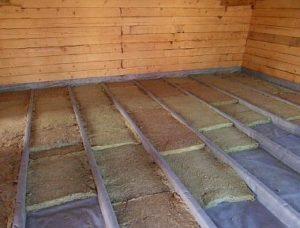
- Thermal insulation material is placed in the space between the beams. Foil is used for this; it not only serves as an insulator but also as a reflector of the heat generated by the heating device.
- A galvanized mesh is installed - the cable will be attached to it.
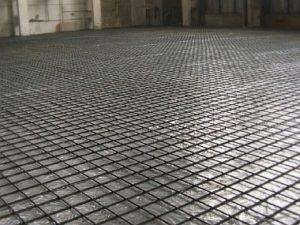
- The heating elements are laid on top of the mesh according to the planned layout. Small cuts must be made at the intersections of the cable and the beam.
- The wires are attached - they are fixed to the bars with mounting film, and mounted to the mesh with clamps.
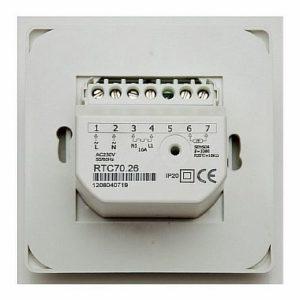
- The system is connected: a thermostat is mounted on the planned section of the wall, and a temperature sensor placed in a corrugated pipe is connected to it.
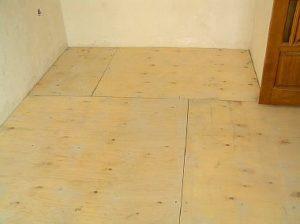
- The underlayment is installed—it serves as the base for the underfloor heating system. Plywood is used and laid over the heating elements. The air gap between the cable and the underlayment should be 10 mm.
- The final coating is installed - it is laid on the plywood.
At this point, the installation can be considered complete; the cable electric floor is ready for use.
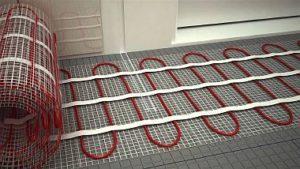
Heating mats
Heating mats are a more modern and functional version of electric cable flooring. Their advantage lies in the small diameter of the wire (no more than 4.5 mm), which is already secured to a fiberglass mesh using one of two patterns: a coil or a serpentine.
Before starting work, you need to prepare a standard set of tools: pliers, a screwdriver, scissors, and a tape measure.
You should purchase all the necessary materials:
- heating mats - the size is calculated based on the area of the room, minus the places where heavy furniture will be installed;
- thermostat;
- thermal insulation material and foil;
- corrugated pipe;
- mounting tape;
- wooden blocks and plywood;
- fasteners.
Step by step, installation of a structure with heating mats is similar to laying a cable, only a little simpler:
- The wooden surface is prepared: it is cleaned and cracks are filled.
- The bars are being installed.
- Thermal insulation with a foil surface is laid.
- Markings are made for the placement of the mats; the heating cable is not laid under large furniture.
- Reinforcing mesh is laid.
- Thermal mats are laid out and attached to the reinforcement.
- The thermostat and temperature sensor are fixed and connected.

- A plywood base is installed.
- The flooring is being laid.
Important! Before installing the plywood underlayment and flooring, test the system for proper functionality.
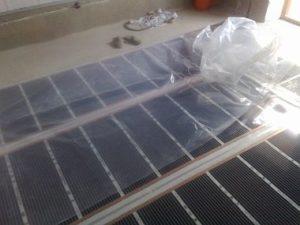
Infrared film floor
Installing an infrared floor is a simpler installation option compared to a cable-based electric system. However, its performance characteristics are comparable to those of the latter type. The heating elements are metal plates (graphite).
As with any construction project, you should stock up on everything you need:
- Infrared film - in size, it should be smaller than the area of the room, since it should not be placed under heavy objects (the carbon elements may become pinched).
- Insulating material with a foil layer - its size should be equal to the entire area of the room.
- Polyethylene film - it is used to cover the heating elements.
- Scotch tape - you need foil and construction tape.
- Plywood - the amount should be enough to cover the entire room in two layers.
- With bitumen insulation and insulating tape.
For your information! You can purchase a ready-made infrared underfloor heating system in a store; it includes all the components needed to install the system. However, it does not include a thermostat or temperature control unit; these must be purchased separately.
To make a warm film floor you need:
- construction knife;
- scissors;
- screwdriver;
- pliers.
The installation process for the infrared film floor pie is as follows:
- Preparing the base. If you have a wooden subfloor, experts recommend laying a plywood subfloor for the film, ideally with a click-lock mechanism. This creates a smooth, virtually seamless surface. The plywood is attached to the wooden surface with screws recessed 1–2 mm into the wood. A thin layer of insulation, such as polyethylene foam, can be placed under the plywood.
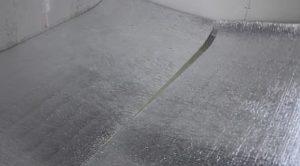
- Thermal insulation. A thermal insulation layer is installed, providing thermal insulation, with its foil surface facing upward. The product is laid end-to-end and stapled to the plywood. The joints between the panels are sealed with tape; foil or construction tape can be used.
- A thermostat installation plan and film placement plan are drawn up. The thermostat mounting location is determined; ideally, it should be near the room's exit and switches. A film installation diagram is drawn, indicating all cable routing.
Advice! It is recommended to install the automatic thermostat for the infrared film floor separately.
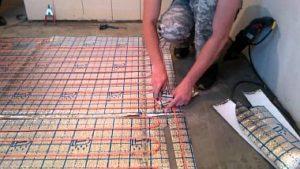
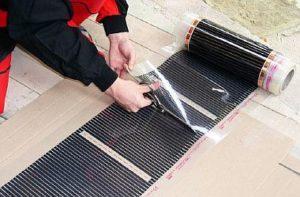
- Preparing the film. Cut the film to the required length in designated areas using scissors. Cutting the film elsewhere is prohibited.
- Film installation. The infrared floor sheets are laid parallel, with the copper strips facing downwards.

- Cable insulation. It is necessary to insulate the cut areas of the film where the cable is not planned to be connected to utilities. This is done using bitumen.
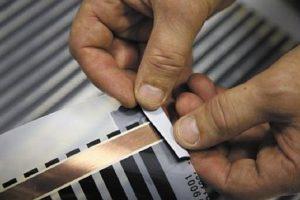
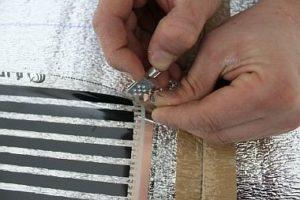
- Installing the contacts. The clamps are placed in the locations on the copper busbar where it will be connected to the electrical circuit. One clamp plate is placed inside the film, and the other is placed outside, on top of the copper strips. The clamp must be securely clamped using pliers.
- Securing the IR film. The underfloor heating strips with attached terminals are connected to each other using construction tape. For better adhesion, the film can be taped at the edges at 500 mm intervals.
- Connecting the system. According to the diagram, the terminals are connected to the ends of the wire. To ensure a good connection, the connection point is tightly clamped with pliers.
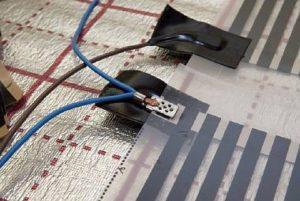
Please note! Some film flooring models are connected to the electrical circuit using a contact—a tab secured with a rivet.
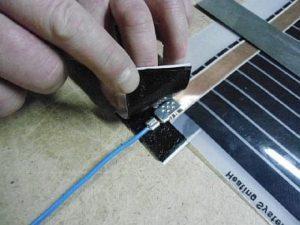
- Terminal insulation. All terminals must be covered with bitumen tape. One strip is applied to the bottom of the clamp, and the other is applied to the top where the clip meets the film. Then, the two strips of tape are glued together. It is important to ensure that all contacts are properly insulated.
- Temperature sensor installation. It is attached to the bottom of the film, to the black strip, 150 mm from the edge of the film. It is secured with mounting tape. The sensor itself and its wire are placed in the foil insulation to create a flat surface. To achieve this, grooves are cut in the insulation for the sensor, terminals, and wires. The wires and sensor are placed in the foil insulation and secured with tape.
- Installing a thermostat. Thermostats can be surface-mounted or recessed into a wall. Depending on the model, the cable runs along the wall or is installed in grooves cut into the wall.
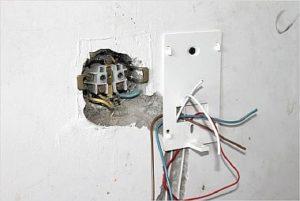
- Connecting the cable to the thermostat. The cable from the infrared film, sensor, and home power source is connected to the thermostat. Follow the instructions included with the thermostat.
Please note: When attaching a wire to the wall, to improve its appearance and prevent accidents, it is placed in a special box that is mounted to the wall.
- Checking the system's functionality. The thermostat is set to 30 degrees Celsius, and the operation of each panel is checked. It is important to ensure there is no sparking at the terminal connections.
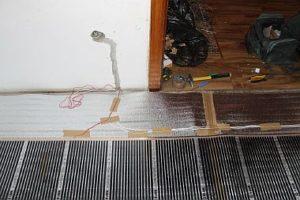
- Waterproofing. A polyethylene film is laid over the entire surface of the IR floor. It is overlapped by 100 mm and secured with tape in several places.
- Underlayment installation. Plywood is mounted on the heating elements to serve as the base for the flooring.
- Laying the final covering. The planned covering is laid on the installed decking.
In conclusion, it's worth mentioning that when deciding which heating system (water or electric) to choose for a wooden floor, you should first decide who will perform the installation work.
If you want to install a heated floor on a wooden floor yourself, you must strictly follow the installation technology and the system manufacturer's instructions.
Video instructions
Watch: DIY PENOPLEX heated flooring
Wooden floor screed


