A brick chimney is a crucial element of a stove heating system. It removes combustion products and creates a draft for fresh air to enter the heating unit's firebox. Laying a brick chimney is a complex construction process, requiring specific skills and knowledge.
- What types of brick chimneys are there – requirements, size, configuration
- What to consider when constructing a chimney
- Height of the structure
- Section of the structure
- Which brick is better to use?
- What kind of solution is used for masonry?
- Laying rules
- Design features and sections of the pipe
- The stages and process of laying a brick stove flue
- How to make a hole for a stove flue in a roof
- Placing the chimney above the roof
- Conclusion
What types of brick chimneys are there – requirements, size, configuration
 There are three types of stove pipes.
- A chimney with a chimney cap. It extends beyond the stove. This type of chimney is mounted on a concrete pipe secured to the ceiling. Its slab is reinforced and must be at least 5 cm thick.
- A permanent structure. A separate foundation is built for it. A permanent chimney is rarely used, and only when another type of chimney cannot be constructed.
- Wall drainage channel. It is constructed in internal load-bearing walls made of brick or stone.
Sometimes a wall chimney is built into an external load-bearing wall. In this case, additional work is required:
- Thicken the wall from the inside (in the form of a pilaster) in the area where the pipe will pass.
- Prevent the chimney from overcooling, which will reduce draft due to steam condensation. To achieve this, maintain the required distance from the chimney to the outer surface of the load-bearing wall.
What to consider when constructing a chimney
The pipe should be laid in such a way that there is sufficient space between it and the outer side of the load-bearing wall - see the table of dimensions.
| Thickness of the external wall in bricks | Gap in bricks |
| 2 | 1.5 |
| 2.5 | 2 |
| 3 | 2.5 |
Chimneys should not be installed in room corners or where walls intersect. If the building is residential, the wall thickness of the chimney must be at least 10 centimeters. The structure must be completely airtight, preventing combustion gases from leaking through.
Houses are often built from concrete, cinder blocks, foam blocks, and sand-lime brick. In this case, the wall sections where the chimney will run should be made of red brick. Their thickness should be at least 12 cm. This requirement also applies to the piers and partitions between the smoke exhaust ducts.
Watch the video
Before laying a brick chimney yourself, you should take fire safety regulations into account:
- the distance from the outer surface of the chimney to walls made of flammable materials must be at least 40 cm.
- In areas where the flue passes through the ceilings, thickenings (edging) must be made.
The chimney duct along its entire length should be assembled so that the dimensions of its internal space are constant.
Height of the structure
The vertical length of the chimney has the greatest impact on draft efficiency. A properly constructed chimney should be at least 5 meters high. The height difference between the roof plane and the chimney head is also important.
- The top of the chimney should be flush with the ridge, or slightly elevated above it, if no more than 3 m away.
- If the roof is flat, the flue gas outlet must rise above it by at least 1.2 m.
- The distance from the furnace grate to the pipe mouth must be at least 5 m.
- The height of a chimney above the roof depends on its exit point relative to the ridge or parapet. This value varies from 0.5 to 1.5 m.
Section of the structure
The chimney's dimensions must be no smaller than the cross-section of the stove's exhaust pipe. The size of the structure's flue duct should be determined based on the heat output of the heating appliance.
The cross-sectional area of the channel must correspond to the volume of combustion products passing through it and be no less than:
- 13×13 cm for stoves with heat output up to 3.5 kW;
- 13×25 cm for analogs with heat output greater than 3.5 kW;
- For a Russian stove with a large portal, you should build a brick chimney with a cross-section of 26x26 cm with your own hands.
Which brick is better to use?
 High-quality chimney laying is only possible with the best materials. Carefully fired red solid firebricks are used to construct the flue gas outlet structure. Refractory fireclay blocks are also suitable. The material grade must be at least M-200.
When laying a brick chimney yourself, choose evenly painted blocks with clear edges. This way, they can be laid on a minimal layer of mortar. The blocks should be single-piece, meaning they measure 25 x 12 x 6.5 cm.
When extending the chimney onto the roof, single and double M-150 sand-lime bricks can be used. They have a high level of frost resistance.
What kind of solution is used for masonry?
When working, a stove-maker can use different masonry mixtures:
- For laying red brick, a clay-sand mortar is used. Its proportions are 1:2. If the clay is very rich, sand is added in 3-4 parts by volume.
- When installing refractory blocks, a mortar mixture of refractory clay, fireclay, and sand is mixed in a 1:1:2 ratio.
- To install a chimney in the attic, you can use a cement-lime-sand mixture in a ratio of 1:1:2.
- For the roof cap, you can use a cement-sand mixture in a ratio of 1:2.
The mortar for laying the stove flue after mixing with water should have a creamy consistency.
Laying rules
The cross-section of the structure must be a multiple of the brick dimensions. The thickness of the outer pipe walls of the overlying structures must be at least half a brick. For greater stability, the thickness of the outer walls of the base of the main structures should be equal to a whole brick, transitioning to half a brick at the top.
Air ducts inside the structure must be installed vertically. Horizontal ducts cannot be installed at the level of the attic floor. This is required by fire safety regulations.
Each stove must be equipped with its own chimney. It's rare for a design to allow two heating appliances to be connected to a single flue. They must be located on the same level, with a separation height of 75 cm or more.
Watch the video
When installing two heating appliances (or a stove and an exhaust system), the two ducts can be connected in a single riser. Their dimensions remain the same. However, when installing a two-duct flue system with a duct cross-section of half a brick by half a brick, sub-dimensions are used. Five full bricks and two ¾ bricks are used in each row. This ensures a secure bond between the masonry.
The installation of a double structure (chimney and ventilation duct) with a channel size of half a solid block is done using eight bricks. If this is done with alternating even and odd levels, it will be impossible to connect the dividing partition with the exterior wall masonry. Therefore, the alternation must be done every three rows.
The first level is assembled from eight solid blocks. The second level is composed of five solid blocks and four ¾ blocks. This arrangement increases the structural strength.
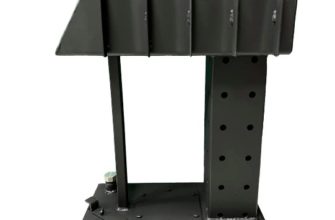
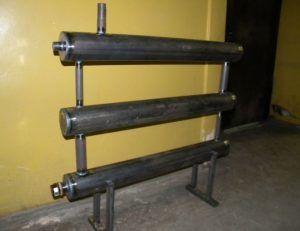
Design features and sections of the pipe
Before you begin laying a brick chimney yourself, you should study its design:

- The first part of the chimney is the lower neck of the structure. It is placed on the shoulders. The damper is installed in it. The bricks are tied together during installation of the neck.
- At a distance of 5-6 brick levels from the ceiling, a flared roof is installed. This expansion extends to the attic.
- The part of the structure you install yourself in the attic space is called a riser. It extends to the base of the roof.
- An otter is laid out from the roof covering. It extends at least 10 cm on all sides. This element of the device prevents precipitation from entering the house.
- Next, the neck is laid out. Its dimensions are the same as the main pipe shaft.
- Next, the chimney cap is installed. A deflector is mounted on it, protecting the flue from precipitation.
The stages and process of laying a brick stove flue
You should have a diagram of the chimney system with its layout. You should use this diagram for construction.
Watch the video
Here is a step-by-step process for laying a stove flue:
- Prepare tools, materials and solution.
- Take measurements up to the damper and fluff.
- Begin laying the blocks (the mortar should be 5-10 mm thick) for the stove pipe. Check the evenness of all rows with a level on all planes. After 3-4 levels, clean the channel of excess mortar.
- Secure the frame to the damper mounting location. It should not disturb the top of the bricks. Therefore, cut a recess in the bricks to fit the frame's dimensions.
- Continue building the structure up to the level of the flared roof. Calculate the number of rows required to achieve the required flared roof height. Keep in mind that each row increases the chimney perimeter by ¼ of the block width. The flared roof should fit snugly against the floor joists. If they are located away from the flue gas outlet, install support frames.
- Next, install the fluffing in order. It can be made square or rectangular.
- After the calculated number of rows, move from the fluffing to the main dimensions of the riser. Extend it to the roof.
How to make a hole for a stove flue in a roof
 The dimensions of the opening in the roofing must be calculated precisely. After the chimney has been laid out to the roof, use a plumb line and a hammer and nail to mark the angular dimensions of the structure on the roof. Do this from the attic side.
Connect the nail holes with a pencil. This will create a rectangular projection of the structure's cross-section onto the roofing surface. Then, measure 10 cm from each side of the figure and draw a small rectangle inside it.
Connect the corners of the shapes and cut out the smaller one, sawing the covering along the lines connecting the corners. Fold the resulting four strips over the board against which they are resting. Do this so that they just fall short of the vertical line. This will ensure that the roofing material fits tightly against the wall of the chimney fixture.
Fill the remaining unprotected triangular spaces between the strips at the corners of the chimney with mortar, placing bricks against them. Do the same on the outside.
Placing the chimney above the roof
Begin installing the otter at the roof level. The instructions indicate that it's more difficult to install than the fluffed roof. The structure should be expanded carefully and gradually, taking into account the slope. When laying a brick chimney yourself, it's important to increase the structure's stability. Therefore, embed steel plates into the otter and secure them to the rafters.
Trim the ends of the blocks. This will reduce the gaps between the otter and the roofing. Alternatively, place sheet metal between the bottom of the pipe element and the roof sheathing. This will prevent precipitation from seeping into the rafters and the attic.
The installation of the chimney is completed by fitting the head and installing a deflector on it.
Conclusion
Watch the video
Laying a brick chimney yourself is a complex and labor-intensive process. Beforehand, calculations must be made and a construction plan drawn up. When laying the bricks, it's essential to adhere to the plan precisely and comply with all construction regulations.