You can connect your toilet to the sewer system yourself; there's no need to call a professional. The procedure doesn't require professional equipment; standard construction tools and materials are sufficient.
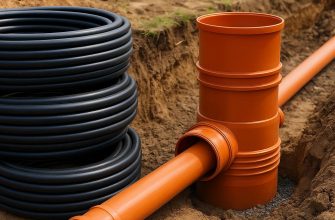
Connections can be made using various components: eccentric sleeves, corrugated pipes, plastic pipes, etc. Each material has its advantages and disadvantages. The choice of a specific component depends on the specific design features of the system.
What tools and materials are required?
Before connecting the toilet to the sewer system, you need to select the necessary building materials and auxiliary tools. The type of fittings used to form the connecting parts depends largely on the connection method, product model and desired location.
Basic tools you will need for installation:
- silicone;
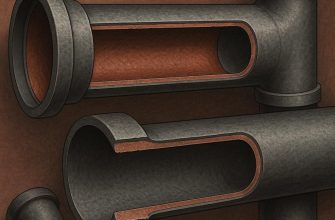
- corrugated pipe for sewerage;
- hammer, marker, construction tape measure;
- hacksaw for metal or plastic elements;
- plastic bends and special corners;
- eccentric cuff;
- sealing cuff;
- rubber adapters;
- parts required to dismantle the components of the previous connection to the riser and securely fix the plumbing.

If cast iron pipes were previously used to connect to the sewer system, then, most likely, professional equipment will be required (a special hammer drill and grinder).
However, in such a situation, it is advisable not to carry out the dismantling procedure yourself; it is advisable to contact specialists who have the necessary equipment.
Methods for connecting a toilet to the sewer system
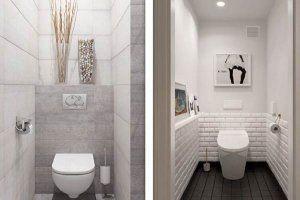
The exact way the toilet is connected to the sewer riser depends on the system design. It's important to note that the toilet shape should be selected based on the sewer system.
There are three main types:
- vertical — Similar plumbing fixtures are most often found in older buildings, where the socket of the sewer pipes in the floor extends into a riser located under the ceiling of the room below. Nowadays, cottage owners also choose this type of connection, as it allows for complete concealment of the sewer line.
- direct – also allows for utility lines to be hidden from view. The advantage of this approach is the ability to install the toilet close to the wall;
- oblique This connection method is used when it's important to ensure proper operation even if the toilet is damaged or the seal is broken. Sometimes, homeowners choose to connect the toilet outlet directly to the riser, but this increases the risk of leakage, so it's not recommended; a special adapter is better.
Dismantling old elements
Before connecting the toilet to the sewer pipe, clear the installation area of any existing structural elements. This procedure is performed using a hammer, screwdriver, and pry bar.
In most cases, the outlet of old products is mounted in a cast-iron structure ("elbow"), requiring the pipe to be broken with a hammer. When performing this procedure, be sure to wear safety goggles. Otherwise, sharp ceramic fragments may get into your eyes, causing injury.
 After the old plumbing fixture has been removed, it is necessary to tap on all sides of the cast iron pipe, then proceed to remove the cement layer and other deposits from the walls.
A screwdriver and hammer are sufficient for removing small parts, while larger components will require a pry bar. When hammering, be careful not to overdo it, as strong blows will cause the cast iron socket to split.
In this case, you'll need to break the floor to access the sewer riser. Then, you'll need to connect the new branch to the riser.
Once the main deposits have been removed, you can begin the final stage of cleaning the pipes. To do this, coat them with a special chemical toilet bowl cleaner and then scrape off the residue with a wire brush.
Finish cleaning with a rag. The first 5-6 cm of the cast iron socket must be completely smooth on the inside, as this is essential to prevent future leaks and ensure a tight seal. Wear protective gloves throughout the entire procedure.
Types of connecting elements
If connecting the toilet directly to the sewer system is not possible due to design constraints, auxiliary materials—connecting pipes—are used. The following types are most commonly used:
- corrugation;
- eccentric cuffs;
- plastic corners and bends;
- pipes of various materials, but plastic ones are preferable.
Connecting a toilet to the sewer system with a corrugated pipe is used when the pipes are misaligned. The advantage of this type is the ability to install the toilet at any angle.
Disadvantages of using corrugated pipes A longer minimum length is required for connecting the toilet to the sewer system. If the distance between the pipes is approximately 12 cm, it's better to choose other connecting components.
 Eccentric cuffs look like two offset elbows. Before purchasing, it's recommended to measure the offset between the sewer pipe and the toilet drain.
This information will help you select the most suitable cuff model in the store. The downside of the eccentric part is its short length, which means it can only be installed with a small distance between the pipes (up to 12 cm).
Elbows and elbows are installed when corrugated pipe cannot be used for some reason. Their advantage over smooth-walled corrugated pipe is that they significantly reduce the risk of blockages.
The main drawback is their rigidity, which can lead to leaks even with slight misalignment. Plastic products can be trimmed to fit the required size, unlike cast iron.
In most cases, steel pipes are used when there is a risk of failure of the water seal mechanism. (Find out what a sewer water seal is, how it works, what types there are, etc.)). If the riser's capacity is insufficient, liquid from the siphon will be drawn into it.
As a result, the water seal fails, and the foul odor from the sewer system enters the room. In this situation, a pipe with an automatic valve is connected to the riser or pipe connected to the toilet. When flushing, a special valve opens, allowing air to enter, preventing the water seal from being breached.
However, steel pipes are not required to implement this feature. Eccentrics and adapters are also available, which provide similar properties to the pipeline. To ensure a secure connection, it is recommended to use a sealant when using any type of connecting element.
For these purposes, it's advisable to purchase a special waterproof sealant designed for plumbing fixtures. If the rubber seal becomes loose, the sealant will prevent leaks.
Corrugated connection
Typically, toilets with straight or oblique outlets are installed using corrugated tubing. It's affordable, can be bent in any direction, and can be used as a temporary connection. When purchasing, consider the length from the sewer outlet to the toilet outlet; the corrugated tubing should be a third longer than this.
What is a toilet outlet? It's the drain opening that connects the apartment's plumbing to the sewer system. There are three types: horizontal, vertical, and oblique outlets.
 Brief algorithm of actions:
- Apply silicone to the joint and insert the corrugated pipe with the sealant into the pipe opening. It's best not to move it until the silicone-based sealant has completely dried.
- Place the toilet in place and check its stability. If it wobbles, level the floor or install special stands.
- Insert the corrugated pipe into the toilet pipe; there is no need to lubricate the connection with anything.
- Pour in a few liters of fluid, wait 1 minute, and then check for leaks. If the connection is leaking, disconnect the corrugated hose, check the seals for proper alignment, and carefully reinstall it.
- If there are no leaks, you can mark the places where the plumbing fixture is attached with a pencil or marker.
- Fix the product so that it does not swing.
- Connect to the sewer.
- After 2 hours, test the pipe by flushing it several times. Wait 5 minutes; if the pipe is leak-free, you can proceed with installing the tank and other components.
- Apply sealant to the joint from the outside to prevent future leaks.
If a small leak (a few drops) was detected during the last test, remove all liquid and the corrugated tube. Then, reapply silicone to the rubber seal and reinstall it on the toilet spout.
Find out what to do if suddenly The toilet cistern started leaking: 9 reasons, why it leaks and video instructions for repair.

Step-by-step installation instructions
After dismantling the previous structure and cleaning the sewer inlet, you can begin installing the toilet. The complexity of this procedure depends on the design of the plumbing fixture.
Toilet with vertical outlet
 This type of plumbing is installed in older buildings and private homes. The toilet design includes a trap and fittings, which are invisible after installation. This type of installation differs from other types of fittings in that it uses flanges. The connection between the sewer and the toilet is tightly sealed, reducing the risk of leakage.
 Since there's no need to leave any space behind the toilet for plumbing fittings, this model can be installed at a minimal distance from the wall. The installation process begins after removing the existing plumbing components and thoroughly cleaning the area where the new unit will be installed.
Steps for installing a toilet in a cast iron sewer system:
- The entire area, including the socket, must be cleared of debris and foreign matter. If necessary, any remaining mortar and elements of the previous product will need to be removed using a chisel, gouge, or other similar tool.
- An adapter, which is a rubber sealing cuff, must be installed into a completely clean socket.
- The device is installed with its outlet in the adapter installed in the previous stage and is fixed to the floor using special fasteners (screws).

Sometimes it's necessary to horizontally shift this type of toilet. This can be accomplished without damaging the ceiling or moving the drain in the room below. However, it's important to understand that this will require a sacrifice of 15-20 cm in height, as the toilet must be raised onto a small pedestal.
Important points to consider when performing the procedure:
- If a displacement of 4-8 cm is planned, an eccentric coupling can be used;
- If a larger offset is required, additional materials will be required: bends and plastic pipe. These are assembled into a Z-shaped structure, which is connected to the socket of the cast iron pipe using a rubber sealing coupling.
- After installing the coupling or pipe, formwork is built around it, then the raised platform is installed with cement. The surface of the podium should be flush with the socket, taking into account the tile finish.
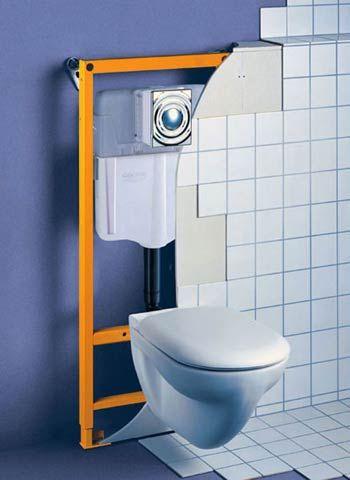
Toilet with direct release
Watch the video on how to connect a bathroom with a horizontal (straight) outlet at home
This type of product is connected to the pipeline using a corrugated product, an eccentric cuff or a durable, non-bending structure made of steel pipe.
This structure should not move when the toilet seat is inserted; it should be held by hand during this procedure. This is quite difficult to do on your own; it's best to ask for help to prevent the structure from shifting.
If the plumbing outlet matches the shape and height of the socket, connecting a toilet with a horizontal outlet to the sewer system is quite simple. In this case, the joint should be sealed with a collar and a waterproof sealant for plumbing fixtures.
It is recommended to seal the connection between the toilet and the sewer pipe, as the horizontal connection method means that water will be located directly at the joint, so any gap can become a source of leakage.
 To achieve a small offset, you should use a cuff with an eccentric; it is necessary to compensate for the vertical displacement of the toilet outlet.
The main drawback of a direct-release toilet is that it can only be connected to a vertical wastewater pipe. The main advantages of this model include its simple and easy installation (it can be done quickly and easily by yourself), as well as the ability to install it with cast iron or plastic piping.
Algorithm of actions:
- Place the toilet without fixing it, mark the mounting points on the floor.
- Remove the device and create mounting holes.
- Install the plumbing fixture using dowels and screws. It is recommended to exercise extreme caution when installing and not overtighten the screw. Doing so may crack the fixture's surface.
- Insert the hose into the drain hole, which has been well lubricated with a silicone-based sealant. It is recommended to hold the drain hole while doing this to prevent any parts from shifting.
- If a slight adjustment is needed, an eccentric adapter can be used. However, keep in mind that this will move the unit forward by several centimeters, requiring re-drilling the holes to secure it to the floor.
- Using the sealing cuff, connect the toilet outlet to the sewer. Check the operation and ensure there are no leaks.
- Fix the product through the already prepared and made holes.
Toilet with an oblique outlet
- The cast iron socket of the branch is cleaned of various debris and remnants of previous installation.
- A platform for the subsequent installation of the toilet is created in the following way: a layer of cement (a solution without adding sand) is poured onto the floor.
- The toilet is placed on the cement, and the remaining mortar is used to seal the socket (2-3 cm deep).

This installation method was widely used in previous decades, but is now quite rare. The main drawback is the inability to remove the toilet for cleaning (if a large object gets stuck in the toilet) or to move it. Despite the simplicity of the procedure, technicians prefer to use a different method.
Nowadays, plumbers prefer to install a toilet with a detachable connection. Instructions for connecting a side-discharge toilet to the sewer system:
- The cement mortar is pressed under the base of the device along its perimeter, which compensates for any unevenness and distributes the pressure as evenly as possible.
- The product is fixed to the floor using anchor screws.
- If no offset is required, the connection to the cast iron socket is made using a sealing coupling. To prevent leaks, use a silicone sealant designed for plumbing (a universal sealant can also be used). The sealant is applied to the outer coupling part. If plastic rather than cast iron pipes are installed, the connection principle is the same, but the coupling shape differs. These parts are more airtight, but it is also recommended to additionally coat them with sealant on the inside. The sealant is also applied to the toilet outlet.
- If a small horizontal or vertical offset is required, an eccentric coupling is used. For larger offsets, a corrugated pipe made of PVC or polyethylene is typically used, with sealing cuffs at both ends. Using such a pipe allows the unit to be rotated at any angle and offset by up to 20 cm. In some cases, if the unit requires custom placement, it is possible to connect several corrugated pipes.
It's worth noting that a silicone-based sealant can be used instead of cement during the initial stage. However, its elasticity can lead to unpleasant consequences: if pressure is unevenly distributed, it can damage the sole of the product and cause cracks.
During installation, it's recommended to ensure that the corrugated pipe doesn't sag at any point. Failure to do so significantly increases the risk of blockages.

Sometimes unexpected complications arise when connecting a toilet to a cast-iron sewer system. For example, after laying tile flooring, the toilet outlet doesn't reach the socket. This problem can be resolved by using a short length of plastic pipe with a diameter of 110 mm. To extend the oblique outlet, follow these instructions:
- Heat the plastic pipe until it is soft and pliable over a heat source (e.g. a gas stove).
- While the material is soft, pull the pipe onto the toilet outlet.
- Cut off unnecessary length.
You can also create a socket on a plastic pipe using a regular 1-liter jar. Slide the pipe over the jar; its diameter is equal to the cross-section of the toilet outlet.
Thus, connecting a plumbing fixture to the sewer system is not particularly difficult. First, you need to select the appropriate connector.
There are three main toilet designs: vertical, horizontal, and oblique. The most suitable installation method is determined based on the chosen design. Each method has its own specific features, which should be understood before beginning the installation.