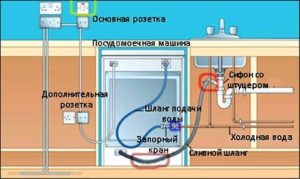
To connect the dishwasher, select a location close to the kitchen faucet (mixer) and sink. Next, locate the connection point of the flexible faucet hose to the water supply. Between them, insert a tee with a ball valve and FUM tape wrapped around the threads. Screw the union nut of the dishwasher's flexible water line onto the cross-piece of the tee. Insert the drain hose of the dishwasher through the cuff into the sewer pipe or connect it to a special drain trap outlet under the sink. All steps and nuances of dishwasher installation will be described in more detail in this article.
Only someone with plumbing and electrical experience should undertake the connection. A DIYer should be able to connect the inlet pipe to the water supply, whether it's steel, metal-plastic, or polymer pipe, and also connect the pipe with a flexible drain hose to the sewer or the kitchen sink trap.
All threaded connections must be made with FUM tape. It is also necessary to ensure the safe connection of the equipment to the electrical network.
Dishwasher without water connection – types, how to choose and connect, operating recommendations, review of the rating of the best models
- What do you need to connect a dishwasher?
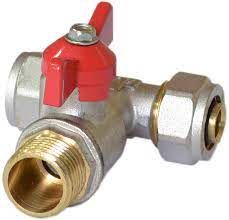
- A tee tap for connecting to the water supply
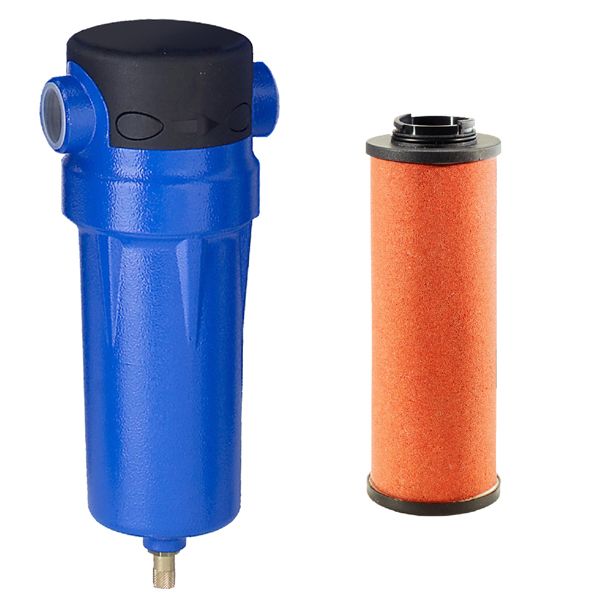
- Coarse filter
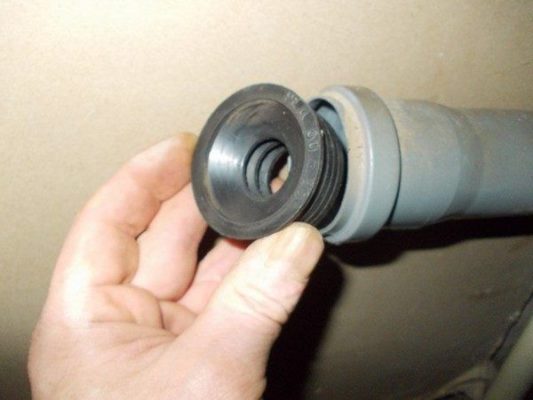
- Plug
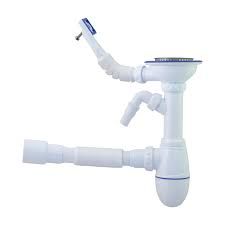
- Siphon
- Drain hose
- FUM tape
- Welding machine for polymer pipes
- Types of dishwashers
- Industrial installations
- Household dishwashers
- Dimensions
- Installation method
- Location level
- Installation rules
- Read the instructions before installation.
- Dishwasher wiring diagrams
- Connecting to the power grid
- Installation of RCD
- How to connect a dishwasher to the water supply
- Connecting the dishwasher drain to the sewer system
- Installation and connection of pipes and components
- First launch
- Common mistakes
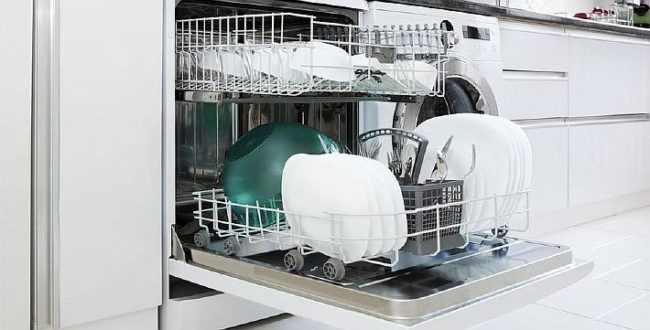
What do you need to connect a dishwasher?
Dishwashers should only be connected to cold water. Some models can also be connected to hot water, but experts advise against this.
The quality of the hot water coolant is such that over a period of time, the dishwasher pipes may become clogged. The following materials and tools are required for installation.
A tee tap for connecting to the water supply
This fitting is used for washing machines. It also fits perfectly in a dishwasher. It is cut into the water supply Cold water pipe with a diameter of 15–20 mm. The tee with a ball valve has a union nut, a ½-inch internal thread, and a ¾-inch external thread.
Coarse filter
To ensure the machine's water supply system lasts a long time without the need for forced cleaning, a coarse filter is installed in the supply pipe. This device is designed to remove suspended particles from the water. The filter consists of a head with two nozzles and a flask that holds a replaceable cartridge.
Plug
A rubber corrugated plug serves as a sealing cuff for the drain hose's entry into the sewer pipe. The adapter plug prevents the spread of unpleasant odors from the sewer.
Siphon
To avoid draining the sink directly into the sewer, a siphon with a drain pipe for connection to the drain hose is installed under the sink.
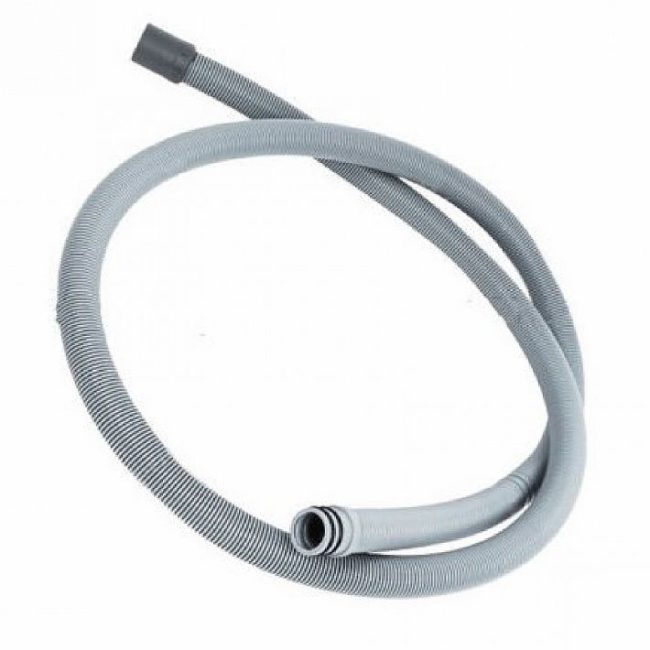
Drain hose
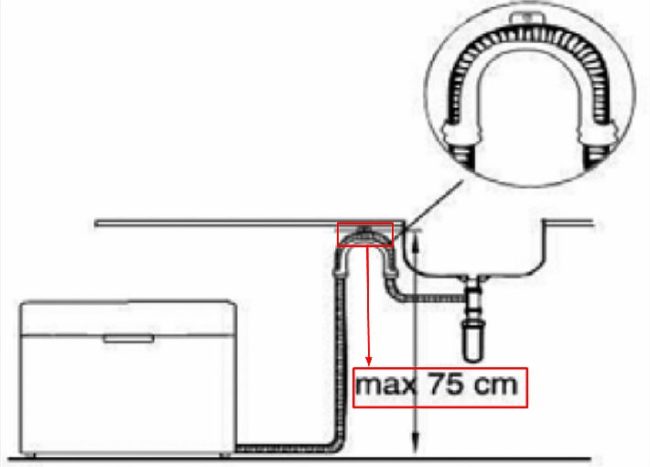
The trouble-free operation of your dishwasher depends on the strength and reliability of the drain hose. Its purpose is to remove dirty water during and after washing dishes. When purchasing, pay attention to the length, material type, and diameter. A short polymer hose can hinder efficient operation, while one that is too long can obstruct water drainage. The optimal length is 1.5 meters.
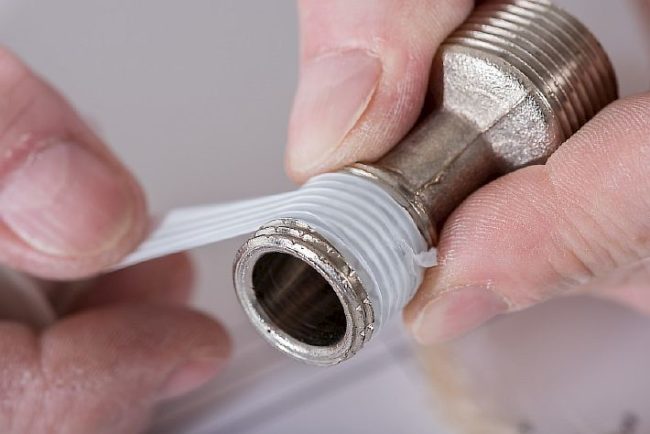
FUM tape
The film sealant is designed to seal threaded connections. The fluoroplastic sealing material (FUM) is resistant to acidic and alkaline environments and can withstand temperatures exceeding 200 degrees Celsius. The material is hygienic and leaves the worker's hands clean during application. The tape is inexpensive and readily available.
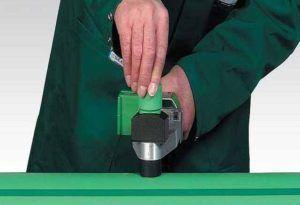
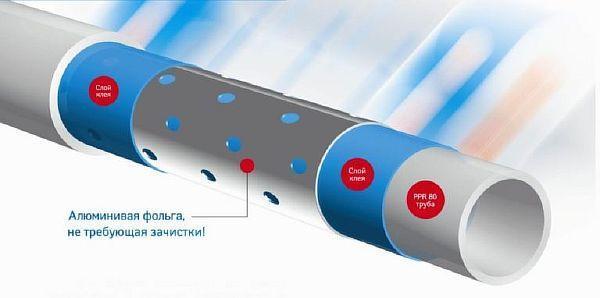
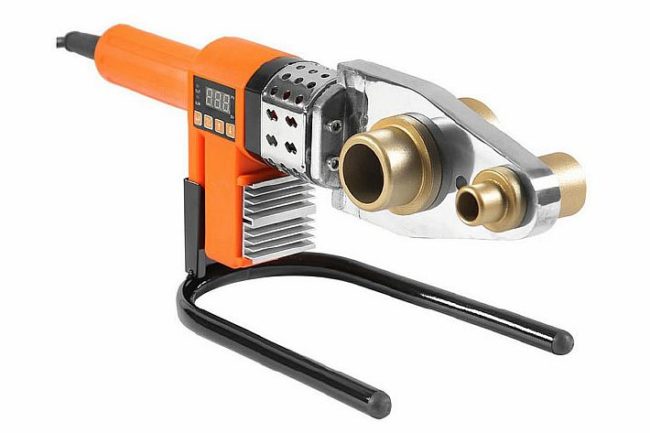
Welding machine for polymer pipes
If your water supply system consists of PVC pipes, you'll need a welding machine to install the plastic supply pipes to the unit. The machine comes with a set of nozzles of various diameters. Following the instructions, you can use the welding machine to create a pipeline with bends in any direction while maintaining a tight seal at the joints.
In addition to everything listed above, you will need a pipe wrench, adjustable wrench, marking tool, pieces of plastic pipe and PVC corners for connection.
Types of dishwashers
Advances in science and technology have opened up unlimited possibilities in the production of various types of household appliances, including dishwashers. A wide range of sinks allows consumers to choose the model that best suits their kitchen needs, including size, shape, installation method, and intended use.
Dishwashers are divided into two main groups based on their usage intensity: household and industrial appliances.
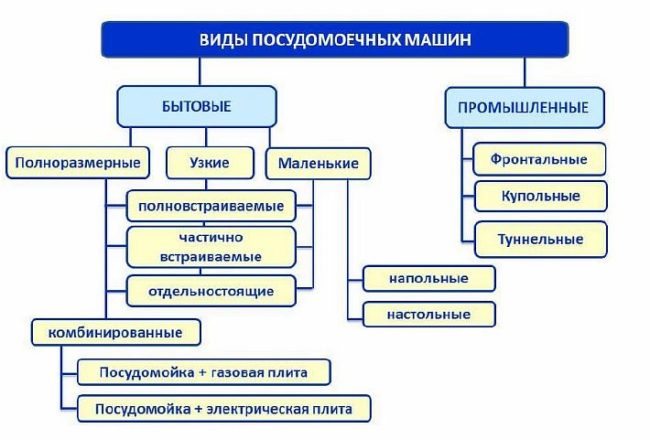
Industrial installations
They are needed where large volumes of dishwashing are required. These are primarily large catering establishments such as cafes and restaurants. The equipment comes in frontal, dome, and tunnel types.
- Front-loading units feature a front loading hatch with dish baskets inside. All front-loading industrial dishwashers are made of metal—food-grade steel. The control panel is located forward on the front of the unit. These units are designed to simultaneously wash several dozen identical pieces of cutlery.

- Dome-type dishwashers differ from other units in that the dishes in the loading basket are located beneath the wash tank, which resembles a dome, hence the name. Dome-type dishwashers are typically installed with a sink and a sorting table for dirty dishes.
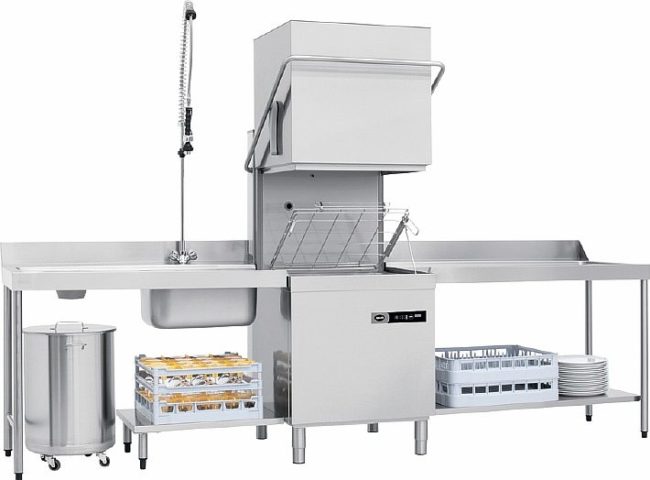
- Tunnel dishwashers are large-scale units that combine a hand sink with a basin, a table for disposing of large food waste, the dishwasher itself, and a table for drying dishes in a basket. This freestanding conveyor line is effective in restaurants with over 100 seats.
Household dishwashers
They are distinguished by the following characteristics:
- Dimensions;
- Installation method;
- Location level.
Dimensions
Based on size, sinks are divided into full-size, narrow, and compact units.
- Full-size models are dishwashers with standard external dimensions: height 800 to 900 mm, width 600 mm, and depth 550 to 600 mm. They offer high productivity, washing 10 to 20 pieces of cutlery in a single wash. Models are available partially or fully integrated into kitchen cabinets, as well as as freestanding units. These units can be produced as combination units, that is, integrated with other kitchen appliances. Relatively recently, models have appeared on the home appliance market that combine sinks with a cooktop, gas or electric stove, and oven. These are quite expensive for the average consumer, which has hindered demand for this type of product.
- Narrow sinks are typically 445–490 mm wide. Narrow machines are popular with owners of small homes, where small kitchens can barely accommodate even the most compact units.
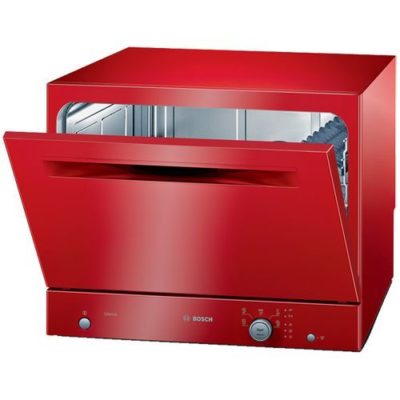
- Compact or small dishwashers have appeared on the home appliance market relatively recently. Their small dimensions (height 440–600 mm, width 500–690 mm, depth 500–550 mm) allow for installation in confined spaces. A distinctive feature of these models is that they are primarily purchased by residents of the remaining prefabricated apartment buildings from the 1960s, known as "Khrushchev-era buildings." In such houses, kitchens occupy literally a few square meters. Sinks of this type are also installed in the kitchens of country houses and summer cottages.
Installation method
Modern dishwashers are divided into two types based on installation method: built-in and freestanding models.
- The dishwasher is installed by fitting it into the base cabinet. The sink depth is 50–60 cm, which is the same as the base cabinets. The dishwasher's front maintains the horizontal and vertical alignment of the cabinetry. These dishwashers are further subdivided into fully and partially integrated. The former are inserted between cabinets or base cabinets under a single countertop. The latter have a top cover that acts as part of the base cabinet's countertop. All utilities are connected to both types of dishwashers from the rear wall.
- Freestanding units are standalone dishwashers with a finished appearance. They can be full-size, slimline, or compact kitchen appliances.
Location level
It's simple. Dishwasher units are divided into tabletop and floor-standing units. Compact sinks are distinguished by their compact dimensions. Unlike floor-standing machines, a tabletop sink can always be placed on a table or hidden in a cabinet of even the smallest kitchen set.
It's connected via a flexible hose to a faucet or mixer tap above the kitchen sink. The water drains through a flexible plastic pipe into a drain pipe or a trap under the sink.
Installation rules
Before connecting a dishwasher, it's important to understand all the details of the kitchen's plumbing system and the specific locations of the dishwasher's connections. When installing the dishwasher yourself, you must adhere to specific installation requirements.
Choosing the right location is important. A separate sink cabinet is convenient because its location is independent of other kitchen cabinetry. The dishwasher should be placed as close to the kitchen sink as possible. This determines the length of the inlet and drain hoses. The shorter they are, the more efficient the dishwasher will be.
The installation of a built-in sink is directly related to the layout of the lower cabinets in the kitchen unit. Manufacturers often include space for the installation of built-in appliances in their kitchen units. This most often applies to semi-built-in appliances, where the top surface serves as part of the kitchen countertop.
Full-size and narrow models are fully integrated into the bottom row of cabinets next to the washing machine and sink, under the countertop. This is done when kitchen cabinetry is custom-made. In this case, the dishwasher is purchased without a front panel. It is manufactured as a door, integrated into the cabinetry. The dishwasher is concealed underneath.
The dishwasher should be positioned so that connecting it to utilities is as easy as possible. After selecting a spot on the kitchen floor for the dishwasher, use a level to check the horizontal position. The machine should be on a level surface with no slope.
Read the instructions before installation.
The manufacturer includes instructions on how to connect the dishwasher with each kit. Following these instructions is important because the dishwasher comes with a 12-month manufacturer's warranty.
Incorrect installation of washing equipment, contrary to the instructions, deprives the owner of the equipment of the right to repair or complete replacement with a new unit in the event of a machine breakdown during the warranty period.
The instructions provide buyers with recommendations on how to connect the dishwasher to the sewer and water supply themselves. The manual also outlines the necessary technical parameters for the utilities, including electrical voltage, cold water operating pressure, and more.
In the accompanying documentation, the manufacturer publishes connection diagrams for apartments and private homes, showing the stages of installing washing equipment in the kitchen.
Dishwasher wiring diagrams
There are several ways to connect dishwashers to the kitchen's utilities. All connections to a built-in dishwasher are hidden by the cabinetry and the dishwasher itself. From an aesthetic standpoint, this is the best connection method.
When installing a freestanding sink, all utilities and connections are visible and located on the outside. In some cases, to avoid unsightly appearance with hoses and electrical wiring on the kitchen walls, these are concealed in grooves and wiring channels, covered with plaster, and then finished.
Compact (portable) dishwashers can be placed on tables, shelves, or hidden in kitchen cabinets. These units are in high demand among owners of small kitchens measuring just a few square meters.
Connecting to the power grid
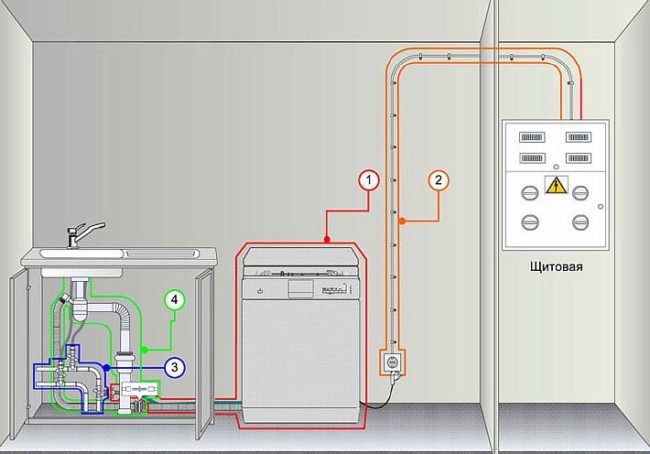
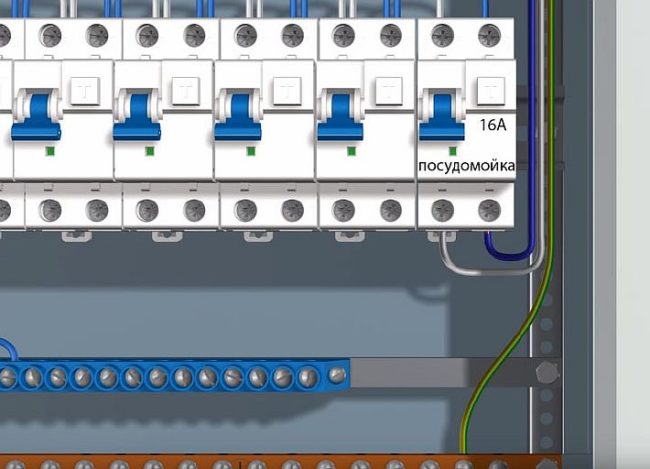
Like any appliance that relies on water and electricity, a dishwasher must have its own dedicated electrical connection. From there, concealed wiring is run to the electricity meter panel, where the wires are connected to a separate circuit breaker (see photo below).
Extension cords, socket groups, or multiple outlets cannot be used to connect to the power source. Connecting to the power grid requires several steps.
Installation of RCD
- An additional circuit breaker—an RCD (residual current device)—is installed on the apartment's electrical panel. The circuit breakers in the panel are located on a DIN rail. If there is no available circuit breaker, a new circuit breaker is installed, powered by the meter.
- A separate power line ensures safe operation of the washing machine. A line from the RCD is routed from the control panel to the kitchen.
- The wiring is installed using three-core VVGng or PVS cable with a cross-section of 3 x 1.5 mm. For this purpose, grooves 25–30 mm deep are punched into the walls. Sometimes, the thickness of the plaster layer is sufficient to eliminate the need for a hammer drill.
- If the wallpaper has recently been renovated, carefully cut it and push the edges apart to create a groove. After the wire is laid, the groove is filled with putty, primed, coated with wallpaper paste, and the edges of the wallpaper are glued back in place.
- Select a location for the outlet installation. The socket receptacle should be located 20–30 cm above the floor. This distance prevents water from entering the outlet in the event of a flooding emergency.

- To install the outlet, you'll need a hammer drill and a concrete drill bit. Drill a hole and insert a plastic box. Pull the wires through it. Insert the fittings. Connect the phase, neutral, and ground wires to the terminals, stripping the insulation from their ends first. Install the faceplate, activate the RCD, and the outlet is ready for use.
How to connect a dishwasher to the water supply
The dishwasher comes with a flexible hose for connecting it to the cold water supply, but you'll likely need to purchase the faucet separately. Once you've got the FUM tape and wrenches ready, connect the dishwasher to the cold water supply.
- A tee with a ball valve (see photo in the "Teep Valve" section) is installed into the cold water supply line. Typically, the closest connection point between the water line and the coarse filter is selected and the valve is screwed in between. If this is not possible, another method for installing the tee is chosen.
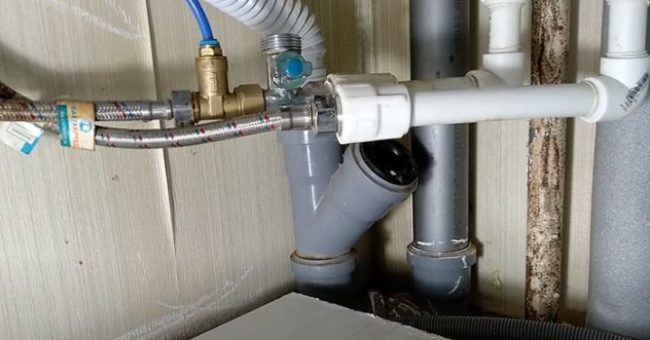
- A union nut of a flexible hose is screwed onto the vertical threaded branch pipe of the tap.
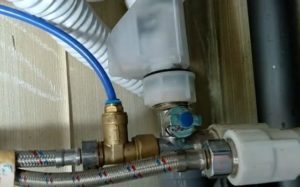
- Turn the handle to open the valve and check all connections for leaks. If none are found, close the valve and proceed to the next step.
Connecting the dishwasher drain to the sewer system
To connect a dishwasher to the sewer system, install a drain trap on the kitchen sink. It has a special fitting with a conical nipple at one end. The dishwasher's drain hose is connected to this nipple and secured with a clamp.
As mentioned above, there are two ways to remove the drain hose:
- In the first case, the end of the drain hose is inserted into a transition sleeve in the sewer manifold branch pipe (see photo in Section 3). This method has the drawback of lacking a check valve, which can cause wastewater to back up into the drain line.
- In the second case, the trap under the kitchen sink is replaced with a similar device, but with a drain outlet (see photo 5). This is the most ideal wastewater drainage option.
- To check the tightness of the connections for leaks, open the tap in the sink.
Installation and connection of pipes and components
If you select the correct diameters of the pipes to be connected to each other, you will not need to apply any special effort.
Several layers of FUM tape are wrapped around the threads and the desired part is screwed onto it by hand. Finally, the assembly is carefully tightened with a wrench, applying a slight amount of force.
First launch
The first start of the dishwasher is carried out as follows:
- visually and by touch check the tightness of all dishwasher connections;
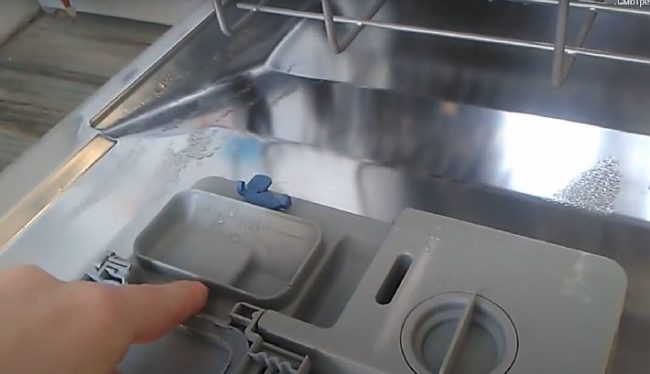
- A cleaning tablet is placed into the loading boxes (they are located on the inside of the hatch or on the front part of the bottom inside the unit) and rinse aid is poured in for the dishes.
- Turn on the dishwasher by pressing the start button on the remote control. This idle run is necessary to remove dust, dirt, and bacteria that may have accumulated inside the machine while it was in storage;
- During the entire work cycle, the tightness of the connections is checked again. If any leaks are detected, they are sealed with FUM tape.
Common mistakes
Homeowners with experience using a dishwasher are taking on the installation themselves. Seeking to install the dishwasher as quickly as possible and save costs, DIYers often make mistakes. the same mistakes, which subsequently result in the failure of dishwashers and unexpected costs for their repair.
To avoid recurrence, the most common installation violations are listed below.
- The absence of a coarse filter leads to clogging of the water pipes inside the machine with various impurities arriving with cold water;
- Connecting the dishwasher to hot water will cause it to quickly become clogged, since, unlike cold water, hot water contains an order of magnitude more contaminants;
- The drain should not allow water to flow into the machine from the sink;
- The absence of a shut-off valve in the drain hose will cause an unpleasant odor from the sewer to enter the dishwasher.