 Imagine this: you urgently need to solder two plastic pipes. Water is leaking out of one, and you need to quickly salvage the situation! But how do you solder plastic pipes? Especially if you're new to the process. This article describes in detail how to solder correctly.
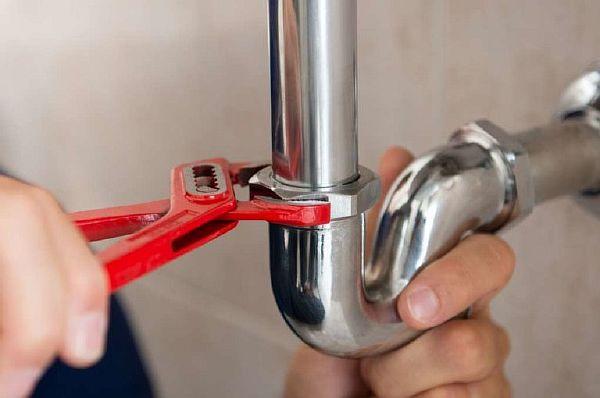
The most effective and painless option is to call a plumber to your home. This may be the most reliable option, but it's also a serious drain on the homeowner's pocketbook and the ego of the "man of the house."
So, we'll rule out this option and learn to solder properly - then your wallet will be full of crisp bills, and the man in the house will have repaired everything himself!
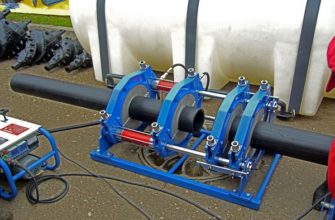
A brief guide to properly soldering plastic pipes: soldering is performed using a special soldering iron heated to 260ºC. The pipe is simultaneously inserted into the inner part and the coupling into the outer part. Heating time depends on the pipe diameter. The heated parts are quickly joined and cooled.
Preparing for the process. What tools will we need?
Turn off the water and head to the plumbing store (if you don't already have everything you need to repair your plumbing in your home workshop)!
 So, our task is to solder two plastic water pipes.
What tools and materials will you need? How to properly solder plastic pipes?
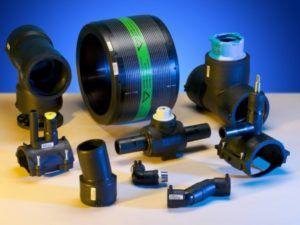
- A device for soldering plastic pipes. Explain to the store clerk what you need a welding machine for, and they'll be happy to help you find the right one.
Moreover, purchasing a soldering tool will be several times cheaper than calling a plumber to your home, and this, as we remember, is one of the fundamental options for choosing a DIY solution to the emerging pipe connection problem!
This soldering tool will allow you to carry out proper repairs to your home's communications!
- A sharp knife or pipe cutter. You'll need it to cut the pipes and trim the edges to ensure a perfectly smooth surface at the ends being joined. A special tool, a pipe cutter, can also be used.
- A fine file, a needle file, and possibly some fine-grain sandpaper. This will be needed to clean the ends we'll be soldering to a perfectly smooth surface.
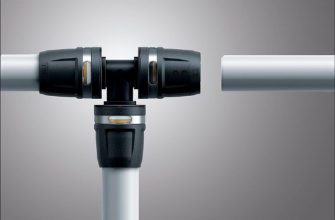
- A fitting/coupling is a small tube that you will put on both ends of the pipes that we will be soldering (also available at a plumbing store).
- Roulette.
- Chamfering machine.
So, everything is ready for installation—let's get started! Just make sure you do it right!
The first step, and perhaps the most important one, is to prepare the necessary elements for soldering.
Preparation of elements to be soldered
First, carefully cut the pipes to the desired length with a sharp knife. You can also use a special pipe cutter if you have one at home.

Next, we trim the burrs from the ends. Burrs are thin plastic shavings, burrs that appear on the ends of the tubes. Since the surface being joined must be perfectly smooth, we carefully remove these burrs with a knife.
After this, we clean the ends of the plastic tubes being connected. For this, we use a thin file, a needle file, or even a riffle file (this type of needle file has a specially curved working surface, which allows us to clean the working surfaces inside the tubes, etc.).
Now we carry out the same cycle of events for the fitting, if it is homemade and is simply a piece of tubing that you will use for soldering.
If the fitting or coupling is purchased in a store, then its internal surface (which is what we need for the connection) should already be smooth and of the required size.
So, the pipes are ready, the fitting is ready.
Let's start soldering
Temperature ranges for pipes of various diameters are presented in a special table, and they must be followed. Incidentally, the soldering machine usually automatically heats the nozzle to the required temperature.
")
However, older, early versions of soldering devices do not have this function, so you will have to regulate the temperature manually.
It's essential to thoroughly treat the workpiece before joining. Be sure to clean the surface of any contaminants and degrease it with alcohol.
The workpieces also need to be chamfered. To do this, use a chamfering tool and alcohol. This operation is only necessary for pipes that were previously reinforced with aluminum or another compound.
For example, some soldering machines can be equipped with several nozzles – up to 4 pieces.
In other words, it is possible to heat two pipes and two fittings simultaneously, and after bringing them to the required temperature, create a fairly large structure in a short time.
The connection itself must be made as quickly as possible to prevent the system from losing its tightness. As soon as you see that the workpiece components have reached the required temperature, immediately remove them from the nozzles and begin connecting.
The correct connection must be made very tightly to prevent leaks in the heating or water supply system in the future.
Checking the joint after soldering
In the end, two plastic pipes for water supply They're tightly connected! Did we do everything correctly? You'll only be able to judge this after some time, when you run water through the "new" water supply.
After soldering the pipes to the fitting, do not rush to open the water tap: at least an hour should pass after the entire procedure of your own repair.
If, for some reason, you still carried out the procedure in a cold room where the temperature was below room temperature, then you should wait at least two to three hours before running a test run of waterThe key here is to take your time and do everything correctly so that your efforts don't go to waste.
At the final stage of installation, it's important to ensure the solder joint is secure. This is best accomplished by running a test run of water. Open the faucet. After the water is running, carefully inspect the entire plumbing assembly you've installed and repaired.
If stains do appear on the structure or fitting/coupling, or water leaks, drips, or even gushes from under the new connection, then your home plumbing repair operation was not carried out correctly!
You'll either have to redo the entire repair process, or fork out the cash and call a professional plumber. If everything goes well, and the water only flows from the faucet, as it should, then congratulations on your success!
Mission accomplished, the family is happy, the plastic water pipes are securely and firmly connected! As you can see, this operation isn't impossible, and by following the basic rules, the desired result can be achieved!
Now you can confidently take on a new renovation project, as you already have sufficient knowledge and know how to solder plastic pipes correctly!
It's such a simple process that I'd be surprised if anyone could screw up soldering. The key is to do everything consistently, carefully, and take your time—and the soldering will be high-quality. And there are plenty of YouTube videos on the subject.