Apartment owners are increasingly installing heated cable floors or infrared mats as primary or supplemental heating. This is because they are energy-efficient, comfortable, and don't spoil the interior. However, without a thermostat, achieving the desired temperature is impossible.
This article will help you navigate the wide variety of thermostats available. We'll explain what a thermostat is, how it works, the different types, and which manufacturers are best. You'll also learn how to connect underfloor heating to a thermostat.
- Thermostat functions
- Types
- Mechanical
- Digital
- Programmable
- Combined
- Which thermostat should I choose?
- Manufacturers
- Optimal installation location
- Wiring diagram for underfloor heating to a thermostat
- Instructions on how to connect underfloor heating to a thermostat
- Connection process
- Phasing
- Do you need land?
- Differences in thermostat connection depending on cable type
- Connecting a two-wire cable to the thermostat
- Single-core cable
- Setting up
- Setting the date and time
- Setting heating by day and hour
- Setting up the service menu
- Children's mode
- Video instructions: how to connect it yourself
Thermostat functions
A thermostat is a device whose electronics can automatically monitor and regulate surface heating. Since the room temperature should not exceed 27 degrees Celsius, higher temperatures will negatively impact both human well-being and the condition of the surface. Therefore, a thermostat is essential.
When the set temperature is reached, it "reads" the sensor data and disconnects the floor from the power source. However, the unit itself continues to operate and act as a controller. As soon as the temperature drops, the heating is turned on.
In addition, the thermostat can turn on an economical mode at night, and it can also be set to turn it off completely during a specified period of time, which saves electricity.
Types
There are several types of thermostats, each with its own control method: mechanical, digital, and programmable. Furthermore, the devices differ in the number of control channels:
- two-zone - operate in two sections of the heating system at once;
- single-channel - signals are processed from one sensor.
Regarding installation, there are - wall-mounted and built-in.
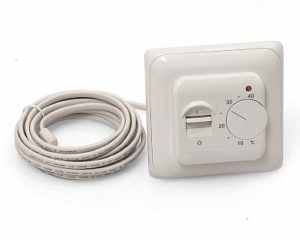
Mechanical
The device is simple and inexpensive. It has a rotary switch on the front that is rotated to adjust.
Some devices have multiple control modes. Turning on and off is manual, and there's no option to save electricity.
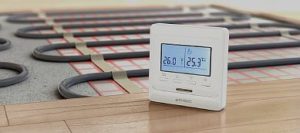
Digital
A popular modern thermostat. It allows for precise temperature control. Units are available in both built-in and surface-mounted versions, with touch or push-button controls.
An electronic display allows you to set the desired underfloor heating temperature. Additional features include automatic shut-off and the ability to lower the power supply by a few degrees, saving energy.
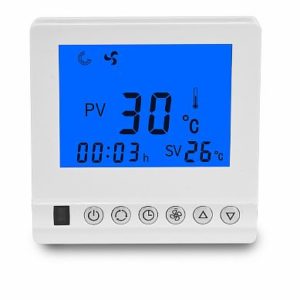
Programmable
A programmable thermostat offers increased efficiency, but is expensive. Built-in units come in small sizes or as large touch panels.
The device's electronics allow for precise temperature settings, as well as on/off times. All readings are displayed on the thermostat panel. Its operating principle allows for energy savings.
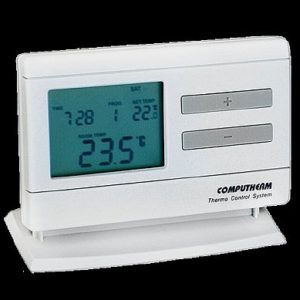
Combined
The control unit is simple in appearance and equipped with an external control panel. The mechanical thermostat is turned on and off manually.
The device comes with a remote control, which eliminates the need to mount it on the wall—a plus, as the box doesn't spoil the room's design.
Which thermostat should I choose?
A mechanical device is suitable for small heated areas, such as a bathroom. Electricity consumption for heating such a room, not significant, but the floor will warm up quickly. Programming heating modes in such a room makes no sense.
If the room is spacious, heating it will require a large amount of energy, and the ability to adjust the heating is important. This means that the underfloor heating will heat up whenever people are in the room. In this case, digital or programmable models are recommended; their higher price is offset by reduced operating costs.
We invite you to read the article - How to choose a thermostat for underfloor heating, where a rating of manufacturers, an overview of models, and selection tips are presented.
It's important to consider the appliance's wattage. If there's a risk of exceeding the thermostat's maximum wattage, a programmable thermostat should be used.
Manufacturers
The main manufacturers producing thermostats for heated floors include:
- Technolux — a well-known company. The models they produce are high-quality and easy to install and adjust. The downside is the high cost of materials.
- Grand Meyer — the brand is popular all over the world, its products are high-quality and affordable.
- Energy — This company's devices are suitable for all types of heated floors. They feature an LCD display and are energy-efficient.
Optimal installation location
The thermostat is mounted on the wall. Choose a location with easy access to ensure easy adjustment and setting of the temperature.
There are a number of rules to follow when determining the location of the underfloor heating thermostat:
- Avoid placing it in a drafty area, in front of a window, or in direct sunlight. This is especially important if it has a built-in thermostat.
- Do not install on an external wall that is in contact with the street.
- The distance from the surface to the device must be at least 40 cm. The upper level is not limited, but there is no point in installing it above a person's height.
- When installing underfloor heating in rooms with high humidity (bathrooms, saunas), it is better to install the regulators in an adjacent room, as they are not properly protected from moisture.
- Place near electrical network.
- The size of the sensor's wire also influences the controller's placement. It should be placed at least 50 cm from the wall.
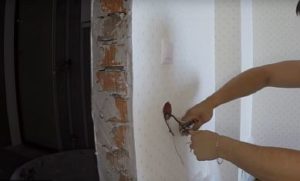
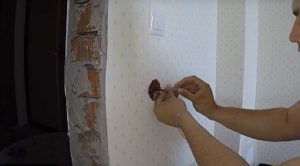
If the thermostat is built-in, you'll need to cut a recess in the wall to accommodate all the electrical wiring. Cut channels from the recess to the floor for the wires.
The groove depth should be equal to two corrugated pipe diameters—10 mm. One pipe will contain the power cable, and the other will contain the temperature sensor cable.
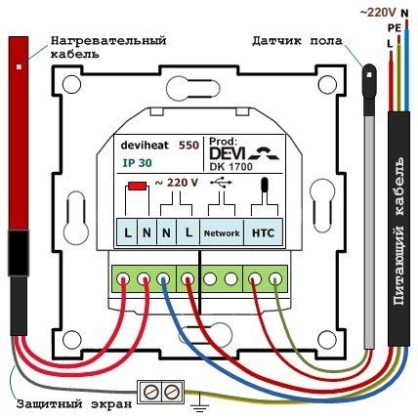
Wiring diagram for underfloor heating to a thermostat
Almost all regulators have the same connection diagram. Instructions are included with store-bought devices.
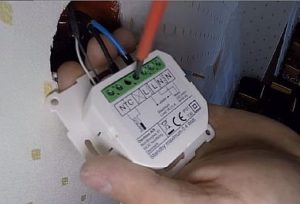
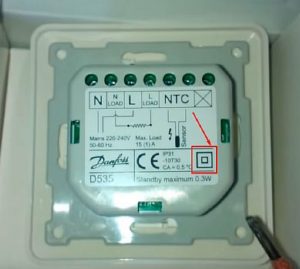
The thermostat is a square box with a pinout. There's a diagram on the back showing how to connect the wires. Even a novice can understand the instructions, as all the terminals are numbered:
- No. 1 - 2 - for power cable;
- 3 - 4 - for heating elements;
- 6 - 7 - for the underfloor heating temperature sensor.
There is a marking of letters:
- L — phase, for white, black, brown conductor;
- N — zero, for blue cable.
Some models have a separate terminal (ground—yellow-green wire) for connecting the ground and shielding braid. Modern devices with remote control have an additional terminal for connecting these channels.
Instructions on how to connect underfloor heating to a thermostat
Before connecting the device, it is recommended to check with an ohmmeter whether the specified resistance matches the actual value. If the reading is within ±5–10%, the device is functioning properly.
Large discrepancies indicate a faulty sensor, in which case it should be replaced.
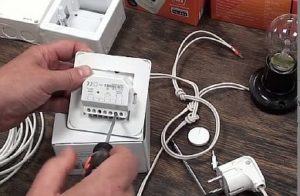
Connection process
The thermostat is connected after the underfloor heating, wall box, and all wiring have been installed.
Connecting a thermostat to a heated floor and to the power grid is easy; you just need to follow the following sequence of steps:
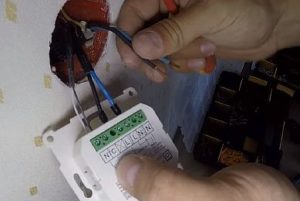
- The wires coming out of the socket box are cut - the length should be 80 - 100 mm.
- Grounding is accomplished by connecting the green and yellow wire of the power cable with a Wago terminal to the copper shielded braid of the heating cable. The shielded end must be tightly twisted, treated with flux, and covered with a thin layer of solder.
- The top cover with the screen is removed from the thermostat.

- The terminals are loosened; for this you can use a 3 mm screwdriver.
- The temperature sensor is connected to terminals 6-7. Polarity is not required. The existing parameters of the underfloor heating sensor indicate its resistance at +25°C is 10 kOhm.

- The power source is supplied:
- connector number 1 - the phase cable L is connected to it;
- nest 2 - zero N.
- The heating cable is connected, the maximum permissible current level is 16 amperes.
- wire N is inserted into the third terminal;
- in the fourth - phase L.
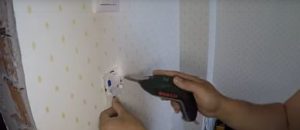
- To place the device in the socket, bend it upward and place your finger underneath the wires. Then, turn the thermostat downward and insert it into the opening.

- The thermostat is fixed to the socket box with screws.
- The upper front panel is put on.
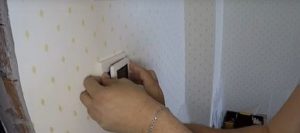
The thermostat is installed, you can proceed to testing it.
The heating mat's cold wires are stranded, so they must be capped before connecting them to the terminals. The power wires can be connected without caps.
Phasing
Phasing is a crucial step when connecting a thermostat. Incorrectly connecting the phase and neutral wires won't affect operation, but safety is questionable.
If the wires are reversed, when the appliance is turned off, the neutral conductor, not the phase conductor, will be disconnected. As a result, the phase conductor in the underfloor heating system will not be disconnected, which is undoubtedly dangerous.
Some thermostats are equipped with a separate switch that, when pressed, shuts off both conductors. However, this is only possible with manual control, and not all models do. With automatic control, only one conductor is shut off.
Do you need land?
Thermostats are often not equipped with a protective ground. This is usually a separate terminal through which the heating wires are connected to the conductor.
The devices themselves have a “square within a square” symbol, which indicates double insulation.
Differences in thermostat connection depending on cable type
The wiring diagrams for connecting a thermostat to underfloor heating systems with different cables vary slightly, but they are not significantly different. Cables have different structures and numbers of conductors, and can be two-core or single-core.
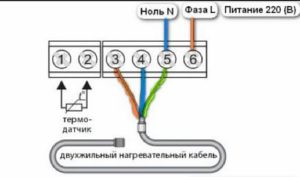
Connecting a two-wire cable to the thermostat
A two-wire cable has three wires under a protective sheath. Two are conductive (brown and blue), and one is grounding (yellow-green). This type is preferred for underfloor heating systems, as it connects to the thermostat at only one end.
Connection diagram:
- the brown phase conductor is inserted into terminal 3;
- in 4 - blue zero;
- in 5 - grounding.
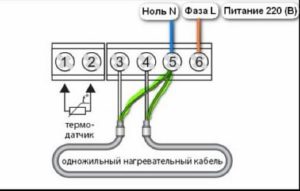
Single-core cable
A single-core cable has only one current-carrying wire and a second grounding wire. Connection features include:
- Both ends of the current-carrying cable are connected to contacts 3–4;
- grounding is connected to 5.
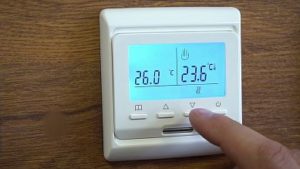
Setting up
Popular thermostat models feature software modules. Using the device, you can set the floor temperature for any period of time. And the touch panel allows you to do this with just a few taps.
The electric floor controller is adjusted as follows:
- The power key "0" is pressed;
- The temperature heating is regulated by the “up” and “down” buttons;
- When the temperature is reached, “set” is displayed;
- The desired temperature level is displayed on the “run” indicator;
- The power is turned off by the on/off button.
Setting the date and time
The thermostat panel features a "book" icon. This button is used to set the date, start, and stop times. To do this, hold it down along with the "up" button for 5 seconds.
A menu opens where you can set the hour and day of the week (days are represented by numbers from 1 to 7). Save the selected option by pressing the power button.
Setting heating by day and hour
The menu is also activated by pressing the “book” icon and holding it for 5 seconds.
In the menu, days appear first. To select the desired option, use the "book" key, as well as the "up" and "down" keys. The settings sequence is as follows: day, time, temperature.
In these settings, the day is divided into six time periods - time:
- rise;
- leaving home;
- returning for lunch;
- leaving lunch;
- returning in the evening;
- night.
Setting up the service menu
This menu is activated with the device turned off using the "book" and "power" buttons. This option allows you to:
- calibration, switching and simultaneous activation of sensors;
- setting the temperature limit;
- setting the temperature on/off step;
- heating level adjustment.
In addition, this menu allows you to reset all settings.
Children's mode
To protect the thermostat screen from accidental pressing, there's a lock function. To do this, press the "up" and "down" buttons simultaneously for 5 seconds. This will reliably prevent accidental operation.
As you can see, connecting electric or film-based underfloor heating to a thermostat is easy—it's the easiest step in installing underfloor heating. Therefore, anyone can do this type of work themselves.


