In pursuit of creating a comfortable atmosphere and favorable indoor microclimate, manufacturers have developed a new type of infrared heating system—a rod-based underfloor heating system (commonly known as a carbon underfloor heating system).
This is a modern model capable of effectively heating an area. We'll discuss its advantages in more detail below.
- What is a rod-type underfloor heating system?
- Peculiarities
- Application
- Design
- Operating principle
- Advantages and disadvantages
- Pros
- Cons
- Manufacturers (Unimat, Kaleo)
- Unimat
- Kaleo
- Installation Features
- Laying on a screed
- On a wooden floor
- Installation of rod-type underfloor heating
- Materials and tools
- Preparatory work
- Installing the system
- Connection
- Finish coating
- Video tutorials
What is a rod-type underfloor heating system?
Rod infrared underfloor heating is also called carbon, since the heating elements are carbon rods attached to a thermal mat.
Peculiarities
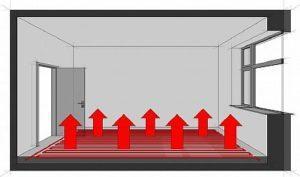
Unlike standard batteries, (find out Which is better: underfloor heating or radiators?), which cannot heat the room evenly, the carbon infrared floor provides uniform heating.
Furthermore, the heat is not wasted on warming the air, but rather directly warms the objects in the room. This heat distribution is the main difference between this model and other electric underfloor heating systems.
Another positive aspect of this floor is that it self-regulates the heat generated based on the temperature, meaning the system does not overheat, which means its service life is extended.
Different manufacturers produce products with virtually identical characteristics, differing only in the length of the mats, power, and distance between the rods.
Application
Rod infrared heated floors offer high performance characteristics and can be combined with other floor coverings, making them suitable for a wide range of applications:
- residential and public premises;
- gyms;
- warehouses and technical rooms.
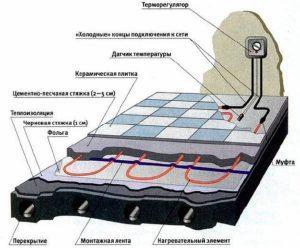
Design
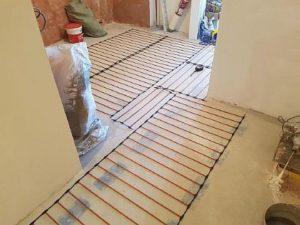
Rod-type infrared underfloor heating systems feature a heating mat made of two copper wires arranged in parallel. The heating elements, or rods, are spaced 10 cm apart.
Each coil contains a large number of ultra-fine carbon fiber filaments coated with polyester, increasing the product's strength and resistance to mechanical stress. The space between the coil and the sheath is filled with magnesium oxide, a material with increased heat transfer.
The rods are connected in parallel using a multi-core cable with a 2.5 mm cross-section and a 3 mm sheath thickness. This method ensures that if one section fails, the entire device will not fail.
The standard product width is 830 mm. The entire structure can be up to 25 meters long. Power consumption is 140 W/m², while the operating power is 105 W/m². The maximum rod heating level is 60 degrees. The infrared wavelength range is from 8 to 12 microns.
The system is equipped with:
- elements for connection;
- corrugated tube - for mounting a temperature sensor;
- end kit.

Sold in rolls, the mats are secured during installation with fasteners, which are included in the kit. Adhesive tape can be used as an additional fastening method.
Operating principle
The operating principle of a rod-based infrared underfloor heating system is similar to that of a film-based system. When the rods interact with an electrical current, heat is released in the form of infrared waves.
The floor heats up quickly due to the electrical energy supplied to the rods. The heat then penetrates the finishing coating, warming people and furniture without wasting heat on the air.
A rod-type heating device, like all electric underfloor heating systems (cable or infrared), must be equipped with a thermostat and temperature sensor. Operating the floor without these devices is possible, but the power will always be the same, meaning no savings will be achieved.
To heat 1 m2 of canvas, you will need from 21 to 160 W, depending on the number of rods in the structure.
Advantages and disadvantages
Rod-type infrared heated floors have many advantages, and this is no coincidence, as their development took into account all the shortcomings of other heating devices, although they still have some disadvantages.
We suggest you read the article where it is disclosed in detail. the advantages of all types of heated floors and their disadvantages.
Watch the video
Pros
The main advantages of core floors are:
- fire safety - do not overheat and can withstand temperatures up to 60 degrees;
- moisture resistance - can be installed in a bathroom or on a loggia;
- environmentally friendly - all components included in the structure are made from environmentally friendly materials;
- compatibility with various floor coverings - can be combined with tiles, linoleum, laminate;
- economical in terms of energy consumption - the power of carbon devices is 87 watts per linear meter, which provides energy savings of up to 30%;
- have self-regulating properties, which allows you to set the desired temperature;
- easy installation - even a non-professional can handle it;
- safety - does not affect human health, since there is no electromagnetic radiation;
- are lightweight - create little load on the floors;
- not subject to corrosion.
In addition, infrared carbon floors are suitable for installation in rooms with complex layouts and under heavy furniture.
Cons
Disadvantages of rod structures:
- Before installing carbon floors, it is necessary to dismantle the concrete base;
- The use of foil backing is prohibited, as the alkali will cause the aluminum to deteriorate, which will lead to malfunction;
- short service life - about 10 years;
- high price compared to other heated floors;
- the complexity of carrying out repair work, since installation is carried out in a screed or on glue.
As you can see, carbon fiber floors do have their downsides, and they should be taken into account when choosing a model and installing it.
Manufacturers (Unimat, Kaleo)
Today, the leading manufacturers of carbon rod heated floors are the Korean companies Unimat and Kaleo.
Video
Unimat
Unimat specializes in the production of electric underfloor heating systems. This brand produces two types of rod heating devices:
- The Rail Unimat features a simple design, 830 mm wide, and a power output of 120 watts. It is recommended for installation under tiles using adhesive or a thin layer of screed.
Important! The flooring layer must be at least 2 cm thick.
- The Unimat Boost model's distinguishing feature is its smaller pitch (9 cm). Its power output is 160 watts, making it capable of heating a large room.
All models come complete with mats, fasteners, wires, corrugated pipe, and an end kit. Additionally, a warranty card, manufacturer's instructions, and a video with a step-by-step installation process are included, making it easy to install the floor yourself.
Kaleo
Kaleo — a leading manufacturer of these heating devices. The company's products offer high quality, a long service life, reliability, and an affordable price.
The products are manufactured using high-tech methods, which ensures fire safety and prevents overheating during operation.
Kaleo systems are quick to install. You can install such a floor yourself, without the help of professionals, in just two hours.
This manufacturer offers models with enhanced functionality, also known as "Smart Floors." They are recommended for heating large areas for energy savings (like cottages and offices).
Installation Features
Rod infrared floors are a multi-layer structure that can be installed in two ways.
Laying on a screed
A screed floor is a subfloor poured from concrete that expands when heated. A layer of thermal and waterproofing insulation, mats, and reinforcing mesh is laid on top of this, followed by a thin screed and the flooring.
For your information! Carbon floors can only be installed without screed on a smooth surface.
On a wooden floor
The essence of installation on a wooden floor, also called a flooring method, is the construction of a "pie" consisting of an insulating underlay with a foil layer, wooden joists, a reinforcing mesh to which the heating elements will be attached, and a finishing coating.
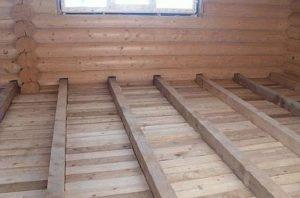
Please note! Do not allow the IR floor to come into contact with metal or foil coverings.
Installation of rod-type underfloor heating
Installing an infrared core floor is simple and within anyone's reach. Let's consider installing this model on a screed, as a more labor-intensive method.
Work should begin with determining the mounting location for the thermostat. It should be located in an accessible location to facilitate the cable from the mat and sensor. Ideally, next to the switch. When installing the floor in wet areas, the unit should be moved to another room.
For your information! Unlike other underfloor heating systems, installing a rod-based underfloor heating system does not require a mat layout, as any heavy interior items can be installed on it.
If desired, you can create a schematic drawing; this will simplify the work. Furthermore, although it's not prohibited, there's no need to lay mats under the furniture, which can save you money.
Materials and tools
Having decided to install a rod floor, you need to purchase the chosen model, which includes all the components for constructing the structure.
In addition, you need to purchase:
- substrate;
- heat shrink tubing;
- thermostat;
- cartridge cases;
- a connecting wire having double insulation.
In terms of tools, stock up on scissors, wire cutters, a knife, a screwdriver, and tape. You'll also need a heat gun to heat the heat-shrink tubing.

Preparatory work
The first stage of the work involves preparing the subfloor, which must be level. If the surface is cement, it must be cleaned and leveled; otherwise, a concrete screed must be poured.
After the mortar has hardened, a polyethylene film (for waterproofing) and insulating material are laid. The insulating material should not have a foil layer, so isolon with a reflective side made of polypropylene or lavsan is ideal.
Important! To reduce heat loss, install damper tape along the walls.
Installing the system
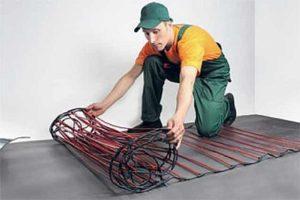
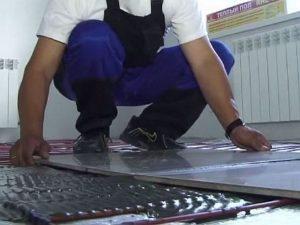
Mats, pre-cut to the required length, are laid out on a layer of thermal insulation, 15 cm from the walls. They should not overlap; a small gap should be left between them.
The product is secured to the insulation material using adhesive tape. The panels are connected using a special cable, which is included in the kit.
Important! To ensure better adhesion of the adhesive or concrete mortar to the subfloor, small windows are made in a staggered pattern in the insulation.
Connection
Connecting the device consists of several steps:
- Installing the thermostat in the planned location.
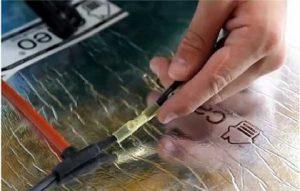
- Electrical circuit connection:
- stripping the cable at the cut points by 1 cm;
- install the contact (included in the kit) on the stripped end of the cable, it should be clamped tightly with pliers;
- connection to the second contact is made by passing the wire through the heat shrink tube, and connecting and fixing it to the terminal, after first removing the insulation from the cable;
- heating the heat shrink tube with a hair dryer;
In this way, the entire system is assembled.
- Temperature sensor placement: It's best to install it in a corrugated pipe. To do this, make a recess in the insulation layer and insert the corrugated pipe with the sensor inside. A cable is pulled from the device and connected to the thermostat.
- Connecting the mat. The wires coming from the floor rods are connected to the thermostat terminals.

At this point, the connection of the underfloor heating system is complete, and it's time to test it. The system is turned on for several hours; it's possible to leave the floor on for a day.
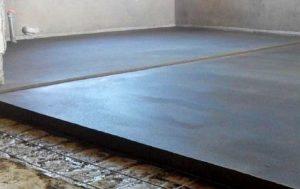
Finish coating
The most common finishing material for this type of flooring is tile, although linoleum or wood can also be used. To install it, the mat surface must be covered with a screed—a cement or epoxy mixture with additives.
The thickness of the layer, plus the tile adhesive, should be at least 2 cm. For added strength, it is recommended to lay a reinforcing mesh on the heating structure, over which the mortar is poured. The system is turned on only after the mortar has completely dried.
Please note! Ceramic or natural stone tiles are suitable for installation over carbon fiber heated floors. The optimal size is 30 x 30 cm, with a 6-8 mm adhesive layer.
The carbon fiber underfloor heating system is easy to install and operate. The key is choosing the right flooring to complement the system.


