Underfloor heating is gaining popularity every year, and the variety of rooms where it's installed is astonishing. Bathhouses are no exception.
There are various heating systems for bathhouses. Today, bathhouse owners are increasingly installing hydronic heated floors powered by a stove.
- Which heated floor should I choose for a sauna?
- Features of the system
- Advantages and disadvantages
- Installation of a water-heated floor from a sauna stove
- Operating principle
- The diagram and structure of the "pie"
- Preparatory work
- 3 ways to install a water circuit
- Into concrete screed
- On polystyrene plates
- Laying on a wooden floor
- Connecting underfloor heating to the stove
- Operating Rules
- Video tutorial
Which heated floor should I choose for a sauna?
Due to physical properties, warm air masses rise, and even in a steam room, where it's hot, the floors can be cold. But this dissonance between the warmth from above and the cold from below makes sauna treatments uncomfortable.
Modern technologies make it possible to improve the microclimate in a bathhouse by installing various types of heated floors under the floor covering:
- cable - are a heating cable laid under the finishing coating, powered by electric current;
- Infrared - a film with infrared plates inside that heat up when energy is supplied, the simplest structure in terms of self-assembly;

- water - a pipeline located under the floor in a bathhouse, with heated water acting as a coolant.
However, bathhouses have high humidity, so many homeowners are hesitant to install electric underfloor heating themselves.
For this reason, hydronic underfloor heating is considered more popular. After all, a sauna is equipped with a stove, and it can be used to heat the coolant, making this combination also cost-effective.
Features of the system
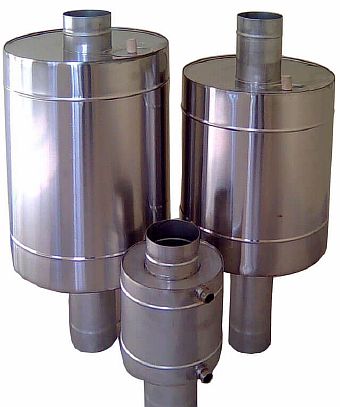
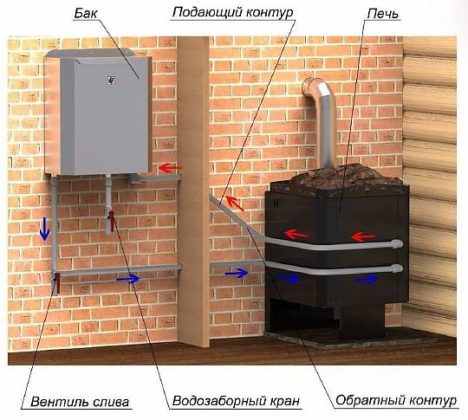
When installing a wood-burning stove-powered hydronic underfloor heating system in a sauna, there's no need to install a boiler. However, a heat exchanger must be installed above the firebox. Any corrosion-resistant stainless steel tank will do. A circuit is then extended from this tank to the room where the underfloor heating will be installed.
To return the waste water to the tank, a small pump will be required. Without it, the system will only function when the heater is located below floor level. The pipe diameter for this system should be 16 mm; standard 24 mm pipes will not work.
The main feature of a floor-mounted stove design is the lack of temperature control. The recommended temperature for heated floors in a sauna is 40 degrees Celsius, while the stove will heat the coolant to boiling point.
Video
Therefore, it is necessary to create a mixing block in which hot water will be mixed with already used water, thereby achieving the required temperature level.
Since it is not possible to install a large container in the furnace, you can place a storage tank next to it and extend steel pipes from it to the heat exchanger.
Advantages and disadvantages
A water-heated floor in a bathhouse, heated by a stove, is a complex structure with its positive and negative aspects.
The main advantages of the underfloor heating system:
- It evens out the temperature, leaving no hot or cold spots, thereby increasing the comfort of your bathing experience;
- the screed, which is used to fill the contour, has the ability to accumulate heat and release it over a long period of time;
- The presence of a stove allows you to save on heating water for the procedure without using additional sources;
- an environmentally friendly heating device - there is no electromagnetic radiation, as when using electric heating, which has a positive effect on human health;
- the possibility of heating large-area houses;
- The absence of a favorable environment for the formation of fungi and mold will extend the life of the bathhouse.
Furthermore, the sauna room is heated by two sources: the stove heating and the heated floor, which increases the rate of warm air exchange and reduces the time needed to prepare the sauna. The uniform heating of the steam room also eliminates drafts.
The main disadvantages of heated floors in a sauna from a stove:
- It is quite difficult to carry out installation by yourself, and you will also need special equipment;
- Carrying out repair work yourself is also not easy;
- The "pie" of the water structure significantly lowers the ceiling level;
- there is a need to re-equip the furnace;
- the need to drain the coolant from the system so that it does not freeze and destroy the pipeline, or the constant heating of the stove;
- complex process of temperature regulation;
- It is not possible to install leaking floors, as the insulation will get wet and the functioning of the system will be significantly reduced;
- When heating the tank with the coolant, a lot of thermal energy is lost, and less is left for heating the steam room and washing room.
Please note! Replacing water with antifreeze eliminates the need to drain the coolant or constantly stoke the heater during cold weather.
It's worth noting that installing heated floors in a bathhouse yourself is quite expensive, but it will pay for itself over time.
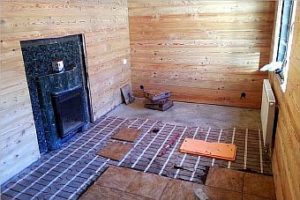
Installation of a water-heated floor from a sauna stove
Originally, hydronic underfloor heating was not intended for installation in a sauna. Therefore, when installing such a system in a sauna, it requires additional components.
The installation of a water-heated floor from a sauna stove includes several components:
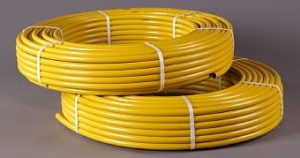
- The underfloor heating system is the main component, laid evenly across the entire floor at a specific spacing, covered with a concrete-cement screed. It's important to choose the right type of pipe, as not every type is suitable. Copper, metal-plastic, or stainless steel corrugated pipes are best. However, many prefer cross-linked polyethylene pipes with increased heat resistance and a service life of at least 30 years, or polypropylene pipes with a warranty of at least 50 years.
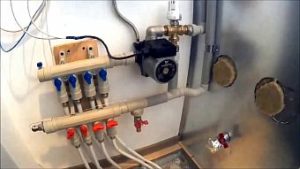
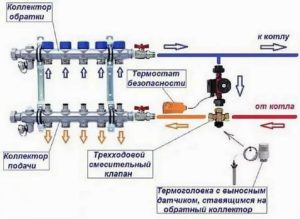
- The mixing unit is a crucial part of the system, as the heater is unable to heat the coolant to the required temperature. It heats the water almost to the boiling point, which is unsuitable for supplying it to the heating system. Therefore, a mixing unit is required. It mixes the boiling water with the used coolant to the required 40°C and then feeds it into the pipeline. It regulates, adjusts, and automatically maintains the desired temperature of the underfloor heating system.
- A heat exchanger is a container, coil, or register located above the firebox where the fluid from the furnace is heated. If antifreeze is used as a coolant, a separate heat exchanger will be required to prevent the antifreeze from contaminating the wash water.
- A circulation pump is essential for the even distribution and movement of the coolant through the piping. Without it, underfloor heating cannot function, as it provides additional pressure to the circuit for fluid circulation. When selecting the pump's capacity, consider the area of the room being heated; the larger the area, the higher its capacity should be.
To reduce the load on the pump, it is recommended to divide the pipeline into several parts of equal length.

- Drainage is essential for removing excess water from the steam room and washroom. You can install it yourself by considering two things: constructing a drain hole through which water will flow into a pipe and be discharged into a septic tank; and pouring a screed with a slope toward the drain hole to ensure all water flows toward the slope.
Operating principle
The device consists of a pipeline containing a coolant, fed by a sauna stove heated by wood or another fuel. The stove must be converted to heat underfloor heating.
Once lit, it warms up the system, achieving full heating by the time the steam room is ready. The water is circulated by an installed pump, which is included with the mixing unit. The warm pipes heat the screed and flooring, which in turn transfer the heat to the room.
The diagram and structure of the "pie"
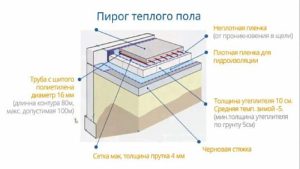
If we consider the device of a warm water floor in a bathhouse from a stove in the form of a “pie”, then it consists of:
- subfloor - concrete or wood;
- waterproofing layer - it prevents the formation of condensation;
- insulation - reduces heat loss;
- reinforcing mesh - protects the insulation;
- foil reflector - directs heat in the desired direction;
- heating element - pipes laid in a spiral;
- concrete screed - having a slope in the direction of drainage;
- finishing coating.
When installing underfloor heating on the ground yourself, it is necessary to arrange a sand cushion, on top of it it is necessary to fill it with expanded clay, and spread a waterproofing layer on it.
In addition, additional installation of a mixing unit, heat exchanger and pump will be required.
Preparatory work
Before you begin installing a hydronic underfloor heating system in your sauna, you need to draw a detailed diagram, indicating the size of the room to be heated, the length of the circuit, the pump connection location, and the connection point for the mixing unit and heat exchanger. The amount of material required for the heating system is determined based on this drawing.
After this, you can proceed to the installation work itself, which begins with preparing the base and drain:
- Remove the soil between the foundation walls and compact the surface. Before doing this, install wastewater drainage pipes. These will drain the water into the sewer system.
- Add a layer of sand and crushed stone (15 cm) and compact well.
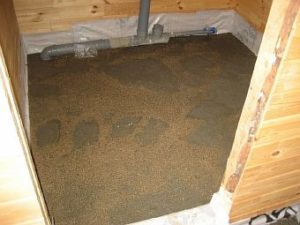
- Lay expanded clay insulation, 150-200 mm thick. Slope the insulation toward the drain.
3 ways to install a water circuit
How to make a hydronic underfloor heating "pie" How to remove a sauna stove yourself? We'll show you how to do the job in a variety of ways.
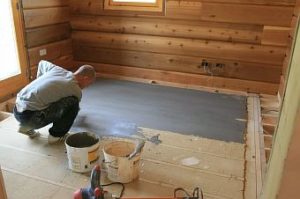
Into concrete screed
A concrete screed foundation is the best option for a sauna, as cement mortar is highly moisture-resistant and allows for high-quality heating. Furthermore, this method allows for savings on materials and equipment.
But when pouring the screed yourself, there is an important condition - it must be done in accordance with the instructions and the technological process.
The disadvantages of this method include the difficulty of repair in the event of a breakdown, and the fact that the structure can only be used after the solution has completely dried, which will take about a month.
The process consists of the following steps:
- The base is prepared - it must be smooth and clean; if significant irregularities are found, a thin screed can be made.
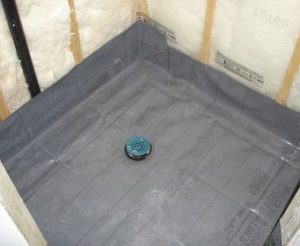
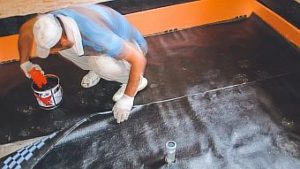
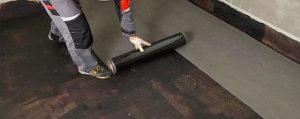
- Double waterproofing is performed: the concrete surface is covered with hot bitumen, and roofing felt sheets are laid on top of it, overlapping by 10 cm. Then bitumen is poured again and roofing felt is laid.
- Insulation is laid—preferably rigid and moisture-resistant (EPS, penoplex), and at least 5 cm thick. When laying the insulation, it's important to remember the drainage slope.
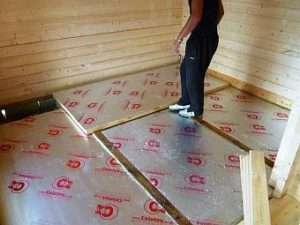
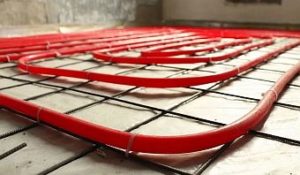
- A reinforcing mesh is installed - the pipe will be attached to it.
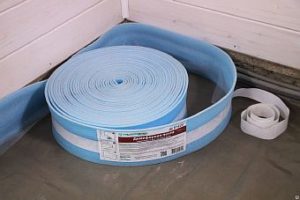
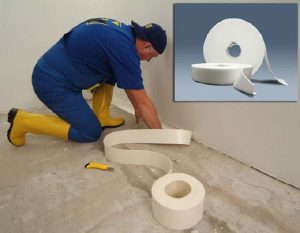
- A damper tape is glued around the perimeter, at the junction of the walls and floor - it compensates for temperature expansion.
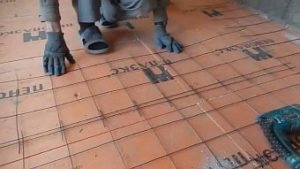
- The heating circuit is placed and secured to the mesh with clamps.
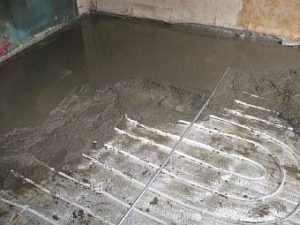
- The screed is poured—this work is performed after the system has been connected and its functionality has been tested. It must be poured while there is pressure in the circuit. Once the screed has hardened, the flooring can be laid.
On polystyrene plates
Polystyrene boards are a high-quality material, which perfectly combines water-heated floors with a sauna room. Their surface is equipped with a foil layer that reflects heat, providing excellent thermal insulation. Furthermore, the slabs have grooves for convenient installation of the heating element.
Installation work for installing a water-heated floor in a sauna from a stove with your own hands must be carried out sequentially:
- cleaning and leveling the subfloor;

- installation of waterproofing - roofing felt is laid in two layers;
- gluing the damper tape around the perimeter;
- placement of thermal insulation mats with bosses - it is better if they have a reflective surface;
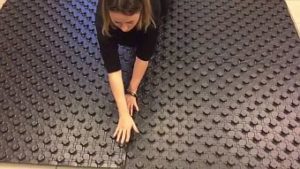
- installation of the water circuit - it is placed according to the diagram in the grooves between the bosses;

- connecting the system - checking for operability and absence of leaks;
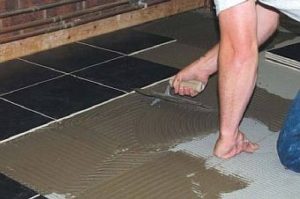
- screed - it is better to pour concrete along installed beacons, the surface should have a slight slope towards the drain;

- Installation of the floor covering - after the concrete has completely hardened, the covering is laid and the floor can be used.
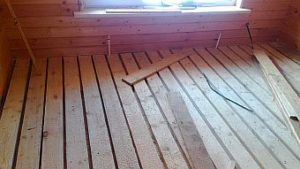
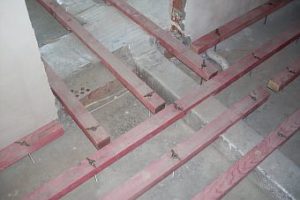
Laying on a wooden floor
This method is suitable if the foundation is weak and won't support the weight of a concrete-cement screed. The pipes are laid directly on the subfloor. However, this design is less effective because the floor isn't in direct contact with the pipe.
However, it is often used when installing heated floors on your own, since baths, for the most part, do not have sufficient strength.
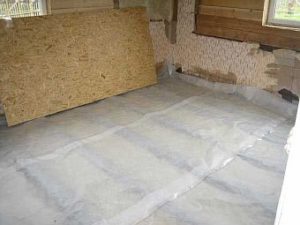
Work should begin with cleaning the subfloor.
Then a polyethylene film is laid as waterproofing, and a damper tape is mounted.
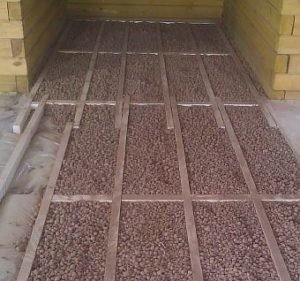
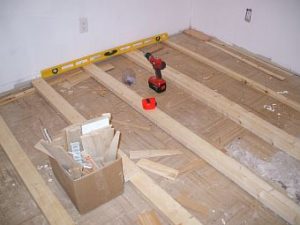
Joists are installed on a wooden floor and secured with screws. They must be laid across the main boards.
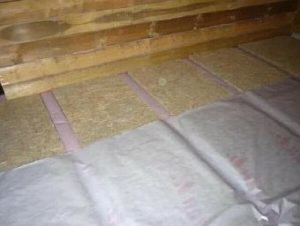
The next stage is thermal insulation, for this purpose, insulation is laid between the joists, and another layer of film is stretched to protect against moisture.
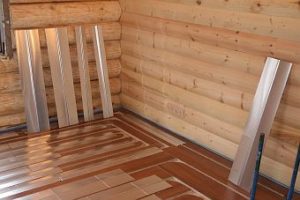
Wooden slats are installed across the joists, and foil is placed in the grooves between them, or a metal profile is placed.
The pipes are laid—they are placed on foil or in a profile according to the diagram. The heating system is connected and its functionality is tested.
A base for the finishing coating is installed from plywood or chipboard sheets.
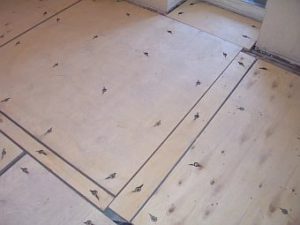
The flooring is laid, most often tiles or wood are used.
This method of setting up your own sauna heating system using a warm water floor is a labor-intensive process, but it will be cheaper.
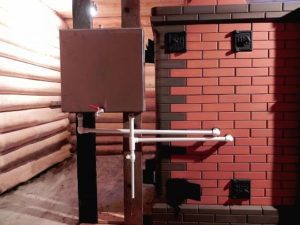
Connecting underfloor heating to the stove
When independently powering the underfloor heating system from the sauna stove, a separate heating line must be installed. This will require installing a heat exchanger above the firebox or constructing a piping system around the firebox.
Watch the video
In addition, to provide the water floor with the required amount of coolant, it is necessary to equip the structure with an additional tank near the stove.
We should also not forget about the mixing unit, in which hot water will be mixed with waste water and supplied to the circuit at the required temperature.
To ensure that cooled water from the pipes is directed back to the heat exchanger for heating, a pump is connected to the system, which ensures circulation of the coolant.
Operating Rules
Operating a homemade hydronic underfloor heating system from a sauna stove isn't difficult or difficult, and doesn't require much effort. Just follow a few rules:
- During the cold season, you should drain the water from the pipes every time;
- it is necessary to maintain a constant working pressure;
- eliminate any faults in the pump and shut-off valves in a timely manner.
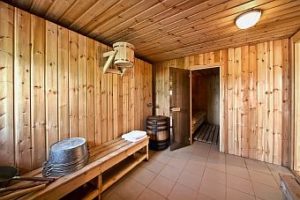
If you followed all the rules when installing a water-heated floor heating system in your sauna using a stove, the system will provide you with comfortable conditions in the sauna and trouble-free, long-term operation.


Why bother with a water-based floor? You can install an electric one, it's easier and cheaper.
The idea has merit, especially since the benefits are obvious. Of course, not everyone is willing to bear the additional costs of installing heated floors. But the level of comfort is worth it.