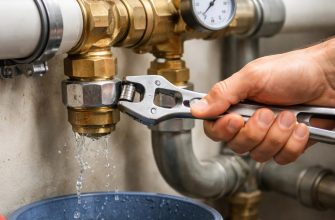
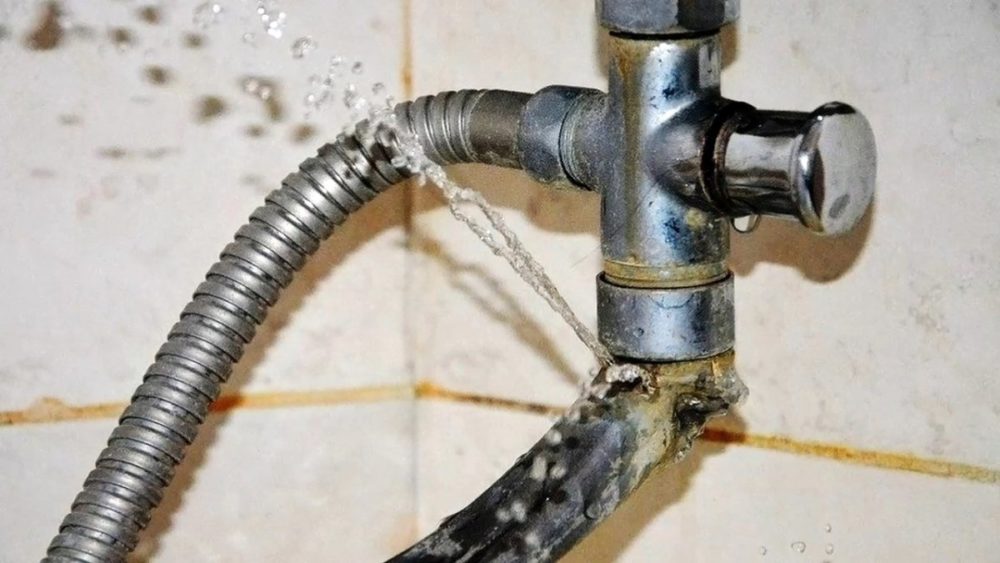
Want to fix a leaking faucet yourself, but don't know how to disassemble the faucet in your bathroom or kitchen?
Start by turning off the water. Loosen the valve stems on the faucet by turning them counterclockwise with an adjustable wrench. For a lever faucet, first remove the handle and top cap, then remove the cartridge from its housing.
We'll discuss the nuances of repairs involving disassembly and replacement of worn parts in this article. We'll also examine the types and design of faucets. The step-by-step algorithm for disassembling a lever and valve faucet will help you complete the repair yourself.
- The structure and types of water taps
- Valve mixers
- Rotary crane boxes
- Half-turn crane boxes
- Lever mixers
- Ball cartridge
- Disc cartridge
- Differences in additional functionality
- Difference in the number of controls
- DIY repair tools
- Disassembling a single-lever mixer with a shower
- Disassembling a two-handle bathroom faucet
- What difficulties arise when disassembling a crane?
- Answers to frequently asked questions
- Video materials
The structure and types of water taps
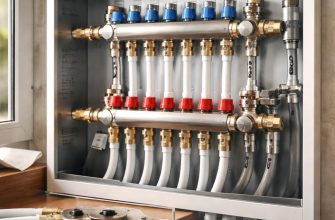
A mixer tap is a plumbing fixture connected via flexible hoses to hot and cold water pipes. A shut-off mechanism is installed inside the tap to regulate the flow and mix streams of different temperatures.
Based on the material they are made from, they are considered reliable. bronze and brass models. Durable non-ferrous metal alloys resistant to oxidation and destruction.
For additional corrosion protection and an attractive appearance, the body is coated with chrome, bronze, nickel, powder coating, PVD, or enamel. After extended use, the bathroom fixture can be easily removed and disassembled for repair.
Stainless steel models offer similar qualities. These faucets are long-lasting, easy to repair, easy to disassemble, and have a beautiful, modern look. The body surface is available in pure stainless steel or with a decorative coating.
Cheap water faucets are made of an aluminum-silicon alloy called silumin. The body and decorative coating quickly deteriorate from constant exposure to moisture, crumbling into a gray powder.
Careful disassembly and removal of a long-used bathroom fixture is virtually impossible. Silumin faucets are cheaper to replace than to disassemble and repair.
Plastic models are rarely found on the market due to low consumer demand. Products typically made in China are considered disposable. It's rarely possible to disassemble a plastic faucet without damaging it, and repairing it is pointless. It's easier to replace it.
Ceramic is often used in plumbing fixtures due to its water resistance. Its brittleness is considered a drawback. Faucets are not made entirely of ceramic, but rather individual components.
In conclusion, it should be noted that after extended use, bronze, brass, and stainless steel faucets are easily disassembled for repair. Other types of cheap faucets are not repairable and are difficult or impossible to disassemble.
Valve mixers
The control mechanism is a rotary and half-turn type crane box.
Rotary crane boxes
A rotary faucet is installed in the kitchen and bathroom. The control mechanism is considered outdated, but remains relevant today. The rotary faucet body is threaded inside to move the threaded stem with the heel.
When turned clockwise for approximately three full turns, the valve shuts off the water. This action is accomplished by the stem settling and the seat, with its rubber or paronite gasket, closing off the seat inside the housing.
To open the valve, rotate the flywheel counterclockwise. On the return stroke, the stem unscrews from the housing, lifting the valve seat with the gasket from its seat.
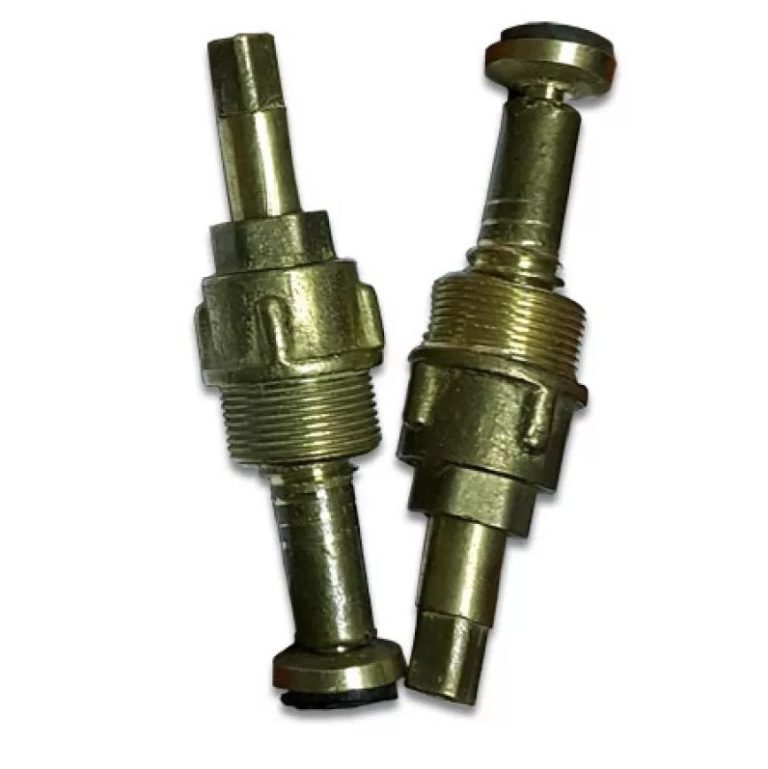
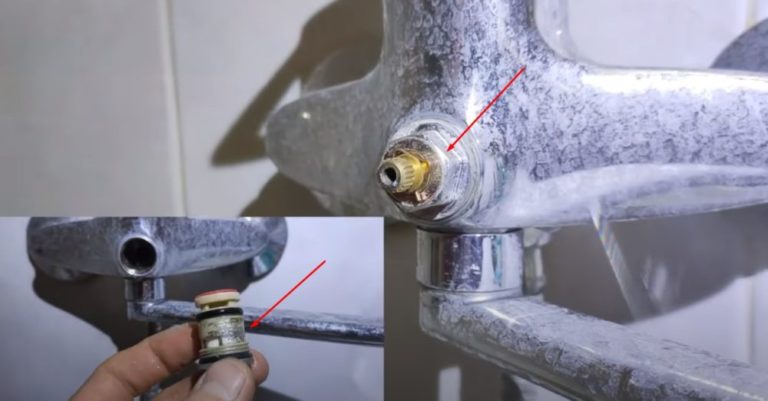
Frequent rotation and pressure on the seat quickly wears out the gasket. Sometimes the heel breaks away from the stem and becomes jammed inside the housing. To repair or replace it, the plumbing fixture must be disassembled by unscrewing the valve body from the housing with a wrench.
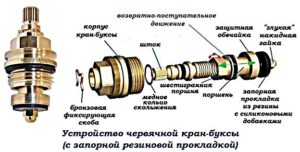
Half-turn crane boxes
Every other modern kitchen faucet and bathroom mixer tap is equipped with a half-turn control unit. To turn on the water, the user similarly turns the handwheel to the left, and to close it, to the right. A half-turn model differs from a rotary valve body in that it lacks a worm gear and a gasket.
The rod rotates the ceramic element, which opens the flow holes on the mating ceramic plate. The maximum rotation angle is 180O until the mechanism stops. To prevent water from leaking when the valve body is closed, the ceramic plates are pressed from below by a ring-shaped silicone gasket.
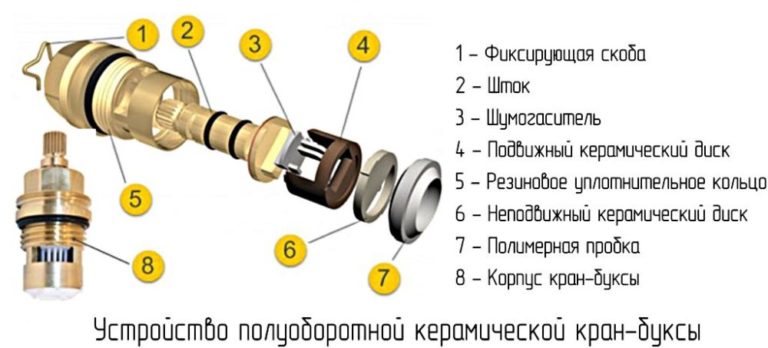
Ceramic plates are less susceptible to wear from frequent half-turns.
A faucet leak usually appears after at least a year of intensive use. The ceramic valve can break if the user applies excessive force without paying attention to the speed limiter.
To disassemble for repair, the half-turn valve stem is unscrewed with a wrench. The worn ceramic and O-ring silicone seal are replaced. If the drive components and stops are damaged due to excessive force, the valve stem must be replaced.
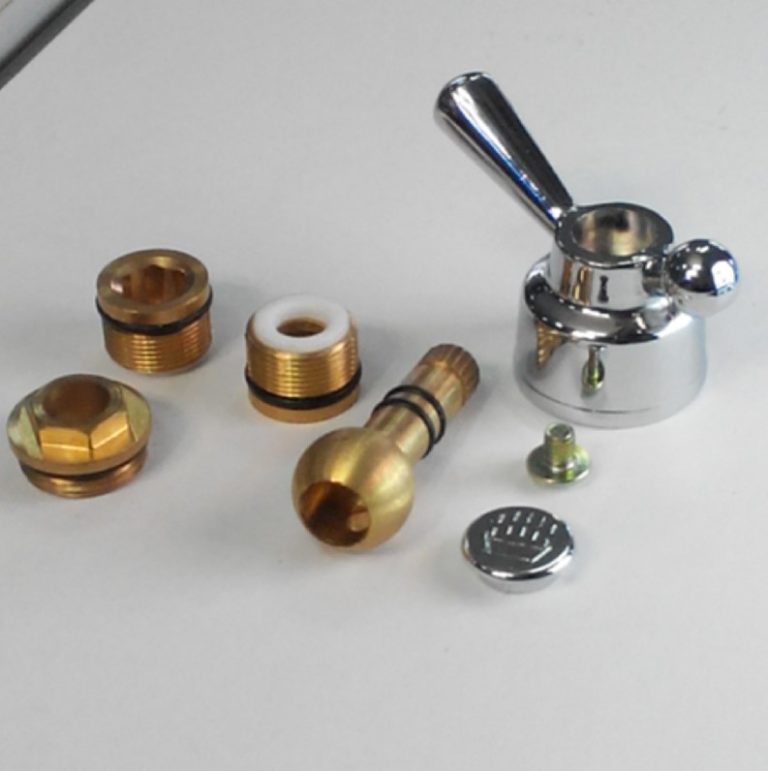
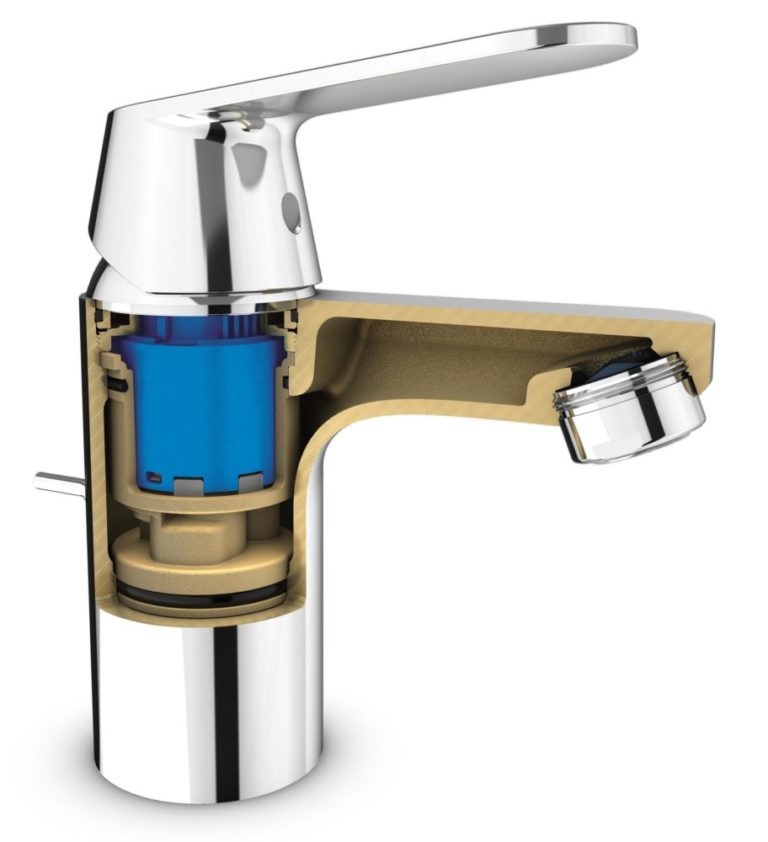
Lever mixers
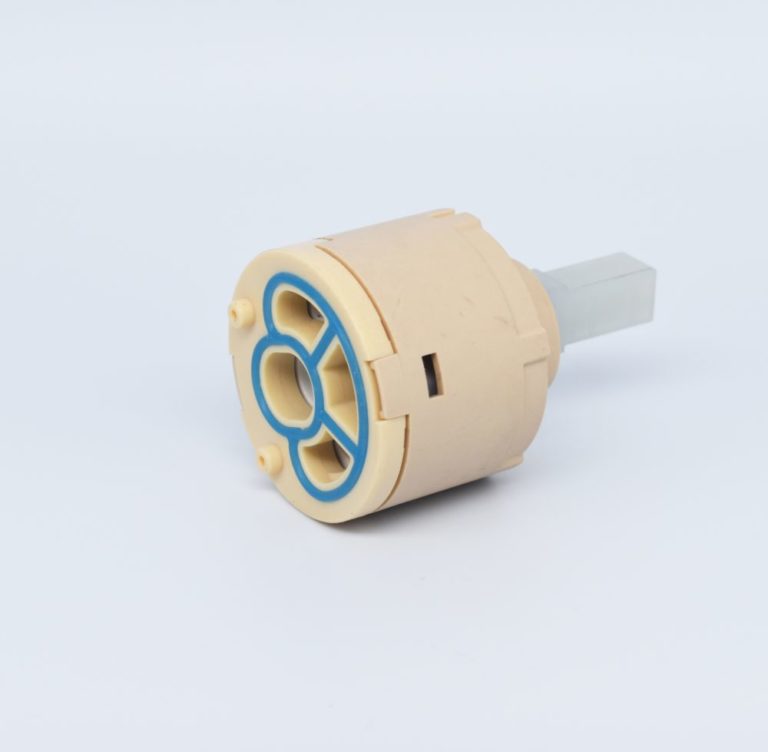
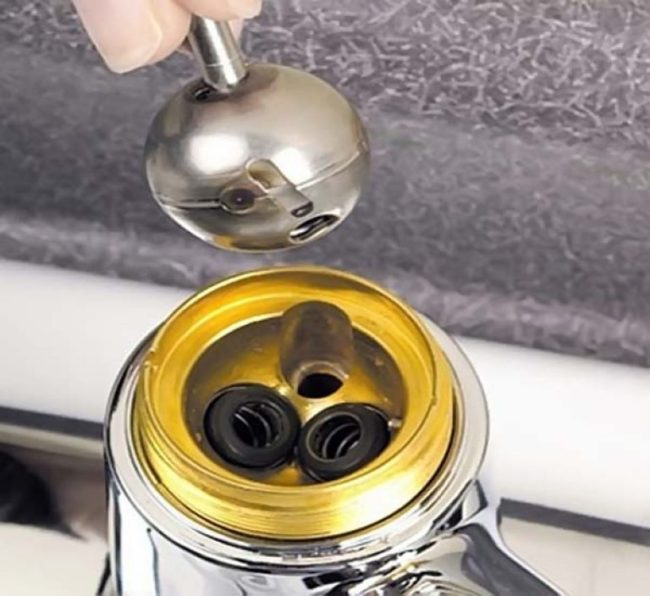
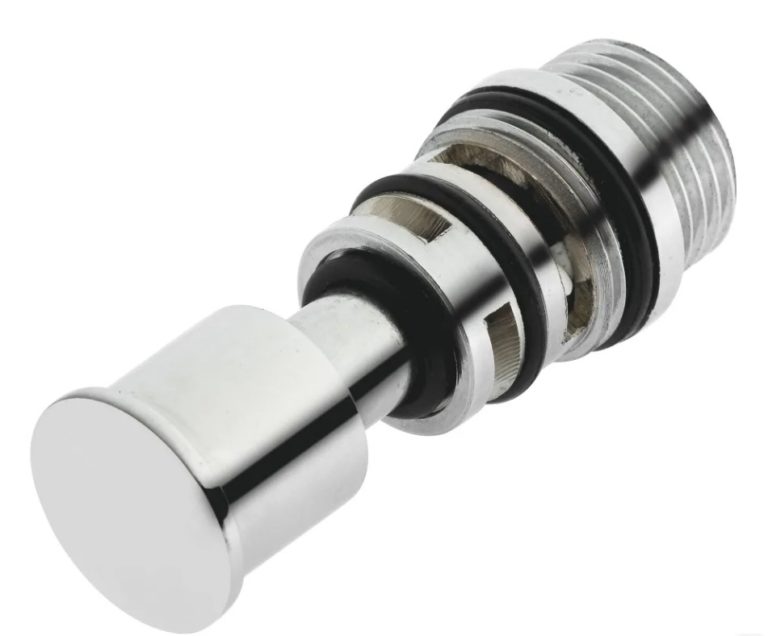
Instead of a crane box and a flywheel, the control unit uses a cartridge with a lever.
The operating mechanism is beyond repair, but enthusiasts manage to disassemble and lubricate it. A broken cartridge is simply replaced with a similar one of the same size. To remove the component from the housing, the control lever and pressure cap must be removed.
Ball cartridge
The unit consists of a hollow spherical body with two inlet and one outlet for water. A ball, operated by the user via a lever, closes the channels and distributes warm and cold air.
Lever-operated sanitary fixtures with ball cartridges are rarely available for sale. The mechanism is expensive and complex to manufacture. Ball cartridges are short-lived and are rarely used by users.
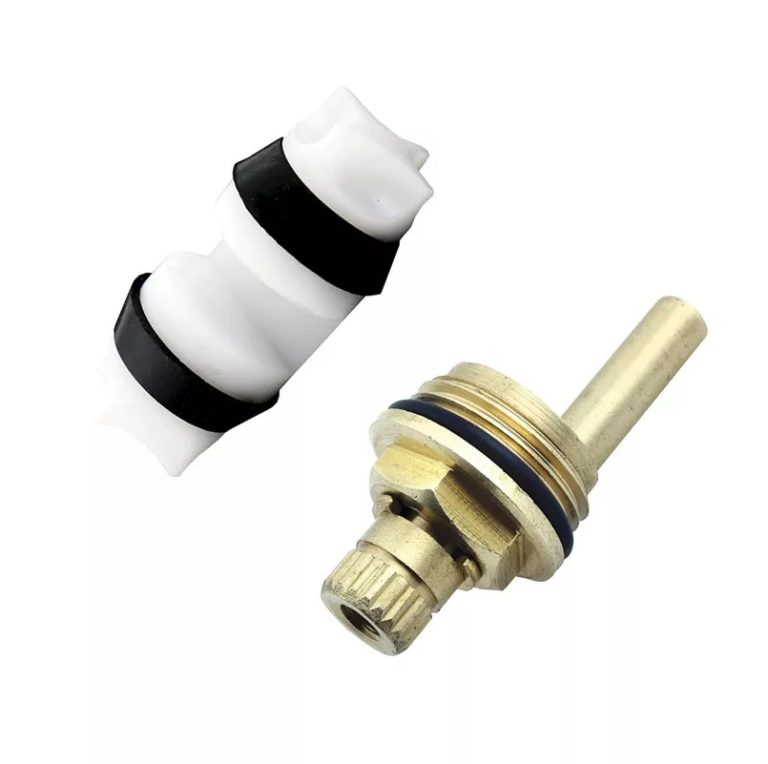
Disc cartridge
The unit consists of a housing containing two ceramic discs. The user uses a lever to move the upper movable element. The disc opens or closes openings on the corresponding fixed ceramic component. By adjusting the lever, the desired pressure and temperature of the mixed hot and cold water flow are achieved.
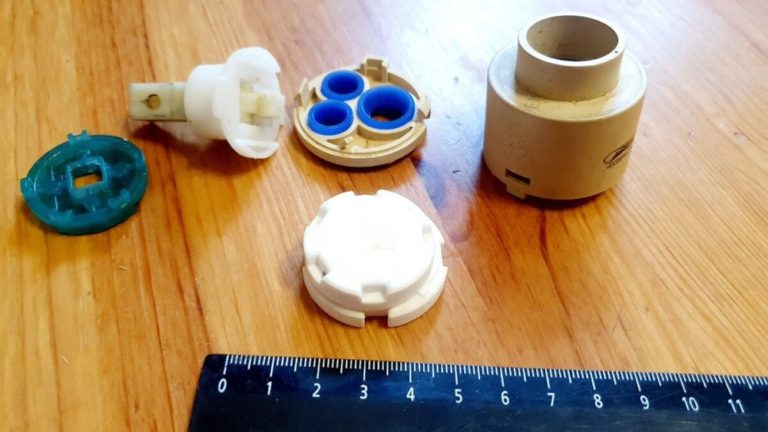
Disc cartridges are durable when used carefully. Original brand cartridges can last the entire life of the faucet. Cheap disc cartridges last for over a year.
Differences in additional functionality
Depending on the installation location and intended use, faucets vary in design and execution. Additional features enhance the ease of use of the plumbing fixture.
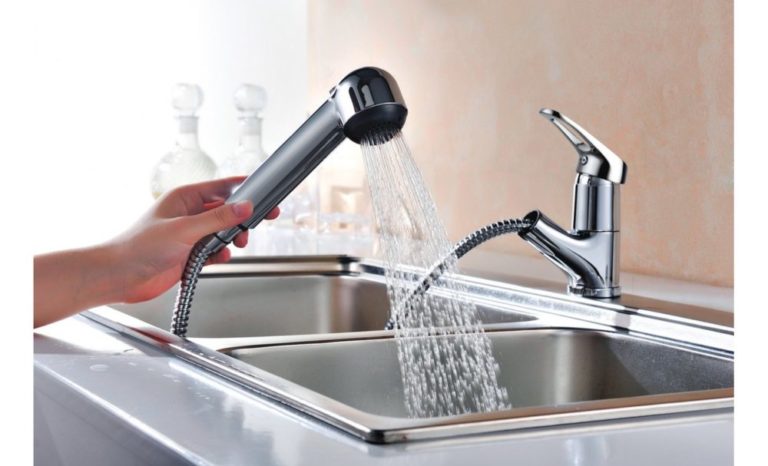
A sink-mounted kitchen faucet for easy dishwashing features a tall, swivel, rigid or flexible spout. Some models feature a pull-out hose and spray head.
A useful option is switching the jet to drip mode, an additional outlet for supplying purified water through a filter.
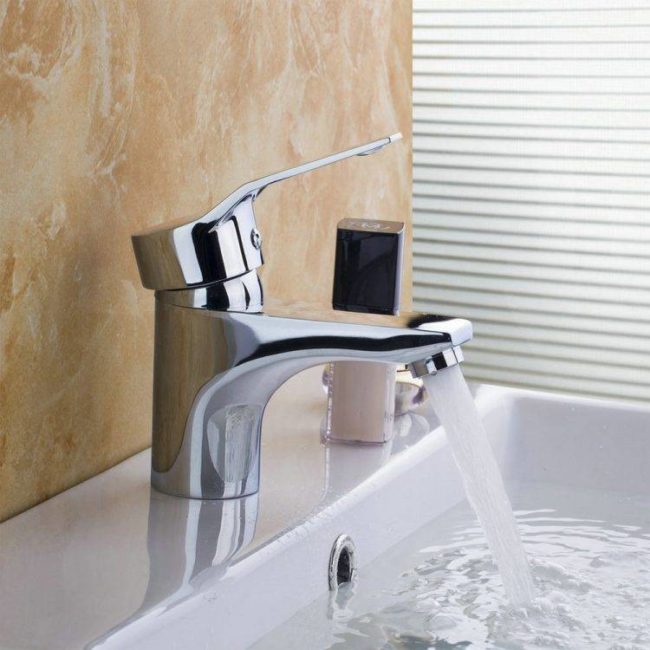
A standard bathroom sink faucet can be installed with a low, fixed spout. This fixture is intended for hand washing. The low spout reduces splashing.
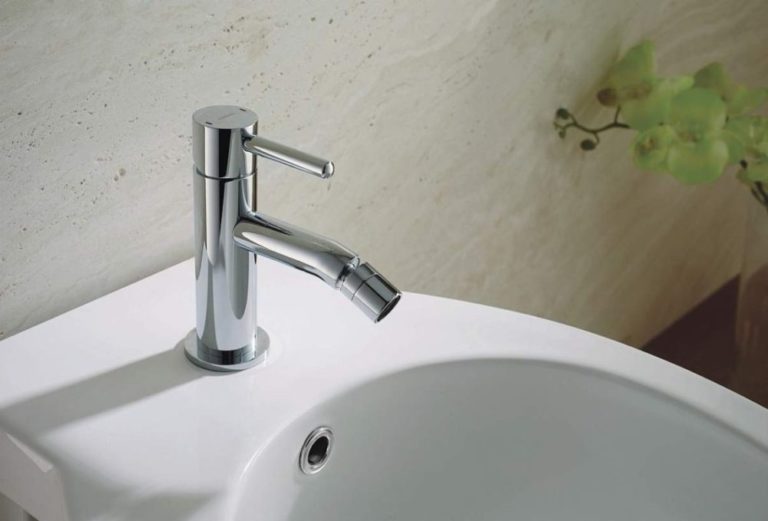
In the bathroom, a bidet is fitted with a mixing faucet with a short spout, either equipped with a free-swivel aerator or a hose and shower head. This allows the water stream to be directed in the desired direction.
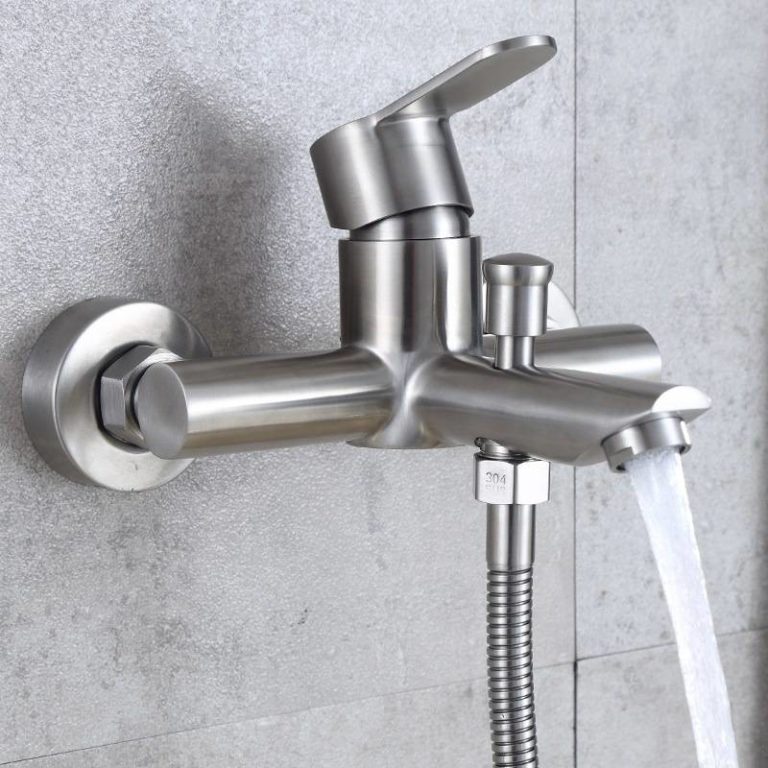
The bathtub and shower mixer features a long, swivel horizontal spout and a hose with a shower head. A diverter is installed to control the water flow:
- The push-button diverter is equipped with a return spring. The mechanism operates reliably and without malfunctions and is easy to disassemble. A diverter with a locking mechanism is more convenient to use. In models without a locking mechanism, the spring automatically switches the flow from the shower head to the spout when the water pressure is low.
- The user controls the ball diverter by moving a handle. The ball has holes that redirect water to the spout and shower head. The mechanism is easily disassembled for repair.
- The eccentric diverter features a lever with an offset plunger. With a half-turn of the control handle, the plunger moves a valve that closes the water supply to the spout or shower inside the faucet body. The mechanism is easy to disassemble for repair.
- An intuitive diverter is built into the swivel spout or control handle. The unit operates like a cartridge. When integrated into the spout, water direction can be changed by sliding it away from or toward you.
When integrated into the handle, switching to the spout is accomplished by tilting the lever toward you. To dispense water through the shower head, tilt the lever away from you. When the handle is level, all channels are closed.
With the lever tilted toward or away from you, hot and cold water are supplied by traditionally turning it left or right. The mechanism is difficult to disassemble.
The push-button diverter rarely requires repair. Sometimes it needs to be disassembled to remove hardened salt deposits. To remove the push-button diverter, follow these steps:
- Remove the decorative cap from the button;
- Unscrew the nut that secures the locking mechanism;
- Remove the switch from the mixer body.
To disassemble the ball diverter, the shower hose and spout are also removed. Inside the housing, use a hex key to loosen the nuts and gaskets holding the ball in place. The stem with the ball is removed from the mixer body. The eccentric diverter is easily disassembled, similar to a ball switch.
The intuitive diverter is more difficult to access. You'll have to disassemble almost the entire faucet to remove the three-way switch from the housing.
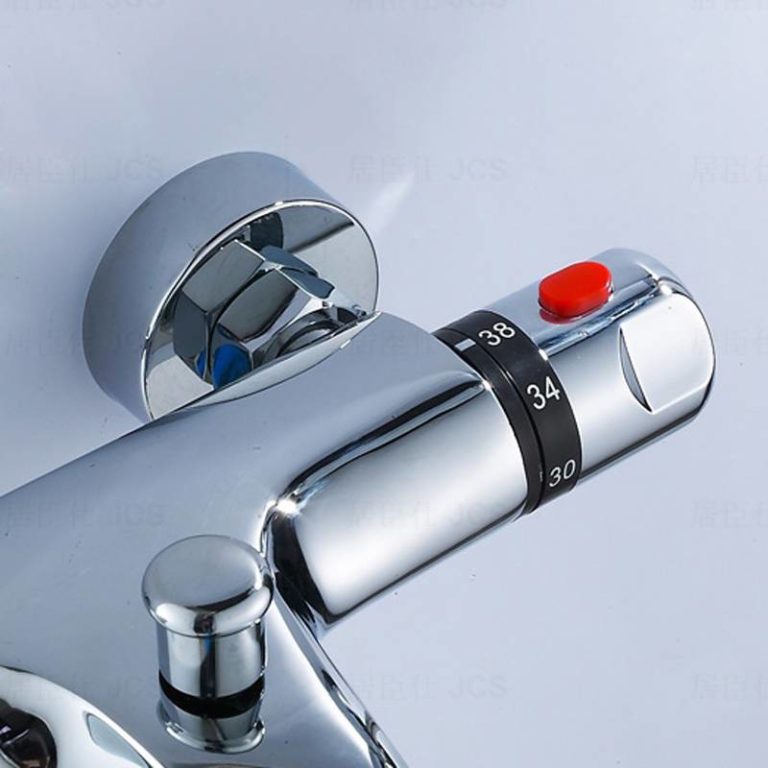
This thermostatic faucet is designed for installation on a bathroom or kitchen sink. Its design features a thermostatic cartridge with a response time of 0.3-3 seconds.
The device automatically maintains a comfortable water temperature set by the user through the operation of a diaphragm. The thermostatic cartridge is not repairable. If it breaks, the unit must be replaced.
Difference in the number of controls
When a plumbing fixture that's been in use for a long time begins to malfunction, it's advisable to completely disassemble the faucet to clean out any hard deposits and replace worn parts. The main problems usually stem from the control elements, the number of which varies depending on the model.
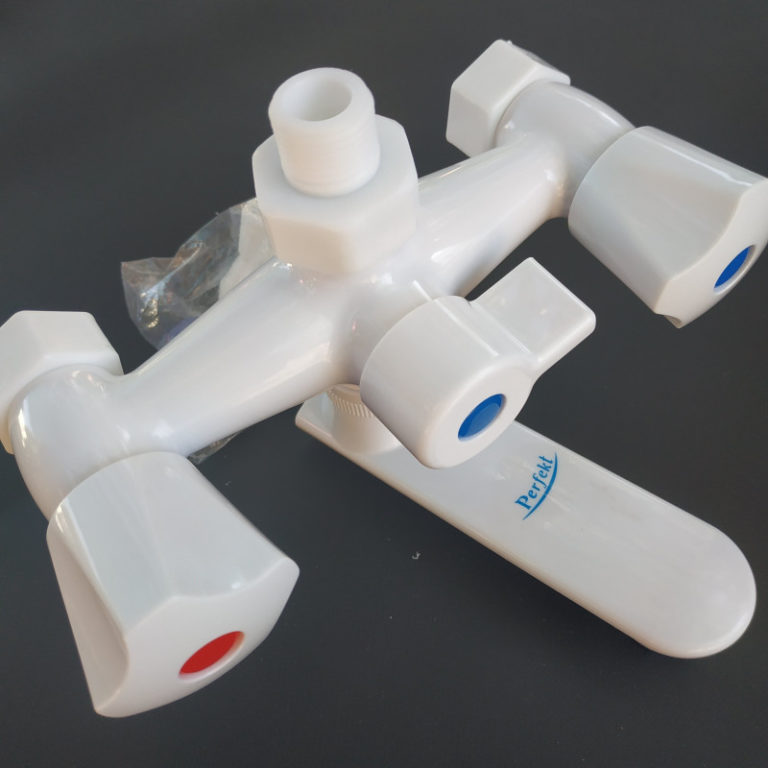
The simplest option for a bathroom is a single-lever faucet equipped with a cartridge. Hot and cold water are switched by turning the handle sideways. If the mechanism breaks, only one cartridge needs to be replaced.
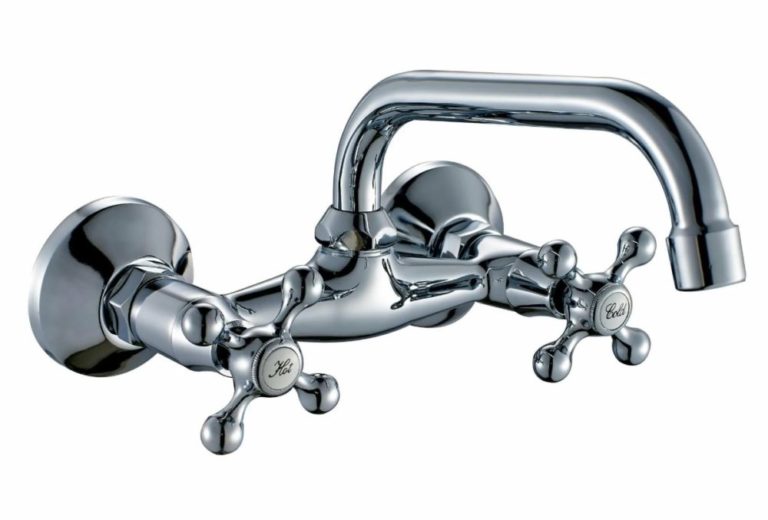
No less common is the two-handle bathroom faucet. The classic design features separate valves for adjusting the flow of cold and hot water.
With prolonged use, the wear and tear of both valves is approximately the same. During preventative maintenance, it's a good idea to inspect both valve bodies or replace them with new ones.
A two-handle bathtub faucet may have a lever mechanism. Mixing hot and cold water is accomplished by turning the levers up or down. Two-handle models typically feature additional features, such as an automatic stop, a hot water shutoff switch, and flow rate adjustment.
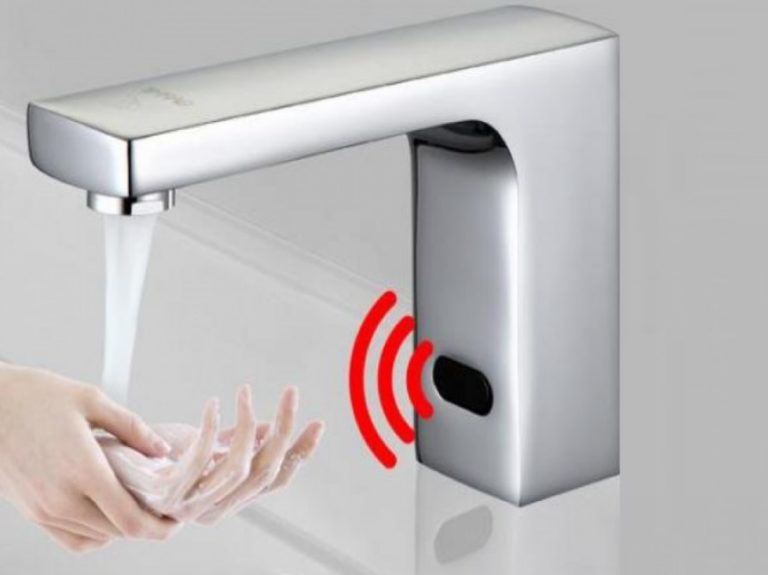
Automatic models have no control knobs. Touchless water use is achieved through a sensor. When a person places their hand near the faucet, the sensor sends a signal to the electronic control unit, which then applies voltage to the coil.
A solenoid core, drawn into the cavity, lifts the membrane, opening the water inlet. The automatic control unit is complex. Disassembling it for maintenance requires electrical repair skills.
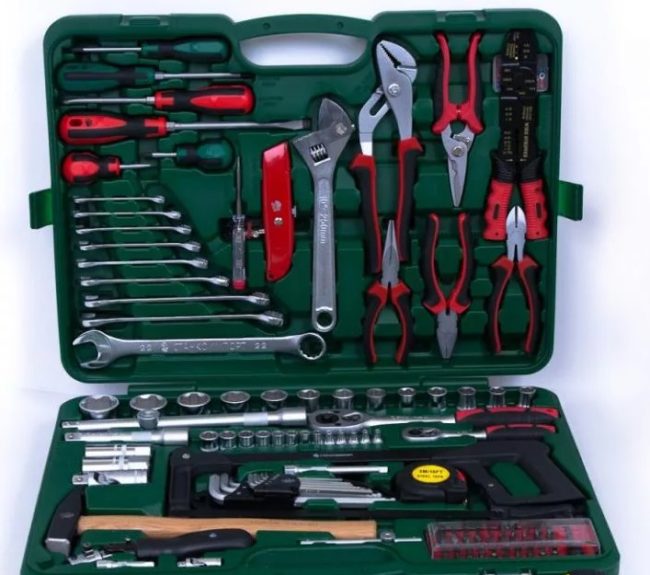
DIY repair tools
To repair a bathroom or kitchen faucet yourself, you'll need a basic set of handyman tools. Get an adjustable wrench or a set of open-end wrenches, a screwdriver, and pliers.
You may need to make your own tools using sharpened wire to remove hard deposits from hard-to-reach areas of the faucet body.
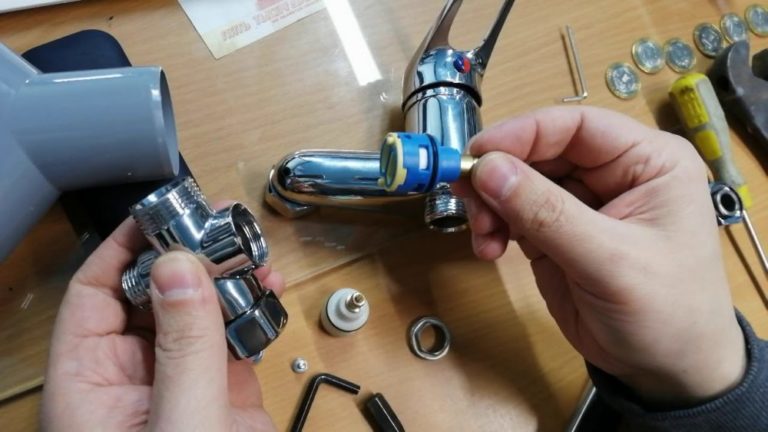
Disassembling a single-lever mixer with a shower
Before turning on the faucet, turn off the hot and cold water supplies to the bathroom. If there is no separate shut-off valve, turn off the main risers. Release any residual pressure from the system by opening the faucet. To disassemble the plumbing fixture, follow these steps:
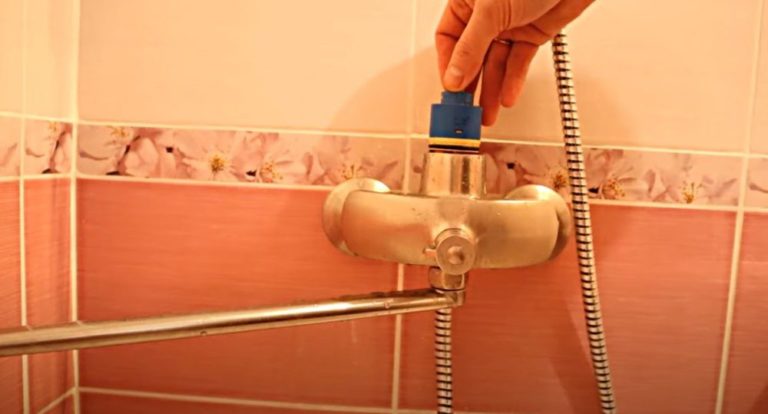
- Find the hole under the control lever. Loosen the screw holding the handle in place. Pull the lever upwards from the cartridge stem. If the handle is stuck, try to loosen it and gently pry it up using screwdrivers or other tools.
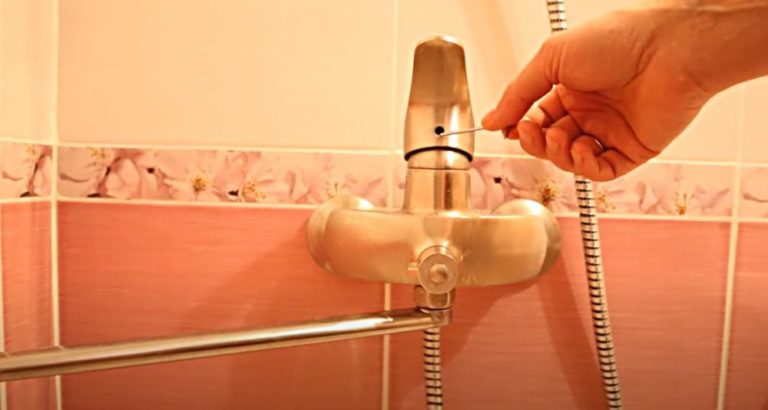
- After removing the lever, you'll see a decorative cap on the housing. This part covers the cartridge. Unscrew the cap by hand to avoid scratching the finish. If the threads are stuck, tap them around with a piece of wood or the handle of a pair of plastic-coated pliers.
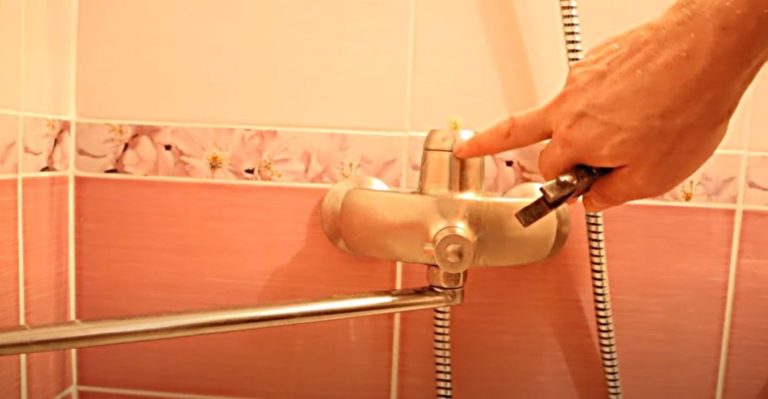
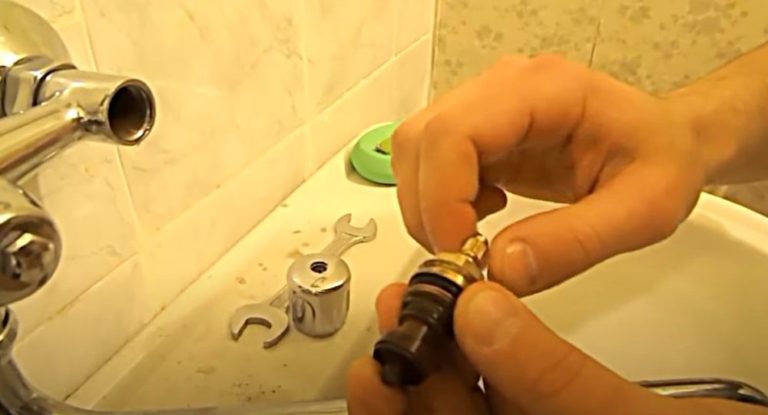
- Under the decorative cap is a nut that secures the cartridge to its housing. Unscrew this part with adjustable-jaw pliers or a wrench.
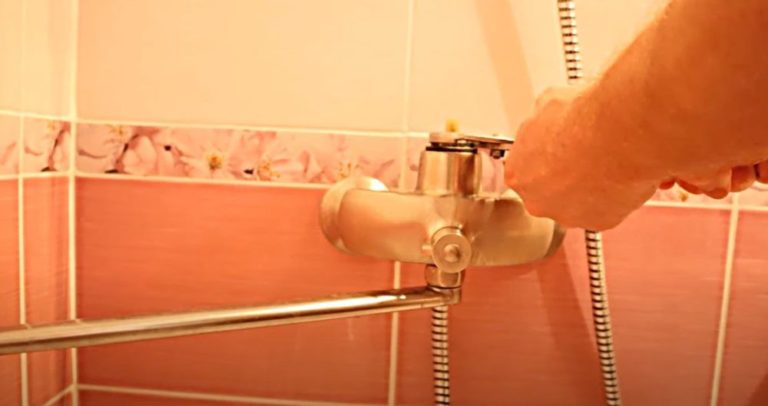
- Remove the cartridge by pulling the plunger upward with your hands. Loosen the stuck part of the cartridge housing with your hands. To increase the force, try pulling the plunger with pliers.
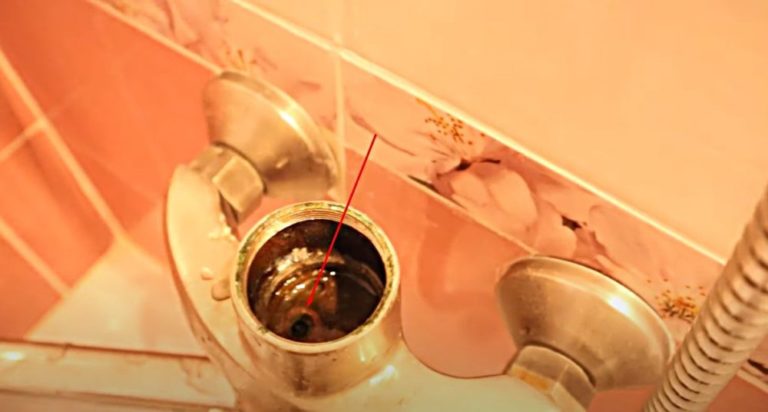
- The cartridge seat has three water inlet holes. Remove any dirt and hard salt deposits to ensure the rubber seals fit snugly into the grooves.
- You can repair the old cartridge if the lever is difficult to operate. Remove the mechanism from the housing. Lubricate the ceramic plates with grease. Reassemble the parts in reverse order. If the old cartridge cannot be repaired, purchase a new one of the appropriate size.
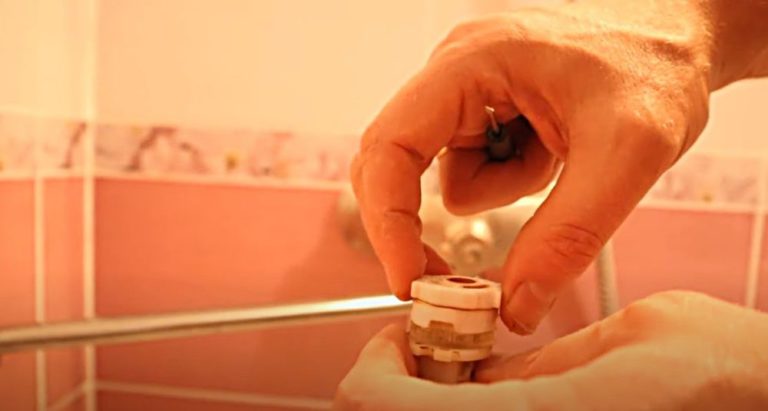
Install the repaired or new cartridge into the faucet body. Reassemble the removed parts: pressure nut, decorative cap, and handle.
To repair the shower diverter, remove the cap from the handle and loosen the screw. Pull the handle toward you while simultaneously rocking it to remove it from the stem.
Under the removed handle, you'll see the switch mechanism. In our example, the diverter is designed like a half-turn valve. Unscrew the switch with a wrench and install a new one, or clean the old one of any hardened salt deposits. Replace the control handle.
Disassembling a two-handle bathroom faucet
A two-valve faucet with both rotary and semi-turn valve bodies is disassembled using the same principles. To repair or replace the mechanism, follow these steps:
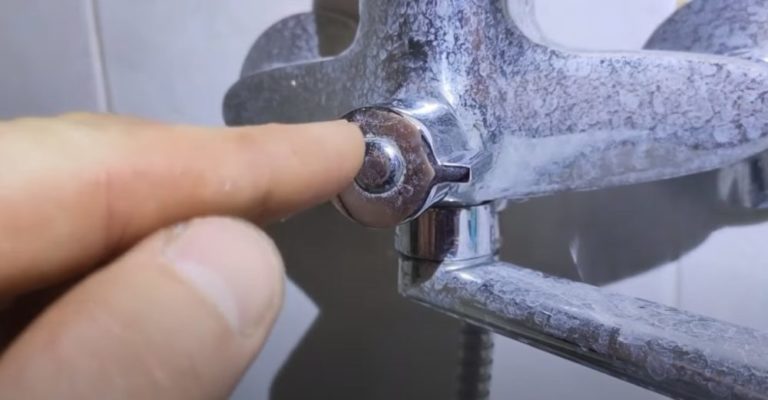
- Remove the caps from the handles. Use a screwdriver to loosen the screw holding the wing nut onto the valve stem.

- To remove the valve from the faucet, pull the thumbscrew toward you. If the handle is stuck, try to loosen it by moving it sideways. After removing the thumbscrew, you'll see the top of the valve body with a hexagonal notch for a wrench. Unscrew the part from the faucet body by turning it counterclockwise.
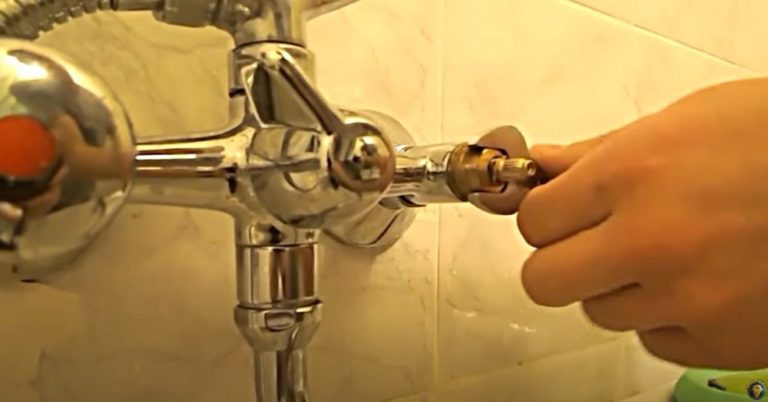
- Once you've successfully unscrewed and removed the valve from the faucet, inspect the valve stem. Check the free rotation of the stem and the condition of the rubber gasket or ceramic plates (depending on the valve stem type—rotary or semi-turn).
Screw the repaired or new valve body back into place. Install the wing nut, tighten the screw, and replace the plug.
What difficulties arise when disassembling a crane?
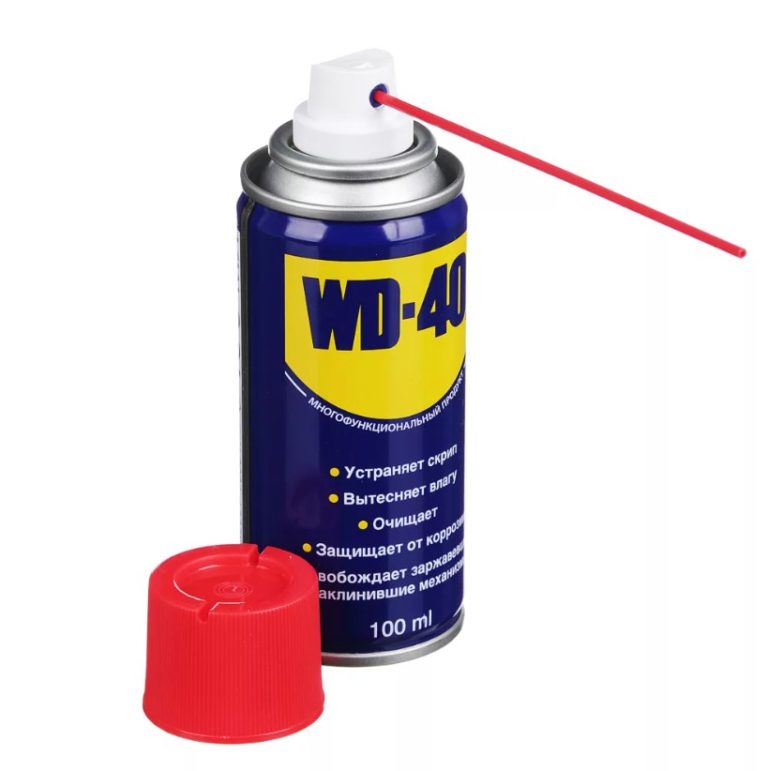
Hardened salt deposits complicate disassembling a bathroom faucet. Corroded threads are difficult to remove. To solve this, spray the affected area with WD-40. After 30-60 minutes, try turning the screw or valve stem counterclockwise and clockwise to loosen it.
If the screw won't come out, drill out the head and remove the handle. The threaded portion of the hardware will remain in the valve stem. It won't be possible to remove it. You'll have to buy a new valve stem.
Answers to frequently asked questions
Remove soft dirt from inside the housing using wooden or plastic sticks or sharpened wire. Treat hard salt deposits with vinegar, lemon juice, or another acidic solution. Wait until the limescale completely dissolves.
For cleaning, do not use abrasive or chemically aggressive agents that can destroy the decorative coating.
To loosen the threads, apply WD-40 aerosol spray and wait a few minutes.
Plumbing fixtures come in single-lever and double-valve versions, with touch controls. The operating mechanism is a full-turn or half-turn valve body and a ceramic cartridge. Bathroom models feature a diverter with a shower hose.
Typically, a 14, 17, 19 mm open-end wrench or a universal adjustable wrench is suitable for unscrewing crane valves.
Try loosening the piston rod by turning the handle or using a wrench. Apply WD-40 to the base of the piston rod.
To remove the plug, pry the part with a screwdriver or knife.
Turn the rod with pliers or a wrench, grasping the rod at the area with notches for the handle.