A pipe bender is a device for bending pipes or other metal products (rods, racks, rolled tubing, etc.). It is classified by operating principle and can be mechanical, hydraulic, or electric.

When building greenhouses and sheds at your dacha, you can't do without this tool. Buying one is expensive, so today we'll tell you how to make different types of round pipe benders at home.
But if you have to bend pipes frequently, it is better to purchase special equipment.
Types of pipe bending machines
These devices allow bending of shaped or round tubular materials at the desired angle. They are divided into:
- hydraulic;

- mechanical;
- manual.

The first type copes with bending large sizes, mechanical models are used for medium-sized ones, and manual ones are considered the ideal option for bending round pipes up to 3 cm in diameter or profile pipes up to 4 cm.
Based on their design features, functionality and operating principle, they are divided into:
- crossbow;

- segmental;

- spring.
 The main manual (mechanical) homemade pipe benders for round pipes include:
Hydraulic pipe benders for round pipes or electric-powered mechanisms are more difficult to manufacture independently.
It is impossible to make a bend without using a pipe bending machine; you can simply ruin the product or deform it.
We present to your attention step-by-step instructions, How to bend metal without a bending machine at home.
The operating technology of any pipe bender lies in the ability to correctly bend the product to the required radius.
If you don't pay special attention to the quality of the result when bending, then homemade designs will cope with this task 100%.
Necessary tools
You should start by preparing the tools you will need for the job.
- welding machine;
- a lathe - if you will be turning the parts yourself, and not resorting to the help of a professional turner (although there are types that do not require turning work in their manufacture);
- vice and hammer;
- metal saw;
- ruler;
- drill;
- Bulgarian.
This is the basic toolkit that is needed when making any model with your own hands; other tools may be needed when assembling a particular type.
We make an electromechanical pipe bender
We've decided to tell you how to make an electromechanical pipe bender. This equipment can handle any size of job, without requiring any physical effort.
For your reference, we present two versions of instructions on how to build a round pipe bender yourself. If you have any questions after reading the text guide, we also recommend watching the video materials.
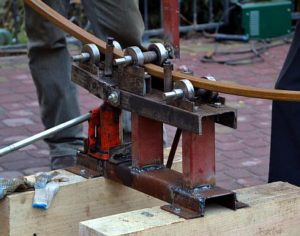
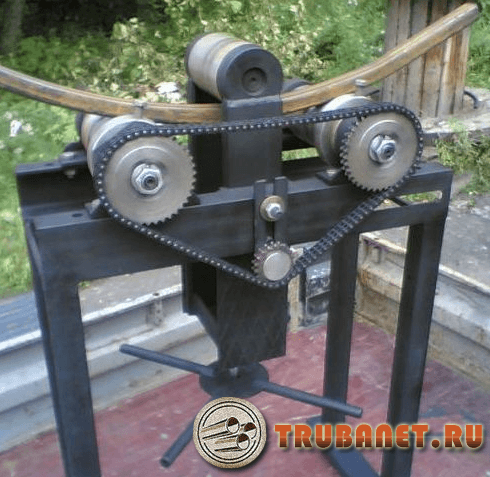
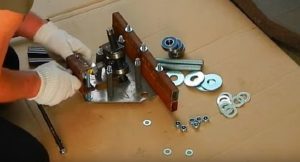
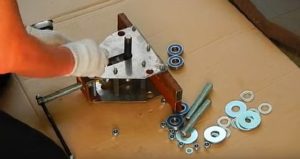
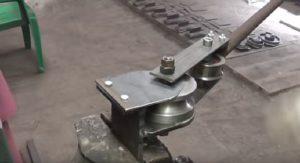
The device consists of three working bodies — one pressure roller and two support rollers, which is why it's also called a three-roll rolling machine. This is one of the most complex bending machines you can build yourself, but we decided to start with it. If we can build it, then making simpler types of pipe benders won't be difficult.
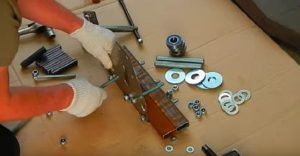
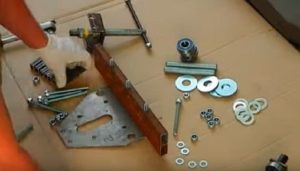
So, we will make the device from: 204 bearings, anti-roll bar from a VAZ car, nuts, studs, pipe cuttings (20 by 40 with a thickness of 2 mm, 15 by 15 by 1.5 mm; 80 - 80 - 5 mm), a metal sheet 3 mm thick.
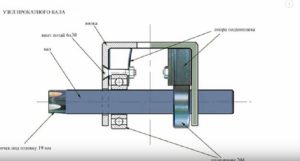
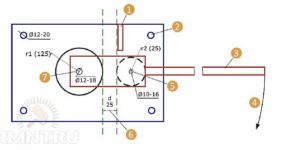
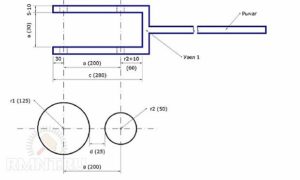
To assemble the electric bending machine, we used the following drawings.


Let's get to work. The step-by-step detailed instructions are as follows:
- We prepare the frame - for this we will need two pieces of reinforcement or profile of the same size, on the upper wall of which we make 4 holes for our studs.

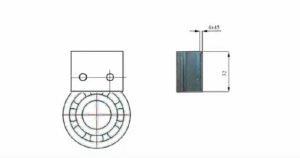
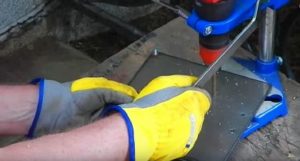
- We cut two side walls of the structure from sheet metal, drill holes in them for attaching them to the frame and installing the rollers, as well as a large opening for the movable roller. The holes should be drilled in both blanks at once so that they align.
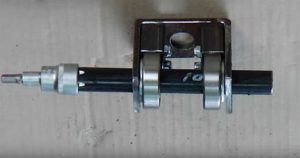
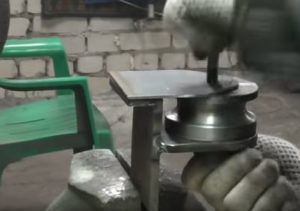
- We take a stabilizer bar from a Lada and machine it to fit a 19mm socket. This will allow the shaft to be rotated with a screwdriver. A 20mm bearing will be mounted on it.
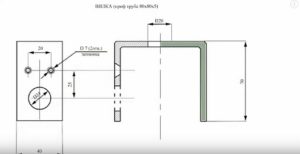
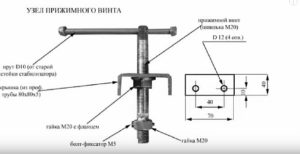
- We begin making a clamping mechanism from a screw and a piece of channel steel, the size of which should be slightly smaller than the distance between the side walls of the structure, so that the workpiece moves freely within it.
We make a hole in the channel equal to the screw's size and weld a nut into it. Then we screw in the screw and secure it with a nut from below. We drill a hole in the top of the screw and insert a pin into it, which will serve as a handle.
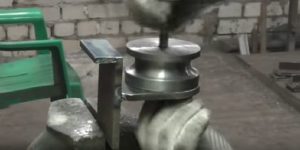
- We place two bearings on the shaft and secure them with washers. The workpiece is mounted on a channel, in which we pre-drilled holes for the clamping screw and side holes for mounting.
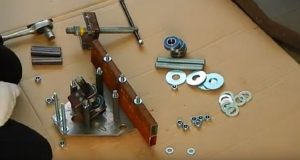
Let's start assembling the device:
- we insert the studs into the holes of one side wall and secure them with nuts;
- The middle studs are our input and output rollers, they are assembled, the size depends on the bearing kit for different tasks;
- We put washers on the lower studs, and then install two blanks from the profile, which will serve as the base of our machine;
- We place the pressure shaft in the middle of the structure, pushing the screw into the hole; it should be located exactly in the center between the rollers, and we install gaskets made of a metal plate between the screw and the cheeks;
- We screw the clamping screw to the shaft channel with a nut;
- We cover the structure with the second side and tighten the nuts.
If you weld a handle to the shaft, you will get a mechanical device that will work from your efforts.
The machine is ready; all that's left is to attach the head to the sharpened side of the shaft and then use a screwdriver to operate the device. This is a universal ring bending machine; you can use it to bend not only round pipes but also profile pipes; you just need to change the attachments on the rollers.
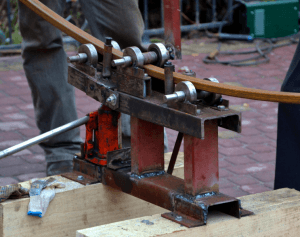
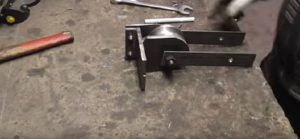
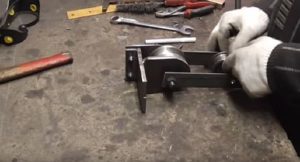
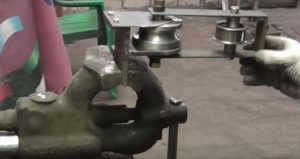
Manual lever pipe bender
If you don't need such a complex device and just need to bend a small round steel pipe, you can build a simple lever mechanism. It's designed for bending thin-walled pipes.
We also decided to try building this pipe bender ourselves. We'll need: a round shaft, a pressure roller, 8mm sheet metal for the frame, studs, and nuts.
While someone could make this device by eye, it's better to prepare a drawing of the pipe bender or find a suitable option online. We decided to work from the drawing.
Let's start making:
- We make blanks for the fork. The fork size depends on the distance between the wheels, or more precisely, on the pipe seat; it should be equal to the pipe diameter plus 1–2 mm. We cut them out of sheet metal and sand them:
- frame and shaft cover;
- a stop for the frame and a small stand for the lid;
- two rectangular plates, along the edges of which we make holes for the studs.
- We make holes in the cover and frame to attach the shaft.
- We secure the stop in a vice, weld a frame to its middle, and a stand for the lid to the top, and grind the seams.

- We thread the pin through the hole in the frame, slide the shaft on, and cover it with a sheet metal cap. Tighten the nuts on both sides.
- We attach the lid to the stand with bolts.
- We screw two rectangular blanks onto the nuts on both sides.
- On top, between these plates, we place a roller, which we secure with a stud and nuts.
- We weld two fork plates, placing a channel blank between them.
- We screw on a handle from a piece of metal profile.
Well, the lever pipe bender is ready. It turns out that almost any home craftsman can make it themselves.
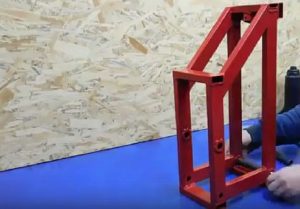
Jack hydraulic pipe bender
Another pipe bender we tried making ourselves was the jack-type. As the name suggests, the main requirement for its assembly is the presence of a jack.
There's no need to buy a new mechanism; an old, used one, which many people have in their garage or can be purchased for next to nothing at the market, will do. We'll also need: a 20 x 40 channel, a chisel, an angle, a stud, a 45 mm screw, and a round bar.
The operating principle of such a design is that the platform, which sets the bending angle, is driven by a jack.
Let's start assembling the mechanism:
- We clean and paint the jack using sandblasting.
- We cut the channels into the required lengths, based on the size of the jack.
- We connect the workpieces with welding magnets - this will facilitate the process of joining and welding the elements.
- We weld the channel sections together using a welding machine and clean up the seams. Our frame is ready.

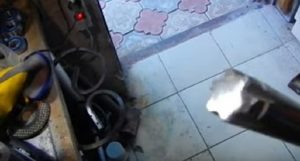
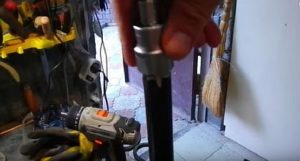
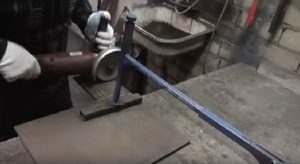
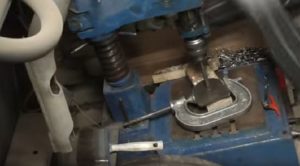
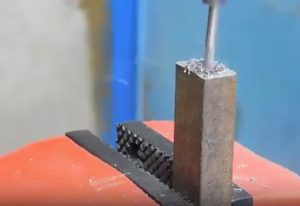
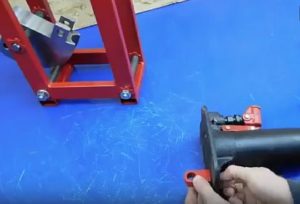
- Now we're moving on to making the support pump, which we'll make from a cutter. To do this, we clamp the cutter in a vice, make a hole in the end with a grinder, and cut a thread.
- We drill another hole on the surface of the cutter; it is necessary for attaching the jack to the round timber.
- We cut the workpiece and sand it.
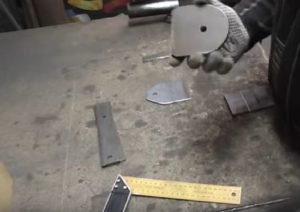
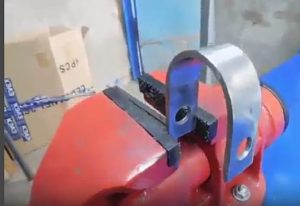
- We cut a small strip from the corner and make holes along the edges.
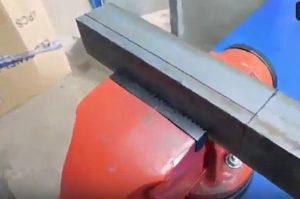
- We clamp the part in a vice and use a hammer to bend it. The result is something like a horseshoe.
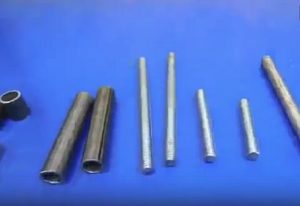
- We prepare additional elements - we cut blanks from a half-inch pipe and a stud.
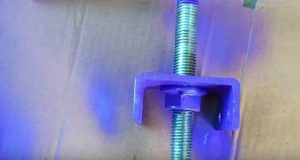
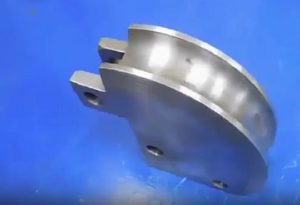
- We're making a round jack from a 45mm screw we found at a metal yard. It's a fairly complex part, so we'll admit we ordered it from a lathe.
- We make holes at the bottom of the frame, as well as for attaching the round timber, and strengthen the structure by welding nuts to the holes.
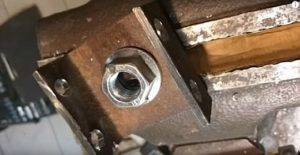
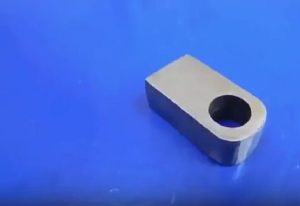
- In our machine, the upper stop is a die holder, the inner diameter of which matches the size of the jack, and it has threaded side holes.
- We prime and paint the finished structure.
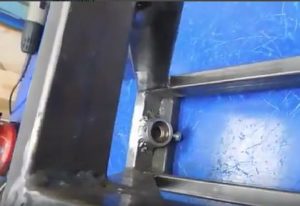
- We insert the prepared studs into the holes at the bottom and secure them with nuts; they will serve as rollers.
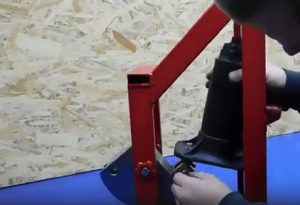
- We insert a pin into the upper hole of the structure, on which we install a round log.

- We screw a part made from a cutter to the jack.
- We fix the jack inside the structure by screwing it to a round log.
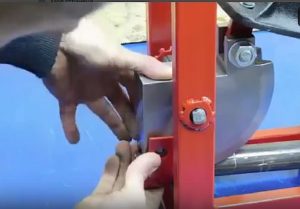
Now our pipe bender is ready to test. Instructions for use:
- We take a two-inch pipe with a round cross-section and place it on rollers;
- Then we fix it with a clamp;
- By working with the jack handle, the pipe is bent.
Wooden pipe bender
Finally, we'd like to show you a wooden pipe bending tool we made ourselves. It's one of the simplest and lightest tools, but it's quite capable of bending a small pipe.
We took several densely textured planks and nailed them together. Using a regular saw, we cut a semicircular piece of the desired diameter from the resulting wooden slab.
The thickness of the wood must be greater than the diameter of the pipe, otherwise it may slip when bent.
The workpiece needs to be secured to a sturdy base. We used a table for this, but you can screw it to the wall. A wooden block was also attached to the base to serve as additional support.
This device operates by placing a pipe in the recess between a wooden blank and a block. The pipe should fit freely into the opening. Using gentle movements, press on the rolled pipe material, bending it to the required radius along the wooden blank.
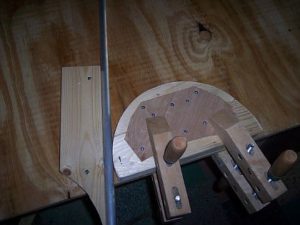
This wooden device bends aluminum and steel components effectively, yet requires minimal manufacturing costs.
We make it from a metal pipe and a nut
This type of bending device is considered the most basic. It is made from a piece of rigid round pipe (metal rod) with a nut attached to the base.
 To ensure the tool operates effectively, the following points should be observed:
- Select a nut so that the size of its internal thread is at least 30% larger than the diameter of the sample being bent;
- The handle itself should not deform under pressure. A steel rod is recommended.
This tool is very easy to use. One person can bend it without assistance. Despite its simple design, it can handle pipes up to 3 cm in diameter.
To complete the procedure, you will need to complete the following steps:

- We make a template of the future bend from wire;
- We take measurements of the template and transfer them to the pipe;
- The pipe is installed on a level floor with a hard covering;
- The pipe is inserted into the pipe bender nut, matching its direction with the measurements on the pipe;
- Using your foot, press firmly against the pipe on the floor, and bend the other end by slowly pulling the pipe bender handle toward you. This allows you to bend it by 10°.
- By moving the pipe through the hole in the nut, the procedure is repeated several times until the bend finally takes the desired shape.
Pipe bender made of metal hooks
 To make it you will need to carry out the following simple steps:
- buy hooks made of high-quality metal at any hardware store;
- We attach them to a stable base with a step of no more than 5 cm. However, the distance of one hook from another will depend on the size of the product that needs to be bent;
- as a result we get a semicircular template;
- An additional support is attached to one side of the device.
The bending process will be similar to working with a wooden template, but in this case, there is no need to make a new template for a different diameter; it is enough to simply move the distance between the hooks.
Bending technology: how to avoid defects
The key technological rule when bending a tubular product on a pipe bender is the sequence of actions, regardless of the size of the pipe.
The process involves a step-by-step bending process, with the corner radius being reduced with each roll. It's important to take your time and avoid abrupt bending. This technology significantly reduces the load on the working axes and protects the pipe from potential deformation.
The main cause of defects is failure to follow manufacturing procedures. Incorrectly calculated bending radius or too small a "tail"—the distance from the start of the bend to the end of the pipe.
If you do not follow these rules, you will not be able to avoid defects on the product, such as:
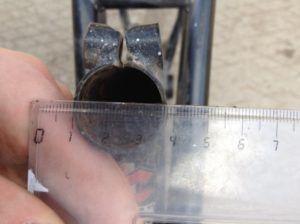
- A stretch or wave is present in the narrowest section, which can lead to a leak. This is especially important for plumbing work, but when building a greenhouse in the country, this defect is less of a concern.
- The "propeller" effect causes the pipe to twist around its axis. This part can no longer be used.
- "Bun" - slight flattening occurs; this defect occurs when bending thin, soft pipes.
- If seamed pipes are offered for bending, which are used during pipeline installation, then the seam must be placed in the direction of the bend;
- When bending large diameters, it is recommended to work with a partner;
- During the process, use protective equipment and remember to follow safety regulations.
To summarize all the above information, one thing can be said: building a pipe bender yourself is a doable task. And it can be accomplished with minimal time and money.
This article provides a step-by-step guide to creating pipe benders of varying complexity for working with round pipes. It also details the materials needed to create these DIY structures with minimal financial outlay.
The choice of a specific model depends directly on the size of the workpiece and the availability of the necessary tools to create a particular design. The photos and videos provided will help you understand all the nuances of this topic and create everything yourself!
In conclusion, any pipe bending tool can be made at home, provided you have the will. Therefore, for home use, there's no point in spending money on an expensive industrial machine. It can be assembled from parts you have in your garage or easily found at a scrap yard.
We hope you find our article useful and that you will make one of the pipe bender models for your own purposes.
Videos and drawings

")