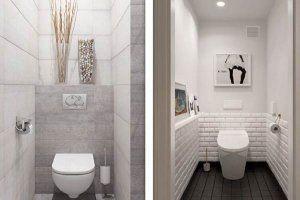
Installing a toilet on a tiled floor can be accomplished in several ways, depending on the design of the fixture. Before beginning installation, carefully read the instructions, gather the necessary tools, and perform the necessary preparatory work.
In most cases, you can carry out the procedure yourself without the help of plumbing specialists.
After completion of installation works, connecting plumbing to utilities: sewerage and water supply. It's also important to follow a specific action plan.
- Preparation for installation work
- Tools and materials
- Methods of fastening to a tiled floor
- Method No. 1 - with vertical arrangement of fasteners
- Method No. 2 - for side placement, fastening to the floor with corner brackets
- Method #3 – using sealant
- The procedure for connecting components to the toilet, connecting to the sewer and water supply
- Common mistakes
- Video instructions
Preparation for installation work
The preparatory stage consists of the following steps:
- choosing a suitable location for plumbing in the toilet, creating markings;
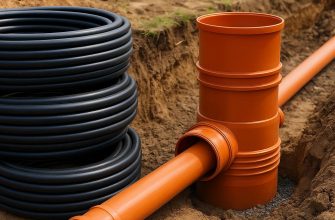
- Sewer and water supply outlets. The ends of the pipes should be approximately 13-16 cm from the surface to allow connection of the device to the utilities;
- If you're renovating a room, you'll need to lay the tiles first, then install the plumbing fixtures. Otherwise, you'll need to cut the floor tiles to the desired shape for the base.
After completing the preparation, it is necessary to prepare the necessary tools.
Tools and materials
To install on a tiled floor, you will need the following tools:
- marker, pencil or chalk to mark the outline of the base on the tile or floor;
- a drill bit for ceramics and a drill bit for plastic dowels;
- a sealant for waterproofing;
- standard set of screwdrivers;
- drill or hammer drill;
- core for cleaning the top layer of tiles;
- spanner and adjustable wrench;
- bolts for securing the toilet to the floor;
- pliers;
- grinding machine with diamond wheel;
- connecting hose;
- tap;
- adhesive (such as liquid nails) if you plan to use method #3 to attach plumbing fixtures to heated tile floors;
- plastic dowels;
- plastic spacers for bolts;
- spatula for removing residues of sealant or adhesive.
Methods of fastening to a tiled floor
There are several installation options, varying in labor intensity and technology, depending on the plumbing fixture model. It should be noted that all the procedures described below are not particularly complicated, but to ensure their proper execution, it is essential to follow the precise instructions.
To perform the last method, which involves adhesively attaching the toilet, it's advisable to have at least some renovation experience. If you don't have any experience, you can practice on a small section of the tile first.
If the bathroom floor tiles are very expensive, it's best to entrust the toilet installation to professionals. Otherwise, the flooring could be accidentally damaged during the installation process.
Types of toilet sink mounting and corresponding installation method:
- Method No. 1 – used when fastening elements are positioned vertically; dowels are used in the process;
- Method No. 2 – when the fasteners are placed on the side, the toilet is secured to the floor with corner brackets;
- Method No. 3 – using an adhesive if there is a heated floor system and communications under the floor covering.

Method No. 1 - with vertical arrangement of fasteners
This method of installing plumbing fixtures on tile floors is the least labor-intensive. It's suitable for models with pre-drilled mounting holes in the bottom. Installation instructions:
- The optimal location for the plumbing fixture is determined, taking into account the distance from the drain to the sewer inlet. This length will be required when selecting the corrugated pipe connecting the toilet to the sewer.
- The outline of the selected installation location should be marked on the tile with a marker or chalk, along with the location of the factory-preset floor mounting holes. It is important that the toilet be installed strictly perpendicular to the floor, as otherwise there is a risk of slight movement of the toilet during installation.
- At the points marked on the tile in the previous step, use a center punch to knock off the tile covering to prevent the tool from accidentally slipping during the process. It's a good idea to lightly dampen the area where you'll be tapping to ensure a more accurate job.
- After drilling holes for the fasteners, the plumbing fixtures are installed. If there are no problems and the location is satisfactory, the toilet is removed and a special sealant is applied along the marked outline. This will prevent water from pooling under the toilet. The fastener holes should also be filled with sealant to ensure a tighter, more secure fit and to waterproof the concrete screed.
- The plumbing fixtures are installed along the contour. Then, the fasteners are carefully tightened so as not to dislodge the fixture. The sealant, which will inevitably be squeezed out by the weight of the toilet, must be immediately removed with a putty knife.
- The strip of sealant is decorated using grout.
- The tank is being installed (learn how to mount the tank yourself) and corrugated pipe, plumbing is connected to the sewer system and cold water supply pipeline.
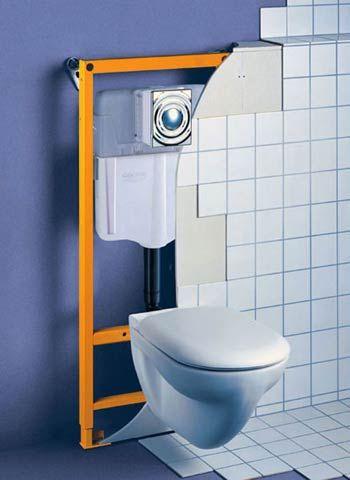
Method No. 2 - for side placement, fastening to the floor with corner brackets
This method involves installing plumbing fixtures with concealed fasteners. This procedure is more complex than the previous one, as it must be performed only according to a clear sequence of steps. The main difference is the close proximity of the waste outlet to the toilet.

Instructions for attaching a toilet to the floor:
- Unlike the previous method, this option recommends completing all pipe installation work first. Ideally, this should be done before laying the floor tiles.
- The plumbing is installed without fastenings; an outline is drawn on the floor and marks are placed indicating the points of fastening elements.
- The lower toilet component (the so-called "concealed mounting") is mounted to the floor. The plumbing fixture is secured using corner brackets. The fasteners must be tightened one at a time, ensuring that the contour is maintained at all times. This ensures a secure installation and prevents even the slightest movement of the fixture.
- The upper component of the product is installed into the already installed lower component and then securely fastened through the pre-fabricated side openings of the toilet. Adjustments can be made during the sewer connection process.
After the product is fully installed and the quality of the installation is checked, the elements used for floor fastening are covered with special decorative caps (to ensure these parts blend into the interior design). This procedure is of moderate complexity and requires extreme care and attention to detail.
Method #3 – using sealant
Quite often, electric or water-based underfloor heating systems are installed in bathrooms, so drilling individual mounting holes is not recommended. This can lead to significant operational disruption, as it increases the risk of damage to cables or waterproofing.
In such a situation, the only solution is to use construction adhesives. Liquid nails, certain silicone compounds, and resins can be used to secure the toilet to the tiled floor.

Algorithm for installing a toilet on a tiled floor:
- Place the plumbing fixture and mark the outline of its base on the tile.
- The surface layer of the tile is carefully scraped using a diamond wheel or similar tool. The resulting roughness will ensure a secure bond with the toilet base. The toilet bowl is cleaned in a similar manner.
- A layer of adhesive is applied 3-4 mm from the created contour, ensuring that most of it remains directly under the plinth. Any excess that squeezes out after installation must be immediately removed with a spatula. If this is not done, the adhesive can only be removed along with the ceramic tile after it hardens.
The procedure for connecting components to the toilet, connecting to the sewer and water supply
 The procedure for attaching components to a toilet after it's installed on a tiled floor consists of the following steps:
- A corrugated pipe is installed, through which the product will be connected to the sewer pipe. This element prevents the spread of foul odors in the apartment, so it is important to use high-quality corrugated pipe. During installation, the pipe must be supported with both hands, so assistance will be required.
- The flush tank is secured using bolts and other parts included in the kit.
- The plumbing is connected to the water supply.
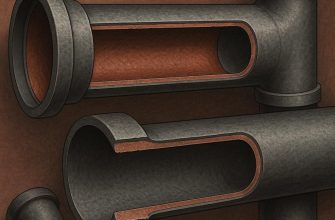
The procedure for connecting to the sewer system depends on the design of the toilet, in particular, on the type of outlet:
- Models with a direct outlet are the most common. Although they can only be installed on a vertical riser at a certain angle, the installation process is quite simple. Connection to the sewer system is accomplished using a sealing or eccentric collar;
- Toilets with vertical outlets are also quite common. Their main advantage is the ability to be installed at a minimum distance from the wall and at any angle. Before installing the plumbing, you'll need to install a flange with a locking device, then connect the sewer line to it and install the toilet on top.
- The installation of a model with a side outlet is similar to that of a straight outlet model, but it is important to maintain a certain angle. This procedure uses an eccentric or sealing coupling.
In most cases, a corrugated pipe is used to connect directly to the sewer outlet. This allows you to not only adjust the distance between the toilet and the sewer outlet but also change the slope.
The presence of a membrane inside the corrugated pipe ensures a tight seal, but silicone sealant is often additionally used for waterproofing.
When installing the corrugated pipe, it is important to prevent it from sagging, otherwise liquid will stagnate in it and blockages will often form.

Connection to the water supply also varies depending on the toilet design:
- If you have an internal water supply system, a flexible hose or special copper tube is used for connection. Typically, such components are sold complete with floor mounting hardware, but it's recommended to check this with a consultant. Sometimes, the faucet threads and the copper tube threads don't match, requiring an adapter and sealing elements.
- With an external water supply system, connection is the simplest. Typically, no additional parts are required.
Regardless of the method of connection to the water supply, all connection points must be covered with a special sealant for plumbing fixtures to ensure waterproofing and minimize the risk of leakage.
Common mistakes
If the plumber doesn't follow the proper procedure when installing a toilet on a tiled floor, the result could be improper functioning of the plumbing fixture, damaged waterproofing (leaks), and the spread of an unpleasant odor throughout the room.
Common mistakes when installing on tiles:
- Uneven toilet placement – to avoid this, it's important to use a spirit level at every stage. Failure to level the toilet can lead to poor waterproofing and damage to the plumbing.
- Insufficient application of silicone-based sealant to the joints. The sealant should also be applied to the contour of the corrugated pipe and toilet base. This error most often results in puddles forming under the fixture or drain pipe.

- During bathroom renovations, debris sometimes gets into the installed toilet. Before connecting the plumbing, it's important to check all components to ensure there are no foreign objects. Otherwise, it could cause a clog.
- Insufficient sealing of the tank valves or their damage can lead to leakage of the tank after a certain period of time.
Therefore, you can install a toilet on a tiled floor yourself. The appropriate installation method will depend on the model's design.
After installation is complete, the following may occur: toilet cistern leaking due to careless installation, see common causes and methods for eliminating them.
When performing the installation, it's important to strictly follow the instructions to ensure a high-quality installation. It's worth noting that if the apartment owner is unsure of their own abilities, it's best to entrust the installation work to professionals.