People who install chimneys and exhaust ventilation systems themselves often ask for a detailed explanation of what a deflector is.
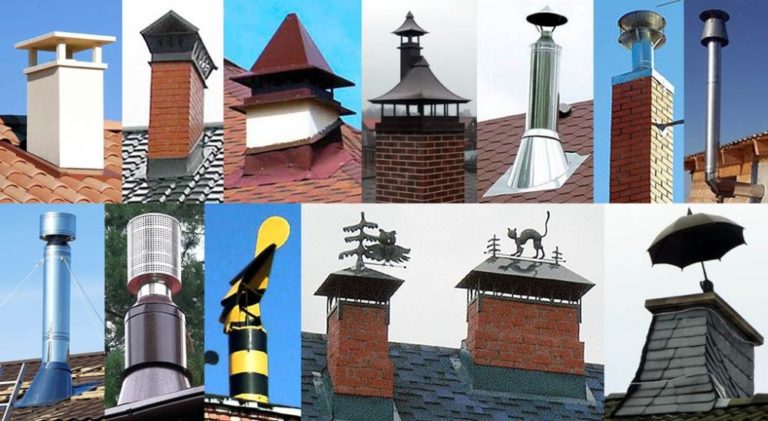
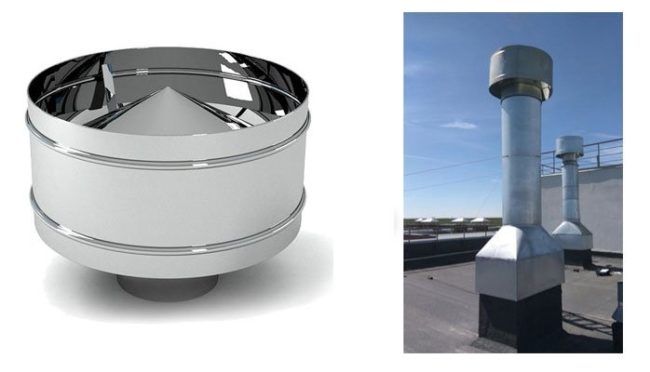
A deflector is an aerodynamic, cap-shaped attachment installed over a chimney or ventilation duct to ensure effective air exchange. Using a deflector reduces pressure at the top of the duct or chimney, promoting natural draft.
I decided to dedicate a separate article to this topic, where I'll discuss the purpose, design, and operating principle of the caps. I'll cover the issue. classification, size range, their pros and consI'll do it. review of popular modelsI'll tell you, How to make a deflector yourself and the specifics of roof installation.
- Purpose of the deflector
- The design and operating principle of the heads
- Operating principle
- Pros and cons of using deflectors
- Classification of ventilation heads
- Size range
- Review of effective ventilation hood models
- The simplest cap
- Volpert-Grigorovich cap
- TsAGI nozzle
- Astato static-mechanical ventilation nozzle
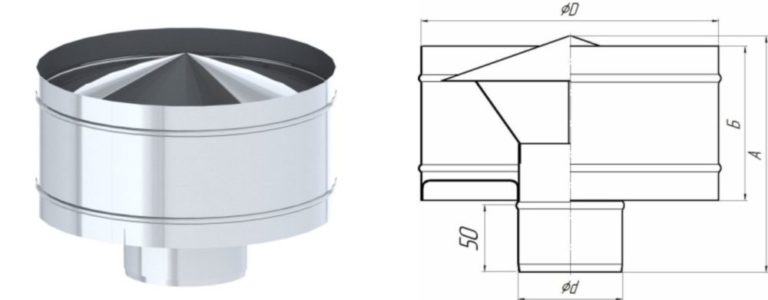
- Ventilation deflector DS
- Turbo deflector
- Rotating weather vane
- H-shaped peakless module
- Which model to choose?
- We make a TsAGI deflector with our own hands
- Rules for installing deflectors
- DIY video
- Answers to current questions
Purpose of the deflector
Job natural exhaust ventilation It directly depends on atmospheric conditions. The draft in the chimney is generated by the difference in temperature and pressure between the outside and inside the building.
Wind influences the operation of the engineering system. Gusts can increase or decrease draft, depending on the strength and direction of the currents.
Installing a deflector on the pipe reduces the impact of atmospheric conditions on ventilation. The cap directs wind currents in the correct direction, increasing the speed at which dirty air is removed from the building through the ducts.
Additionally, the ventilation nozzle performs the following tasks:
Using a deflector increases the efficiency of natural ventilation by up to 20%.
The design and operating principle of the heads
Ventilation caps vary in shape, design, and size. They range from simple mushroom-shaped caps to complex spherical and H-shaped caps. Regardless of design, all models share three basic structural elements:
Some deflectors, such as the DS, are equipped with a filter mesh. The screen traps small debris, including dust, but reduces draft.
Operating principle
The head unit operates based on Bernoulli's law. A relationship is established within the housing between the air exhausted from the exhaust duct and the pressure. The narrowing of the air duct by the diffuser accelerates the flow velocity. The pressure in the pipe decreases, creating a vacuum.
Let's look at the operating principle step by step:
- The head mounted on the pipe captures the air flow.
- The air mass entering the housing is directed into the diffuser, where it is subsequently divided into streams that help reduce the pressure at the outlet of the ventilation shaft.
- Exhaust air exits the building through a shaft into the resulting vacuum. Wind gusts carry the polluted air into the atmosphere.
At the outlet of a ventilation shaft or chimney, the pressure difference increases when the head is properly sized and installed at the correct height. As this difference increases, so does the air exchange rate.
Pros and cons of using deflectors
The roof vent or chimney outlet must be terminated with a cap. There's no doubt about the necessity of installing a cap. I suggest considering the pros and cons to gain a general understanding of the design's usefulness.
Pros:
- protection of the channel from precipitation, debris, and bird penetration;
- increased traction;
- reducing the likelihood of reverse thrust;
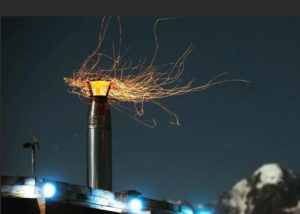
- extinguishing sparks on the chimney.
One of the downsides is the potential for ventilation problems when upward wind currents hit the cap. To prevent this, I recommend installing a cap with two cones.
Classification of ventilation heads
Deflectors are classified by the material they are made of. Galvanized, stainless steel, and aluminum caps are considered the most user-friendly. Copper products are expensive. Plastic and ceramic constructions are short-lived.
The main classification is based on design features:
- Static – have no moving parts.
- Rotary – consist of a stationary base and a rotating element with blades.
- Static fan-assisted units consist of a stationary base. To forcefully remove contaminated air, the design is supplemented with an axial electric fan.
- An ejector wind vane with a rotating body consists of a stationary base and a rotating cap on a bearing. A weather vane mounted on the top ensures rotation in the direction of the wind.
The heads can be open or closed with an outer casing.
The shape is selected to match the exhaust duct: round, square, or rectangular. Adapters can be used to install round heads on rectangular pipes.
Size range
Review of effective ventilation hood models
Roof ventilation deflectors vary in design, which affects the efficiency of the engineering system.
The simplest models without electrical equipment provide natural passage of air masses.
Hoods with a fan and automation enhance draft and automatically regulate the speed and volume of air exhaust through the exhaust duct.
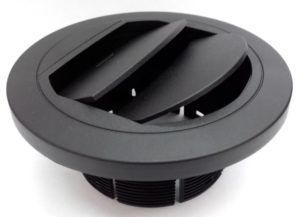
The simplest cap
A mushroom-shaped cap is often seen on ventilation and chimney stacks in private homes. Theoretically, the structure acts as a deflector. In practice, the umbrella merely prevents precipitation from entering the chimney. The cap has little effect on draft intensity.
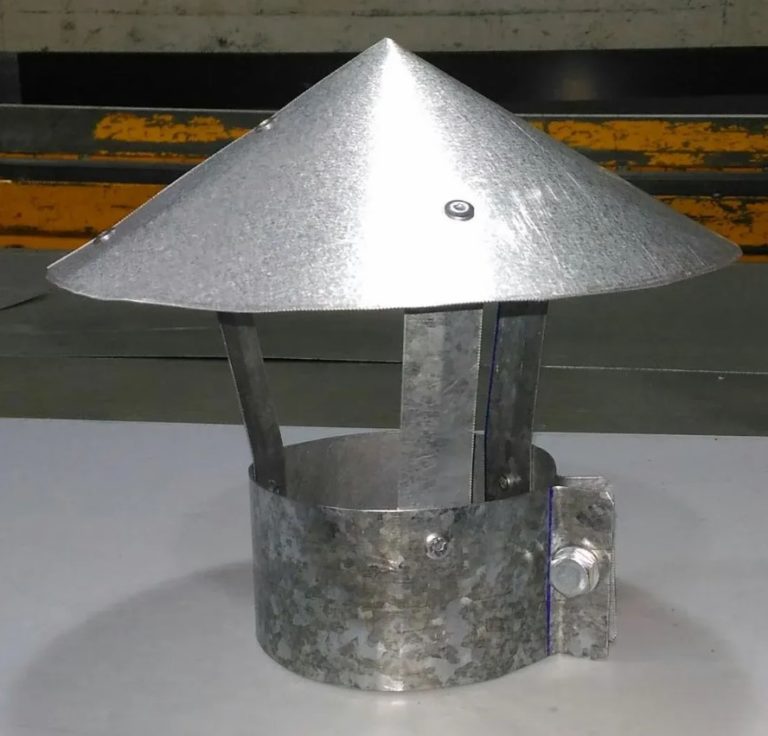
The mushroom's popularity stems from its simple design. To make it, simply shape it into an umbrella from a tin circle, attach three strip legs with rivets, and use a clamp to secure it to the pipe.
Volpert-Grigorovich cap
The model's popularity is due to its efficiency and ease of manufacture. The cover is easy to make yourself from galvanized sheet metal. It consists of five parts:
- tapered diffuser;
- 3 racks;
- conical umbrella;
- reverse cone cap;
- ring for fixing on a round exhaust pipe.
If you install a cap on a rectangular chimney, use an adapter.
The design is a cone-shaped structure that flares downwards. A reverse cone-shaped plate is attached under the cap. This creates an additional air flow without creating a pool of air under the cap.
Due to the narrowing of the channel, the flow velocity under the lower cone-shaped plate increases. Draft is improved by increasing the pressure difference.
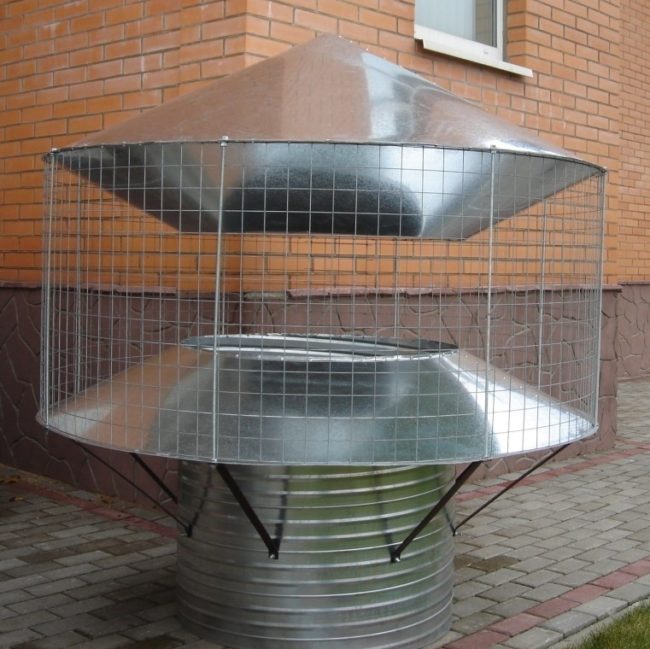
TsAGI nozzle
The design is intended to increase draft by exploiting wind pressure and the resulting pressure differential. A standard conical cap on three legs is installed inside the nozzle. The outside of the umbrella is covered by a cylindrical screen attached to the poles.
The nozzle's features include the ability to be mounted on an air duct using a flange, bandage, rails or a nipple.
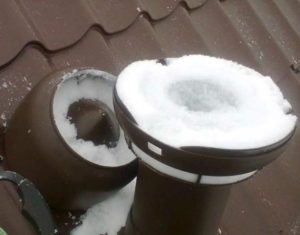
I consider the formation of ice on the inner walls of the cylindrical screen in winter to be a serious drawback.
As the ice thickness increases, the outlet becomes blocked.
The nozzle is sensitive to wind currents. During calm weather, draft resistance is created inside the housing. The deflector is convenient for home ventilation due to its easy DIY construction and durability.
Apart from rare cases of icing, the TsAGI nozzle does its job perfectly.
Astato static-mechanical ventilation nozzle
The deflector is named after the French company that developed it. The manufacturer has included a fan for active operation.
After the engine starts, the ventilation duct maintains its aerodynamic performance. A vacuum equal to the combined air pressure and fan thrust is created.
The deflector can operate in passive mode with the motor off. The vacuum created is equal to the sum of gravity and wind pressure.
The deflector is installed on single-story and multi-story buildings. A nipple connection is provided for round pipes. For rectangular ducts, the nozzle is attached via an adapter.
I consider the high cost of the model with a two-speed fan to be a disadvantage – from 1300 to 4000 USD.
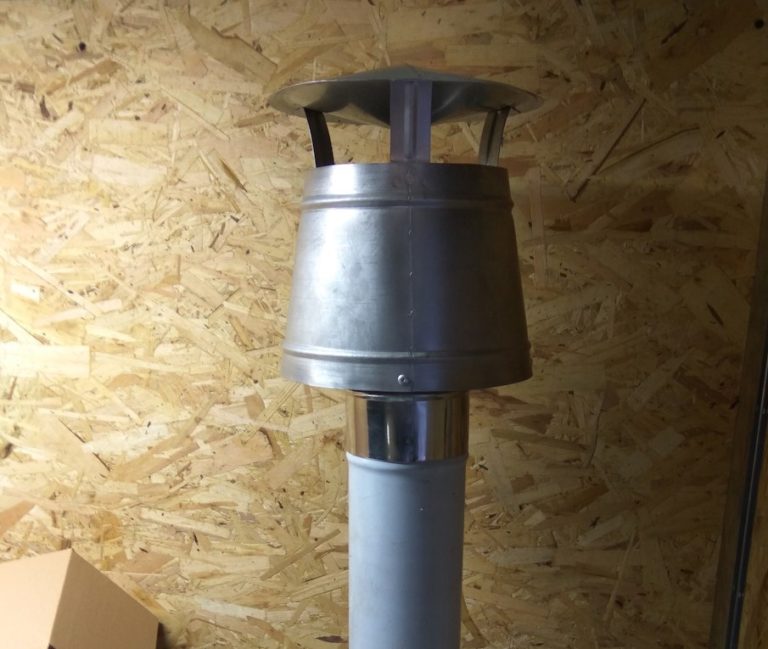
Ventilation deflector DS
The DS nozzle looks like a copy of the Astato. It differs from the French deflector by the lack of an electric fan or other moving parts.
Three conical plates are installed inside the housing. One of the truncated channels of the hood is located above the exhaust duct.
The thrust is increased by additional vacuum created by the pressure difference inside and outside the deflector body.
In the original design, the hood is installed on the exhaust hood to naturally exhaust air from the building. It can be combined with a fan, which must be purchased separately.
A wind flow passing through the deflector at a speed of 5-10 m/s increases the draft to 10-40 Pa. Maximum performance is observed at 50% outside air humidity and a temperature of +25OC, deviation from the horizon of the wind flow 30O.
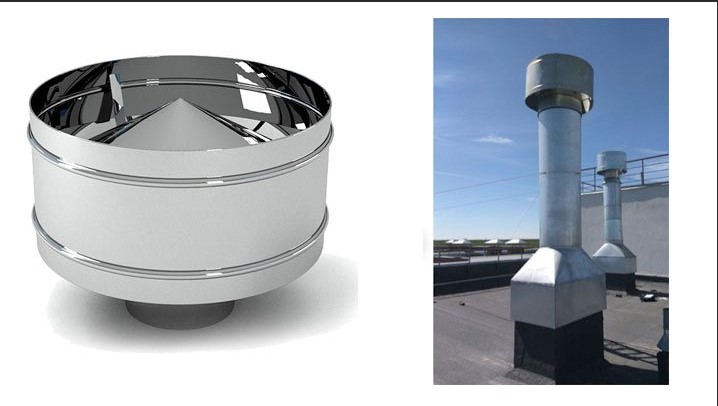
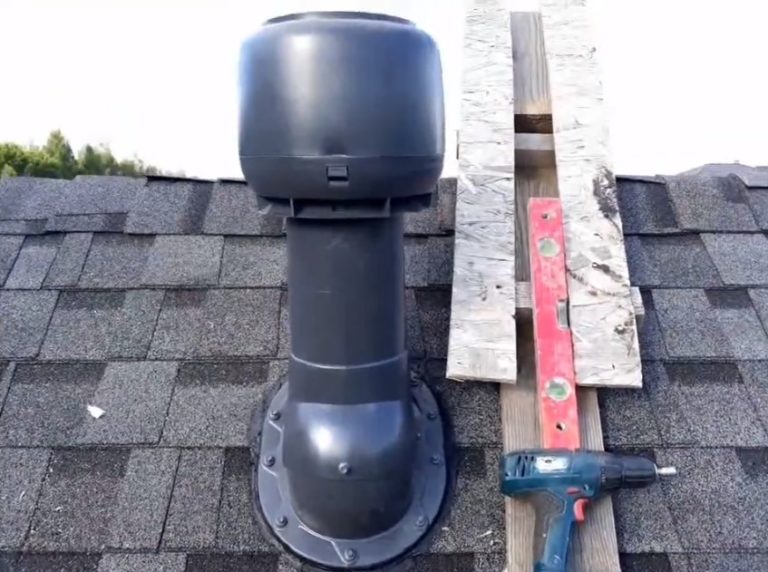
Turbo deflector
The rotary attachment is made of a rotating spherical head and a fixed frame.
The turbine element resembles a drum with thin metal blades. Rotation is initiated by a light wind speed of 0.5 m/s in the direction of the flow.
A partial vacuum is created under the hood. A vacuum is created at the end of the duct, reducing the likelihood of backdraft.
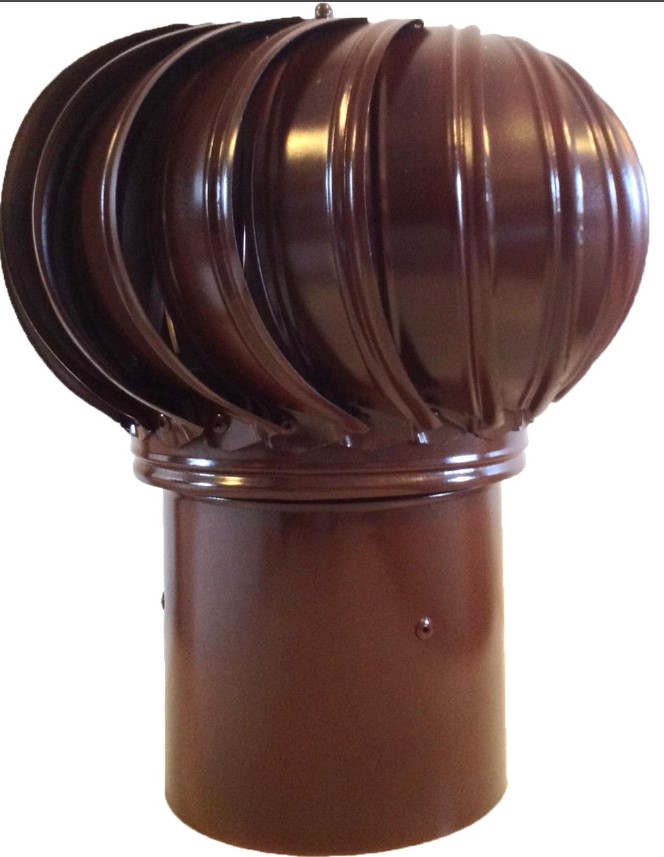
Compared to hoods without moving elements, the turbo deflector increases the efficiency of air removal from the hood by up to 4 times.
In hot weather, hot air is quickly removed from the room, saving on air conditioning costs. Condensation and ice rarely form inside the rotating spherical hood.
Energy-efficient operation is achieved by eliminating the need for an electric fan. In addition to dirty air, the turbo deflector extracts dust, steam, and heavy gases from the ventilation duct.
During calm weather the rotary nozzle does not work, which I consider to be the main drawback.
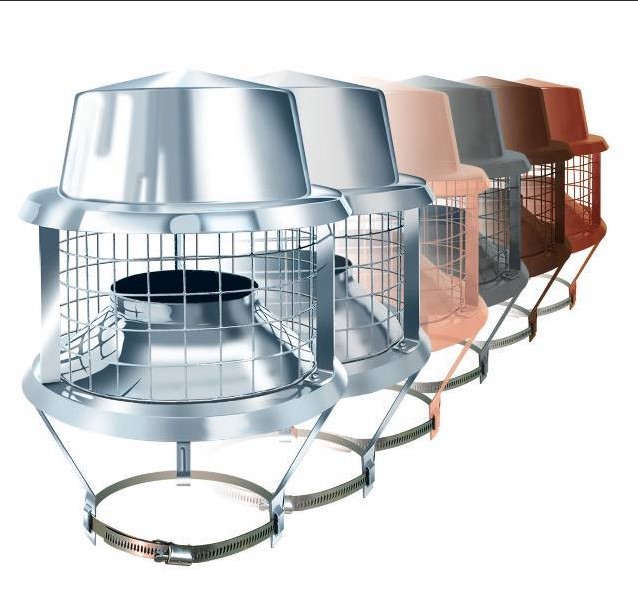
Rotating weather vane
The attachment consists of a set of bent visors, mounted for rotation on a bearing assembly. The shape of the cap resembles a hood or a fishing net, which has given rise to additional names for the design.
The top of the canopies is equipped with a weather vane. The guide element rotates the cap in the direction of the wind.
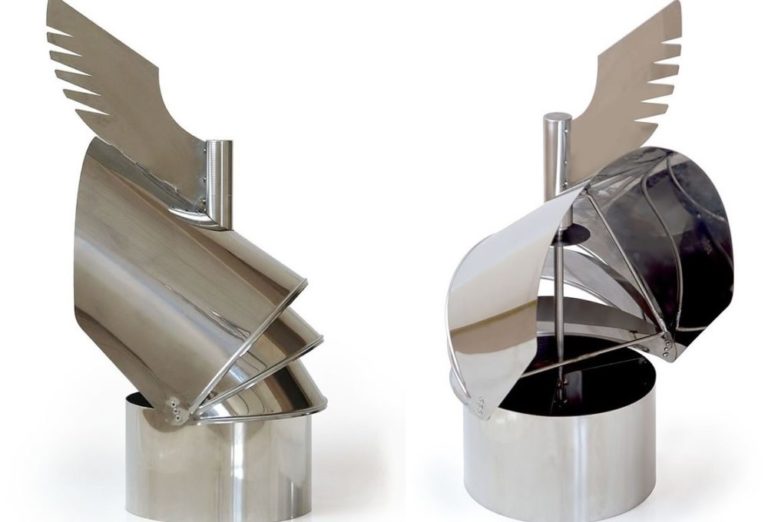
The special design of the weather vane affects the operating principle:
- the wind flow turns the weather vane together with the cap along the line of wind movement;
- air flows penetrate under the hood between the gaps of adjacent visors;
- under the cap the flows are redirected upwards;
- according to the laws of aerodynamics, a vacuum is created due to a drop in pressure and an increase in the speed of moving flows;
- The draft in the exhaust pipe increases, additionally creating conditions for the forced removal of dirty air from the building.
The weather vane has a complex design. I do not recommend this model for self-production.I'd like to point out the limitations of the work. A weather vane on the exhaust vent is effective. at a wind load of no more than 0.8 kPa.
H-shaped peakless module
The nozzle is not typically installed on residential roofs. The module is used on exhaust shafts and chimneys of industrial buildings.
A deflector installed on a ventilation pipe can increase draft by directing air flows into vertical elements and then sucking out dirty air through horizontally located tubes.
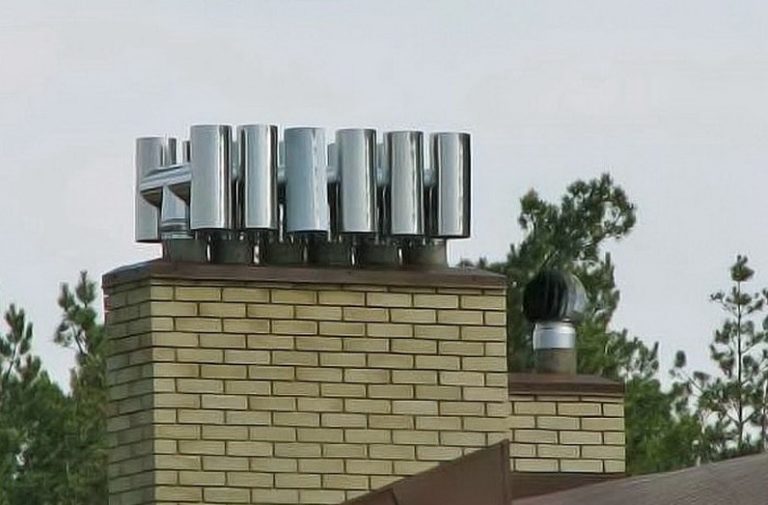
The top of the module is not covered by a canopy. Horizontal tubes provide protection from precipitation. The H-shaped deflector is most effective in windy conditions with strong gusts.
To remove dirty air from the building, wind currents directed from the bottom up are used.
Which model to choose?
For DIY, efficient models of range hoods for a private home, I recommend Volpert-Grigorovich and TsAGI hoods. If you're buying one, consider a rotating vane or turbo deflector.
Despite its industrial purpose, craftsmen have learned to make H-shaped deflector from PVC sewer pipe fittings. The attachment is installed on the exhaust vent of a country house or outbuilding.
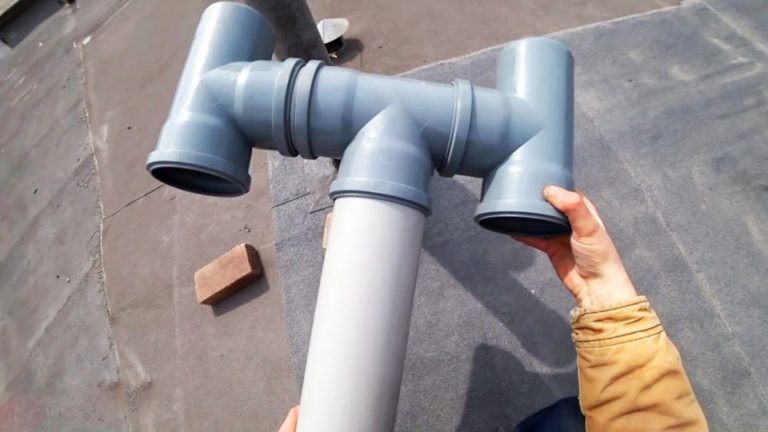
An H-shaped deflector is assembled on the chimney from three galvanized or stainless steel tees to prevent it from melting under the influence of high temperatures.
We make a TsAGI deflector with our own hands
The Grigorovich cap, shaped like a mushroom, is easier to manufacture. I recommend not taking the easy way out and opting for the TsAGI deflector. It's no more difficult to manufacture, but it can enhance draft and prevent the reverse effect.
For this project, you'll need galvanized sheet metal, metal shears, a hand riveter with rivets, and a marking tool. Once the materials are prepared, we begin fabricating the TsAGI:
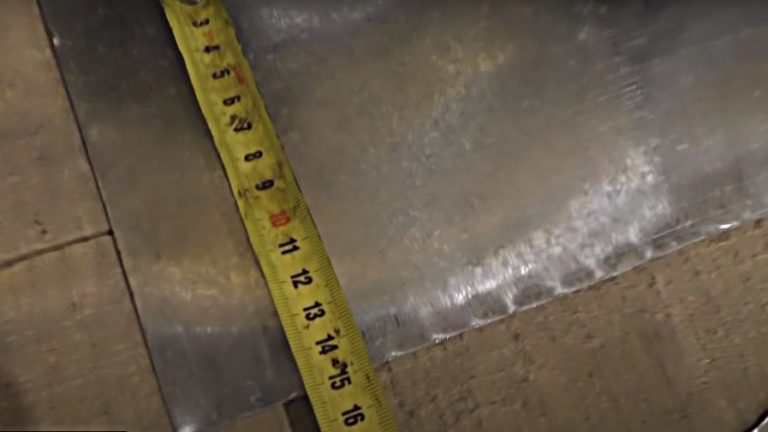
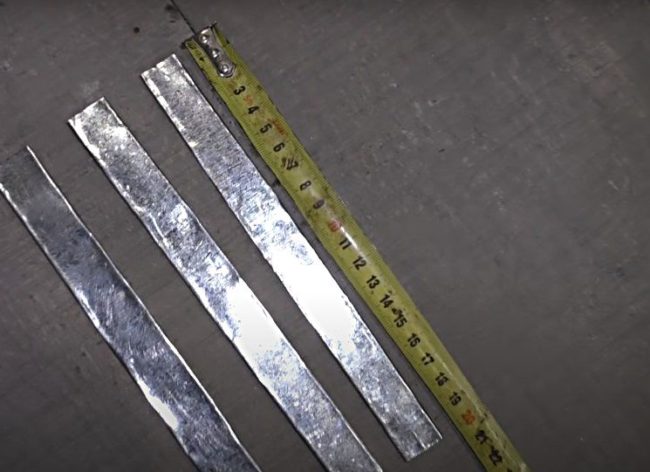
- Mark the parts on the galvanized sheet. Use metal shears to cut out a rectangular strip measuring 15 x 90 cm. This blank is needed to make the cylindrical body.
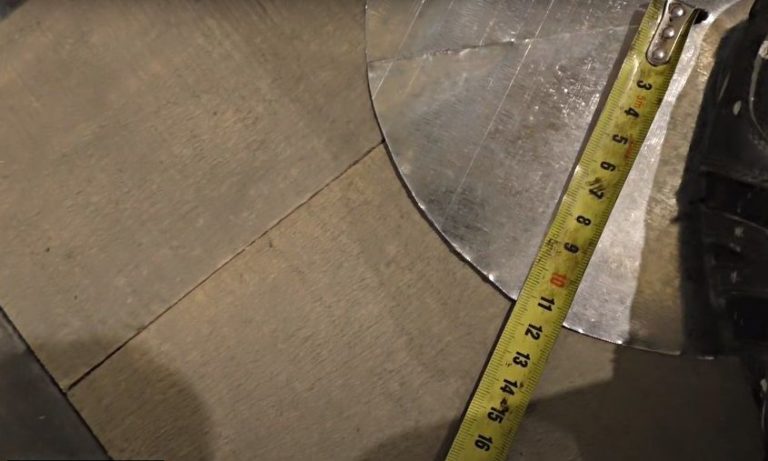
- To make an umbrella from galvanized steel, cut a circle with a radius of 11.5 cm. To give the piece a conical mushroom shape, make a cut from the center to the edge. Bend the circle with your hands so that the cut edges overlap. The resulting umbrella should resemble a small cone.
- Clamp the resulting cone at the junction of the cut edges with a planer. Check the shape of the workpiece and ensure the joints fit tightly without distorting the metal.
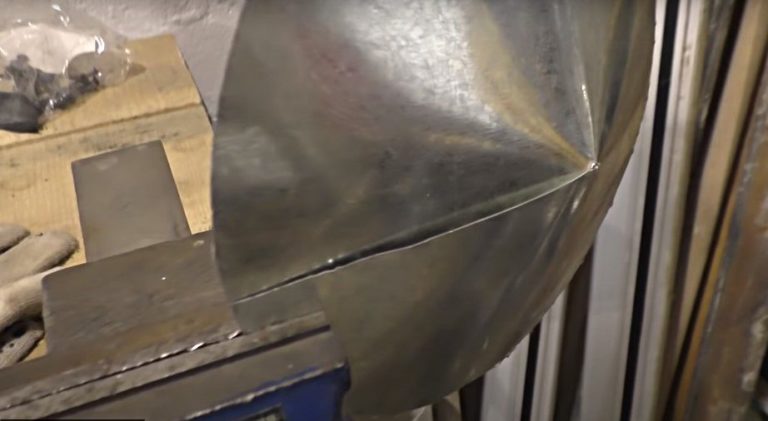
- Drill holes along the cone joint to catch the overlapping edges of the metal. Using a hand riveter and rivets, join the umbrella seam.
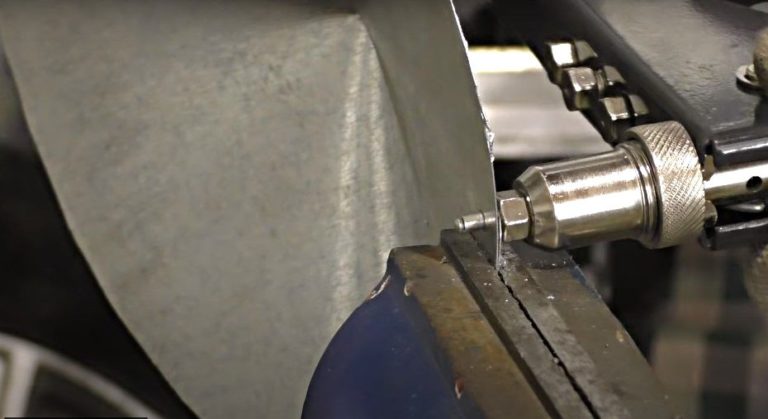
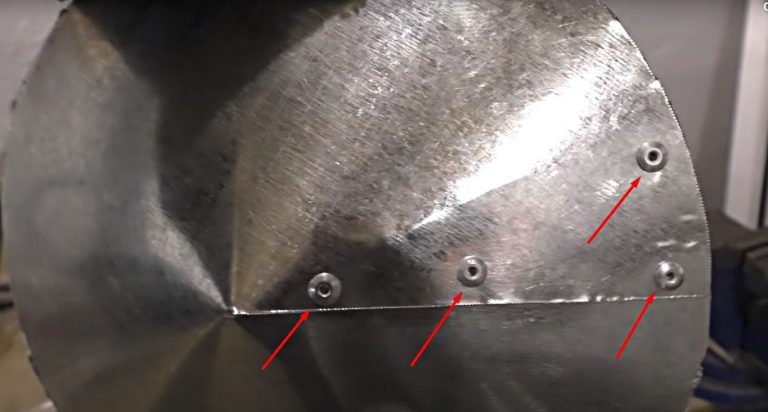
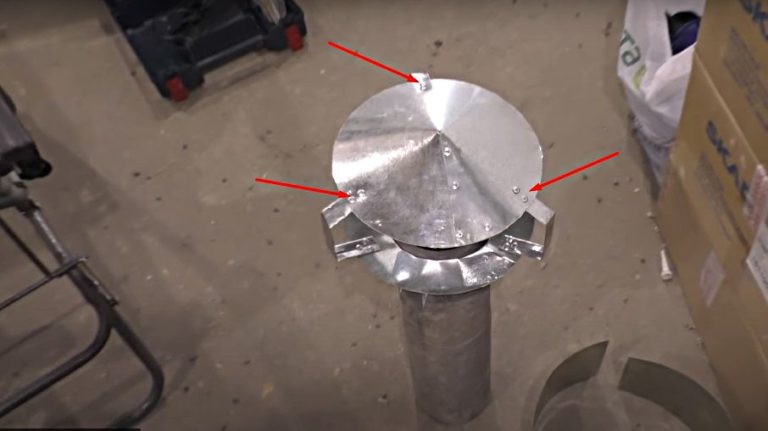
- To ensure a secure joint, install three rivets at equal distances along the outer seam. Use a fourth rivet to secure the edge of the metal at the back of the umbrella.
- Cut a second circle of the same size from galvanized steel. Form it into another cone, but secure the joint at the edge of the umbrella with three rivets. This blank will be used to make an adapter between the ventilation pipe and the hood.
- Draw the petal markings from the center of the cone.
- Cut off the tip of the cap with a hacksaw.
- Use metal scissors to cut the petals and bend them at a 90 degree angle.O into the convex side of the cone.
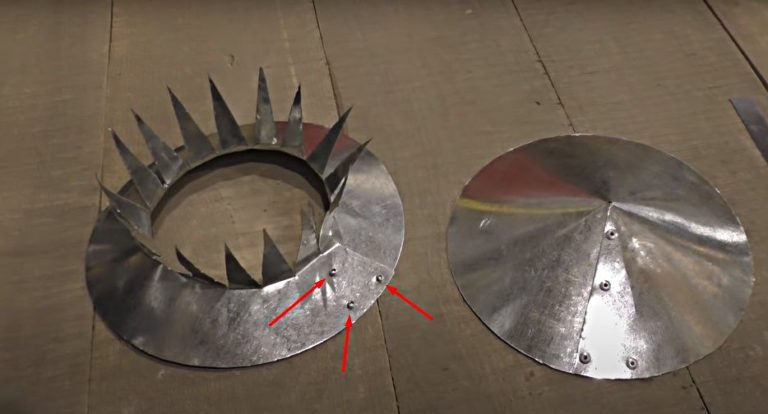
The result should be a ring-shaped part with a hole equal to the diameter of the exhaust pipe.
- Temporarily place the resulting ring onto the exhaust pipe, petals down. Try it on to ensure the pieces fit.
- To connect the bottom ring to the top umbrella, make three posts. Cut three strips of galvanized steel, each 20 cm long and 2-3 cm wide.
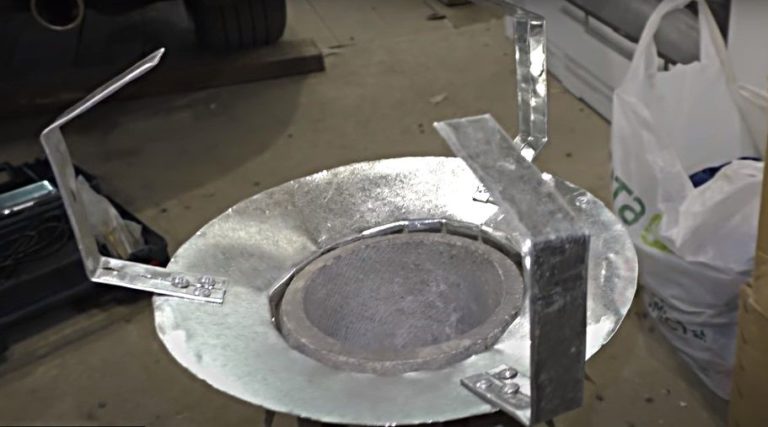
- Place the prepared strips evenly spaced on the lower deflector ring. Secure each piece with three rivets.
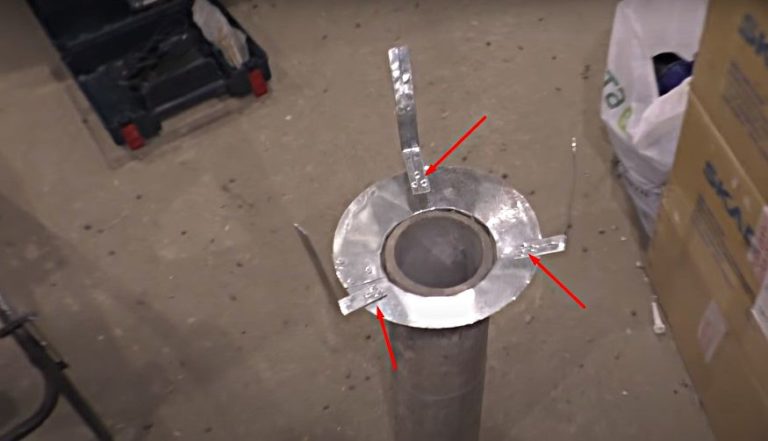
- Bend the posts into a "U" shape to create lateral projections extending beyond the umbrella and the bottom ring. Their contours should match the inner diameter of the cylinder that serves as the deflector body.
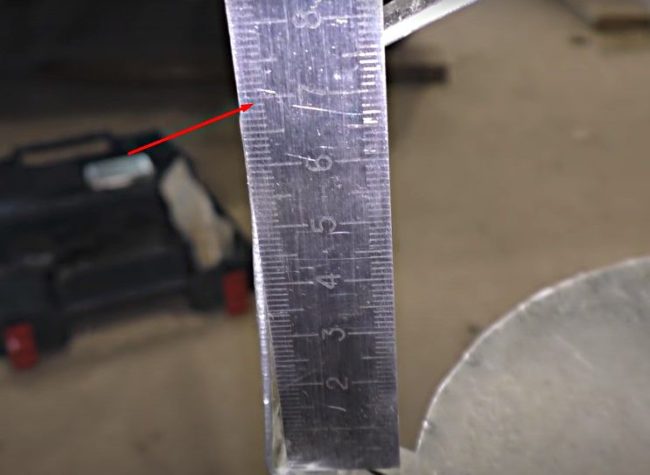
- The uprights, when already curved, should have vertical sections 7 cm high. Check the dimensions with a ruler.
- Place the umbrella on the posts. Mark the mounting locations. Drill two through holes in each post. Connect the pieces with rivets.
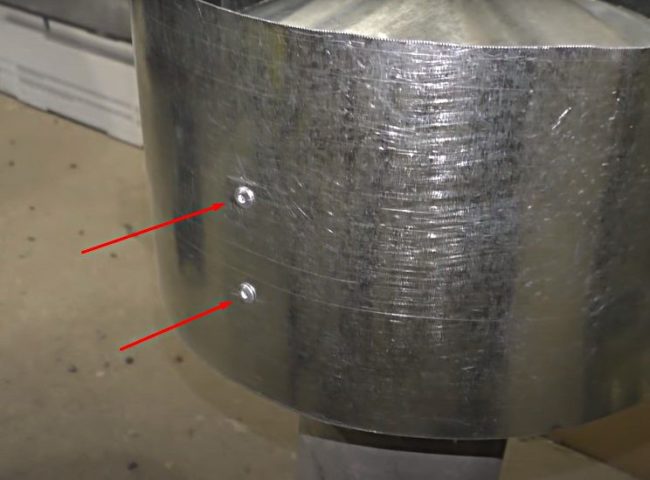
- Bend a ring from a rectangular galvanized sheet measuring 15 x 90 cm, but do not join the edges yet. Test the piece against the vertical uprights. Mark the holes for the rivets.

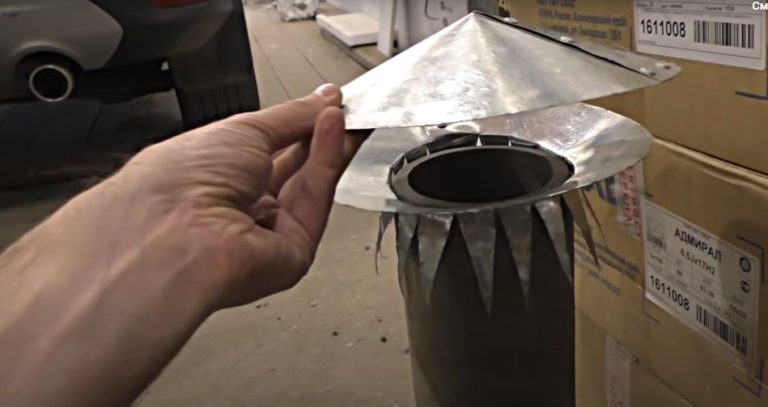
- Drill through holes according to the markings. Secure the casing to the posts with rivets. Join the overlapping edges of the ring itself.
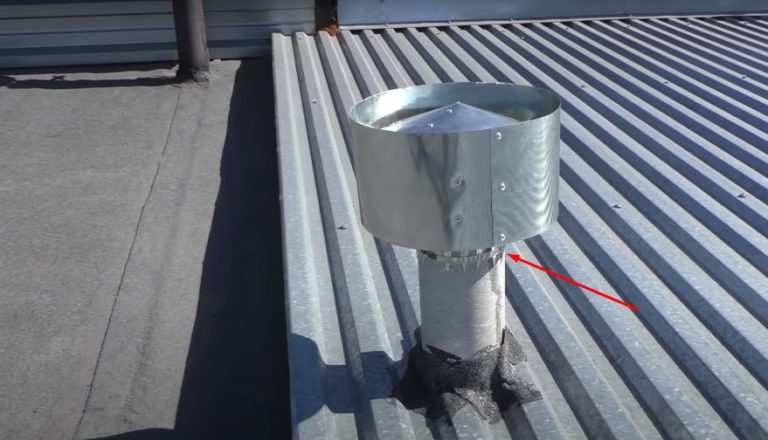
Attach the finished deflector to the exhaust pipe. Secure the petals to the duct walls with a clamp. The TsAGI deflector is ready for use.
Rules for installing deflectors
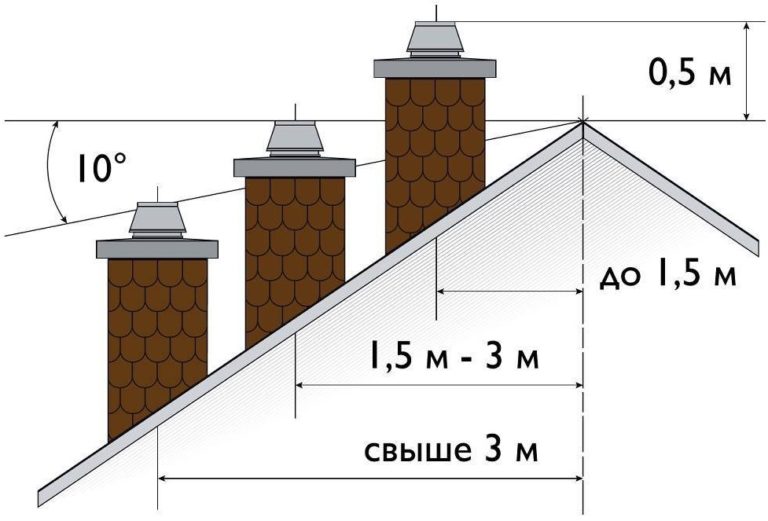
For proper ventilation, a purchased or homemade exhaust deflector must be installed correctly. This isn't about how it's attached to the chimney, but rather how it's positioned on the roof. To create draft, position the deflector relative to the roof surface at the following height:
- above 50 cm from the ridge or parapet of the roof, when the exhaust duct is located less than 1.5 m from the highest point of the roof;
- above or at the same level as the ridge girder, when the distance between the air duct and the parapet is from 1.5 to 3 m;
- at or above the level of an imaginary line drawn at an angle of 10O from the top of the ridge to the top of the cap on the pipe, when the distance between them exceeds 3 m;
- above 50 cm from the roof anywhere on a flat roof.
Neighboring tall buildings can create an aerodynamic shadow. A similar situation occurs on the roofs of single-story private homes surrounded by dense tree cover.
Installing an exhaust deflector in the aerodynamic shadow area is pointless. For the exhaust hood to function properly, place the unit in an area free of wind. Regardless of the roof shape, the deflector should extend above the highest point of the roof.
DIY video
Answers to current questions
A deflector refers to a cap (protective hood) on a ventilation pipe or chimney.
An aerodynamic cap is used to enhance draft within a ventilation duct or chimney. The cap seals the chimney opening from precipitation and birds.
The deflector operates according to Bernoulli's law. Outdoor wind currents pick up the dirty air exiting the room through the pipe. As the airflow increases, the draft increases.


