The problem of poor ventilation in a room manifests itself in the formation of stale air. A person has difficulty breathing and illnesses progress, mold appears in the roomThe issue can be resolved by restoring air exchange by installing an exhaust hood and an air intake device, but proper calculations are required for the system to function properly.
In this article, we'll discuss in detail how to install ventilation in a room or improve an existing system, including the materials and tools needed. We'll also review utility system diagrams and ventilation equipment. We'll also look at calculation examples and installation instructions for ventilation units.
- Methods of providing air exchange
- Natural air exchange
- Mechanical air exchange
- Mixed air exchange
- Ventilation design, development of schemes
- Calculating the air volume for a room
- Choosing a location for vents and fans
- Materials and tools for ventilation installation
- Instructions for creating a flow from an adjacent room
- Instructions for creating an inflow from the street
- Installation instructions for an internal wall-mounted recuperator and breezer
- Ventilating a room with an air conditioner
- Room ventilation from a centralized system
- How to improve ventilation
- Maintaining ventilation in working order
- Answers to current questions
Methods of providing air exchange
Ventilation is the complete cycle of replacing stale air with fresh air in a room per unit of time, taking into account standard volumes. There are three methods of providing air exchange: natural, mechanical, and mixed.
The ventilation type is determined individually for each room in a house or apartment. Calculations take into account the room's volume, intended use, and the expected number of permanent and temporary occupants.
Natural air exchange
This method is commonly known as airing a room through open windows and doors. From an engineering perspective, natural ventilation refers to the process of moving air masses through specially designed vents.
Both room ventilation options are characterized by the absence of fans. Air is moved by the difference in temperature and pressure between the outside and inside the room.
In a classic design, the supply vent is located at the bottom and the exhaust vent is at the top. The vents in the room are positioned opposite each other. Fresh air entering through the supply vent is circulated throughout the entire room.
The air flow collects moisture vapor, unpleasant odors, and other pollutants while simultaneously warming up. Warm air is lighter than cold air. The heated air rises to the room ceiling and is discharged outside through the exhaust hood. The circulation cycles repeat.

The only mechanical equipment used in natural ventilation is a check valve. It is installed in the supply and exhaust vents to prevent draft reversal. The mechanism's operation does not affect the flow rate.
Natural ventilation of a room requires no energy, which is an advantage. A major disadvantage is its dependence on weather conditions.
Draft decreases or reverses when the air conditioner is running indoors in the summer when the temperature outside is warmer than the temperature inside. A similar problem occurs when wind direction and atmospheric pressure change.
Mechanical air exchange
The ventilation system features forced air exchange. Fresh air from outside is drawn in through the intake vent by a fan and directed into the room. Exhaust air flows into the exhaust hood. The exhaust fan expels stale air outside or into the common building duct.
Disadvantages include the utility system's dependence on electricity. Equipment installation and maintenance costs increase. These disadvantages are outweighed by the advantages of mechanical air exchange. Ventilation is independent of weather conditions, temperature differences, and pressure fluctuations. Standard air exchange is maintained in the room 24 hours a day.
Those who regularly ventilate their rooms often wonder how to improve ventilation by converting the natural ventilation system to a mechanical one. There are two modernization options: installing fans on the supply and exhaust ducts or installing air conditioning equipment.
The advantages of the first option are its simplicity and low cost. The average cost of a fan is 1,500-11,000 rubles, depending on the manufacturer and technical specifications.
A device with a power output of 12-24 W is sufficient for one room, indicating low energy consumption. Powerful fans with a power output of approximately 70 W are designed for larger rooms. For DIY installation, simply secure the device to the exhaust and supply vents with hardware.
A disadvantage of fans compared to air conditioning equipment is their inability to provide a comfortable microclimate in a living room. The blades of a fan merely accelerate air movement. A wall-mounted or duct fan cannot regulate temperature, humidity, or act as an ionizer.
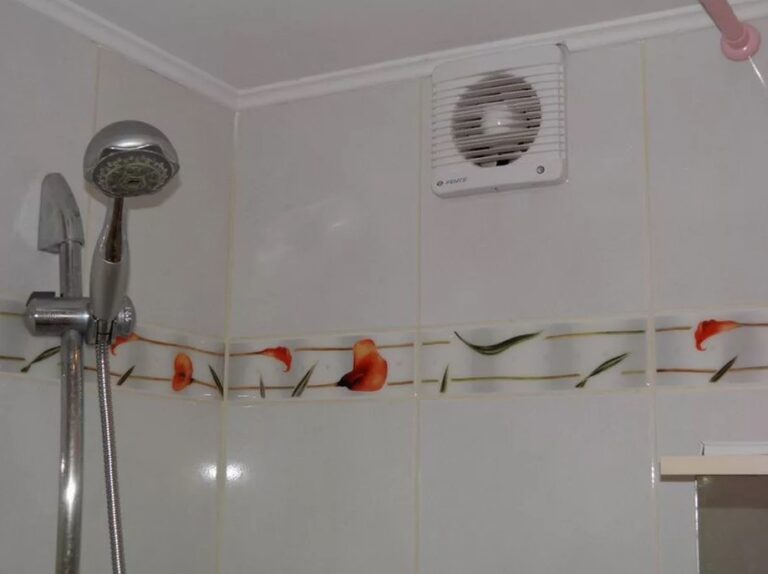
It is better to place the devices in the dressing room, pantry, bathroom And kitchenWall fans are convenient when you need to ventilate a closed utility room that doesn't have windows for regular ventilation.
The advantages of the second option lie in the equipment's versatility. HVAC equipment includes air conditioners with ventilation functions, recuperators, and air breezers. The unit delivers fresh air to the room, filtering the air.
To improve the microclimate, ionization, humidity, and temperature control are provided. The number of functions depends on the equipment model.
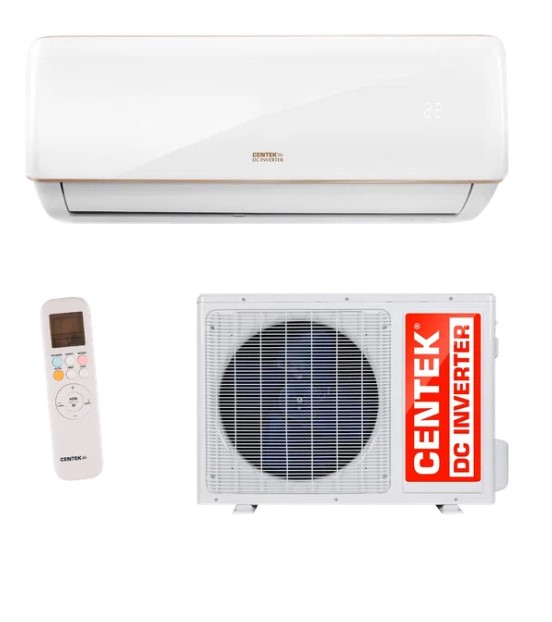
It's more cost-effective to install an air conditioner in the living room. There's a huge selection of models, from portable and mini units to wall-mounted units. A split system is convenient for providing ventilation between rooms with air flow. One unit will be installed outside, and each room will have its own module, but the units will operate in the same mode.
The cost is determined by the air conditioner's specifications. For example, let's take the CENTEK CT-65EDC09 split system with ventilation. The equipment is designed to air condition 40 m2The split system has a power of 9 BTU and a noise level of 18-25 dB. Price: approximately 25,600 rubles.
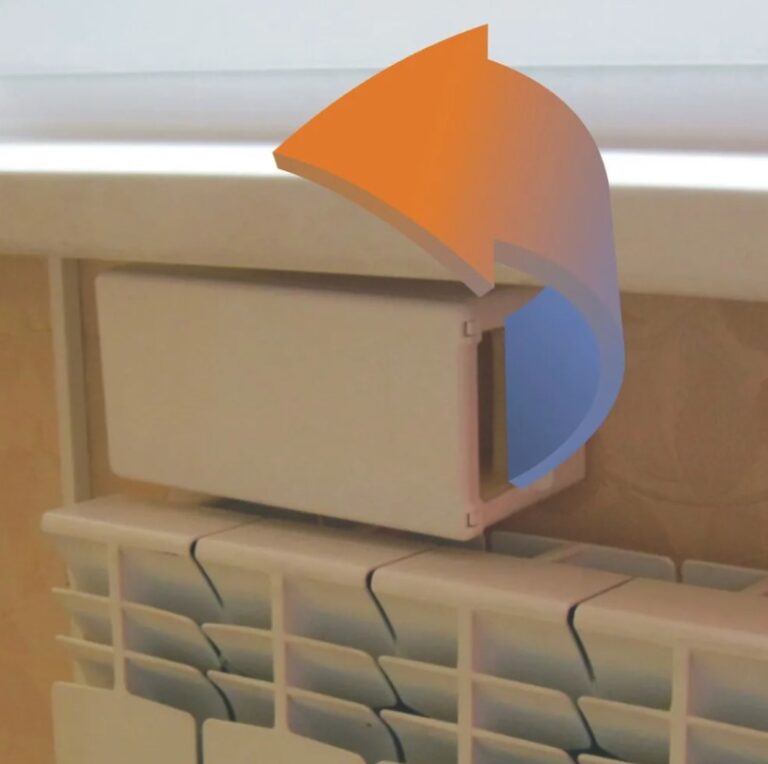
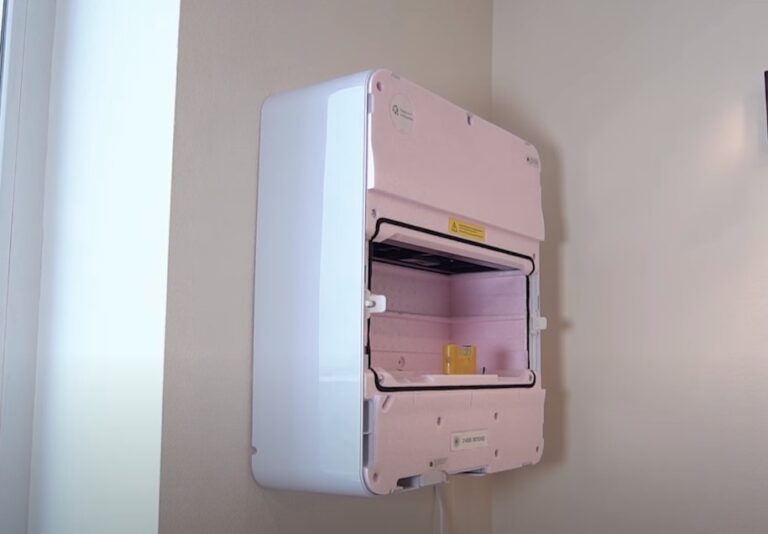
In the bedroom, ventilation can also be achieved by installing an air conditioner, but sometimes it's more convenient to use a breezer or wall-mounted heat recovery unit. The unit is installed in a wall opening with an insulated duct installed. The electronic unit is located in the room. From the outside, the opening is covered with a hood with a protective grille.
Wall-mounted heat exchangers and breezers offer better ventilation than split systems. These units provide a full supply of outdoor air and remove waste air. The only drawback is that wall-mounted heat exchangers and breezers cannot cool or heat a room like a split system.
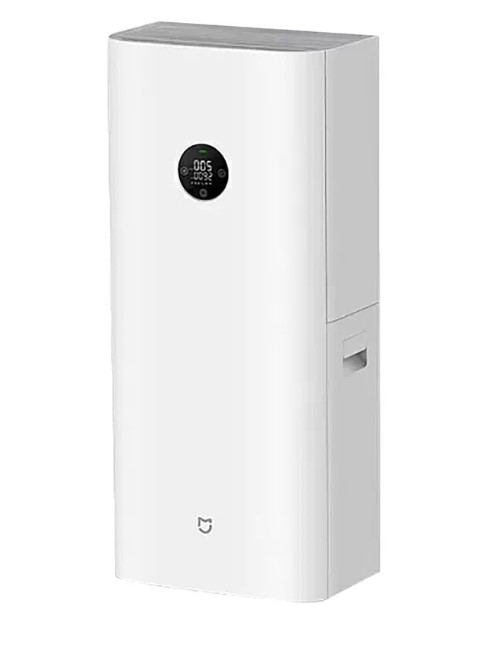
Costs are similarly determined by the device's specifications. For example, in the mid-price range, consider the Xiaomi MIJIA NEW FAN A1 air purifier. It costs 34,130 rubles. This model provides air exchange rates ranging from 30 to 150 m3.3/hour. The supply air is heated by a 0.4 kW heater.
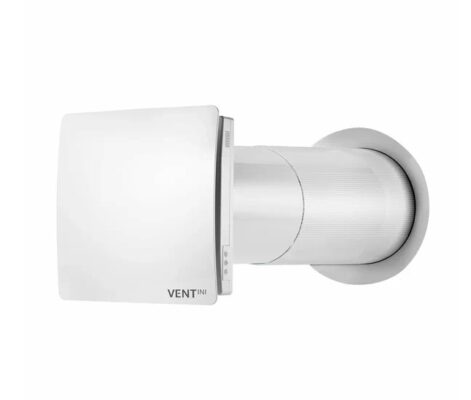
Let's look at the installation and operating costs of a wall-mounted heat exchanger using the VENTINI HRV-60 (B) Wi-Fi model as an example. The unit costs 37,500 rubles. The heat exchanger provides air exchange in the range of 26-60 m3.3/hour, has a capacity of 0.002 kW.
To ventilate all the rooms in an apartment or private home, it's more cost-effective to install a ducted utility system and connect a high-capacity heat recovery unit. The unit is placed on a balcony, in a designated space in a utility room or attic, mounted under the ceiling, and then concealed with a finishing touch.
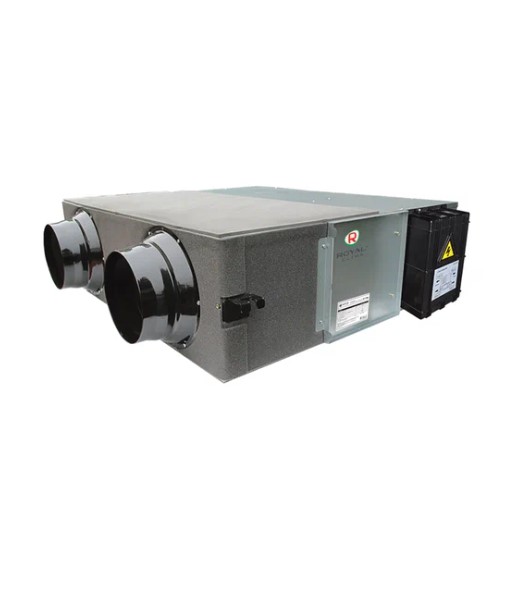
Let's look at the costs of installing a recuperator for general ventilation of each room using the Royal Clima SOFFIO Uno RCS 350 U model as an example. The average cost of the unit is 64,800 rubles. The device provides air exchange of up to 319 m3.3/hour, creates static pressure of up to 495 Pa, consumes power of 0.105 kW.
Mixed air exchange
Ventilation combines mechanical and natural air exchange. This option is suitable for bathrooms and kitchens. Mixed ventilation can be used in windowless rooms where the air is exposed to intense pollution. Such spaces include a home workshop, a vegetable storage room, or a basement under a private home.
In mixed ventilation, the exhaust hood is typically equipped with a duct or wall fan. Air is drawn naturally from the outside through a vent or from an adjacent room via a transfer vent.
The advantages of mixed air exchange include:
- Easy to install and maintain.
- Minimum energy consumption.
- Stable air circulation, weakly dependent on weather conditions.
Mixed ventilation is the best choice for a single-room utility system, both economically and technically. A utility system isn't always capable of providing the required air exchange for an entire house or apartment, which is one of its drawbacks.
Ventilation design, development of schemes
Ventilation can't be determined by guesswork, random guesswork, or simply by selecting the right equipment. Precise air exchange calculations are required for each room, taking into account its intended use, volume, and expected occupancy.
It's necessary to consider the air duct layout. Determine the locations for ventilation vents and the installation of devices. Each issue is addressed during the utility system design phase.
Calculating the air volume for a room
Ventilation regulations are governed by document SP 54.13330.2016. The new current version is SNiP 31-01-2003. Clause 9.2 specifies that the calculated air exchange characteristics for a residential building must be taken in accordance with SP 60.13330.
The air exchange rate per unit of time in a room of a specific purpose must correspond to the data in Table 9.1:
- For a bedroom, living room, children's room, where the total living space per person is less than 20 m2 living space, the air exchange rate is set at 3 m3/hour for every 1 m2 rooms.
- For a bedroom, living room, children's room, where the total living space per person is more than 20 m2 living space, the multiple is set at 30 m3/hour for every 1 m2 rooms.
- For a kitchen with an electric stove, a multiplicity of 60 m is established.3/hour.
- For kitchens with gas appliances, the multiplicity has been increased to 100 m3/hour.
- For the bathroom, shower, and toilet, the multiplicity is set at 25 m3/hour.
To calculate the air exchange rate for a specific room, taking into account the recommended ventilation rate, use the formula: L = N x V. The value of N is substituted with the data from Table 9.1. The value of V is substituted with the total volume of the room, calculated by multiplying the length by the width and the height.
Calculations are simpler based on sanitary standards. For each person permanently residing in the house, the air exchange rate is 60 m3.3/hour. For a guest temporarily staying in the room, the air exchange rate is 20 m3/hour. To calculate, multiply the number of people by the recommended air exchange rates and sum the results.
Let's say there are two residents and three guests in the living room. The first step is to calculate the values for each category of people: 2 x 60 = 120 and 3 x 20 = 60. The second step is to sum the obtained results: 120 + 60 = 180. According to our calculations, 180 m should change in the living room in 1 hour.3 air.
The air exchange rate depends on the parameters of the ventilation components. Ductless systems are simpler. The instructions for the diffuser, valve, wall-mounted fan, or duct fan specify the device's air flow capacity and performance. Based on the manufacturer's specifications, a model is selected based on the calculated air exchange parameters.
The situation is more complex with ducted mechanical ventilation. To obtain the recommended air exchange rate, the duct cross-section must be calculated. Before proceeding with the calculations, let's review some important information:
- The standard air velocity in the main vertical duct is 5 m/s.
- The air velocity in the branches from the vertical duct is 3 m/s.
- For rectangular ducts, the length to width ratio is 3:1.
To calculate the cross-section of the air duct, use a table with diagrams.
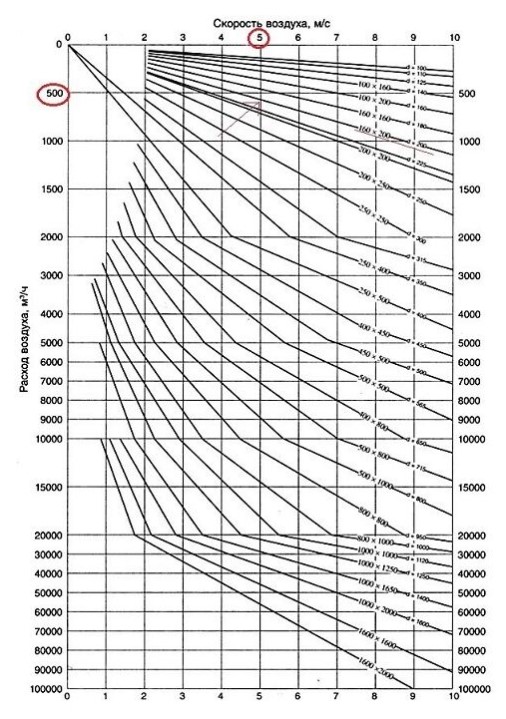
In the table on the left, select the calculated air exchange rate. On the top scale, select the speed—3 or 5 m/s. From the selected values, move horizontally and vertically to the intersection of the table lines.
From the found point, move downward until it intersects with the diagram curve. The number indicated at the intersection of the lines indicates the cross-section of the duct: for a round pipe, it's the diameter; for a rectangular box, it's the area.
Choosing a location for vents and fans
The location of the ventilation openings is considered in accordance with the chosen ventilation scheme. Air from the supply vent should flow through the entire room before being exhausted to the exhaust vent.
The natural air intake at the room entrance should be heated to reduce heat loss. It's advisable to install the opening for the wall valve under the windowsill above the radiator.
A window ventilator is installed into the window frame. Regardless of the type of air supply unit chosen, the opening on the street side should be made on the windward side of the building.
Natural and mechanical exhaust vents are routed through a common building duct or a riser to the street. The exit location is chosen downwind of the building, relative to the wind direction, so that gusts of wind capture the exhaust air being exhausted from the room. The exhaust vent is always located under the ceiling.
If the room is separated from the main building ventilation system, an intake and exhaust vent must be installed in the room. When air circulation is planned throughout all rooms, transfer vents are installed at the bottom of interior door leaves or on partitions.
Air inlets are located in clean rooms: living rooms, bedrooms, hallways, and corridors. Exhaust vents should be installed in the dirtiest rooms: toilets, bathrooms or combined bathrooms, and kitchens.
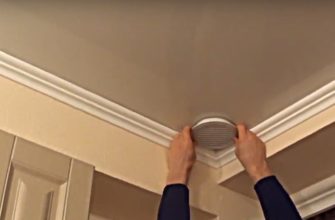
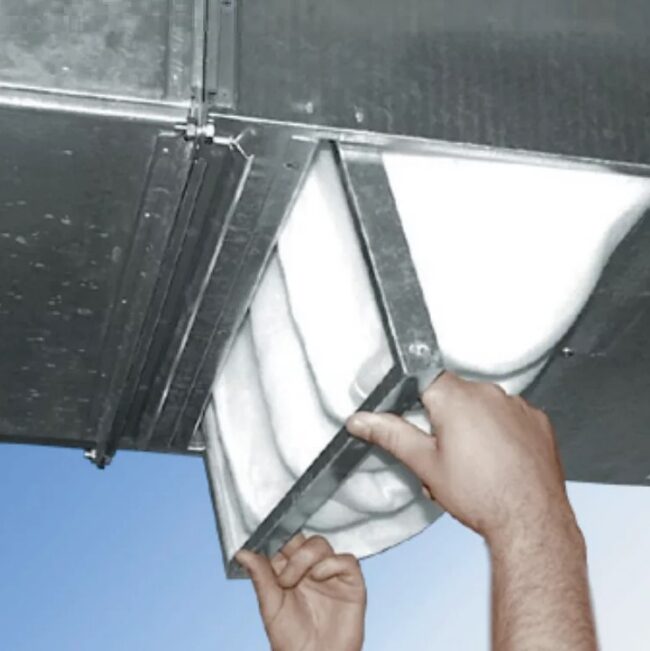
When it is decided to ventilate a room with a wall-mounted recuperator or breezer, an opening for the air duct outlet is installed on the wall approximately in the center between the ceiling and the floor.
If the room is ventilated by a common-building ventilation system with a heat recovery unit, a branch air duct should be installed from the unit or main ducts. The pipes are concealed under the finishing cladding, and the ventilation openings, covered with a decorative grille, are exposed to the surface.
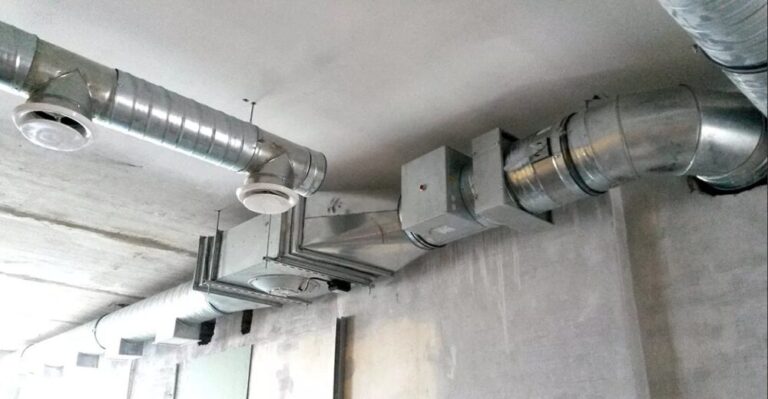
To draw air in and exhaust exhaust from a stationary recuperator, two ducts are routed to the outside through a wall or structural elements of the attic using corrugated pipe. The outlet point is determined by the unit's installation location: in the attic, under the ceiling, or on the floor in a designated area of the utility room.

Materials and tools for ventilation installation
The list of materials required is determined by the type of ventilation being installed. A ducted system requires air ducts, clamps, shaped connectors, and corrugated hoses.
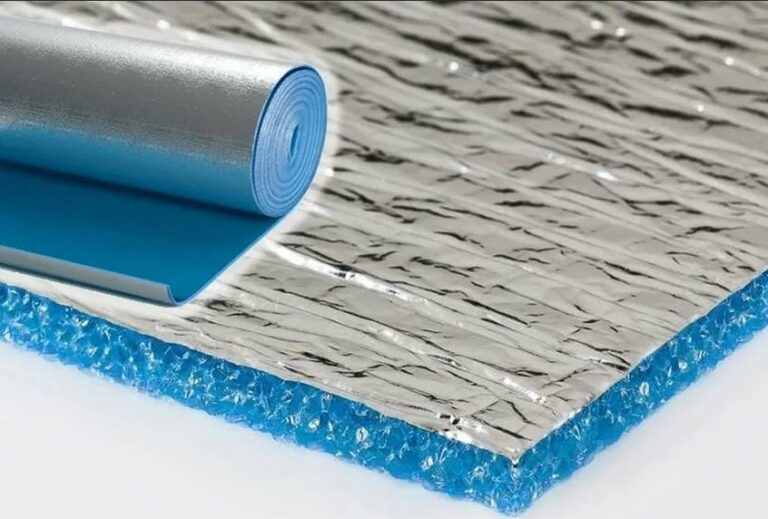
The equipment required will include a heat recovery unit with a muffler, duct fans, and an electronic control unit. Penofol or other insulation will be required for soundproofing the entire line and insulating the ducts running through cold areas of the building.
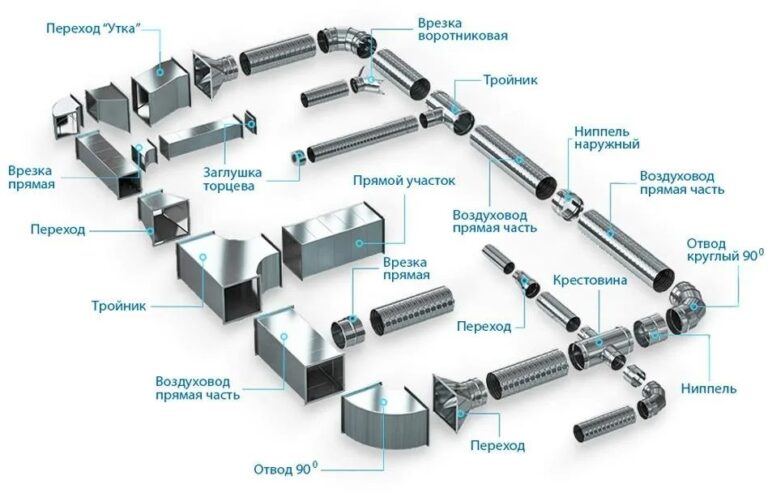
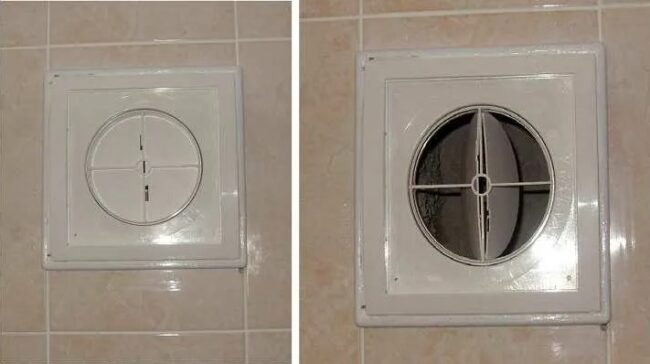
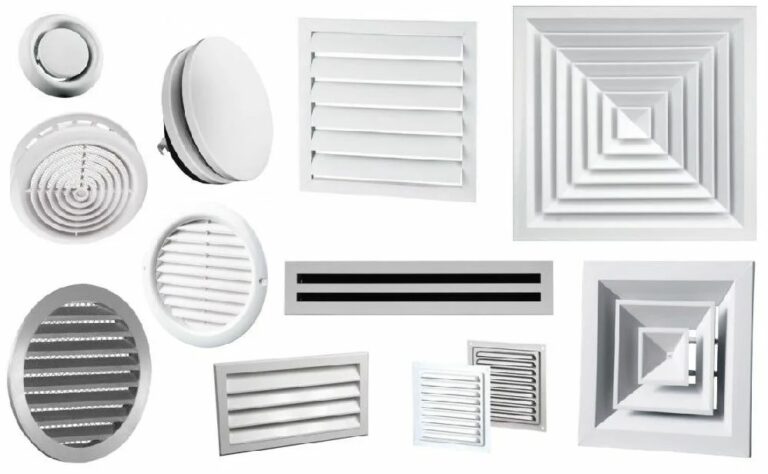
Ductless ventilation requires devices installed in vents. Natural ventilation uses grilles, window and wall valves, diffusers, and air diffusers.
Standard set of tools for self-installation of ventilation:
- Hammer drill with drilling function.
- Angle grinder, screwdriver, electric drill.
- A set of drill bits for concrete and wood, with a crown bit.
- Hammer, long chisel, pliers.
- Phillips and regular screwdriver.
- Level, tape measure, pencil.
A standard set of tools is sufficient for installing ventilation units in wooden, aerated concrete, and other buildings where the walls are constructed from drillable materials.

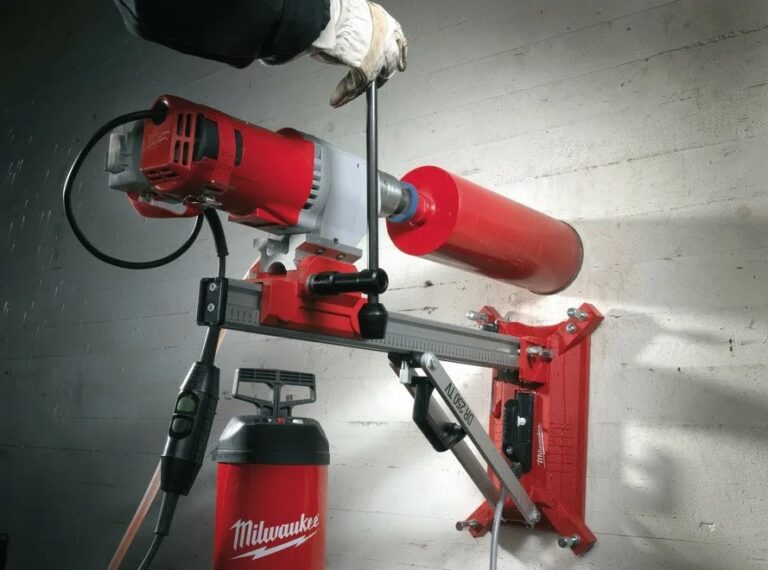
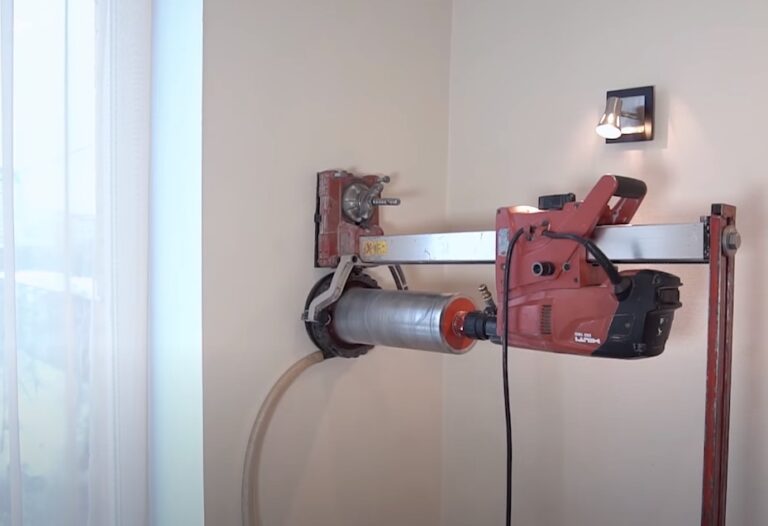
Making a through-hole for an air duct in reinforced concrete with a household hammer drill is difficult and not always possible. This problem can be solved by hiring professionals with diamond drilling equipment.
Instructions for creating a flow from an adjacent room
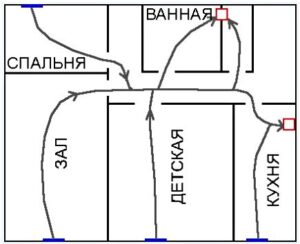
Properly ventilating a room doesn't require a complex design or a ducted system. Most often, the problem can be solved by redirecting airflow from an adjacent room. For example, a living room or hallway may have sufficient airflow.
The bathroom is equipped with an exhaust fan, but due to the lack of air intake, moisture vapor is not removed. A new supply air source doesn't necessarily have to come from outside; it can be directed from the living room or hallway through a transfer vent in the door.
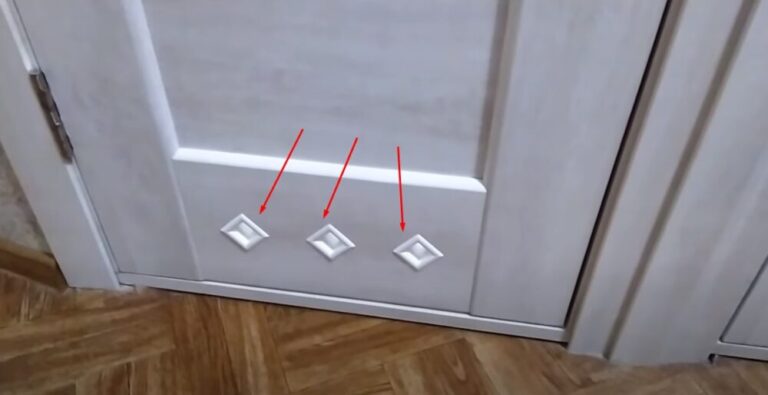
To create a vent, cut a hole in the bottom of the window frame and install a decorative grille. The recommended size is 30x25 cm. Grilles come in various shapes and sizes. For a more decorative look, you can install several small elements instead of one large grille. The total usable area of the vent should be 30-40 cm.2.
Let's take a step-by-step look at how to install 3 grilles into a door:
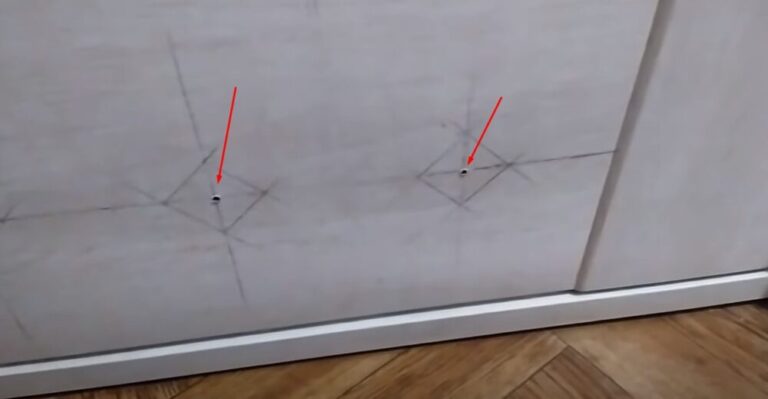
- Mark the bottom of the door where you want to install the grilles. Use a pencil, ruler, and level.
- Using a drill bit, drill 10mm holes in the center of the drawn windows. Use the drill bits to insert a jigsaw blade.
- Starting from the center hole, use a jigsaw to cut out the windows along the marked outline. Sand the cut edge to remove any burrs.
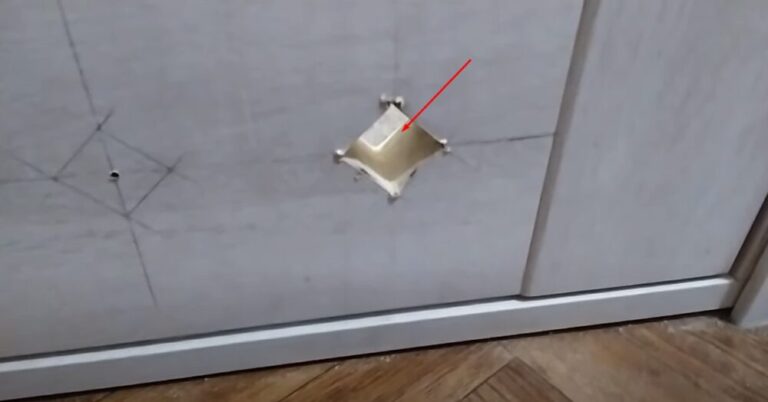
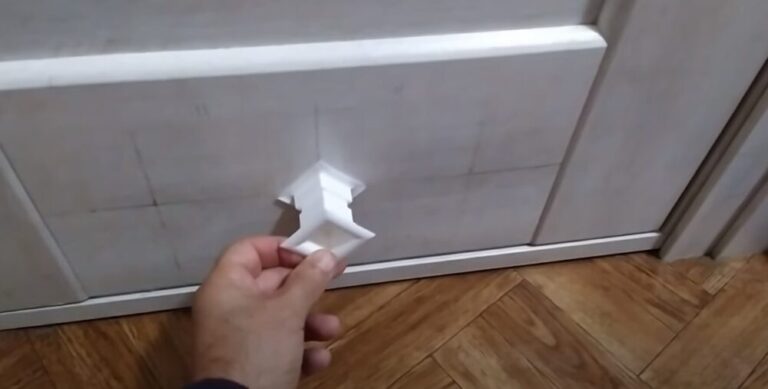
- Insert the grilles into the cut-out windows. The elements consist of two mating parts, which are usually snapped into place with clamps when connected.
To check the airflow, close the door and place a paper towel over the openings. The airflow will deflect the paper towel in the direction of air flow from the supply to the hood.
Instructions for creating an inflow from the street
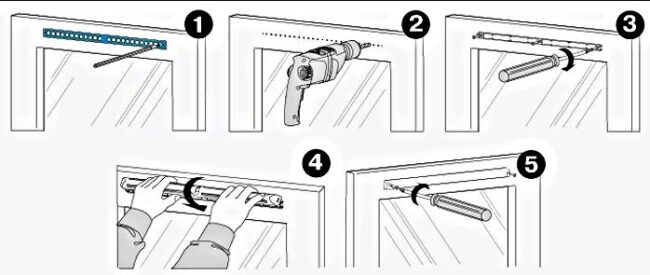
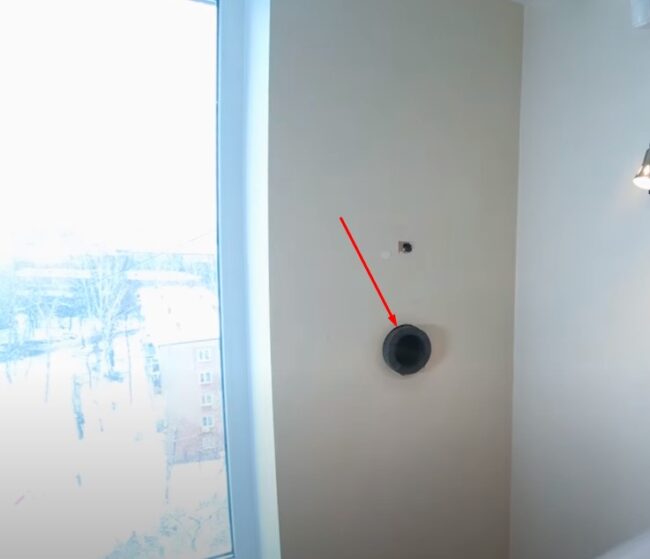
To create an air vent from the outside into the room, drill a through hole in the wall. Determine the diameter using calculations. Typically, a vent with a diameter of 80-150 mm is sufficient for a medium-sized room.
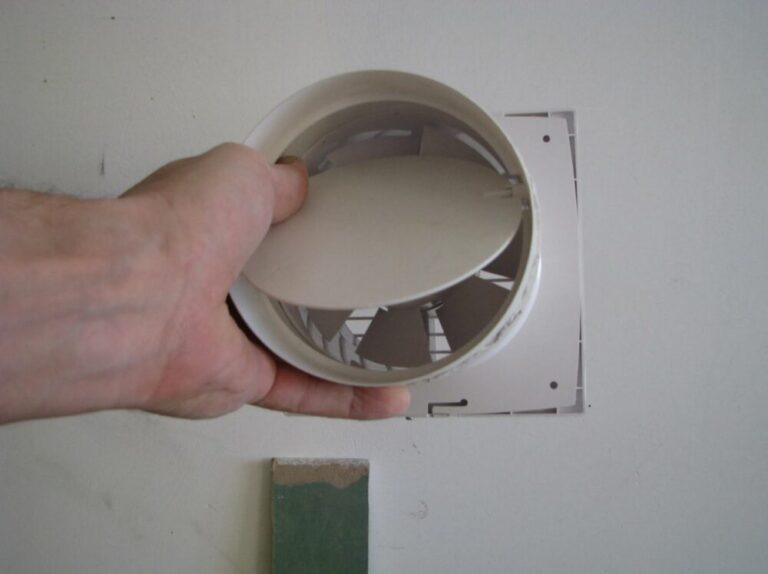
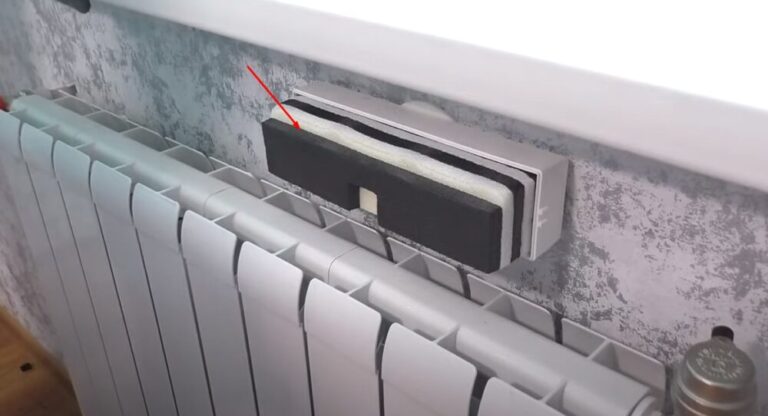
You can cover the opening with a diffuser, grille, wall valve, or air diffuser. The most practical option for a living room is to install an adjustable air vent under the windowsill:
- Select a location for the valve with the damper control mechanism on the wall between the top of the radiator and the windowsill. Incoming air from outside will be warmed in winter, reducing heat loss in the house.
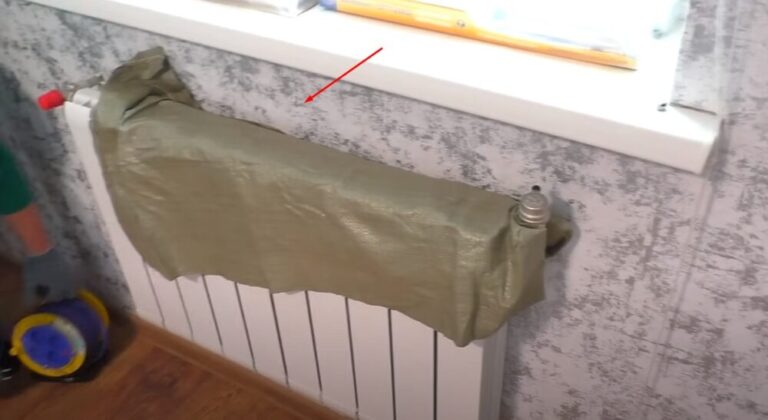
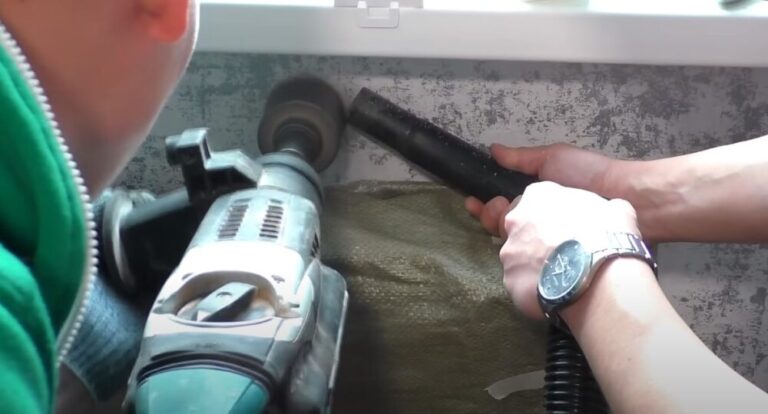
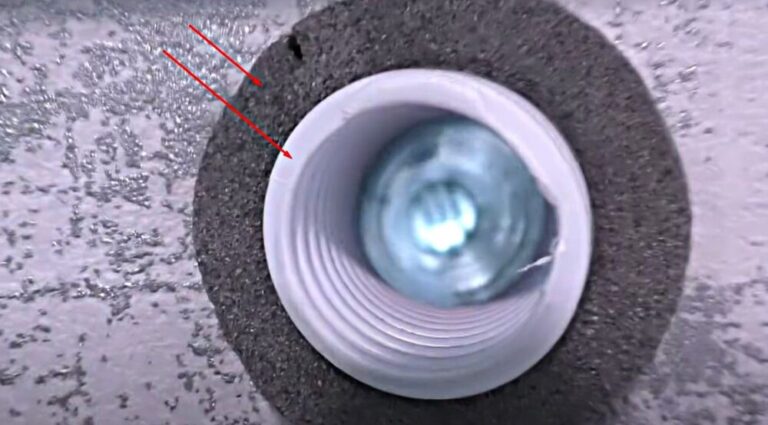
- Drill a through hole in the wall. Use a hole saw with a diameter matching the cross-section of the valve's insulation sleeve. Hold a vacuum cleaner hose to the drilled hole to remove dust.
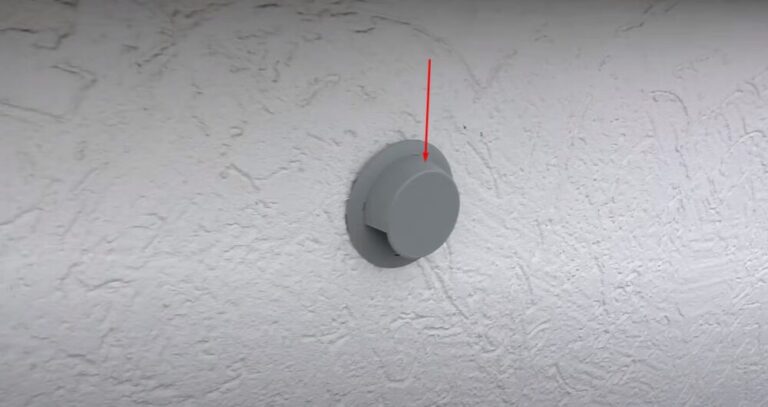
- Insert the pipe insulation into the finished opening. Measure the length of the plastic sleeve to match the wall thickness. Insert the cut piece into the opening of the pipe insulation. Cover the supply vent on the street or balcony side with a decorative cap.
- From the room side, secure the valve body to the wall in the vent area using dowels and screws.
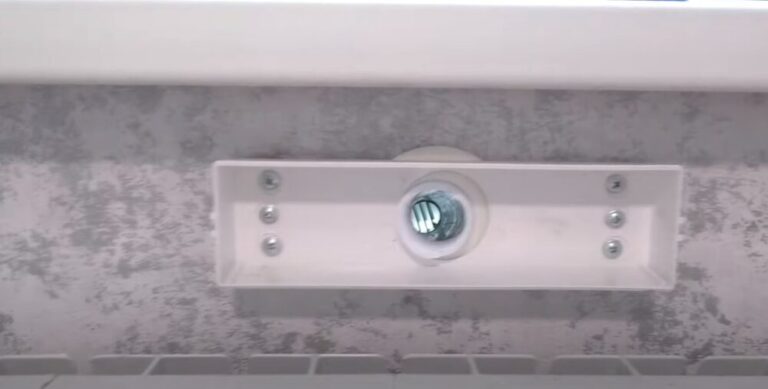
- Install the filter in the housing and close the lid. Check the airflow through the valve and adjust the air volume with the damper.

In a room with a window, you can create an inflow by installing a window ventilator. Secure the surface-mounted valve with screws to the top of the opening sash. Trim the ventilator to the correct length and remove the original seals from the window frame. Install the included thinner rubber bands into the grooves to create a ventilation gap.
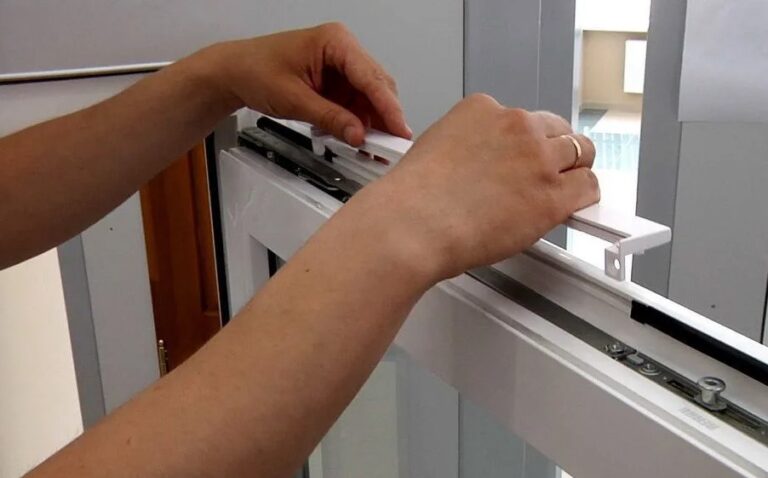
You can install a recessed ventilator on a fixed window. Use a drill to drill through the frame. On the indoor side, screw in the plate with the damper and adjustment mechanism. On the outdoor side, cover the perforations in the frame with a counter plate with a cap.
Installation instructions for an internal wall-mounted recuperator and breezer
For independent room ventilation, install a wall-mounted breezer or recuperator. These units operate on both supply and exhaust air. The housing includes a built-in fan, filter, and supply air heating system. Manufacturers are expanding their functionality with humidity and temperature sensors and automated controls.
Regardless of the model, the installation principle for a breezer and compact recuperator is similar to that of a wall valve. Simply drill a through hole and insert a bushing with pipe insulation.
From the room side, secure the breezers or recuperators to the wall using dowels and hardware. Cover the outdoor vent with a decorative cap. Connect power to the unit and start it up. Check the modes and set the supply and exhaust ventilation to comfortable settings.
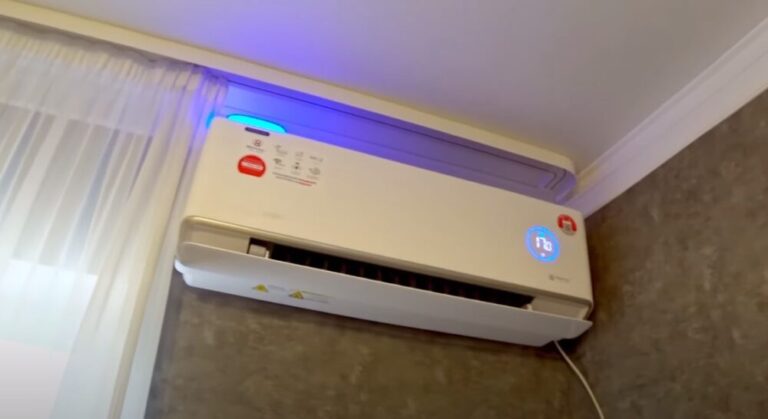
Ventilating a room with an air conditioner
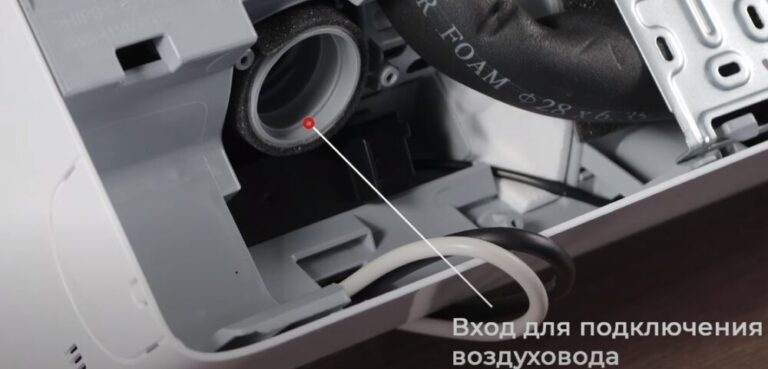
For air conditioning and ventilation, install a split-system air conditioner with an air inlet function. This system differs from a standard air conditioner in its design. The indoor unit is equipped with a compartment for an air inlet filter and a duct connection.
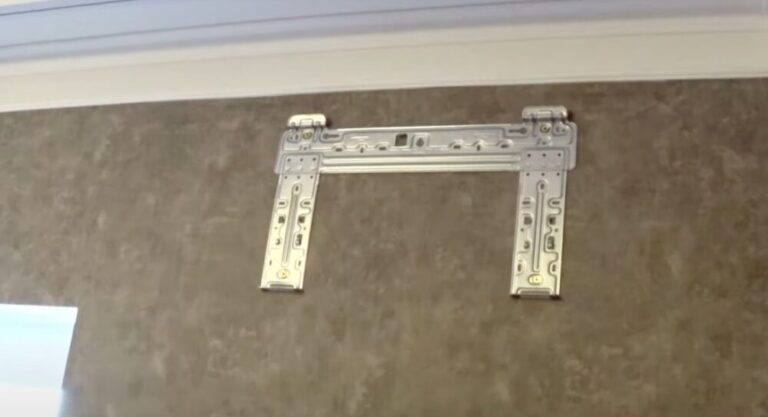
Installing an air conditioner yourself is difficult without experience and tools. The best option is to hire a specialist company. The technician will mount the indoor unit to the wall using a template and frame. Utilities will be routed from the module to the outside through a pass-through hole.
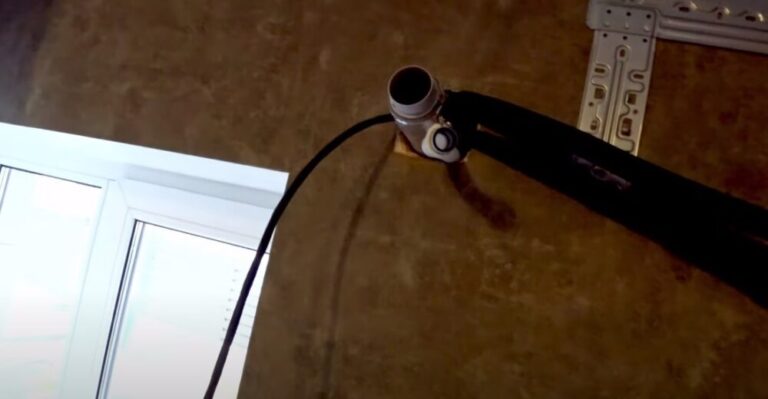
From the street side, the contractors will secure the outdoor unit to the façade with brackets and connect the utilities. The air duct supplying the indoor unit will be covered with a cap and grille.
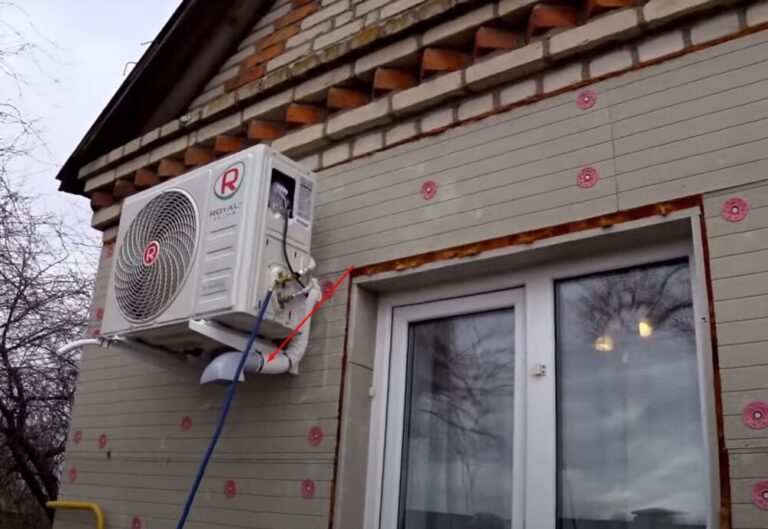
Each air conditioner model has its own installation nuances, but the general principle is the same. The supply ventilation operates simultaneously with the split system. Outdoor air enters through a duct located under the outdoor unit. The flow is directed to the indoor unit. After passing through a filter, the fresh supply air enters the room by mixing with the air coming from the indoor unit.
Room ventilation from a centralized system
When a room has a properly functioning centralized ventilation system, it's easier to connect it to the main system. Allow the air to flow through windows, a wall valve, or a transfer from an adjacent room.
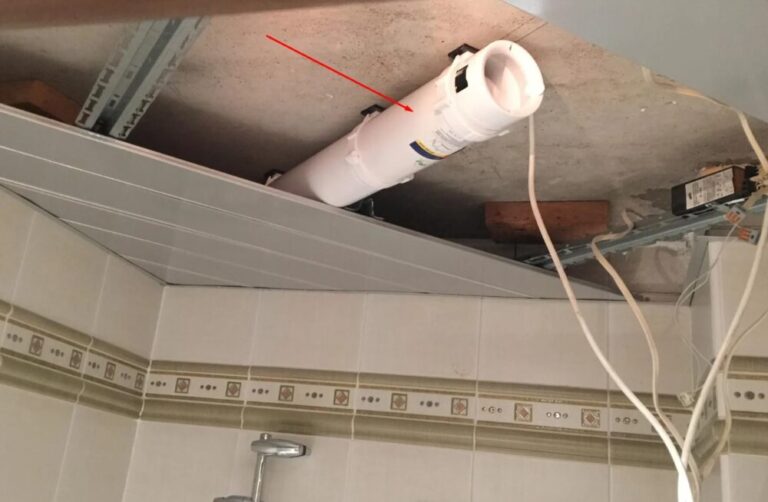
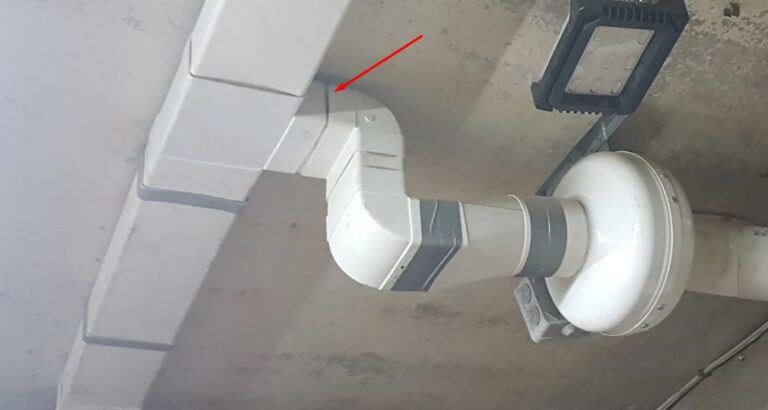
Choose the most convenient and cost-effective option. Route the exhaust hood through ducts under the suspended ceiling. Secure the ducts to the interfloor ceiling with clamps.
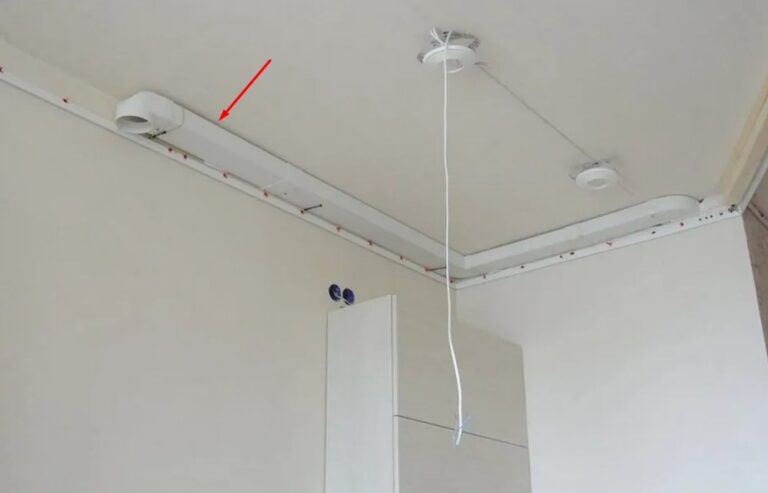
Install tees on the air duct where the exhaust openings are located. Close one end of the duct in the room with a plug or install an elbow to create an outer vent.
Lead the other end of the exhaust duct through the hole in the wall to the location of the main central ventilation shaft and connect using an adapter.
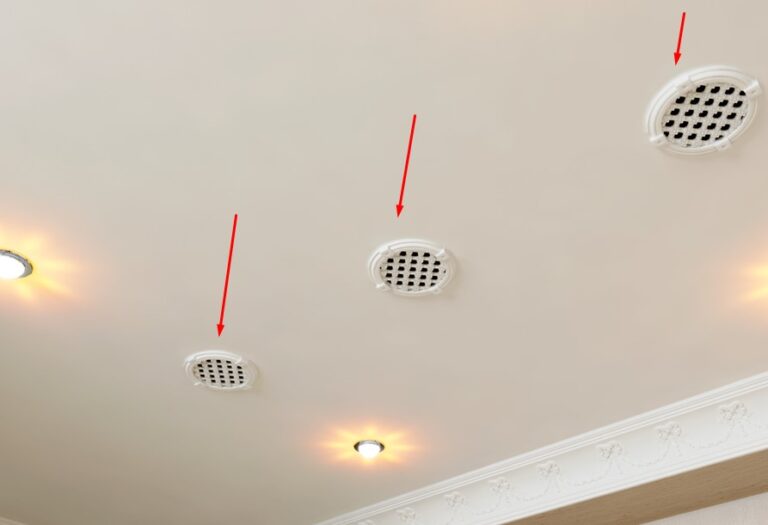
When installing drywall or a suspended ceiling, make ventilation openings around the shaped elements. Cover the vents with decorative grilles, air diffusers, or diffusers.
How to improve ventilation
To ensure proper ventilation, ensure free air flow into the room and exhaust through the exhaust hood. Avoid obstructing the vents with furniture or decorative items. If air flow is insufficient, periodically switch the vents on your plastic windows to ventilation mode.
Strengthen weak natural ventilation by installing a fan. To save energy, install a motion sensor in the bathroom. The forced-air exhaust fan will turn on when people are present. Install an air quality sensor in the kitchen. When the pollution level exceeds the set limit, the exhaust fan will automatically turn on.
Maintaining ventilation in working order
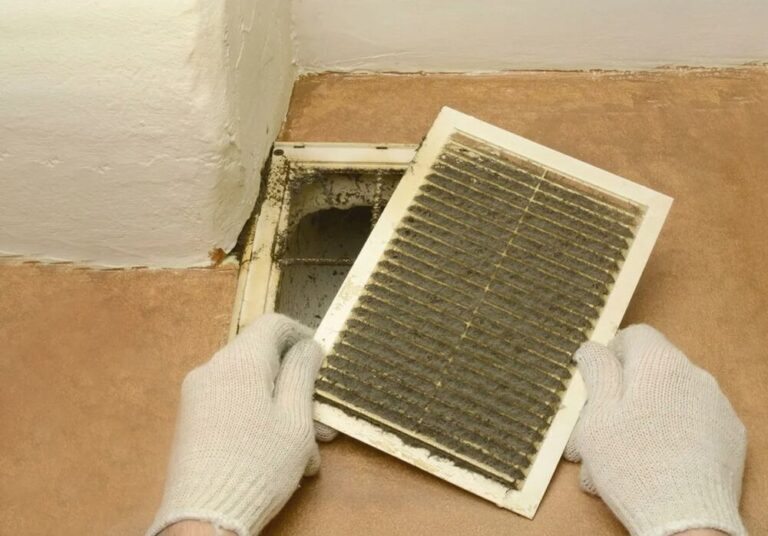
Contaminants pass through air ducts, fans, and other ventilation components along with the air. Dust, grease, and small debris accumulate, forming deposits and blockages. With every millimeter of narrowing of the air passage, the duct's throughput capacity decreases.
It's harder for the motor to turn fan blades coated with grease and dirt. To ensure proper airflow and longer equipment life, maintain your system in good working order.
In multi-apartment buildings, the building's ventilation system is maintained by the management company. The responsible person determines the frequency of maintenance, but no less than once a year, as stipulated by Government Resolution No. 1885 of October 24, 2022. In your own home, you can maintain the utility system yourself. Follow the recommended schedule:
- surface cleaning of chambers – once a month;
- surface cleaning of air intake shafts – every six months;
- mechanical cleaning and disinfection of air ducts – once a year;
- cleaning the disposable filter – once a month or replacing the worn out element;
- Cleaning the cyclone filter – once a year.
Fix mechanical failures immediately upon detection. Delaying repairs will result in additional equipment failure, which will increase repair costs.
Take preventative measures to avoid emergency situations. If the fan's sound changes, check the bearings. They may need new grease. Replace any loose bearings.
Ventilation noise increases due to vibrations in the air ducts. Find the loose section and tighten the fasteners. If the hum is caused by dirt accumulation in the ducts and on the fan blades, clean them.
Check the operation of the check valves. The valve should make a popping sound when the fan is turned on and off. A lack of sound indicates a faulty mechanism.
The valve stem or the valve petal itself may be jammed in the housing due to dirt. Disassemble the valve mechanism and clean any grease buildup.
Clean your ventilation grilles of cobwebs and dirt at least once a month. The severity of the dirt is visible to the naked eye. If the grille is still clean, you can adjust the cleaning frequency.
Answers to current questions
You can ventilate the room yourself using a simple ductless system. Allow natural circulation through vents or install fans to increase air exchange.
Install a wall damper at the bottom of the wall for the supply air. Install an exhaust vent with a check valve under the ceiling, venting the air duct outside on the side of the room opposite the supply air. You can use the supply or exhaust vent from an adjacent room. To circulate air between rooms, install transfer vents on interior doors or partitions.
Ventilation is needed to supply clean air to the room and remove carbon dioxide, moisture vapor, and unpleasant odors.
To purify the air in a closed space, install an exhaust fan and natural air intake. You can install an air purifier, an exhaust recirculation hood, or an air conditioner with a ventilation function. This equipment draws the air in the room through a filter. The recirculation process releases purified air into the room.