Depending on the operating principle, ventilation in bathrooms and toilets can be natural or forced. A ventilation system is needed to remove moisture and unpleasant odors and prevent the spread of mold.
For ventilation arrangement, the following have been developed: sanitary rules, norms and requirementsInstallation is carried out based on the results of the system performance calculation.
To install ventilation, you need to assemble an exhaust duct from air ducts and attach it to the ceiling. Installing a duct fan will increase the exhaust system's performance. To increase air flow, in addition to the gap left under the door, you need to install an air inlet valve in the wall opening.
We'll discuss how to implement these steps in practice in this article. We also recommend reading the instructions: How to choose a bathroom exhaust fan.
- Why is ventilation needed in a bathroom?
- Ventilation installation rules: standards, requirements
- Calculation of ventilation performance
- Types of ventilation for bathrooms
- Ways to improve ventilation performance
- A step-by-step guide to installing ventilation in a separate bathroom and toilet in an apartment.
- Commissioning works
- Installation video
- Answers to current questions
Why is ventilation needed in a bathroom?
Bathrooms and toilets are special spaces where high concentrations of moisture and unpleasant odors occur. Constant dampness, coupled with warm air, promotes mold growth.
Mold, appearing as black, blue, and green spots, first appears on the bathroom walls. Gradually, the fungus migrates to other living rooms.
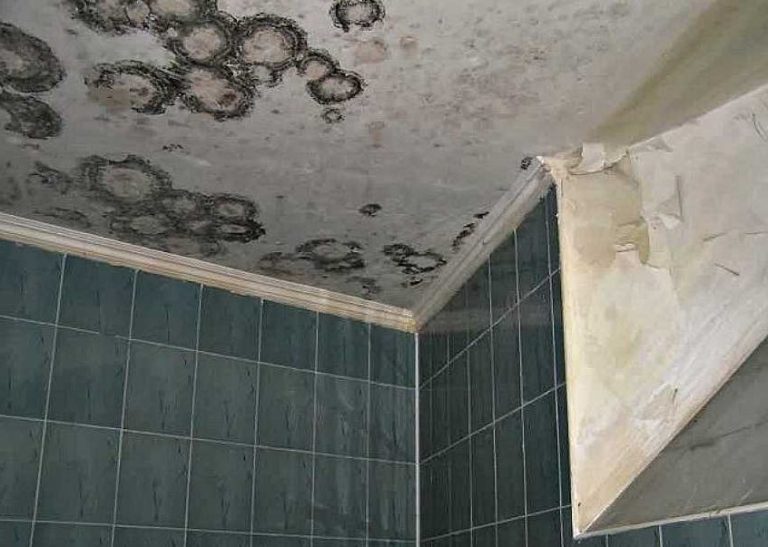
Mold not only destroys finishes and personal belongings, but also causes allergic reactions in people through airborne spores.
The problem is equally relevant for apartments and private homes. To protect the living space from unpleasant factors, ventilation is necessary.
A properly functioning ventilation system ensures adequate air circulation. Odors from the bathroom and toilet do not permeate living spaces. The room breathes easily, reducing the risk of respiratory illness.
Ventilation installation rules: standards, requirements
Air exchange can't be created spontaneously by implementing the first idea that comes to mind. Such ventilation is of no benefit.
There are air exchange standards, which must be provided by the utility network. In legislative documents, a private house and apartment are considered a single system requiring balanced ventilation.
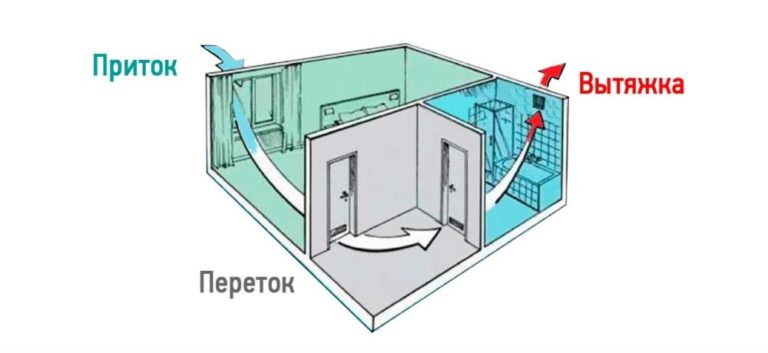
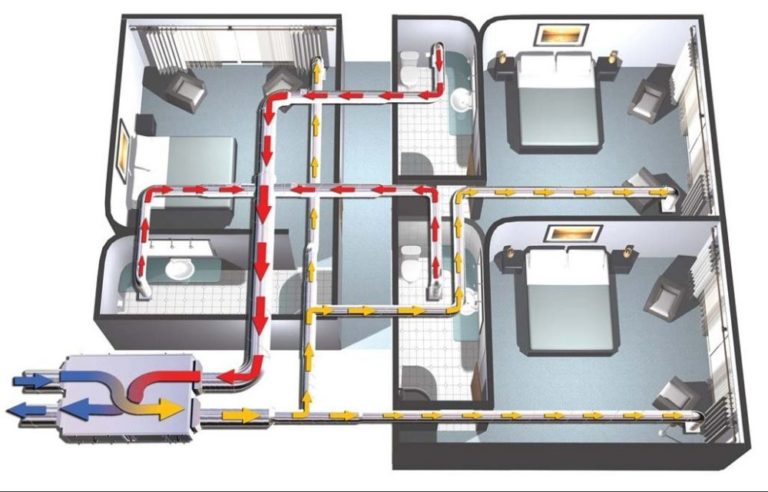
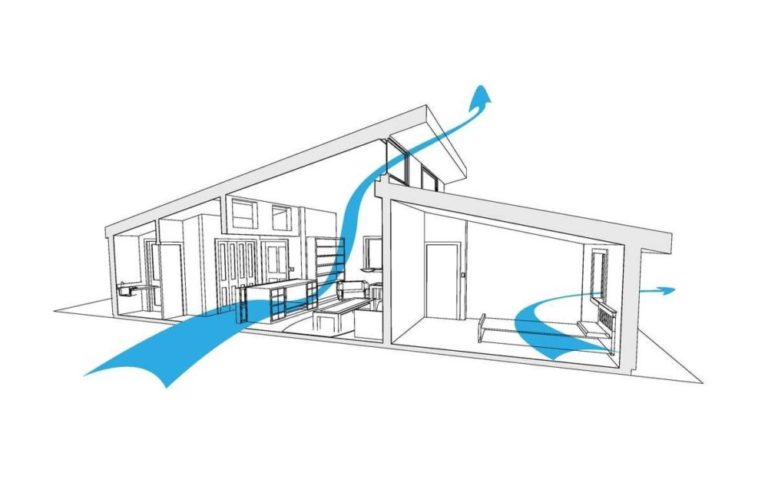
A common setup involves fresh air entering living rooms and then penetrating through a gap under the doors into the toilet and bathroom. Exhaust air from the bathrooms is removed through an exhaust hood.
 There's little difference between an apartment and a private home in terms of exhaust duct design. Multi-apartment buildings are designed with a shared ventilation shaft.
The bathroom and toilet already have an exhaust duct, but it's not always sufficient. To improve air circulation, the apartment owner can install additional ventilation.
However, connecting the hood to the common building shaft is permitted with partial blocking of the ventilation opening. The apartment owner must obtain permission from the organization that services the apartment building.
In older buildings with worn-out utility systems, the inspector may prohibit connecting the hood to the common building shaft.
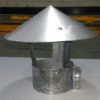
Ventilation in a private home is simpler. The property owner installs an exhaust duct with a pipe, leading the riser through the roof to the street.
There are no specific restrictions from third-party organizations, but ventilation must comply with sanitary standards.
The information is reflected in the current version SNiP 41-01-2003 And SP 54.13330.2016Additional standards for residential multi-apartment buildings are reflected in the current version. SNiP 31-01-2003.
- According to legislative documentation, a separate bathroom and toilet in a private house or apartment must receive 25 m of fresh air from living rooms.3/hour.
- For a combined bathroom, the inflow volume standard has been increased to 50 m33/hour.
Affluent people are building modern private homes using custom designs that include spacious bathrooms.
Recommended tributary 25 m3/hour For a large room with a bathtub, shower stall, and other amenities, it's not enough. A similar issue applies to the toilet and combined bathroom.
To ensure complete air exchange, it is more advantageous to make calculations based on the volume of the room.
Air flow rate per 1 m3 the bathroom space is 6-7 m3/hour. For 1 m3 The toilet and combined bathroom are set at 8-10 m3/hour.
Calculation of ventilation performance
In complex ventilation calculations, tabular values of the air exchange rate and volume for rooms of a specific purpose are helpful.
The tables are freely available. It's best to calculate for the entire house or apartment using three parameters:
- The established sanitary standard for the supply of fresh air for each person living and temporarily staying in the building.
- Recommended air exchange rate per hour for each room.
- The established air exchange rate for every 1 m2 area or 1 m3 volume of the room.
For example, for a house with an area of 120 m2 with 5 permanent residents required:
The greater value in three calculations is 249 m3/hour. Take the number as a basis and round to 250 m3/hour, distribute it among the rooms of the whole house.
There are strict standards for the kitchen, so it is advisable to allocate approximately 150 m3/hour.
The remaining 100 m3/hour From the general value, divide it for the bathroom, toilet and living rooms, taking into account the established air exchange standards for each room according to its intended purpose.
Types of ventilation for bathrooms
In a private home or apartment, one of two types of ventilation is installed: natural or forced. The first option is easier to implement.
A drawback of this system is the inability to regulate draft. It often disappears or creates the opposite effect when it's hotter outside in the summer than in the room where the air conditioner is running.
When installing natural ventilation, the following rules must be observed:
- each room should be equipped with a separate hood with a vertical duct;
- the bathroom and toilet are rooms with the same specifics, where ventilation is permitted to be arranged through a common duct;
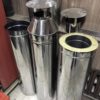
- Due to weak natural draft, ventilation ducts are made from pipes with smooth walls;
- When developing a design, they try to reduce the number of turns and bends that increase traction resistance;
- In private one-story houses, the ducts are laid under the ceiling with the pipe leading out through the attic and roof to the street.
Due to its low efficiency, natural ventilation is not used in modern housing construction.
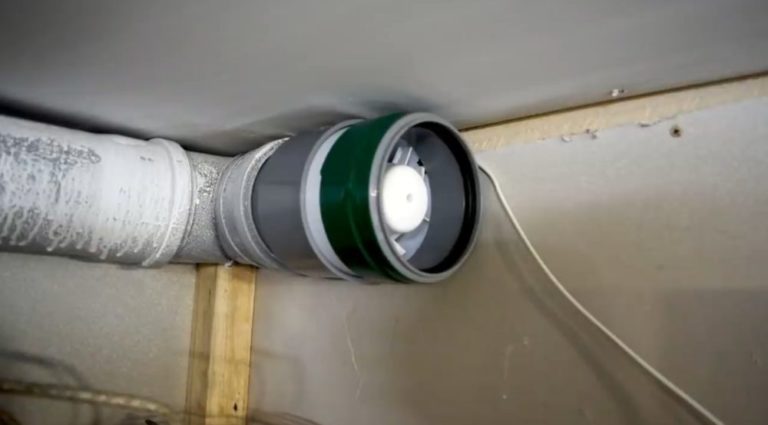
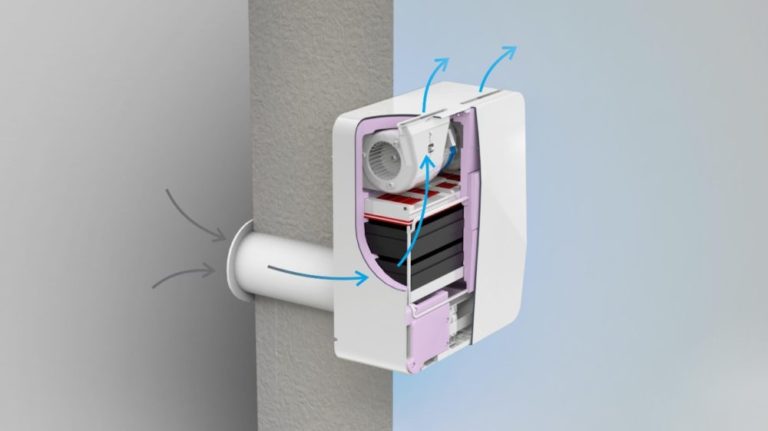
New projects feature a forced-draft ventilation system. A mechanical system differs from natural ventilation in that it incorporates equipment. Duct fans force air movement.
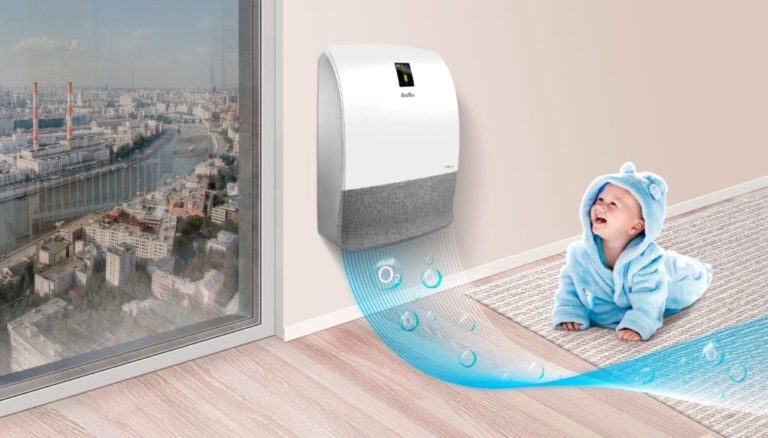
The utility system can be supplemented with a recuperator, filter, or humidifier. Operation is controlled by an automated system with a sensor array and an electronic unit.
Ways to improve ventilation performance
If you install one exhaust hood in the bathroom and toilet, even with a fan, it will not provide the required air exchange.
The supply and exhaust ventilation system is fully functional. Fresh air is supplied in exactly the same amount as is exhausted through the hood.
To improve ventilation performance, use the following recommendations:
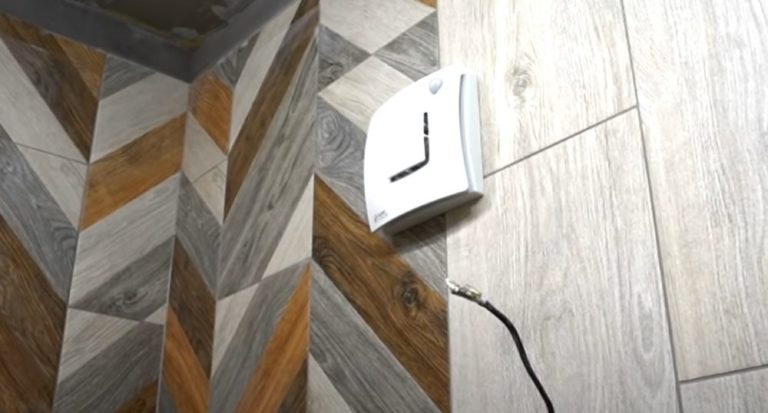
- Install a fan for natural ventilation.
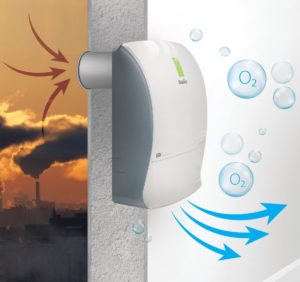
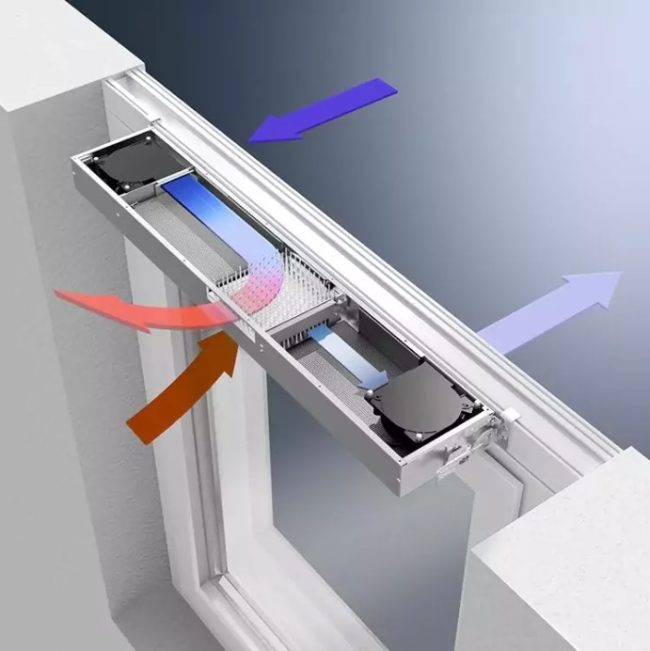
- The air flow through the gap under the door isn't sufficient. Install additional wall-mounted air inlets or install a ventilator in the window frame.
- Keep your air ducts clean. Clean any dirt from the inside of the ducts.
- Install a single-unit heat recovery unit for the bathroom and toilet, or install it throughout the entire house. The equipment will automatically maintain user-set air exchange parameters and maintain a favorable microclimate.
Improved models are equipped with heating, humidification and automatic control functions.
A step-by-step guide to installing ventilation in a separate bathroom and toilet in an apartment.
In private houses and apartments, bathrooms can be either adjoining or separate. A ventilation scheme for specific rooms is developed based on the layout.
Ventilation in an adjacent bathroom is easier to implement by installing 1-2 exhaust fans. Automated equipment with humidity and motion sensors is considered effective.
In an empty room, the fans operate at speed 1. When someone enters the bathroom or the humidity inside the room increases, the automatic system switches the fans to speed 2 or 3.
The option of connecting exhaust fans to a common ventilation duct is good for an adjoining bathroom, but is not suitable for a separate toilet and bathroom.
A forced-air system will mix air flows. A running bathroom fan can force moist air through inactive equipment into the toilet.
A similar situation occurs in reverse. If the bathroom exhaust fan isn't working, the toilet fan can direct some of the dirty air there through the common duct.
The problem of preventing air masses from mixing is solved by installing check valves, but this is expensive, complicated, and less reliable.
It is advisable to implement an improved scheme for separating single-channel forced ventilation in the bathroom and toilet by installing a common duct fan and a box for distributing air flows.
The installation technology for utility lines depends on the type of residential building. In an apartment, the exhaust system is connected to the common duct through a combination grille.
In a private home, air is exhausted through a pipe leading to the outside above the roof. The outlet is located at the top of the wall or through the ceiling and roof.
The apartment scenario is more complex, so we'll examine the technology and nuances of ventilation installation in detail:
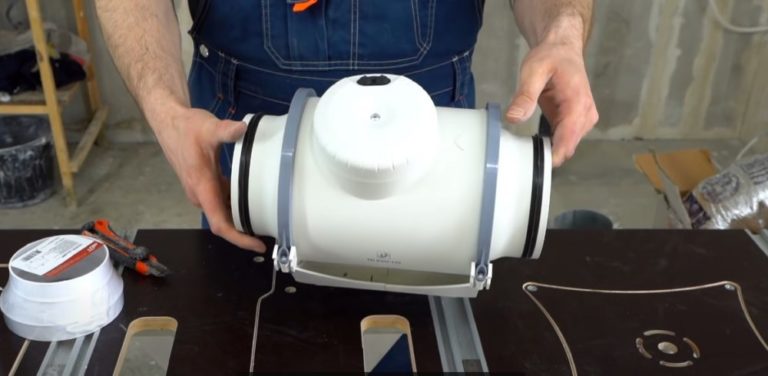
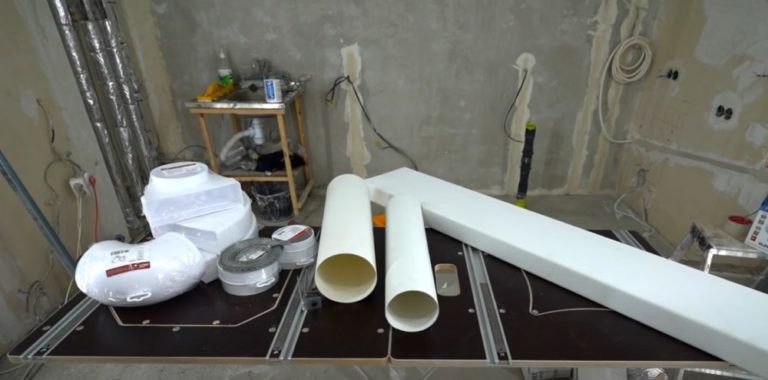
- To force separate air flows, purchase a duct fan. This equipment can serve both the bathroom and toilet simultaneously.
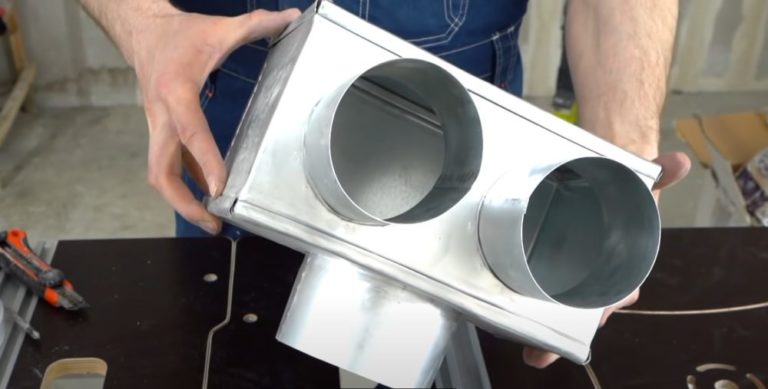
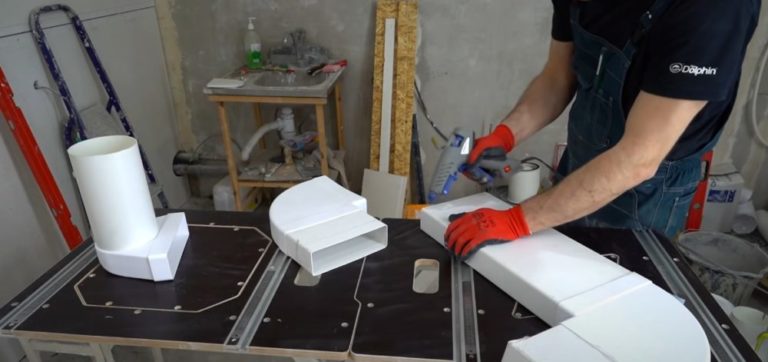
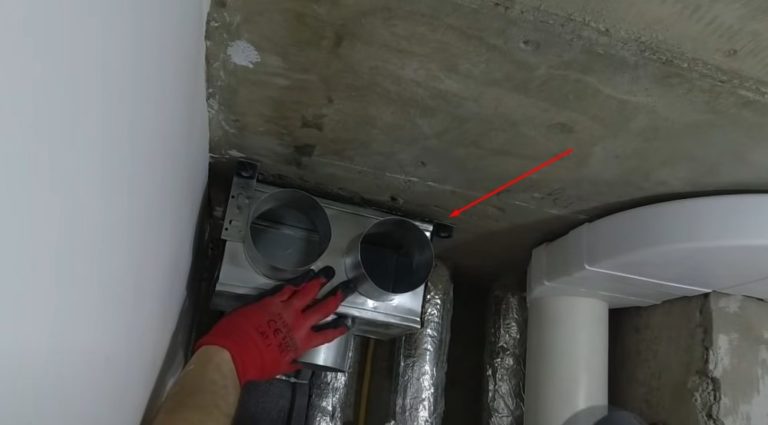
- Prepare the air distribution box. The unit consists of a rectangular housing and three ducts—one common outlet and two separate inlets.
The box can be custom-made by sheet metal workers. The distributor itself is easy to assemble from plastic air ducts, gluing the parts together with a hot glue gun.
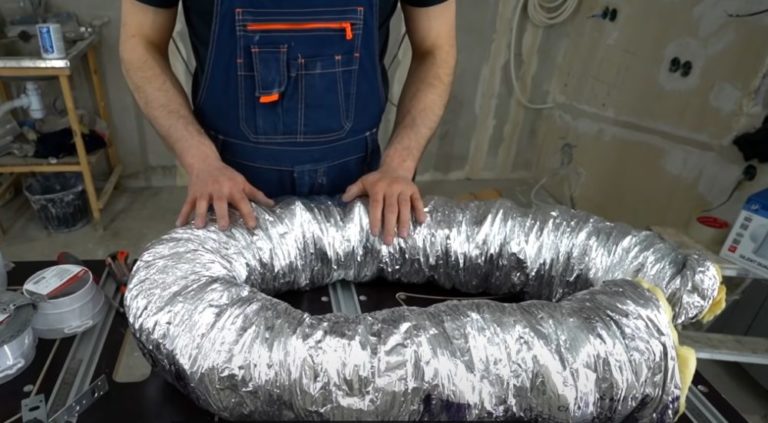
- To connect the duct fan, prepare a flexible, sound-insulated air duct.
- To assemble the main ventilation line, use plastic channels and fittings.
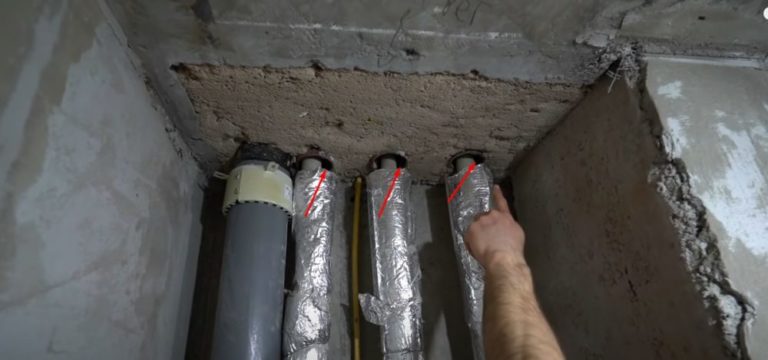
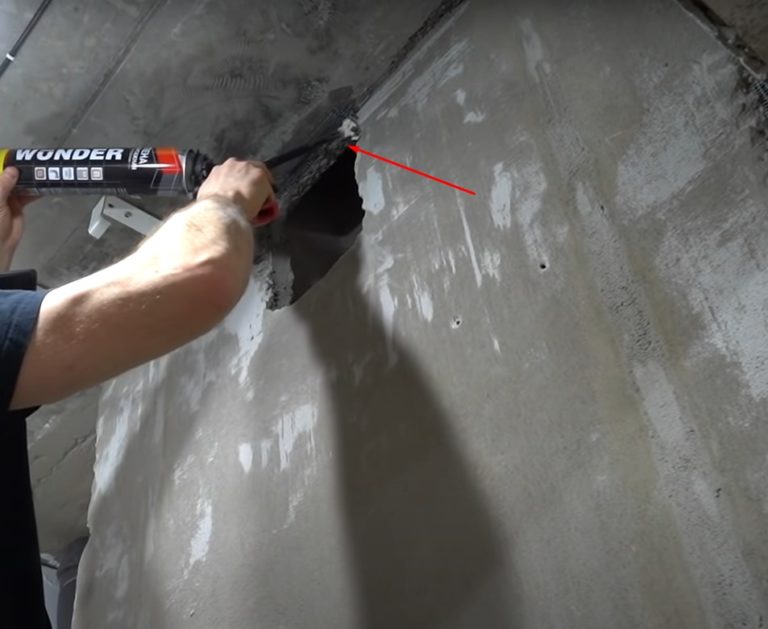
- The apartment shares common utility risers. The pipes run through the floors between floors using sleeves, where gaps are often left due to negligence on the part of the builders.
The joints need to be sealed, otherwise the ventilation system will draw air from the bathrooms of neighboring apartments.
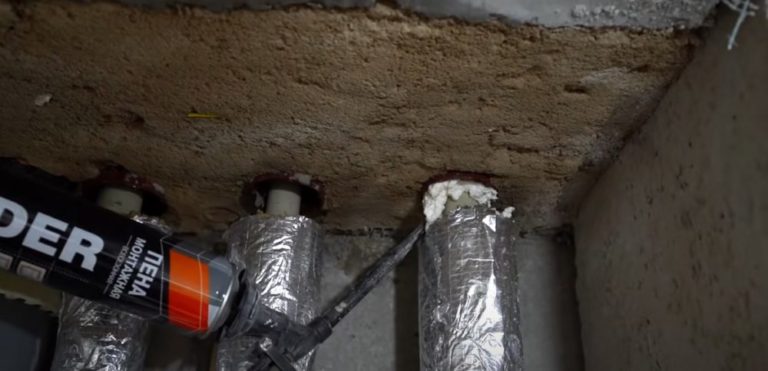
- Wet the gaps between the sleeves and the risers generously with water. Using a gun and foam, thoroughly seal all cracks.
Allow the polyurethane foam to dry. Use a sharp knife to trim off any protruding hardened foam.
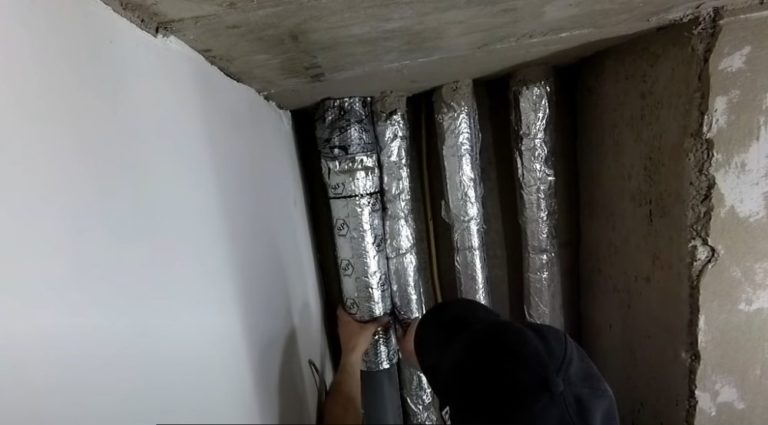
- Before installing ventilation ducts, ensure that the common building risers are soundproofed. If the pipes are bare, wrap them with soundproofing material.
Soundproofing doesn't affect ventilation performance, but its absence creates discomfort in the apartment. What's the point of using flexible, sound-insulated ductwork to connect a duct fan if the entire riser system isn't soundproofed?
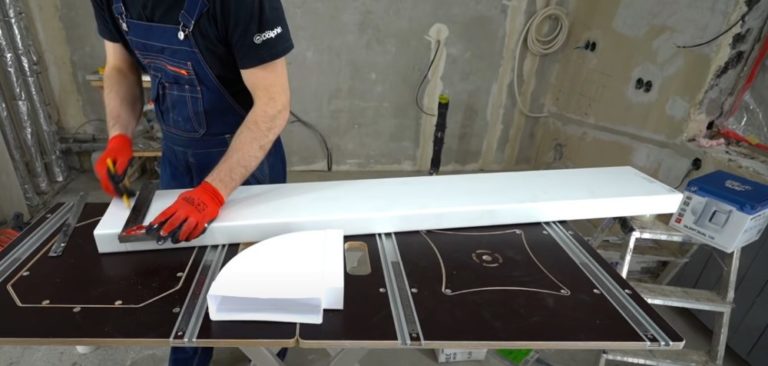
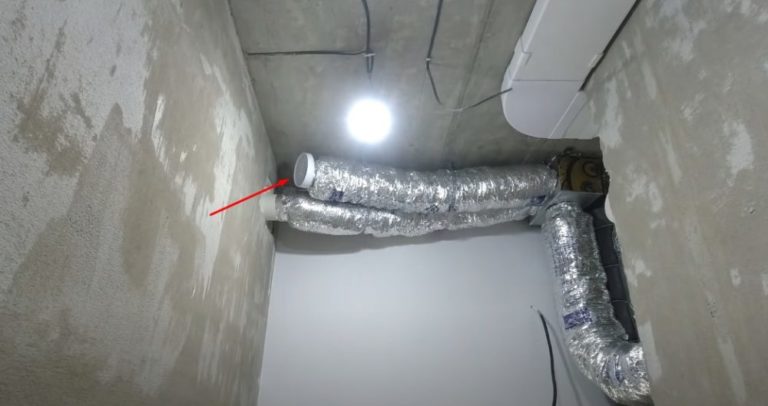
- After the preparatory work is complete, begin assembling the ventilation duct from plastic components. Use a flat box with a cross-section of 125 mm.
The air duct will run under the ceiling between the bathroom and toilet. A fan and junction box will be connected to the duct, and its outlet will be installed into the building's common ventilation shaft through a combination grille.
- The finished duct for the toilet and bathroom will be in the shape of an elongated letter "P", with an adapter for a round pipe installed at one end for connecting a fan.
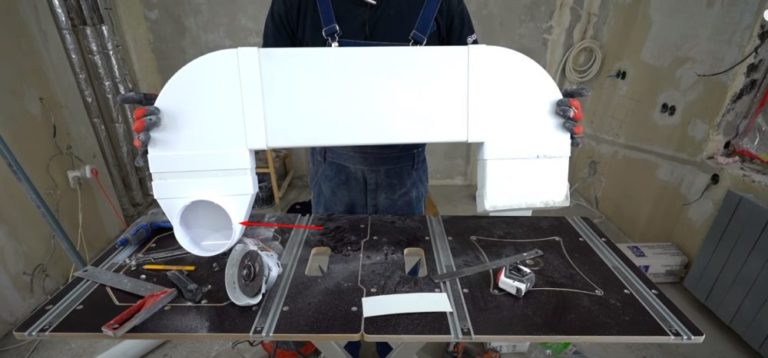
- Temporarily secure the plastic duct to the ceiling. Check the dimensions. Mark the mounting location for the duct fan under the round pipe adapter on the wall.
To prevent the motor noise from spreading through the structural elements of the apartment, attach a sound-insulating pad under the equipment.
- After fitting, remove the structure and disassemble it into its components. Reassemble the channel, sealing the joints with a hot glue gun. The seams must be 100% sealed to prevent leaks of contaminated air.
- After gluing, hang the duct in place under the ceiling. Before installation, apply foam around the perimeter of the ends of the walls of the general building ventilation opening. The foam will adhere to the duct and ensure a sealed joint.
- Using the included mounting hardware, attach the duct fan to the wall with a piece of soundproofing attached. Connect the exhaust port of the fan to the round plastic duct.
- Using automotive sound deadening sheets, cover the walls of the metal junction box. Attach mounting brackets to the housing with screws for ceiling mounting.
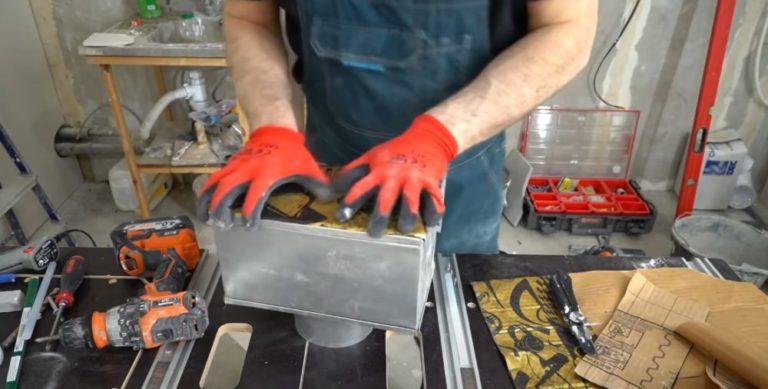
- Secure the sound-insulated junction box to the ceiling using anchor bolts or dowels and screws.
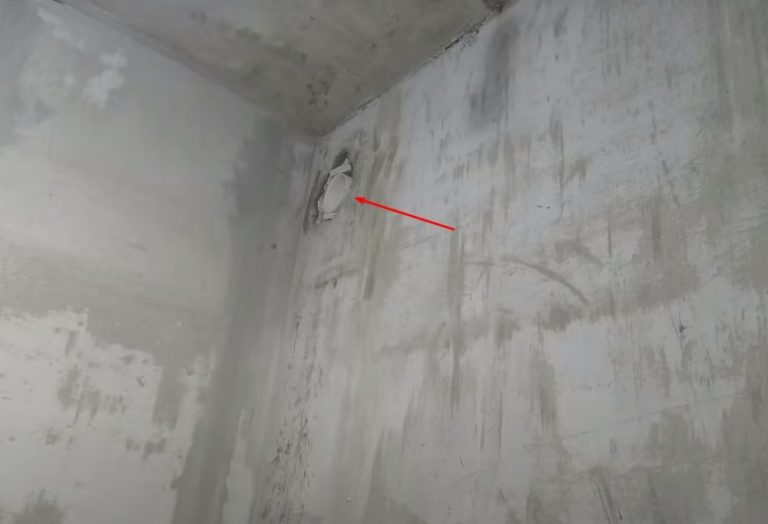
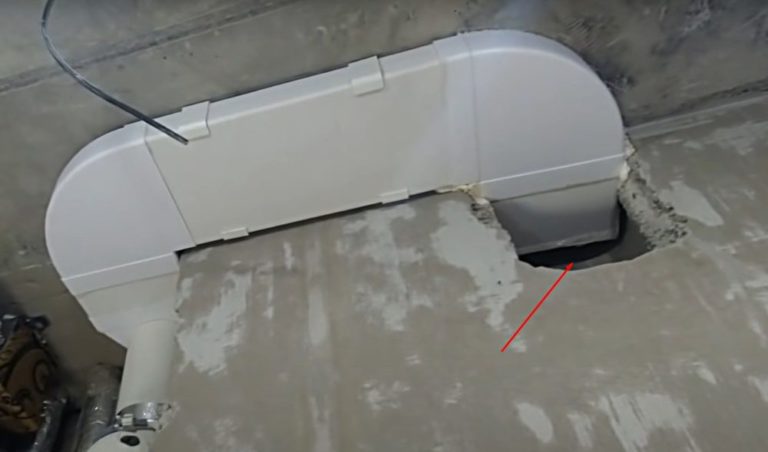
- Drill a hole through the ceiling at the top of the wall separating the bathroom and toilet for the round channel. Use a hammer drill, a drill, and a chisel and hammer. A hole saw is also helpful.
The installation technique depends on the wall material. Insert a plastic sleeve wrapped in sound-insulating material into the hole.
- Measure the distance from the duct fan inlet to the outlet of the distribution box. Cut the flexible duct to the correct size.
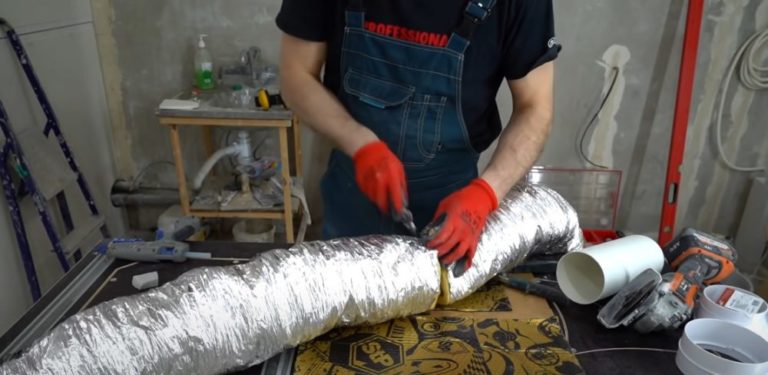
- Connect the outlet of the distribution box to the inlet of the duct fan using flexible ducting. Seal the joints with aluminum tape and secure with plastic cable ties.
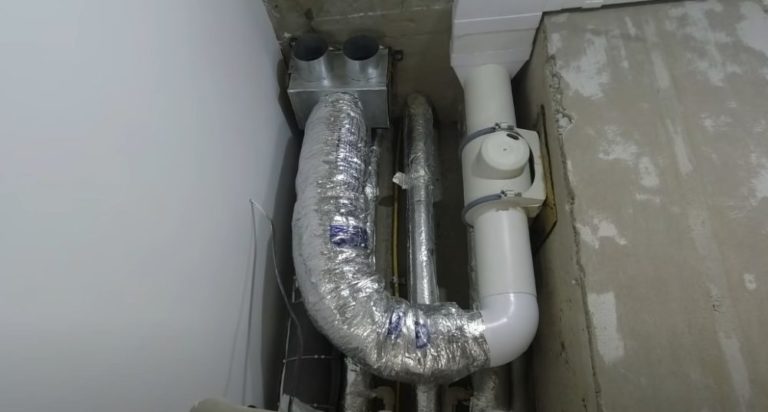
- Measure the distance between one of the junction box entries and the sleeve coming out through the wall from the bathroom.
Cut the flexible duct to size. Connect the two units' nozzles, securing the joints with aluminum tape and clamps.

- Connect another flexible duct to the second inlet of the distribution box. The other end remains free. It will suck dirty air from the toilet.
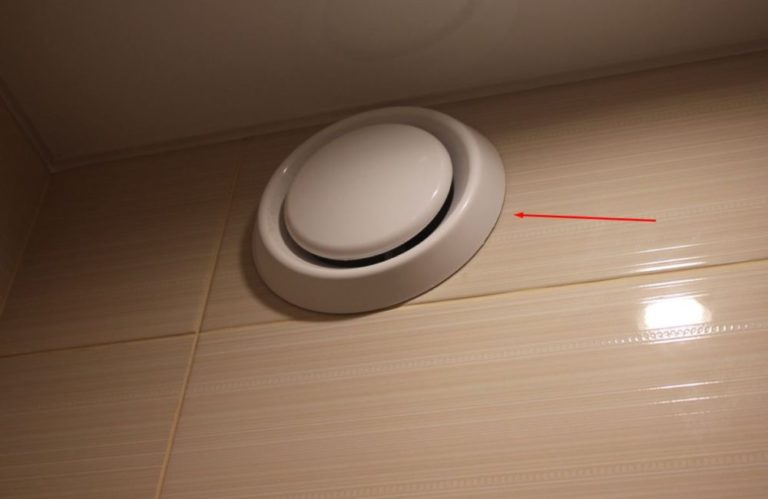
When the entire structure is hidden under the trim, the free end of the duct can be connected to the one cut into the suspended ceiling. anemostat.
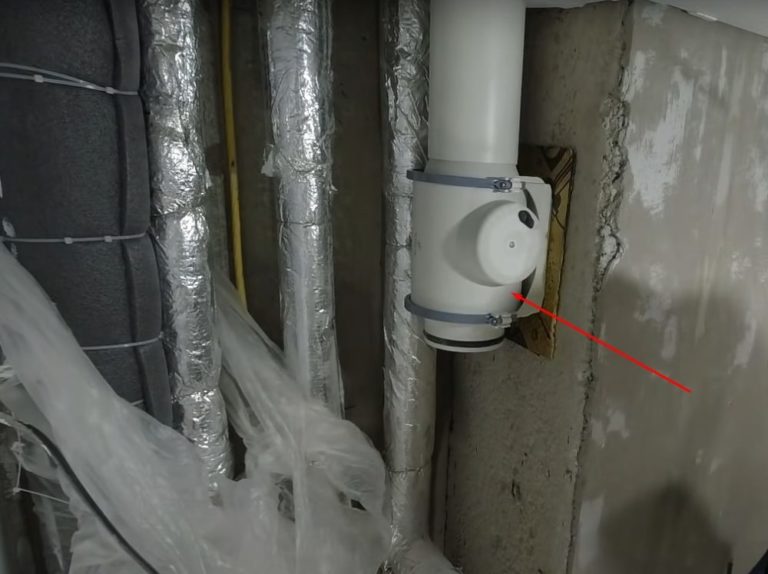
- Secure the flexible air ducts to the ceiling with clamps to prevent sagging. Cover the opening on the sleeve on the bathroom side with an air diffuser, an air valve, or a standard decorative grille.
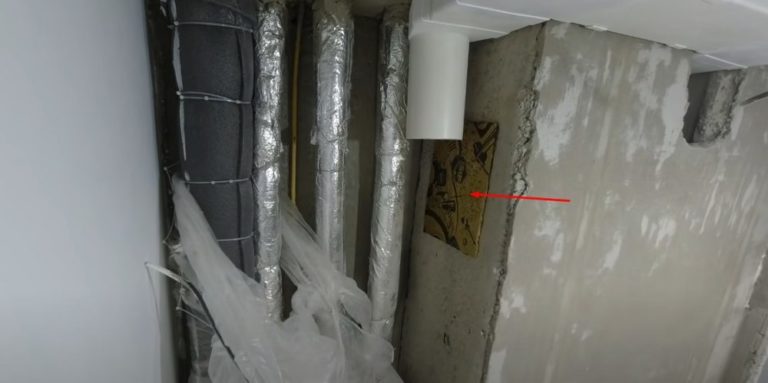
- There should be a free ventilation hole in the common house shaft under the plastic channel entering the wall.
It must not be completely blocked. Cover the remaining opening with a decorative grille. If the fan breaks or the air ducts become clogged, the toilet will still be able to ventilate naturally.
Instead of a regular one, you can use a combination grille, which has an outlet for connecting a ventilation duct from the apartment.
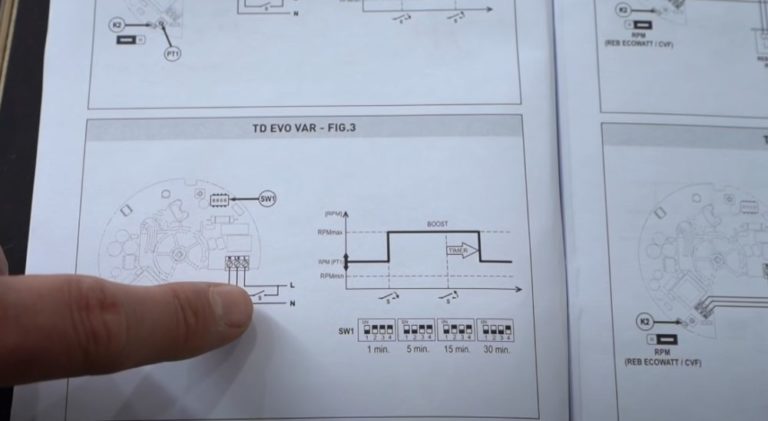
After installing the ventilation units, connect the wiring to the duct fan. You can find the wiring diagram in the manufacturer's instructions for the equipment.
Commissioning works
After completing the bathroom and toilet ventilation installation, check the operation of the utility system. Turn on the duct fan. Test the suction power of dirty air by changing the speed settings.
You can get accurate measurements with an anemometer. If you don't have one, use a simpler method. Place a sheet of paper against the exhaust vent. When the fan is running, it should
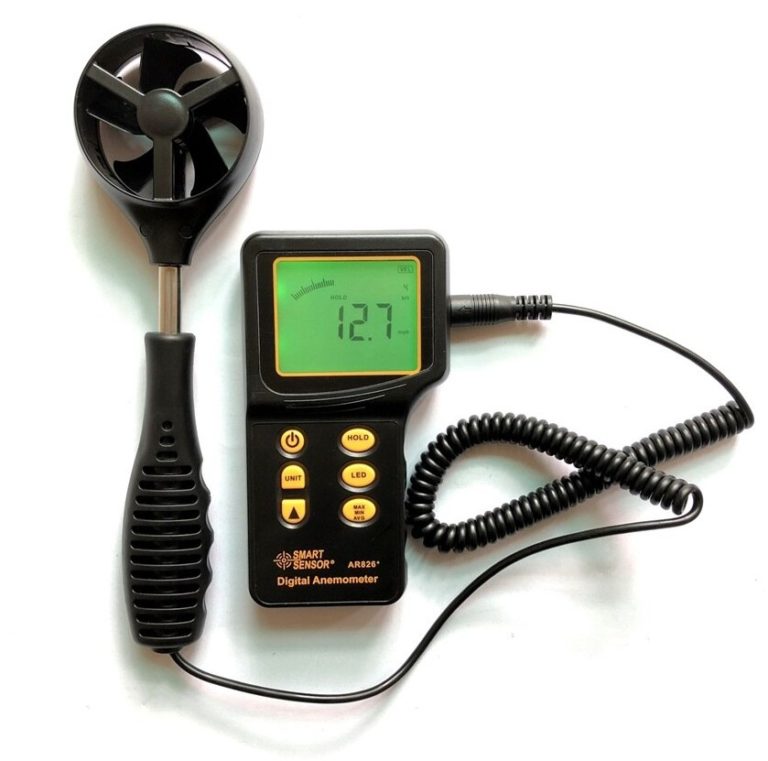
Place a sheet of paper on the ventilation grille; it should stay stuck. As the airflow speed increases, the paper will become increasingly difficult to remove.
Installation video
Answers to current questions
The exhaust vent can be located on the ceiling or the top of the wall, set back 20 cm from the floor. For better air flow, position the hood diagonally or opposite the door.
Permission to connect to the building's general ventilation system is granted by the building's maintenance organization. The outcome depends on the building's design and the ventilation shaft layout. If permission is granted, connect the duct without completely blocking the wall vent.
A vent pipe is an extension of the sewer riser. Connecting ventilation ducts to the sewer network is prohibited.


