Properly arranged and functioning ventilation in a suspended ceiling is necessary to normalize blood pressure Between the load-bearing floor and the finishing material. Air exchange removes moisture, which promotes fungal growth.
We'll discuss the purpose, operating principle, and technical aspects of ventilation in more detail in this article. We'll also explore the different types of engineering systems and provide a step-by-step installation guide. We'll conclude this overview with helpful tips and answers to frequently asked questions.
- Why ventilate a suspended ceiling?
- Ceiling ventilation scheme, in which rooms to do it
- Technical aspects when choosing a ventilation type
- Types of ventilation
- Grilles
- Slot ventilation grilles
- Magnetic ventilation grilles
- Shadow ventilation grilles
- Ventilation using exhaust fans
- Ventilation with a floor-to-ceiling air conditioner
- Ventilation through a centralized ventilation system
- Ventilation using ventilation shafts
- Natural ventilation
- Artificial ventilation
- Ceiling hood
- Practical tips for ventilation installation
- Ceiling ventilation installation instructions
- Kitchen and bathroom ceiling hood installation instructions
- Disadvantages of ceiling space ventilation
- Answers to current questions
- Video instructions for installing ventilation in a suspended ceiling
Why ventilate a suspended ceiling?
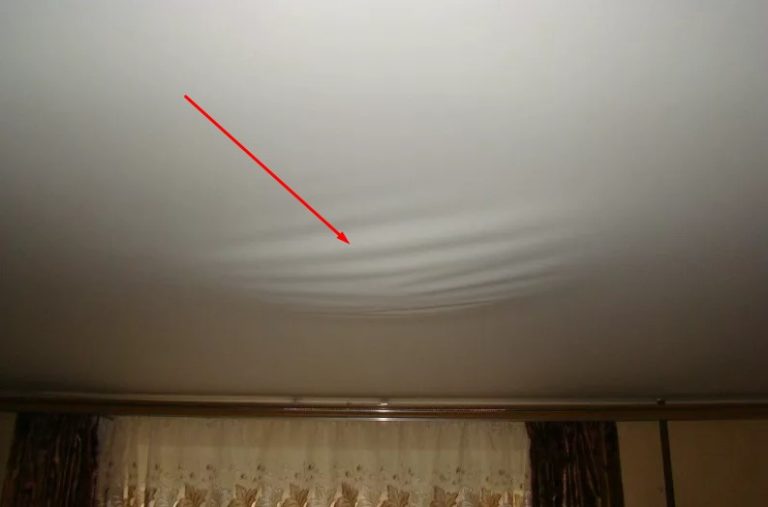
After installing a suspended ceiling, a closed space is created between the load-bearing floor and the finished surface. The air is not exchanged, but it is exposed to different temperatures between the room and the attic or second floor.
The difference in temperature values leads to the creation of unfavorable factors in a confined space:
- pressure is created, deforming the tension fabric;
- condensation forms, appearing as damp spots on the walls along the perimeter of the tensile structure;
- Mold fungi multiply, which are dangerous to human health, destroying wooden structures and appearing as black spots on the walls.
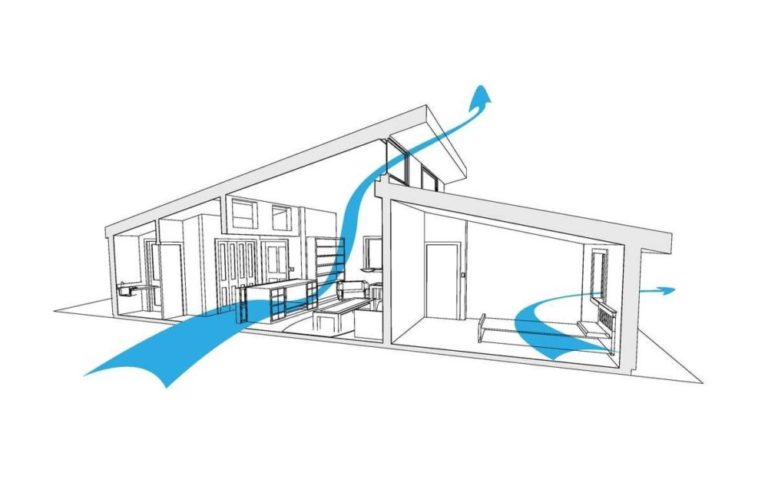
The built-in ventilation in the suspended ceiling ensures air circulation. The open space normalizes pressure and temperature, and moisture vapor is removed.
Ceiling ventilation scheme, in which rooms to do it
Air circulation occurs when the ceiling ventilation system provides for the intake of fresh air and the removal of exhaust air. Technically, ventilation installation is required in all rooms with a suspended ceiling. However, there are certain rooms where a system is absolutely necessary:
- Ventilation is essential in the kitchen, where the stretch ceiling is exposed to moisture vapor and temperature fluctuations. Air vents are installed with filters to prevent contaminants from penetrating beneath the suspended ceiling.
- Ventilation is just as important in the bathroom, toilet, or combined bathroom, where the stretch ceiling is exposed to similar factors. Moisture-resistant vents are installed.
- The bedroom is the second most important room where ceiling ventilation is required. During sleep and rest, the concentration of carbon dioxide and moisture vapor in the room increases. To create a comfortable atmosphere, heaters, humidifiers, and other devices that affect the stretch ceiling are used. Ceiling ventilation can be either natural or forced. The latter option requires a quiet fan that won't interfere with rest.

Living rooms, hallways, and other rooms should preferably be equipped with ventilated ceilings, as the suspended ceiling and interfloor ceilings also require protection from harsh elements. The type of ventilation equipment is selected at your own discretion. There are no special requirements.
Technical aspects when choosing a ventilation type
In terms of design and material, a stretch ceiling is a solid PVC or fabric finish. To ventilate the resulting space, ventilation grilles are installed, which disrupt the integrity of the fabric. During installation, it's important to accurately calculate the installation locations. Incorrectly cut holes cannot be repaired without leaving a trace. The grilles cannot be moved later.
Forced-draft ventilation openings are made at the entry and exit points of air ducts. For natural ventilation without ducts, grilles are installed that are not connected to fans or ducts. The optimal opening pattern is diagonally across the ceiling corners or in rows.
Air flows throughout the entire ceiling space. Free, natural circulation equalizes pressure and intensively removes moisture vapor. The risk of sagging or being sucked in by the intense airflow created by the forced-air system's fan is eliminated.
The stretched fabric cannot be used as a support base for utility system components. The first step is installing the ventilation units. The second step is stretching the ceiling.
Working components in the ventilated ceiling space become inaccessible for repair. To avoid having to remove the suspended ceiling, install equipment requiring periodic maintenance in easily accessible locations.
With a classic ceiling finish, the ceiling is connected to the walls by profiles. The joint is concealed by an insert or baseboard, and standard grilles are installed in the corners.
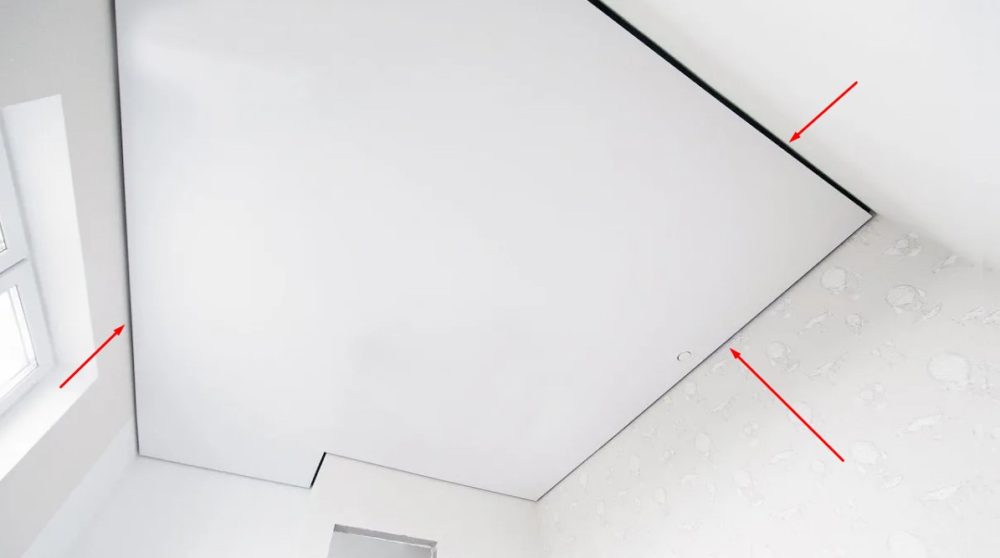
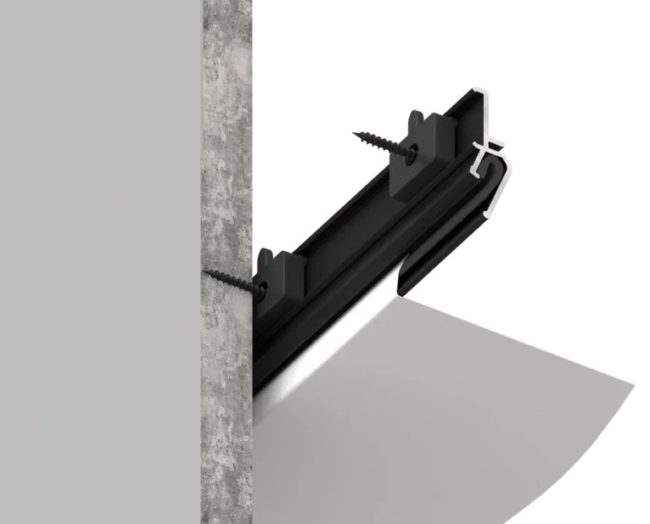
Shadow ceilings differ from classic ceilings by a 7 mm gap created around the perimeter where the ceiling meets the wall. This creates the effect of floating in space. Magnetic shadow grilles and AIRKRAAB profiles are used to ventilate the ceiling area.
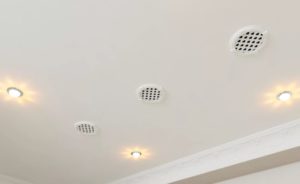
Types of ventilation
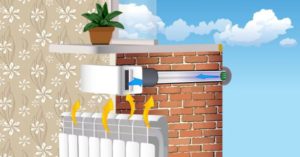
To understand how to make ventilation, you need to know structure and types of utility networksTo ventilate the ceiling space, natural air exchange through vents equipped with grilles is most often used.
Mechanical equipment is used to force circulation of large volumes of air. While the equipment varies in functionality, all options rely on a fan to move the air flow.
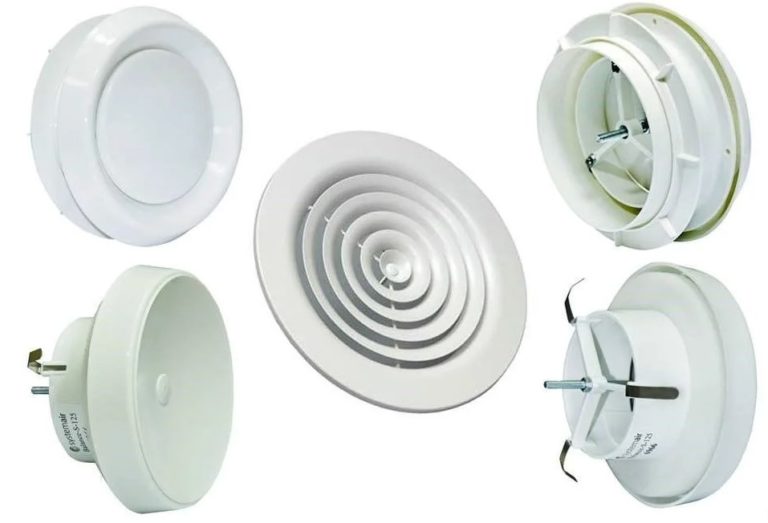
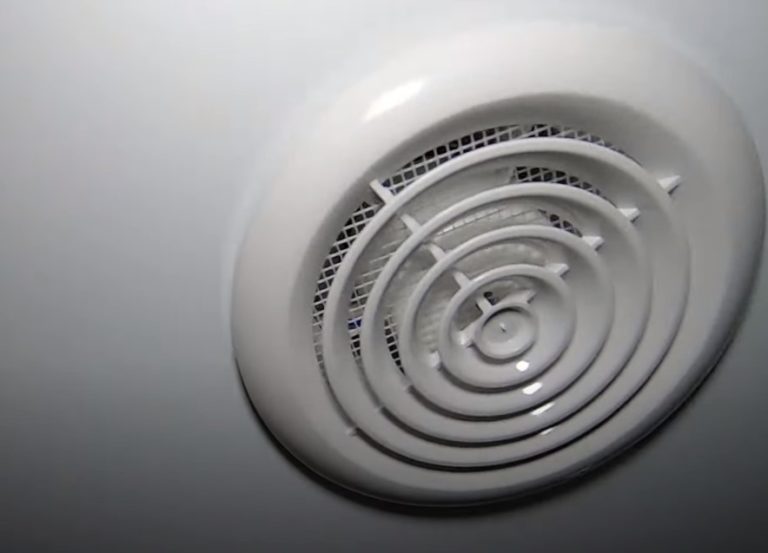
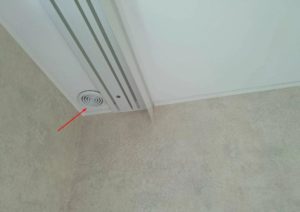
Grilles
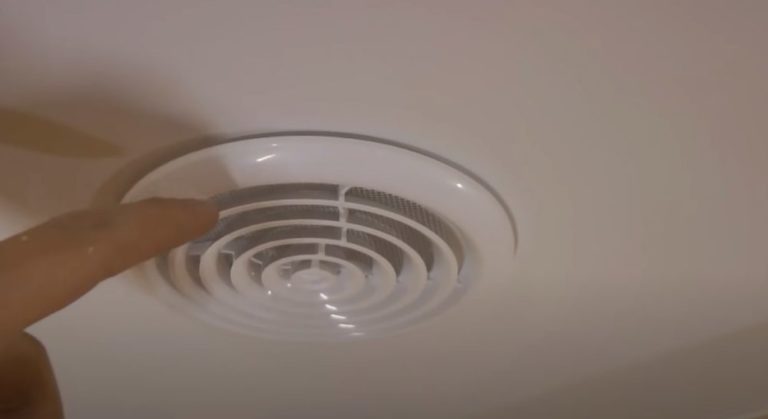
Grilles are made of metal and plastic. The latter is more commonly used for stretch ceilings. The most common size is 600x600 mm. For small spaces, 225x225 mm grilles are used, while for larger rooms, grilles up to 1050x1050 mm are used.
Slot ventilation grilles
The term "slot ventilation" is a general term for ceilings, regardless of the type of grilles installed. Air flows through the gaps created by the slats or caps of the ventilation units.
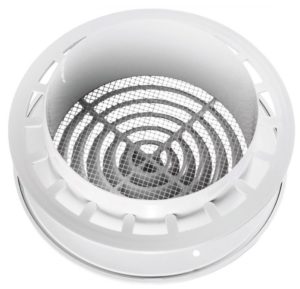
The classic grille is made of slats arranged in one or two rows. The slats serve as air flow guides. A petal valve prevents backflow.
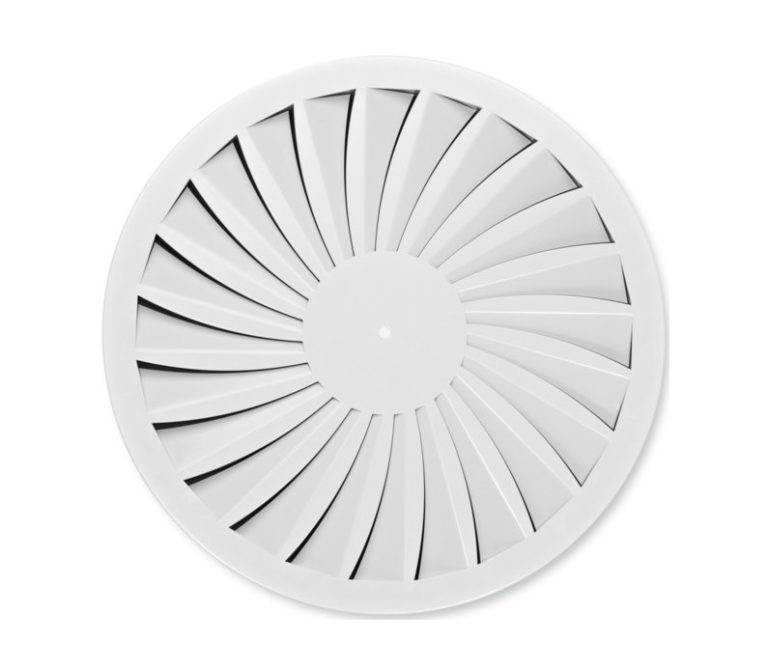
A diffuser is an advanced type of grille, complete with rotating slats, an impeller, and baffles. Controls allow the airflow to be adjusted to specific requirements. Compared to a grille, a diffuser disperses air better.
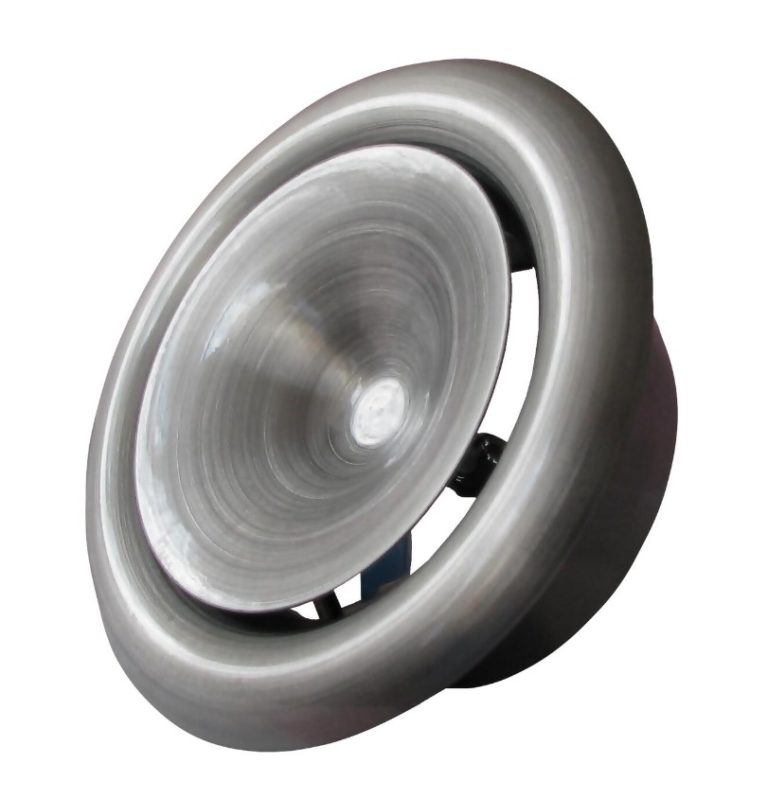
The diffuser consists of a housing with a movable disc valve inside. When closed, no air flows. Increasing the gap between the valve and the housing increases air flow. The shape of the disc determines the direction of air flow. This feature determines the location of the diffuser:
- the plate concave inwards is the supply anemostat;
- the outwardly convex plate is an exhaust anemostat;
- a flat plate with rounded edges – a supply and exhaust anemostat.
Improved anemostats are equipped with multiple plates. Stepped control is convenient for setting the direction and volume of air flows.
Advantages of slot ventilation:
- Ease of execution.
- Low cost of components.
- A universal option for natural and forced ventilation.
Disadvantages include improper installation or selection of the device, and poor quality workmanship of cheap products. Installation of a standard grille is complicated by the need to create a foundation on the interfloor ceiling. The fasteners must be aligned flush with the tensioned fabric.
Slot ventilation is suitable for all rooms in a standard apartment or private home with a suspended ceiling.
Magnetic ventilation grilles
Magnetic ventilation differs from traditional grille systems in that it uses grilles with magnets. The housing is made of metal and coated with a plastic layer.
The embedded element has a built-in magnet. The decorative grille cover does not need to be glued or screwed to the base. The cap adheres to the embedded element's magnet.
Advantages:
- Easy maintenance. The cap can be easily removed and replaced multiple times.
- Versatility of use. In addition to slot ventilation, magnetic grilles can be used as an inspection hatch for accessing the lighting power supply or fire detectors.
- Convenient to use for ventilation of individual levels of a multi-level ceiling.
Magnetic grilles have no significant drawbacks. Their price is slightly higher than that of traditional models without magnets.
Magnetic elements are ideal for single- and multi-level ceilings. They can be installed in both dry and damp rooms. The polymer coating protects the metal base from corrosion.
It's convenient to install a magnetic grille on a ventilation box hidden under a stretch ceiling. The air duct acts as an embedded element.
Shadow ventilation grilles
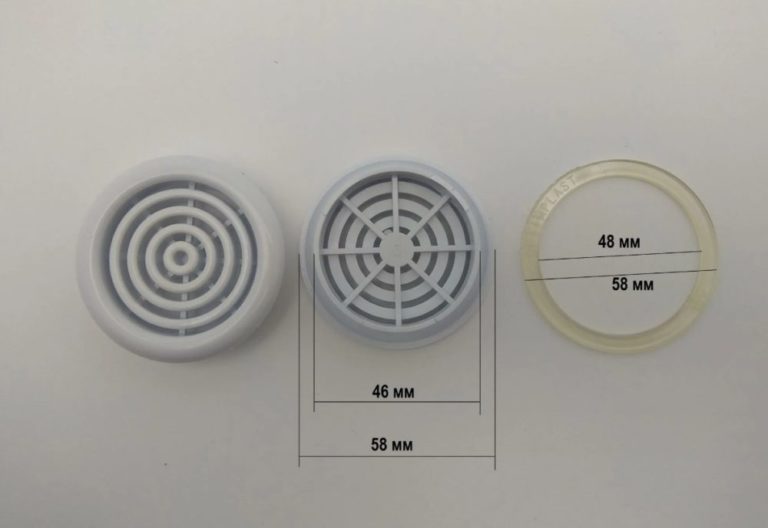
On the ceiling, with a 7 mm gap between the stretch fabric and the walls, shadow ventilation is provided using a Koch diffuser. This element is also known as Eclipse. It is a magnetic slot ventilation grille with a shadow slot.
Round diffusers with diameters of 125 and 150 mm are common. The diameter is selected based on the ceiling area. The kit includes a grille with magnets, a plastic thermal ring, an air flow regulator, and an insect screen.
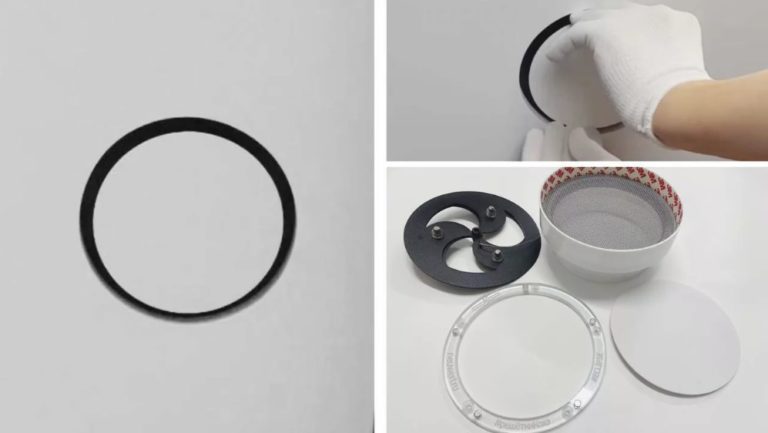
The AIRKRAAB shadow profile is installed discreetly. The strip is attached along the perimeter of the walls, within the gap created by the 7 mm indentation of the stretched fabric. The profile has air channels.
Advantages:
- Concealed installation.
- The diffuser creates a neat, narrow gap that does not attract attention.
- The classic, stylish design matches the design of any suspended ceiling.
Disadvantages include the difficulty of installation. The installation location and height must be carefully calculated to ensure effective airflow and prevent drafts. If you lack the necessary skills, it's best to entrust the installation to professionals.
AIRKRAAB profiles are ideal for use in shadow ceilings due to their intended use in this area. The Eclipse grille can be installed on a seamless stretch ceiling or suspended plasterboard structure.
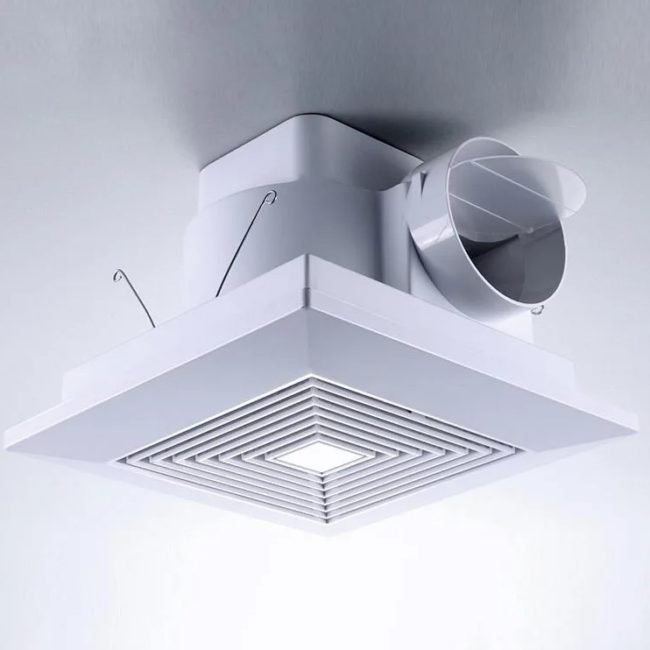
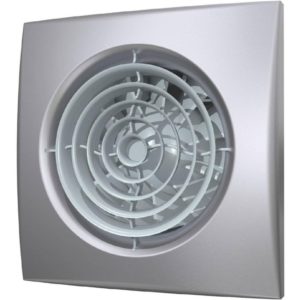
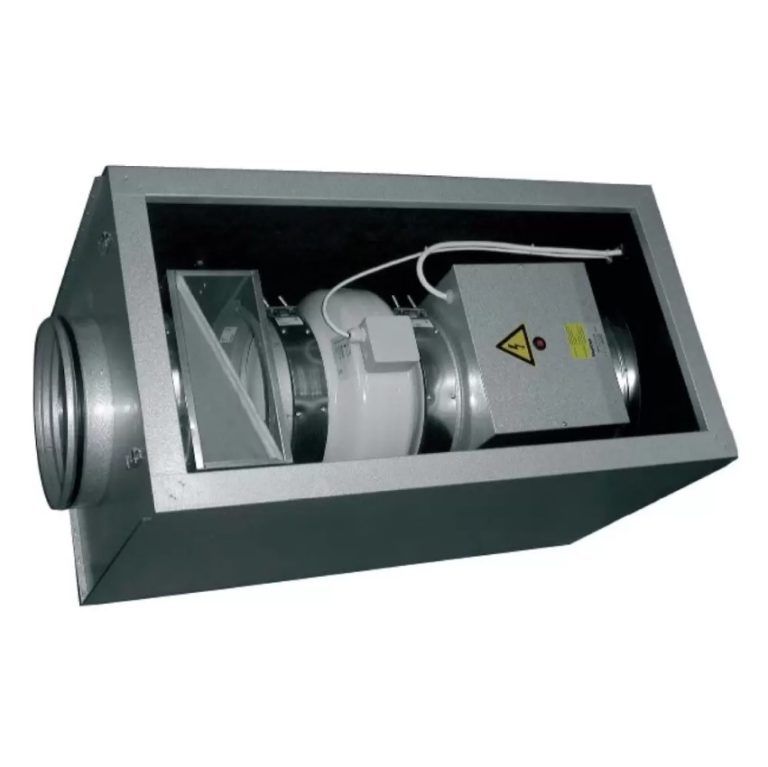
Ventilation using exhaust fans
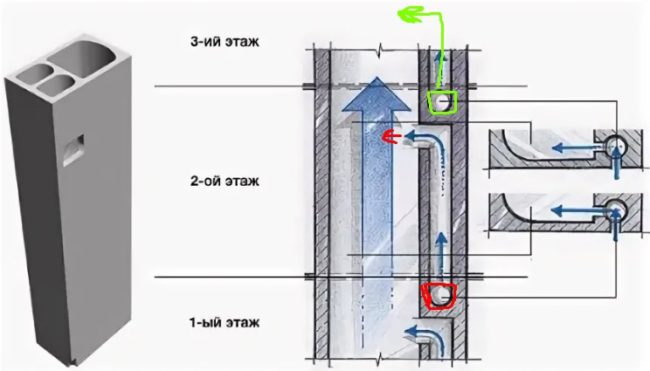
Forced ventilation for the exhaust hood is provided by installing a fan. An exhaust duct is a mandatory component of the system. The design of the utility system depends on the installation location. In an apartment, the exhaust duct is connected to the building's main ventilation duct, with openings with grilles located in the kitchen and bathroom.
In a private home, the exhaust duct is installed as a riser made of a pipe with a diameter of at least 110 mm. The outlet is through the ceiling and roof to the outside. The ceiling exhaust duct is connected to the riser using shaped adapters.
Advantages:
- Stable air circulation regardless of environmental factors.
- Diversion of large volumes of dirty streams.
- Complete removal of moisture vapor and unpleasant odors.
Disadvantages include additional costs for purchasing and installing equipment, as well as electricity costs. Incorrect installation or miscalculation of fan power results in poor air exchange.
When equipment performance exceeds the standard, areas with depressions form on the surface of the stretch fabric due to the strong air suction from the ceiling space. In apartments, forced-air exhaust is not always allowed to be connected to the common building shaft. Ventilation must be routed through the wall to the outside.
Installing an exhaust fan is important in a large room or where the atmosphere is heavily polluted with moisture vapor, soot, and unpleasant odors.
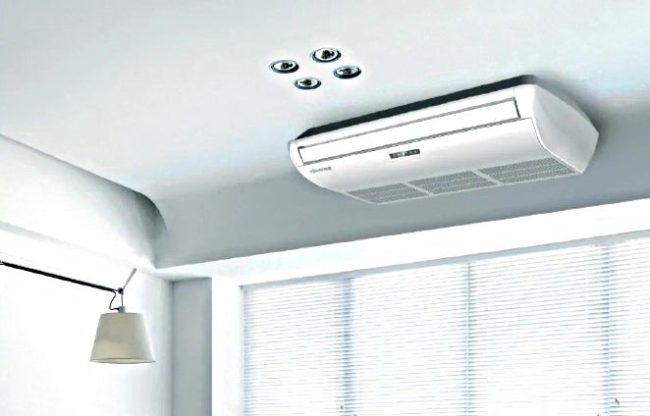
Ventilation with a floor-to-ceiling air conditioner
A split system with both supply and ventilation functions is one option for implementing air exchange in the ceiling space. The outdoor unit is installed on the building's façade. The indoor module is mounted in the ceiling area. By adjusting the operating modes of the split system, excess moisture is removed from the air.
Advantages:
- Creating a favorable overall microclimate in the room and ceiling space.
- High-quality mechanical air exchange.
- Possibility of setting a comfortable mode using the air conditioner settings.
Disadvantages include the high cost of the equipment. A split system will only provide ceiling ventilation in one room. For multiple rooms, a multi-split system with the appropriate number of indoor units can be installed, but this comes with additional costs.
To create active ventilation with multiple exhaust, additional fans will need to be installed. This will increase equipment and electricity costs.
Installing a floor-to-ceiling air conditioner specifically for ceiling ventilation isn't cost-effective. This option is suitable when the decision is made to install HVAC equipment for room air conditioning. Ceiling ventilation will serve as a secondary function.
Ventilation through a centralized ventilation system
Centralized ventilation is installed in new apartments and private homes. The utility network consists of branched ducts, filters, fans, and other equipment. The layout is developed during the building design phase. Ceiling ventilation elements are connected to the existing network later.
Advantages:
- Easy to connect to an existing network.
- Effective removal of dirty air through ducts.
- Possibility of changing ventilation modes.
A disadvantage is the impossibility of ventilating the ceiling if the house doesn't have a centralized network. Installing dedicated ventilation lines in the ceiling space for air exchange is not cost-effective.
This option is suitable for an apartment or private home where a centralized utility network is already installed and operating.
Ventilation using ventilation shafts
In apartment buildings, air is exhausted from all rooms through a common ventilation shaft. Connecting a ceiling-mounted exhaust system with natural ventilation reduces financial and labor costs.
Advantages:
- Saving money.
- Possibility of performing work using your own resources.
- No equipment cluttering up the space.
Disadvantages include the need for precise calculations. The capacity of the communal ventilation shaft is not infinite. Errors will result in insufficient air exchange and periodic backdrafting.
This option is suitable for apartments where it is difficult to ventilate the ceiling space in any other way.
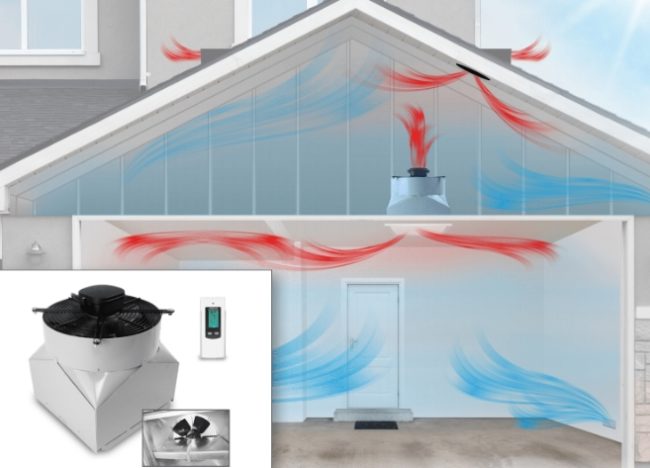
Natural ventilation
Artificial ventilation
Ceiling hood
The opening for removing air from the ceiling space and the room is called an exhaust vent. The ventilation unit is called a hood. Natural ventilation uses a grille, an anemostat, and a diffuser. The unit is not equipped with an electric fan.
In mechanical ventilation, the hood in a suspended ceiling is equipped with a fan. Additional elements include air ducts and grilles. The hood is dependent on the power grid. A power outage can result in reduced or complete cessation of ventilation in the ceiling space.
Practical tips for ventilation installation
Choose the type of utility network based on the best possible benefits. Minimize financial and labor costs without sacrificing performance. If obtaining permission to connect to the building's main network is difficult, consider alternative independent ventilation options.
Punctures and cuts in stretch ceilings cannot be completely concealed. If you lack the necessary skills, entrust the installation of equipment and gratings to professionals. Mistakes are expensive and sometimes impossible to repair.
Ceiling ventilation installation instructions
Ceiling ventilation in bathrooms, toilets, combined bathrooms, kitchens, and other rooms follows the same design. The same equipment and installation technology are used for the selected utility system of a specific type.
The only difference in kitchen ventilation is the need to extend a duct from the suspended ceiling to connect the ducted hood above the hob.
As an example, let's first take a detailed look at the installation instructions for a bathroom suspended ceiling ventilation system, where diffuser mounting elements were installed before the ceiling was stretched:
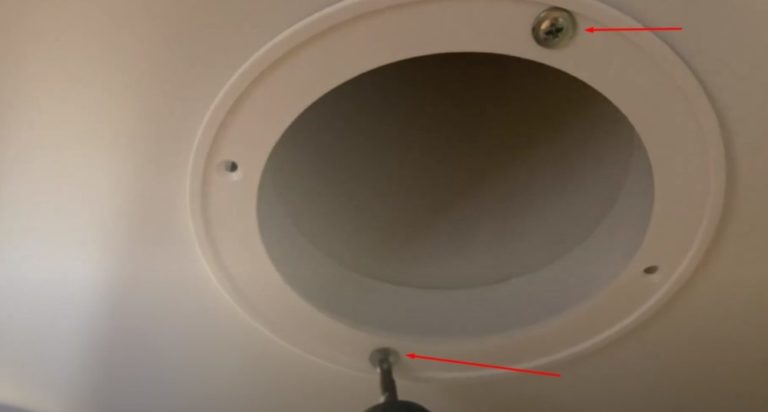
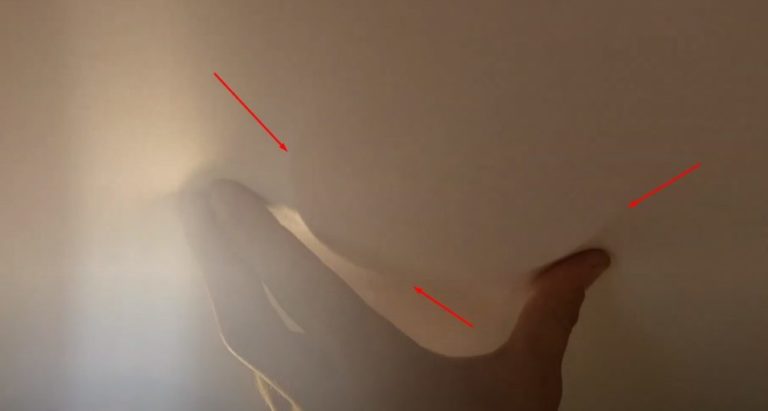
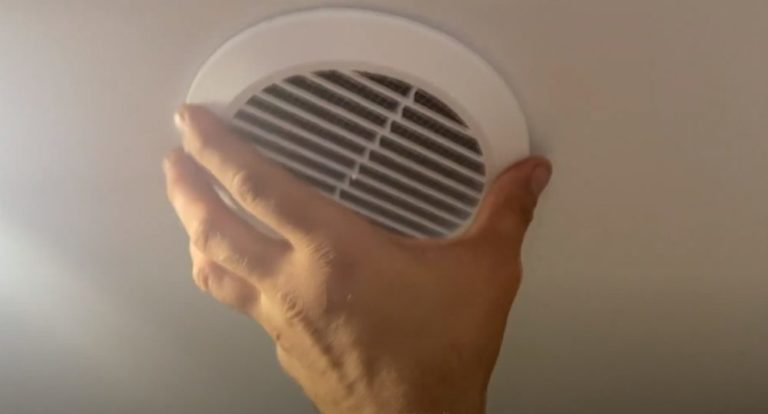
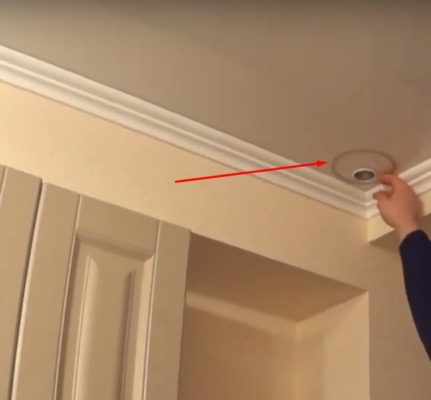
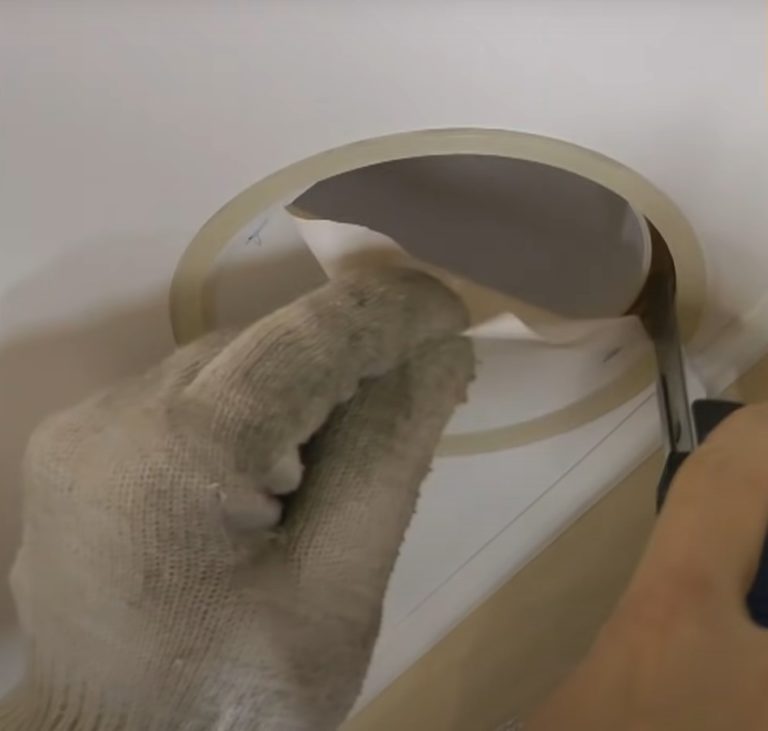
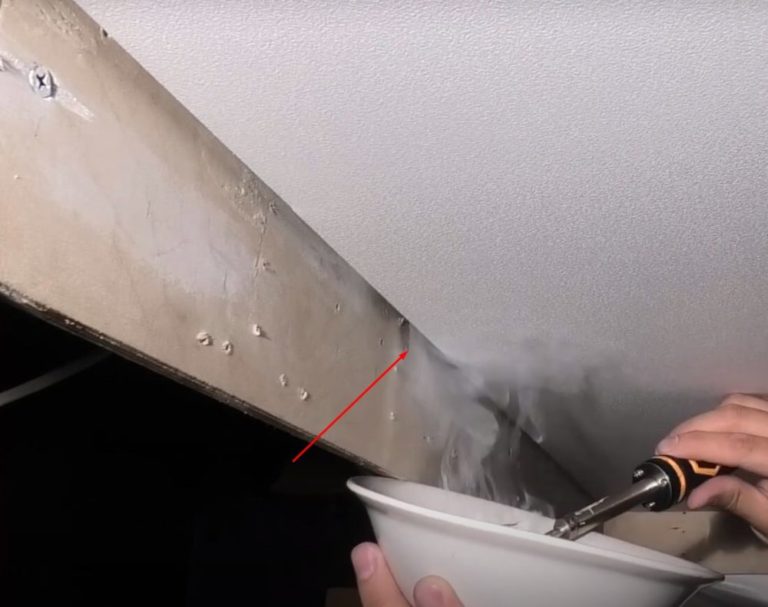
- At the intended location of the embedded element, apply light pressure to the tensioned fabric with your hand. Use the protrusions to determine the contours where the grille will be secured.
- Take the mounting ring included with the grille and apply adhesive over the entire surface.
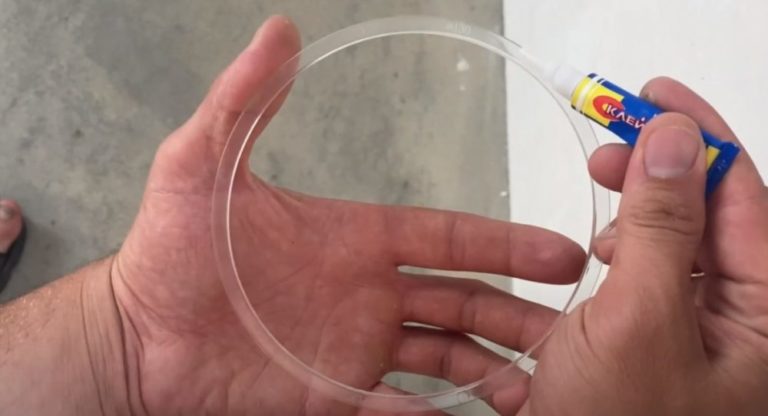
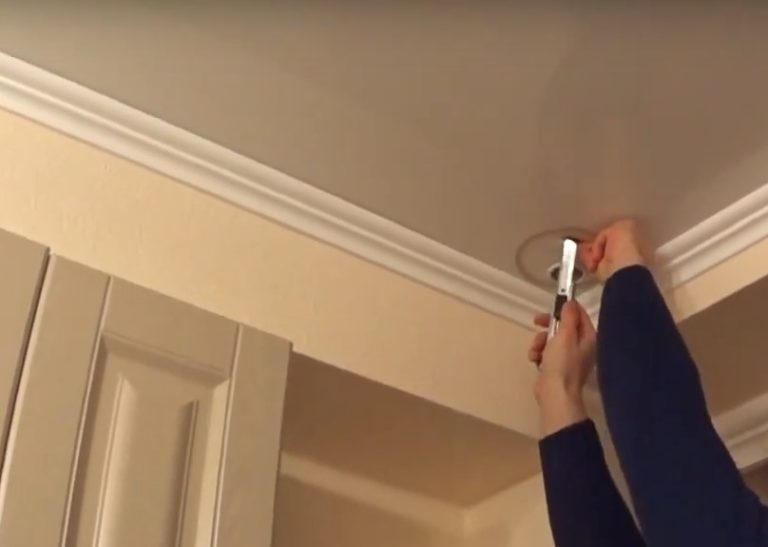
- Glue the ring to the suspended ceiling near the raised portion of the embedded element. After the adhesive has dried, cut out a circular piece of film inside the mounting piece using a utility knife. Be sure to adhere to the inner edges of the ring.
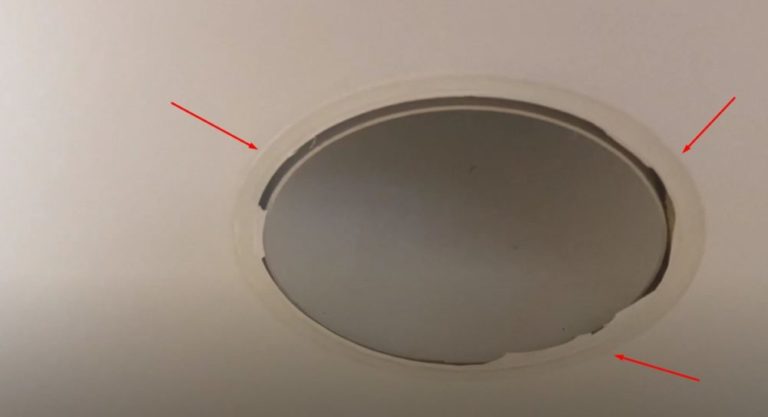
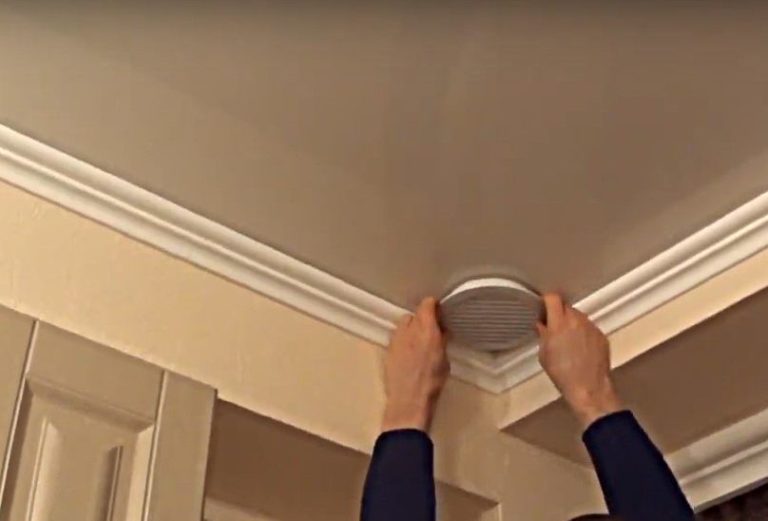
- Insert the diffuser flange into the ring-framed hole. Secure it to the embedded element with screws.
- Insert the decorative grille into the flange hole.
Repeat this action to install subsequent grilles.
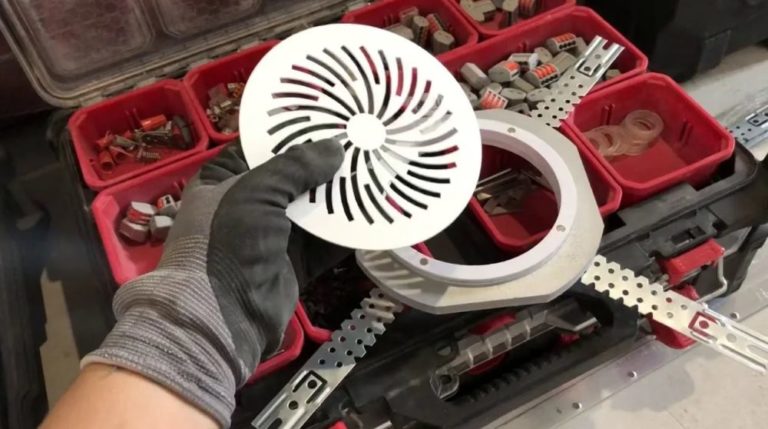
The second example we will consider is the installation of diffusers, when the installation of embedded elements was not planned in advance or the installed grilles turned out to be of too small a cross-section and require replacement.
Follow these simple steps:
- Buy lightweight plastic diffusers consisting of a thermal ring and grille. Glue the ring to the intended installation location.
- Using a utility knife, cut out the film along the inner edges of the ring.
- Insert the grille into the prepared opening, framed by the glued ring. Check that the slats are aligned correctly.
Repeat the steps to install the next grilles.
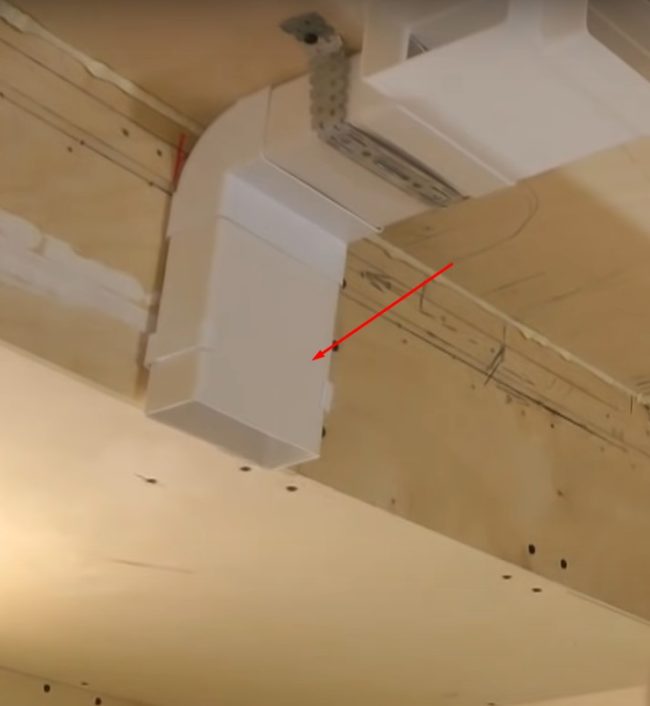
The third example we will consider is the installation of a kitchen ceiling ventilation system, where it is necessary to lower a channel from under the stretch film to connect the exhaust hood duct above the hob.
Follow these steps:
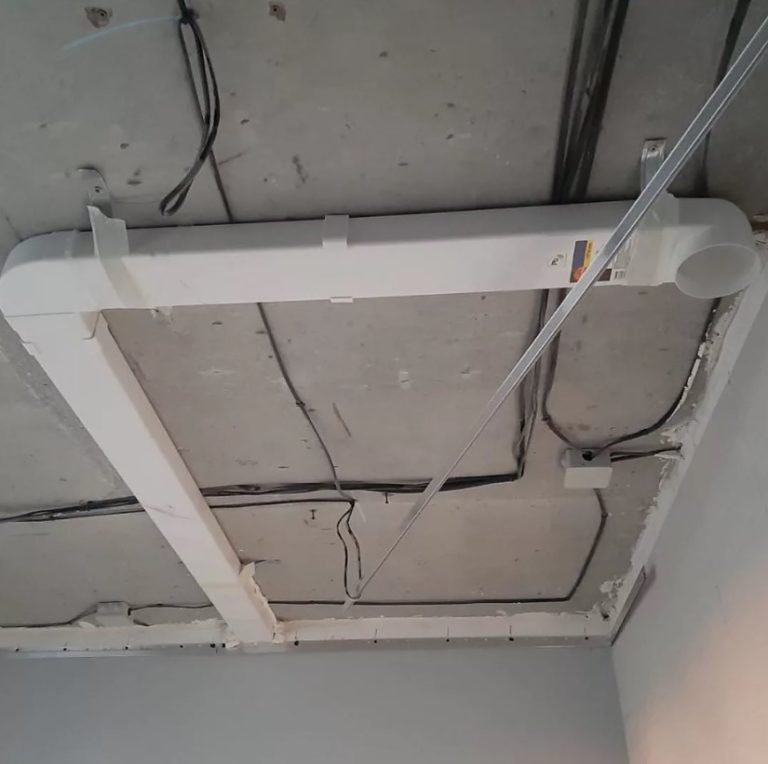
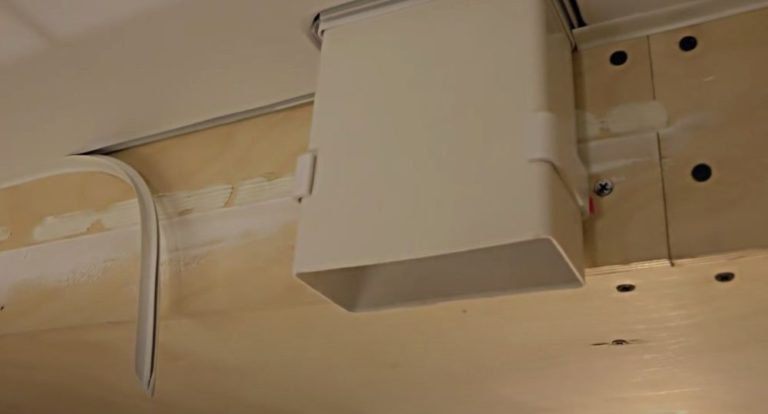
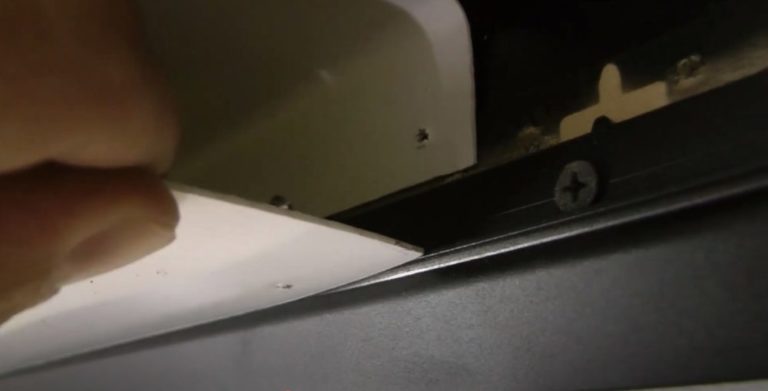
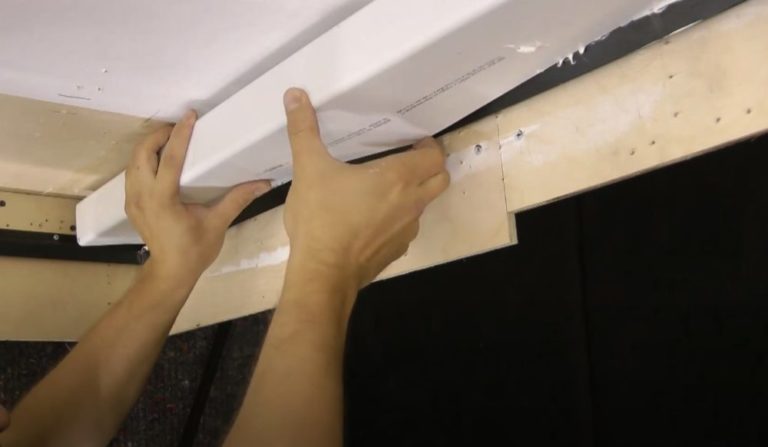
- Before stretching the fabric on the ceiling, secure the exhaust duct. Use rectangular plastic ducts instead of corrugated ducts and round pipes. Connect the duct outlet to the exhaust riser, where the stale air is discharged.
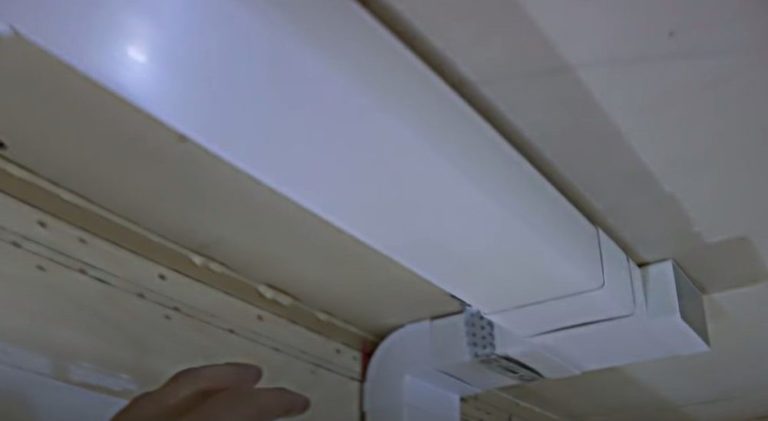
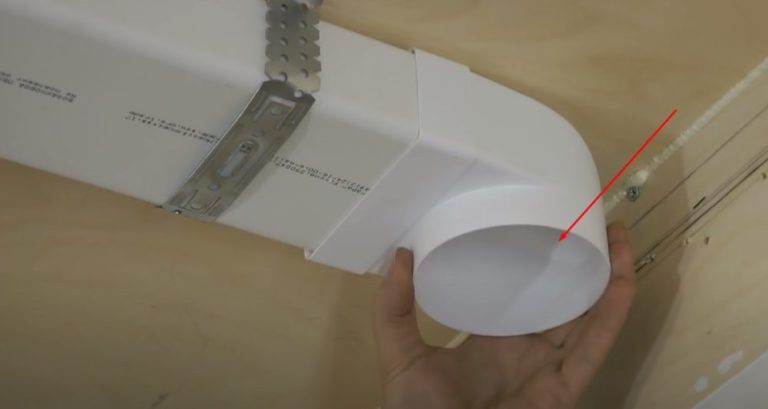
- Lower the other end of the box down the wall where the gas or electric stove will be located. To connect the exhaust hood with a corrugated duct, install an adapter with a check valve on the lower end.
- If you don't want to install a rectangular vent, install an adapter with a check valve on the straight section of the duct under the ceiling. The corrugated pipe from the exhaust hood will fit into the hole in the tensioned fabric, framed by a thermal ring and flange.
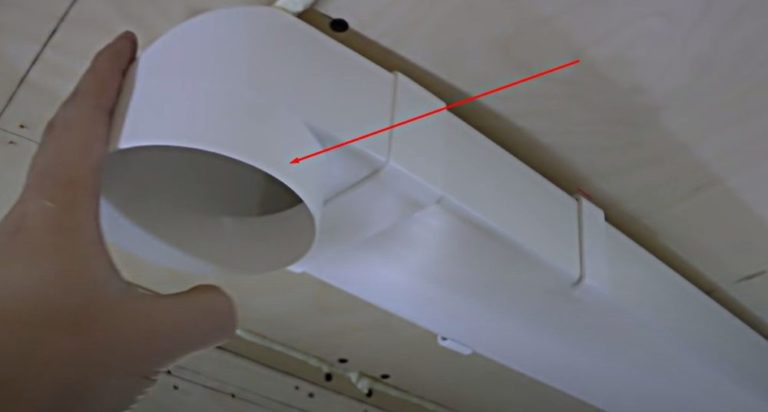
- To ensure natural exhaust from the kitchen when the exhaust hood fan is off, create a branch from the duct using a tee. Fit the end of the duct with an adapter for a diffuser with a check valve.

After stretching the ceiling fabric, glue thermal rings where the ventilation openings are located. Cut the film to the inner diameter. Install the diffuser grilles.
When the kitchen and bathroom are ventilated through a single duct connected to a common exhaust stack, install an intermediate check valve on the duct between the rooms. This separation unit will prevent contaminated air from entering the other room.
Kitchen and bathroom ceiling hood installation instructions
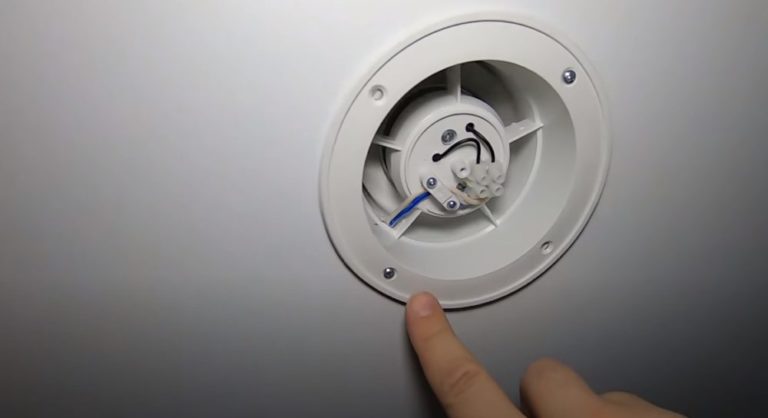
A simple mechanical exhaust system in a bathroom can be achieved by installing a riser with a PVC pipe extending outside. Cut the other end to the desired height for the stretched fabric. Secure the embedded element to the ceiling. After stretching the fabric, prepare a hole with a glued-on thermal ring. Insert a duct fan into the plastic pipe. Cover the hole with a diffuser. Design the fan so that the grille is flush with the stretched fabric after installation.

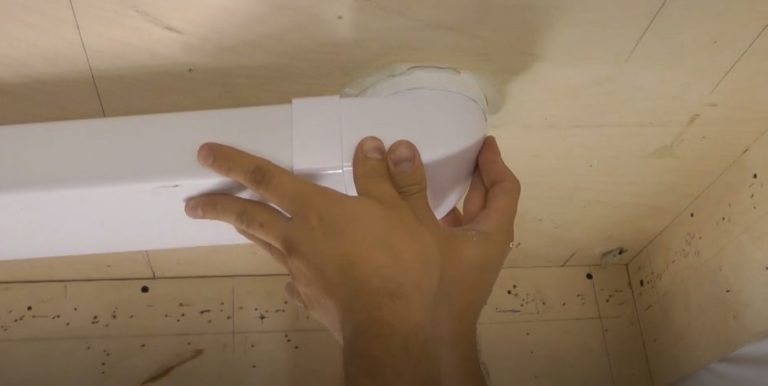
Use a rectangular box to provide forced or natural ventilation for a shadow ceiling. First, attach AIRKRAAB profiles along the perimeter of the walls. Cut the rectangular plastic box lengthwise to match the corner where the wide and narrow shelves meet. Place the duct flat against the ceiling and secure with screws. Insert the cut edges into the AIRKRAAB profile grooves.
Install the boxes around the perimeter of the shadow gap and connect them with elbows. Seal one end of the common duct and connect the other to the exhaust riser. When the hood starts operating, stale air from the room will be drawn into the boxes through the shadow gap and the AIRKRAAB profile and exhausted to the street or the common duct.
Disadvantages of ceiling space ventilation
A fly in the ointment can spoil a barrel of honey. This principle is used to identify the shortcomings of stretch ceiling ventilation. Three main disadvantages are highlighted:
- Installing vents compromises the airtightness of the stretch ceiling. If the neighbors flood the apartment above, water will leak through the vents.
- The costs of installing additional equipment are increasing.
- Despite the stylish design of the grilles, the aesthetic appeal of the stretch ceiling is lost. The design concept is distorted. The created floating effect or other feature appears less realistic.
Doubts about the necessity of ceiling ventilation are dispelled by its benefits. Human health and a favorable indoor microclimate are factors that outweigh unnecessary costs and aesthetics.
Answers to current questions
You can hide air ducts in a room with a ceiling height greater than 2.6 m. First, cover the utilities with a box made of plywood, drywall, plastic, or stainless steel.
Place ventilation holes in opposite corners of the ceiling, diagonally or in rows.
Install the hood first to prevent dust buildup and damage to the stretch ceiling during installation. It's easier to conceal some of the installed ductwork under the ceiling.
The tensioned fabric must be attached with an indentation of at least 100-150 mm from the exhaust duct.
Create additional air circulation through an open transom or a PVC window set to micro-ventilation mode. Install an additional exhaust vent in the suspended ceiling.


