The ventilation system is developed during the design phase of a private home. It is necessary to consider air flow rates and ventilation requirements for different rooms. Priority supply and exhaust system.
If an old residential building lacks ventilation, supply and exhaust units must be installed. The ventilation system design is developed taking into account SNiP standards for each room.
In this article we will learn about the types and schemes of ventilation, the features of ventilation of various premises (bathroom, toilet, kitchen, attic, basement, etc.), we'll walk you through the step-by-step process of installing a range hood and exhaust pipe, and how to set up a supply and exhaust ventilation system yourself.
We suggest you read the instructions on how to do it. ventilation for a gas boiler in a private house.
- Air flow rates
- Types of ventilation systems
- Ventilation schemes
- Features of ventilation of different rooms
- Step-by-step installation process of a range hood and a vent pipe
- Do-it-yourself arrangement of the inflow
- DIY installation of a supply and exhaust system
- Step-by-step video editing
- Answers to frequently asked questions
Air flow rates
The volume of air exchange in residential premises is regulated by regulatory documents: SNiP 41-01-2003And SP 60.13330.2010.
Depending on the intended purpose, the frequency of replacement of the total volume of air per unit of time is established for each room.
The rate of multiplicity per hour:
- kitchen – 12;
- living rooms – 1;
- utility rooms – 0.2.
Recommended air exchange volume per 1 m32 area
- bedroom, hallway, living room – 3 m3/hour;
- separate bathroom – 25 m3/hour;
- separate toilet room – 25 m3/hour;
- combined bathroom – 50 m3/hour;
- kitchen with electric stove – 60 m3/hour;
- kitchen with gas stove – 90 m3/hour.
GOST 30494-2011 regulates carbon dioxide levels for normal human habitation in a room. CO levels2/1 m3 air should be 400-600 ppm.
Types of ventilation systems
In a private residential building, you can set up three types of ventilation for air exchange yourself: natural, forced, and mixed.
Previously, houses were built without ventilation systems. Air exchange was achieved through natural ventilation through special gaps in wooden windows and doors, and a through-hole above the gas stove on the kitchen wall.
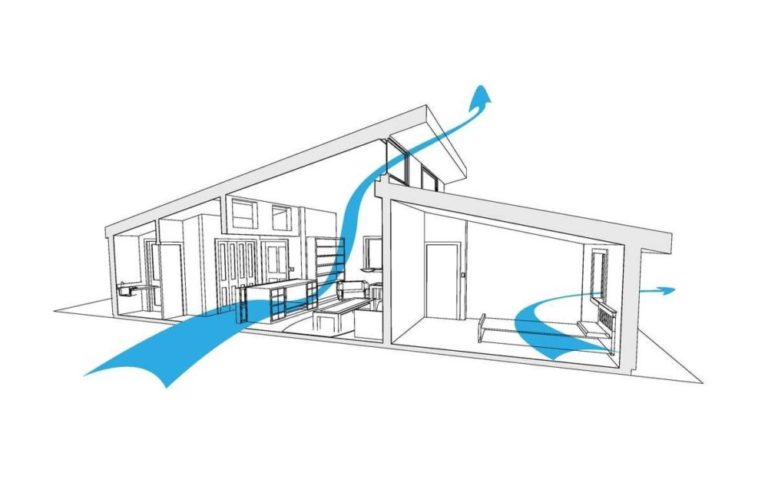
Supply and exhaust valves are now being installed. Natural ventilation works simply: cool, fresh air flows in from the street at the bottom of the wall, and warm, stale air is expelled through an exhaust vent under the ceiling.
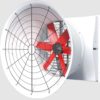
Natural ventilation has been abolished in modern housing construction since 2004. Private homes are designed with forced-air systems. Air exchange is achieved by mechanically forcing airflow using fans. These fans move according to a predetermined pattern within a specified volume.

Mixed ventilation is a system with a fan on the supply or exhaust side. One airflow is forced, the other is naturally circulated.
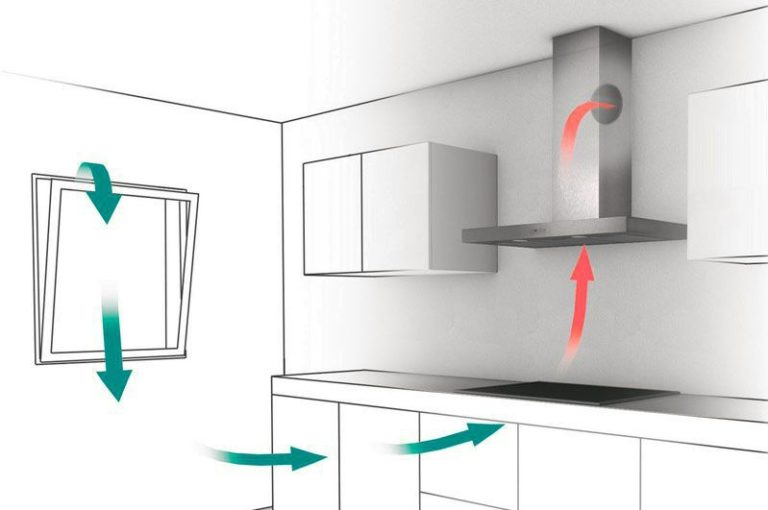
This option is common when the question arises about how to install a range hood in an old house. Natural air intake is provided through windows or an air vent. Mechanical air exhaust is provided through a kitchen hood over the stove or a window fan.
Ventilation schemes
Based on the general design, ventilation can be ducted or ductless. To install a ducted system yourself, you'll need to install air ducts throughout every room of the house.
A ductless system is simpler and cheaper, but less efficient. It eliminates ductwork and requires supply and exhaust units.
Find out how install a supply valve into the wall — installation sequence, installation errors, answers to questions.
Based on the principle of air flow movement There are 3 different schemes:
- Supply air. Air is naturally or mechanically drawn from the street into a private residential building through supply air vents.
- Exhaust. Air is naturally or mechanically removed from the house to the outside through exhaust vents.
- Supply and exhaust. A single supply or exhaust system does not work. To ensure proper air exchange in a home, both supply and exhaust must be provided simultaneously. This is the principle behind the supply and exhaust system.
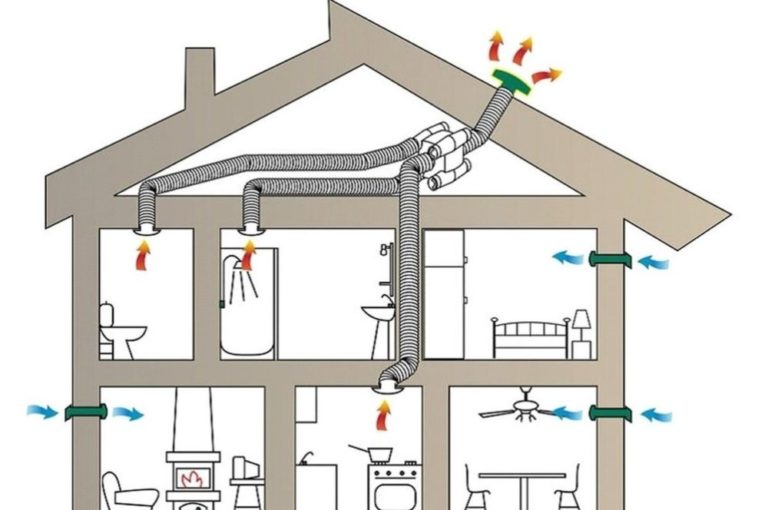
Modern houses are designed with an efficient forced supply and exhaust duct system.
Features of ventilation of different rooms
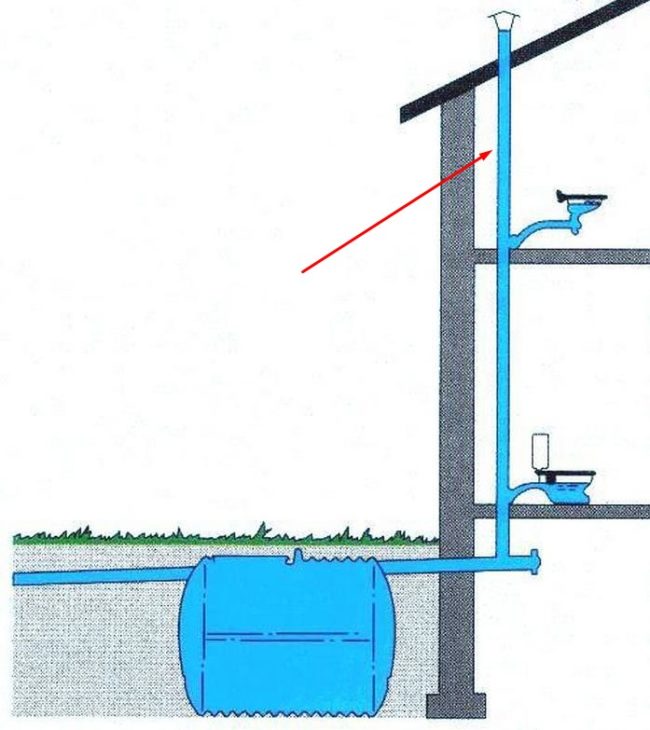
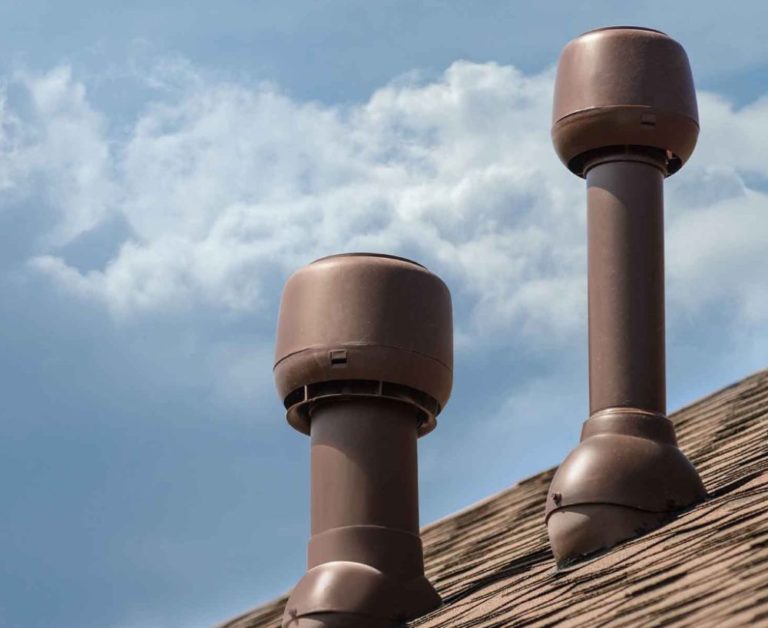
The air duct is an extension of the riser, leading through the roof to the street.
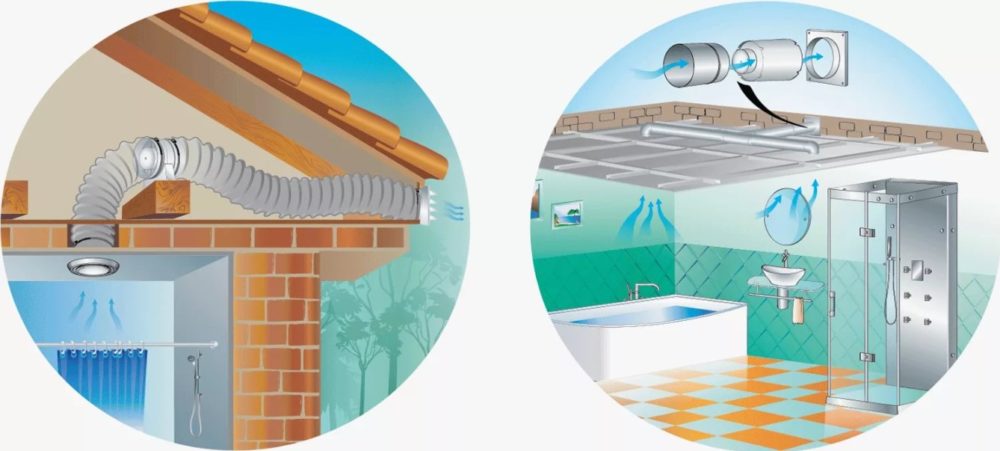
- Kitchen. This specific room is polluted with air containing moisture vapor, grease, soot, and unpleasant odors. A forced-air duct exhaust system with a vent or an exhaust hood that cleans the air by recirculating it through a carbon filter is required. Air intake is provided from an adjacent room through a gap under the door or by installing a supply valve.
- A separate bathroom and toilet or a combined bathroom. A forced-air exhaust system is required to remove moisture and stale air. The air intake is organized similarly to a kitchen.
- Living rooms. Between bedrooms and the living room, a supply air flow can be arranged under the interior doors through a gap or locally supplied through a duct. Exhaust air is provided locally from each room through a ducted ventilation system. Supply and exhaust units can be installed separately in each room.
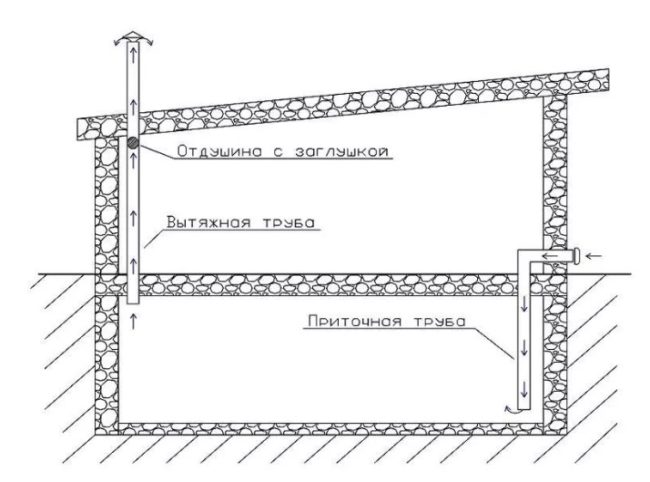
- A basement or cellar under the house. To ventilate the basement, install a supply pipe. One end extends 20-30 cm above ground level near the foundation. The other end extends to the basement floor, leaving a gap of approximately 20 cm. The exhaust duct extends through the ceiling and roof to the outside. A 10-20 cm overhang is left below the ceiling. The duct can be connected to the general building exhaust duct.
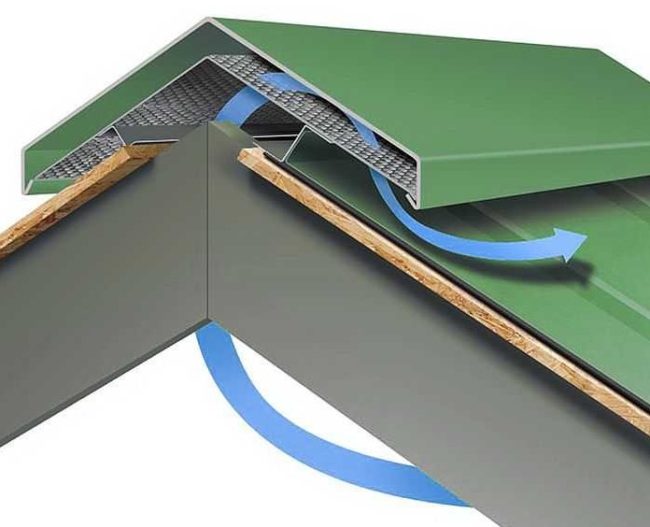
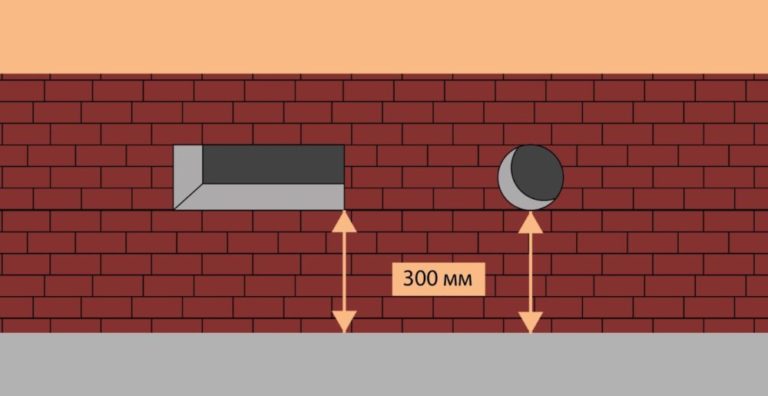
There's a fourth type of ventilation—underfloor ventilation. This design is suitable for a private home without a basement, with a strip foundation, and built on a site with damp soil.
To prevent moisture from rotting the floor, vents are left in the concrete strip. The openings are located more than 30 cm above ground level. To reduce heat loss in winter, the vents are closed.
Step-by-step installation process of a range hood and a vent pipe
Ventilation is more conveniently installed during the building construction phase due to the need to create passages through walls and ceilings. The engineering system is included in the design of a new home.
Old private buildings were once built without ventilation. The most common was a chimney vent through the wall in the kitchen with a gas stove.
Natural ventilation is insufficient for air exchange in a modern residential building with a bathroom. To solve this problem, we'll consider one option for providing ventilation in an existing home by installing a range hood in the kitchen and waste pipe in the bathroom with your own hands:
- To install the utility lines, prepare the necessary plumbing tools. You'll need a jigsaw, an electric drill, screwdrivers, and pliers. You'll also need a level, a tape measure, and a hammer and chisel. Consider the exact tool list based on the material of the walls and ceilings where you'll be drilling the air duct openings.

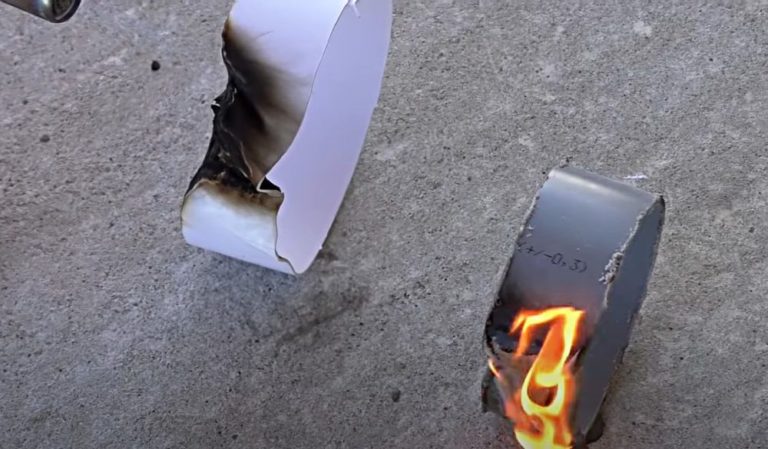
- Prepare ductwork using 125 mm diameter plastic pipe. For the kitchen range hood, use special white ventilation ducts. They are flame-resistant compared to gray plumbing pipe, which is important for installation above the stove.
The waste riser in the bathroom is not exposed to high temperatures or open flames. Gray plumbing pipe is suitable for sewer ventilation.
Test their fire resistance by lighting two pieces of the material with a gas torch. The ring of white air duct melts but goes out. The section of gray plumbing pipe melts and burns.
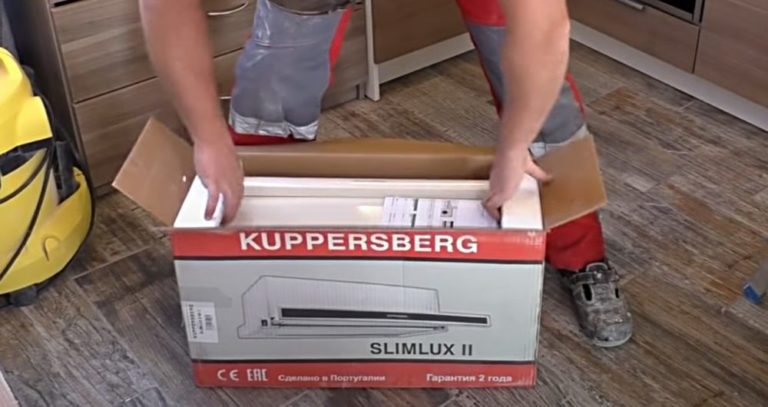
- Prepare the kitchen hood. Read the manufacturer's installation and operating instructions. To connect the hood to the utility system of a private home, prepare a valve, fittings, clamps, and foam sealant for sealing the gaps in the wall openings.
To insulate the outlet of the ducts in the attic, use spray-on thermal insulation in cans.
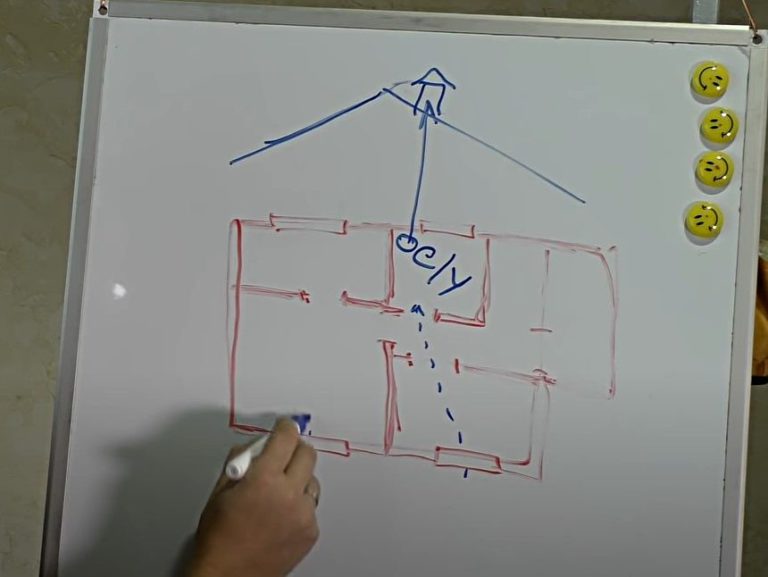
- Draw a floor plan of your house on a piece of paper. Create a convenient layout for the exhaust ducts in the kitchen and bathroom. Having a drawing handy will make installation easier.
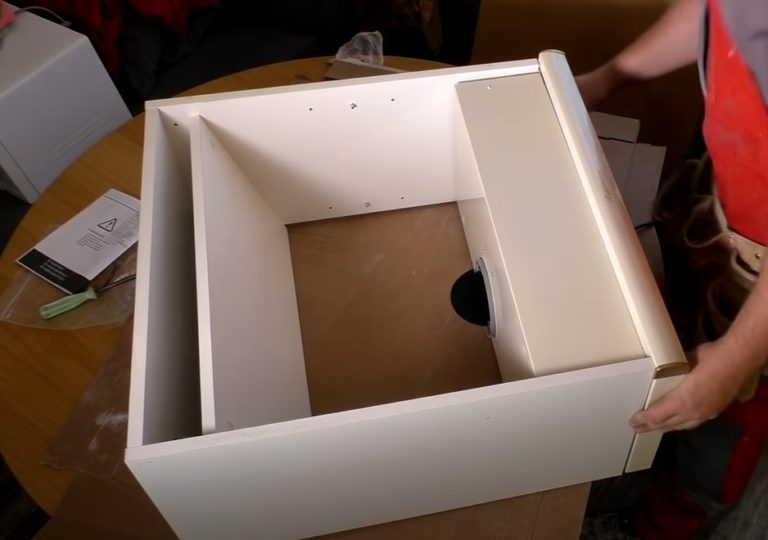
- In the kitchen, remove the cabinet above the stove where you plan to install the range hood. Remove the door with its hinges and the bottom of the cabinet. Test-fit the range hood to the bottom of the cabinet. Make sure the dimensions match and that there are no other parts interfering with the installation.
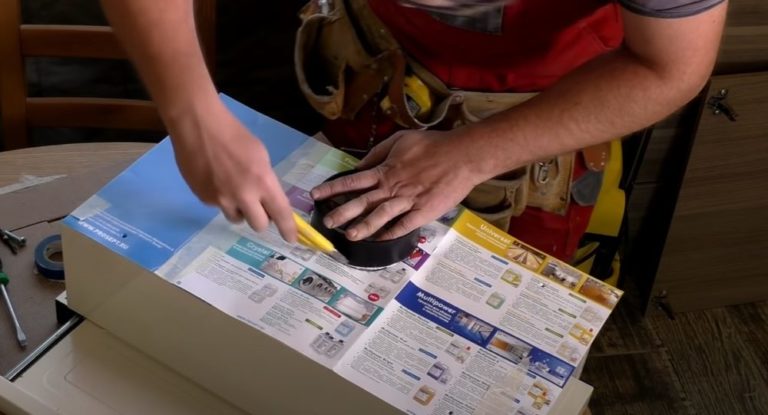
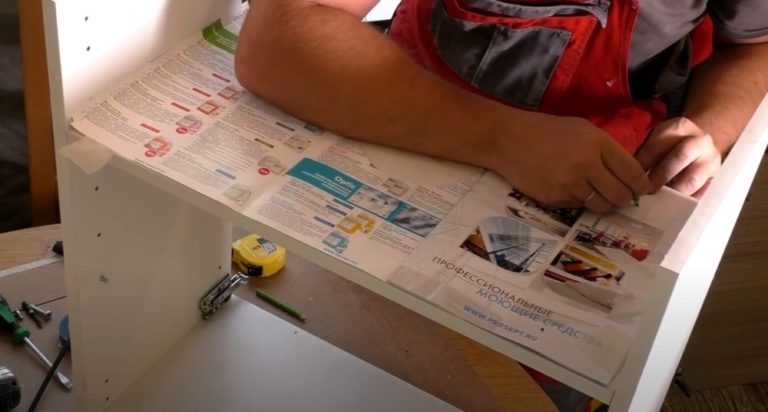
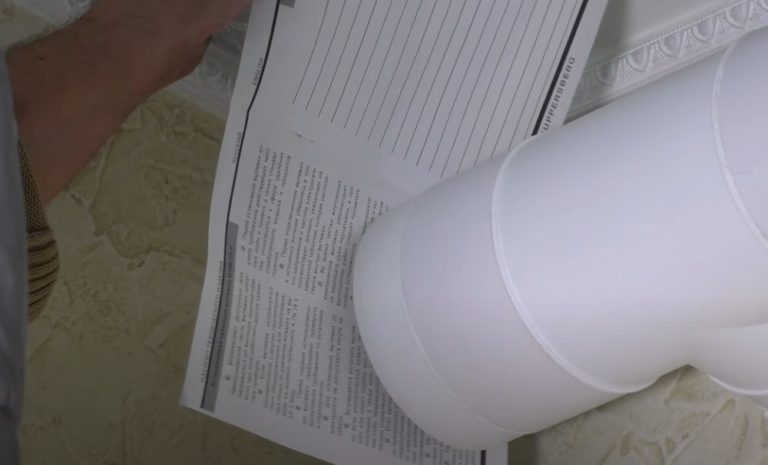
- Use unfolded newspaper or magazine pages to make a template for marking the duct and screw locations. Place the paper on the bottom of the exhaust hood. Use a knife to cut a large hole for the duct. Use a pencil to poke holes in the locations of the mounting screws.
- Use the dismantled cabinet base to create a shelf. Use the template to mark the holes for the duct and screws.
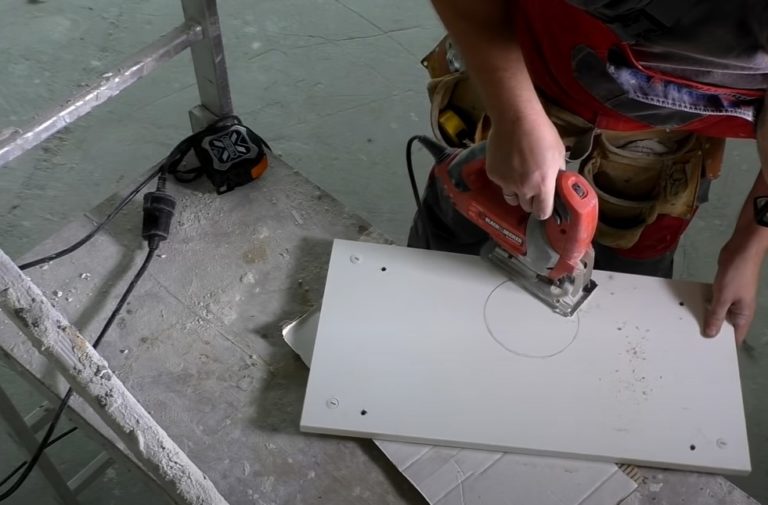
- Use a drill to drill holes for the screws in the shelf. Use a wood or metal drill bit. Make a small hole along the edge of the duct markings for the jigsaw blade. Cut a large circle along the outline.
Test the pipe to ensure it fits freely through the hole. Additionally, mark a large circle using the template and cut it out in the cabinet roof for the air duct outlet.
- Install the exhaust hood and shelf into the cabinet body. Secure the parts with screws. Insert the pipe through the prepared holes and connect it to the exhaust outlet of the hood.
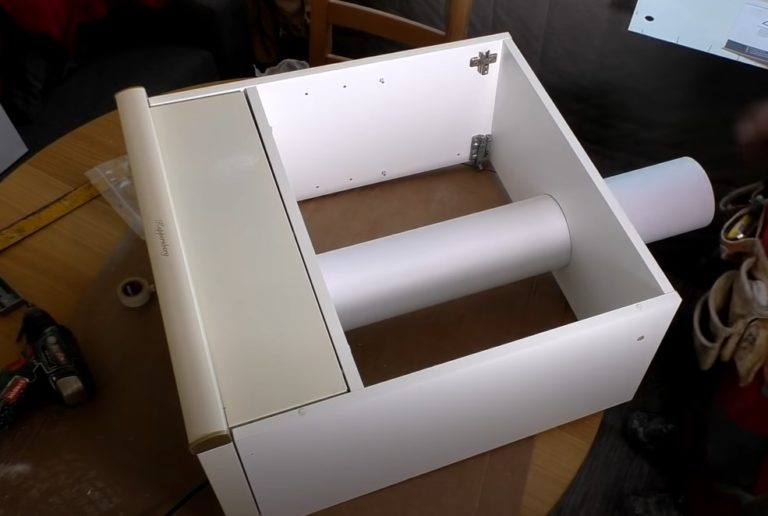
- To prevent the range hood from creating noise, reduce vibration in the ductwork. Seal the gaps where the ductwork passes through the holes in the cabinet shelf and ceiling with sealant.

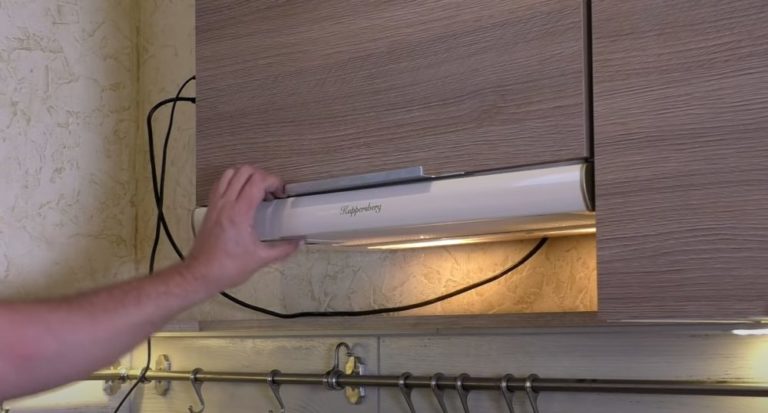
- Install the cabinet door. Hang the kitchen unit in its proper place above the stove. Plug in the range hood and test it.
- To ensure your DIY ventilation system in a private home exhausts stale air outside, install an exhaust duct above the closet, close to the ceiling. Mark a hole on the wall for the air duct to exit into the bathroom, from where it and the waste pipe will be routed through the attic to the outside.
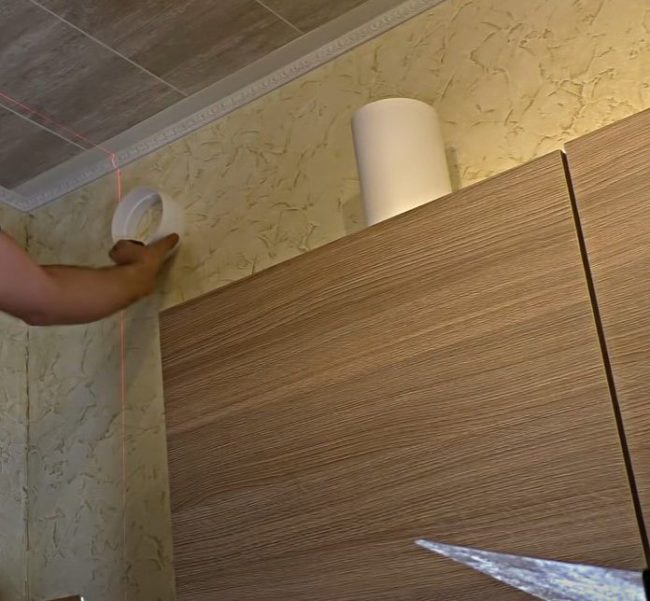
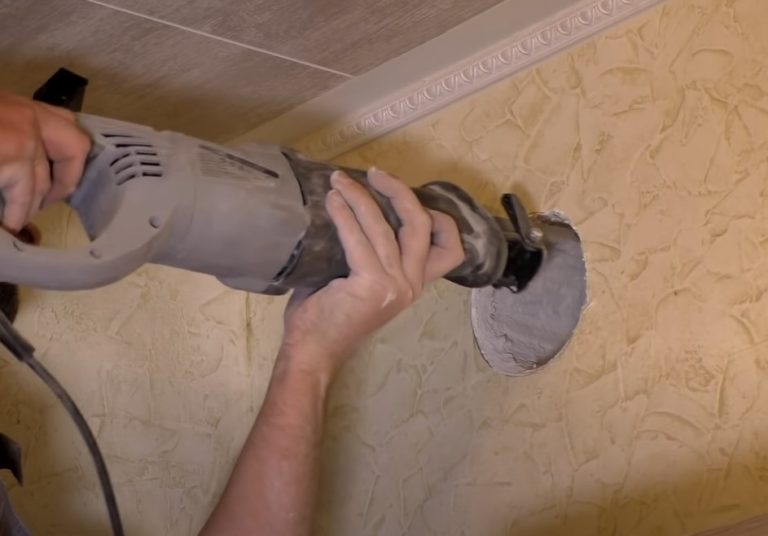
- Drill a hole in the wall using the markings. Choose the method based on the material of the interior partition. Drill the hole with a hole saw. Use a hammer drill, electric drill, or hammer and long chisel.
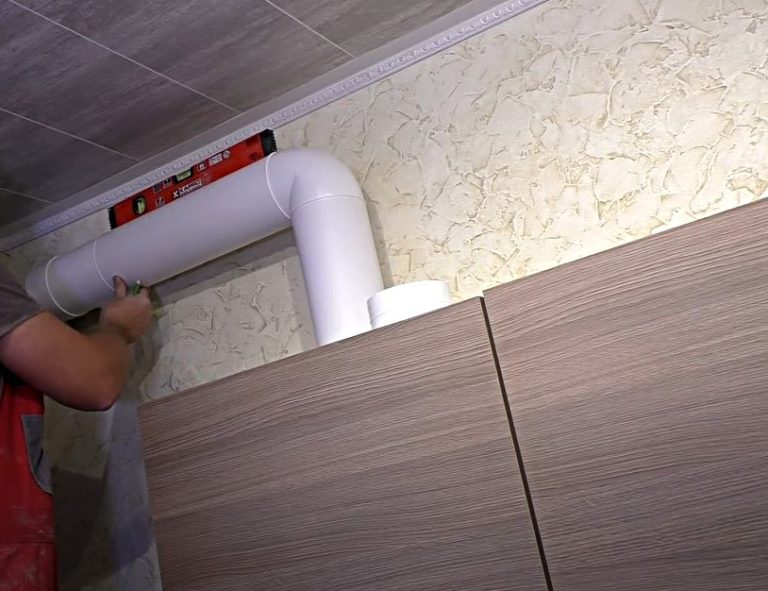
- According to the ventilation diagram, assemble the air duct from the fittings. Connect one end to the exhaust hood outlet, and route the other end through the hole in the wall using the side tee. Seal the gaps with sealant.
Install an air vent on the remaining central outlet of the tee in the kitchen. The mechanism's petal will close the duct when the range hood is on and open it when the hood fan is off.
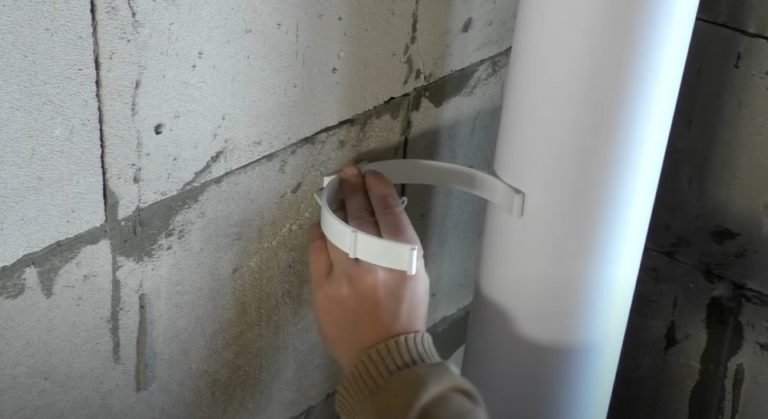
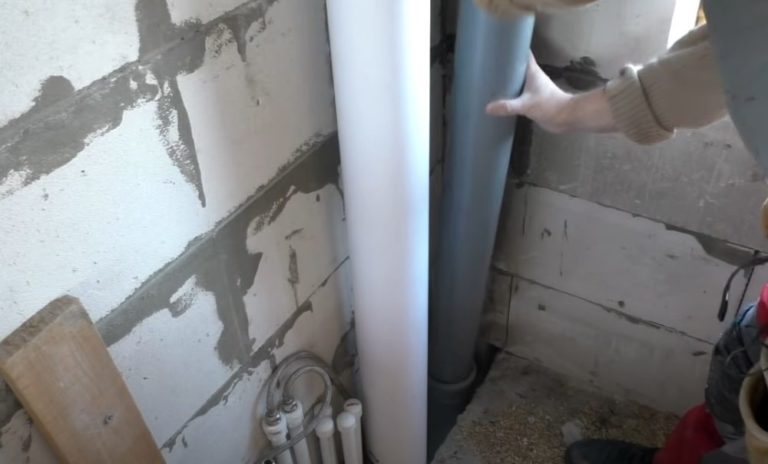
- In the bathroom, connect the exhaust duct to the ventilation riser using an adapter. Secure the common pipe to the wall with clamps. Route the duct through the ceiling into the attic, from where you can then create an outlet onto the roof using a pass-through.
- Place a waste pipe in the bathroom next to the ventilation duct. Install it on the sewer riser and route it through the floor to the attic, where it will eventually exit through a roof outlet.
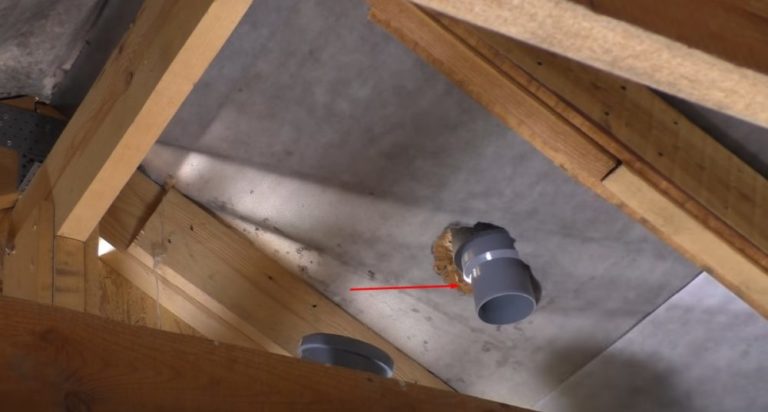
- Mark holes on the roof, aligned with the two risers, on the attic side. Cut out the roofing material between the sheathing boards. Attach the penetrations with the pipe and deflector to the roof.
Bring the adapters to the attic and connect the white ventilation riser and the gray waste pipe to them.
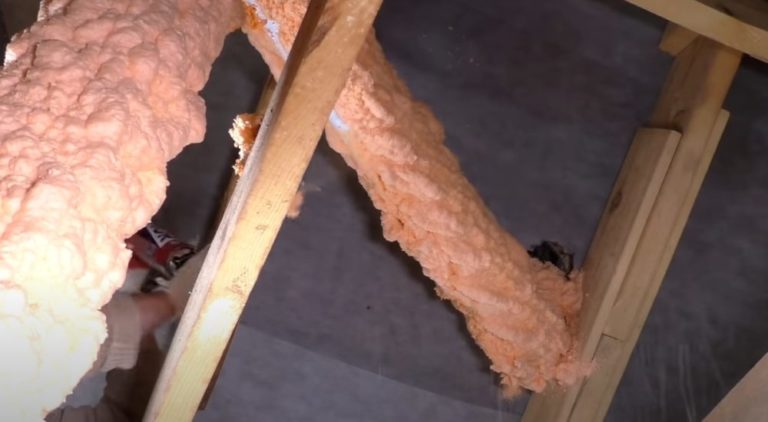
- In winter, temperature differences within the attic ducts can cause condensation, which can turn into ice. To ensure proper operation of the ventilation system, insulate the ventilation ducts with spray-on insulation from cans.
- Test your homemade ventilation system with the range hood turned off. Place a piece of paper against the kitchen ceiling vent. It should stick to the opening.
When you turn on the hood, the shutter will close the valve. Air will be exhausted through the appliance's hood.
You can check how the air is being exhausted to the outside by climbing onto the roof. You can feel the outgoing air through the vents in the air ducts with your hands or by tilting a piece of paper against them.
Do-it-yourself arrangement of the inflow
A homemade, functioning range hood in a private home won't provide the required air exchange without an air supply. You can provide fresh air from outside by installing additional air supply units.
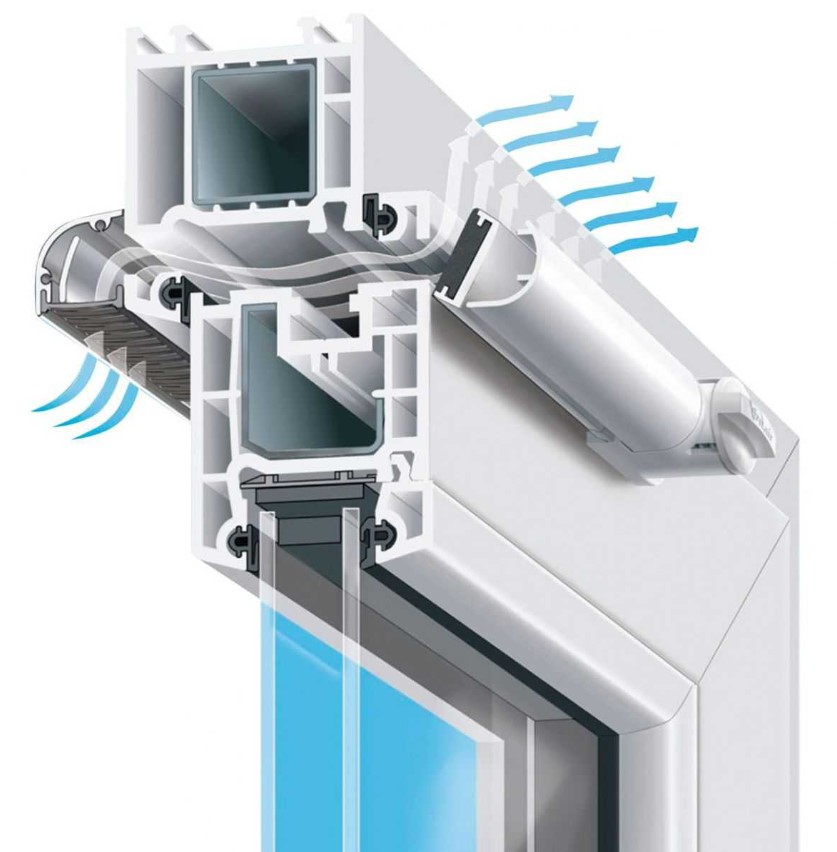
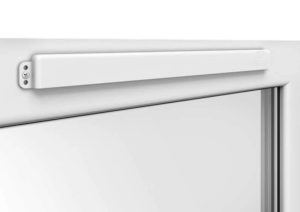
It's easy to provide fresh air ventilation in every room of a private home by installing window vents yourself. There are two types of valves:
When renovating a private home yourself and installing new PVC windows, order them with vents included. Opening window frames are factory-fitted with a handle and air vent.
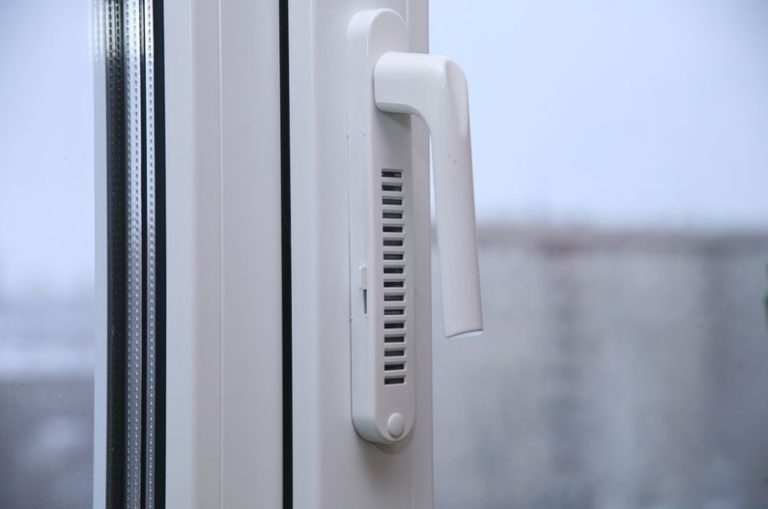
Window vents have limited performance and are suitable for small rooms. For a larger private home, it's necessary to consider other methods for properly ventilating the air yourself, increasing the air flow.
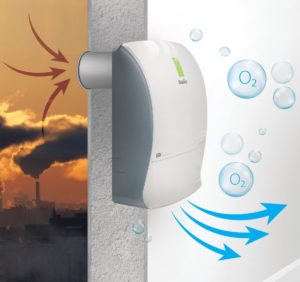
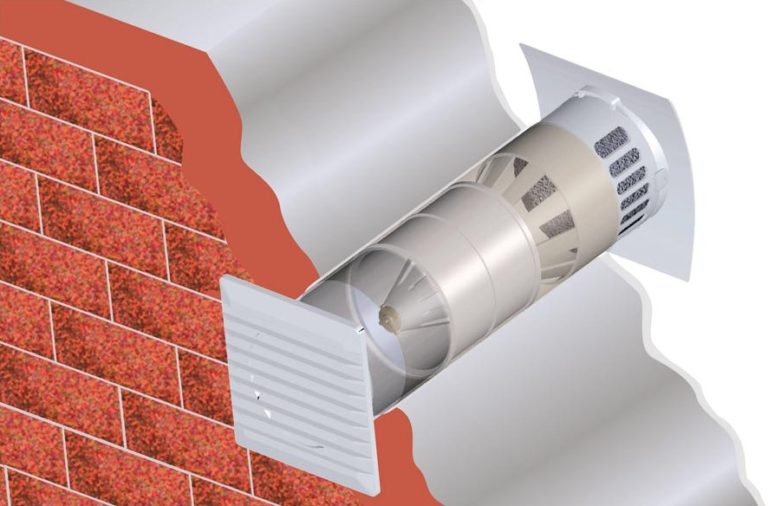
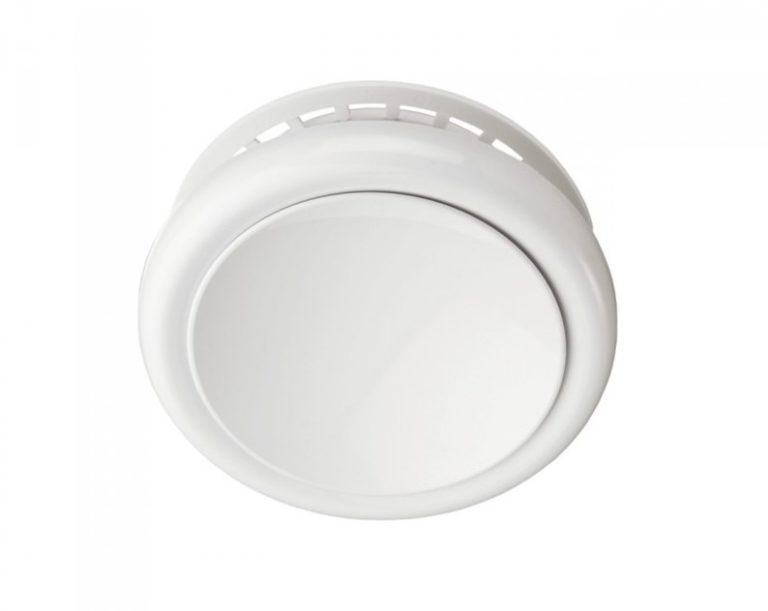
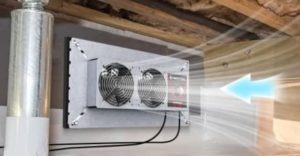
An inexpensive and simple option is to install a wall air vent through a through-hole. Inexpensive devices are equipped with a damper. Multifunctional models are available with a filter, heater, and fan.
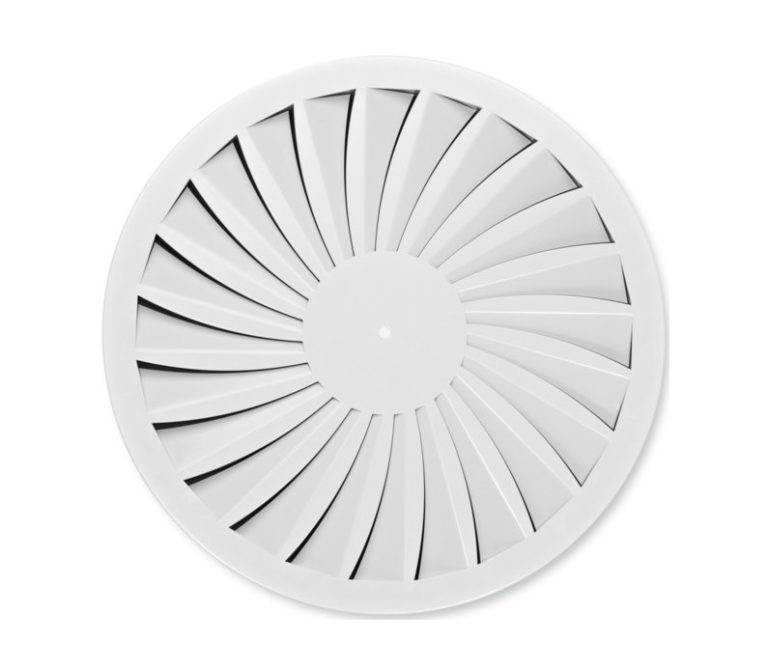
You can create an inexpensive supply ventilation system by installing a diffuser yourself in the hole in the wall of each room in your private home.
The simplest mechanism resembles a ventilation grille, but additionally has a static pressure chamber, an impeller, and blades for better distribution of incoming flows.
Instead of a diffuser, you can install supply air valves in each room of your home. These devices are equipped with a disc valve mechanism to regulate the air flow.
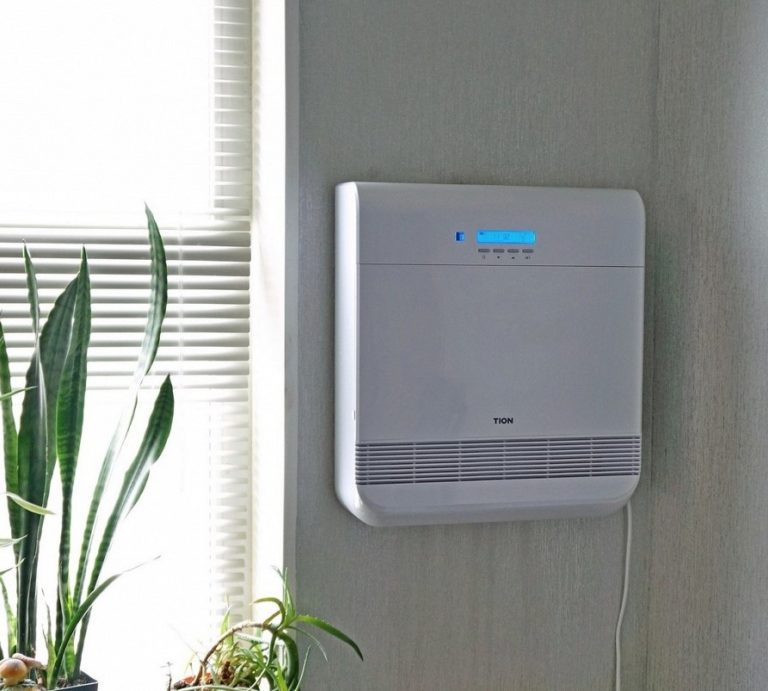
Installing a breezer in a private home is more expensive but more effective. These multifunctional devices purify incoming air, heat it, humidify it, and force it under pressure with a fan.
DIY installation of a supply and exhaust system
In a private home, supply and exhaust ventilation is necessary for every room without exception. Despite the low cost of simple valves, installing supply and exhaust devices in every room is difficult.
It's not guaranteed that a home-built utility system will provide a residential building with the required air exchange rates. A more effective way to ventilate a home is to install a heat recovery unit. This unit handles both supply and exhaust air flows.
What is air recovery? in ventilation - principles and operating diagram, types, how to install it yourself.
Depending on the model, they feature heating, cooling, humidification, or dehumidification functions. Heat recovery units are equipped with filters, fans, and an automatic control unit.
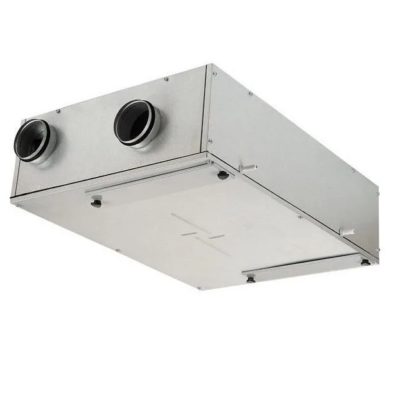
For one room, you can install a single-unit unit yourself. A compact household recuperator is designed for an average capacity of 100 m3.3/hour.
However, this won't solve the problem of ventilating the entire house. Installing a single-unit unit in each room is expensive, even if you do it yourself without hiring outside professionals.
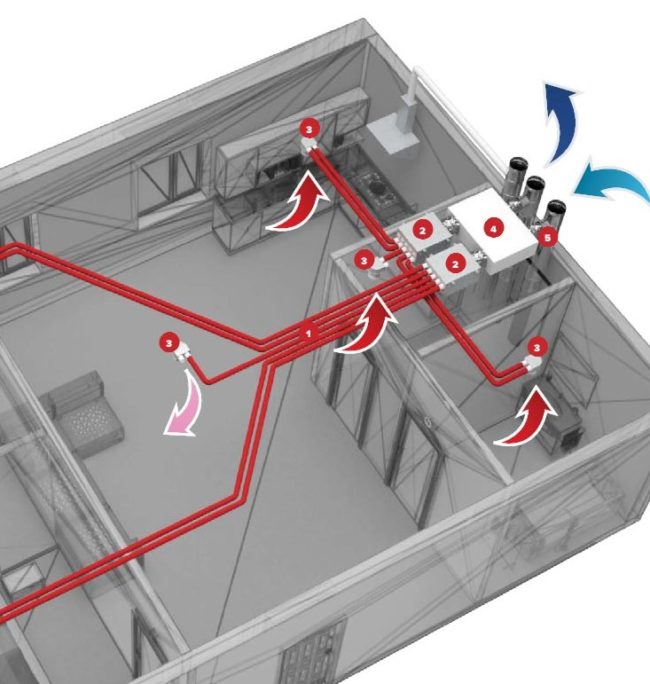
A complete supply and exhaust system is more cost-effectively implemented by installing a heat recovery unit for the entire house. A separate room is required for powerful equipment. An insulated attic is suitable.
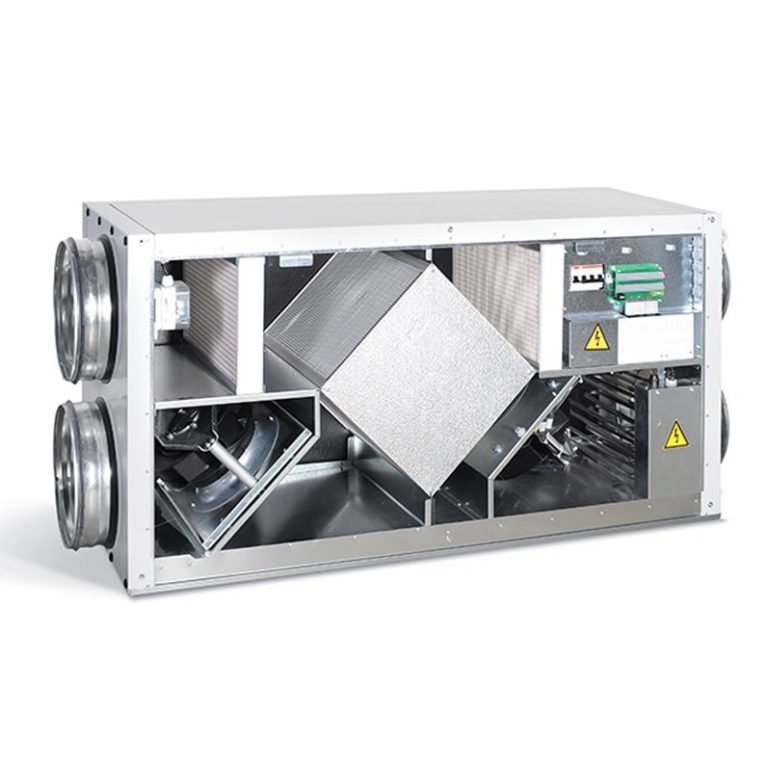
This option is ideal when there's a basement or cellar beneath the house. Modern private apartments are often designed with a garage, sauna, or swimming pool. Installing a heat recovery unit solves the ventilation problem for each room.
Supply and exhaust ducts are installed from the equipment to each room. The supply ducts are located at the bottom, and the exhaust ducts are located at the top. The recuperator is equipped with a muffler to prevent the sound of the fan from spreading throughout the house.
Step-by-step video editing
Answers to frequently asked questions
In a private home, natural, mechanical, and mixed ventilation systems are installed. The system can be ducted or ductless, supply, exhaust, or a combination of both.
The ventilation system removes stale air from the home, replacing it with fresh air. Along with the fresh air, harmful carbon dioxide, moisture, and unpleasant odors are removed.
The length, shape, and cross-section of the air ducts are determined by calculations. The ducts must ensure the system's performance while maintaining the recommended SNiP air exchange rates in each room of the residential building.
The design of the utility network depends on the layout. A complete set consists of air ducts, a heat recovery unit, and supply and exhaust units for local installation.
A natural system can be set up by installing wall and window air valves.
Supply ventilation can be with natural air intake or forced air flow by a fan.


