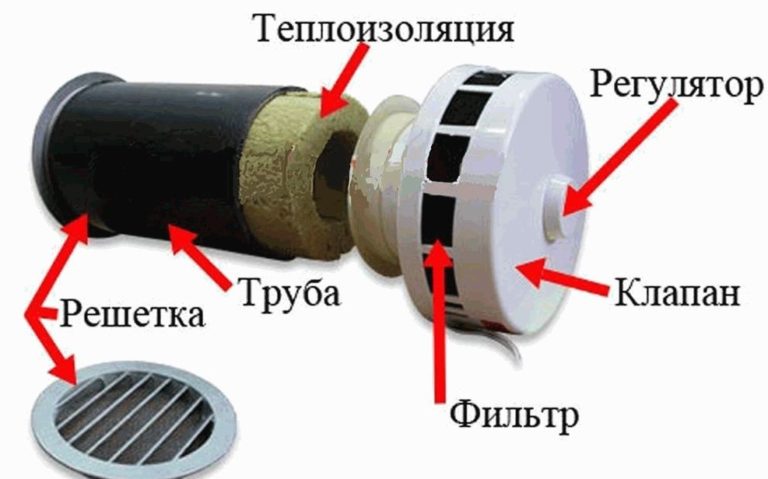
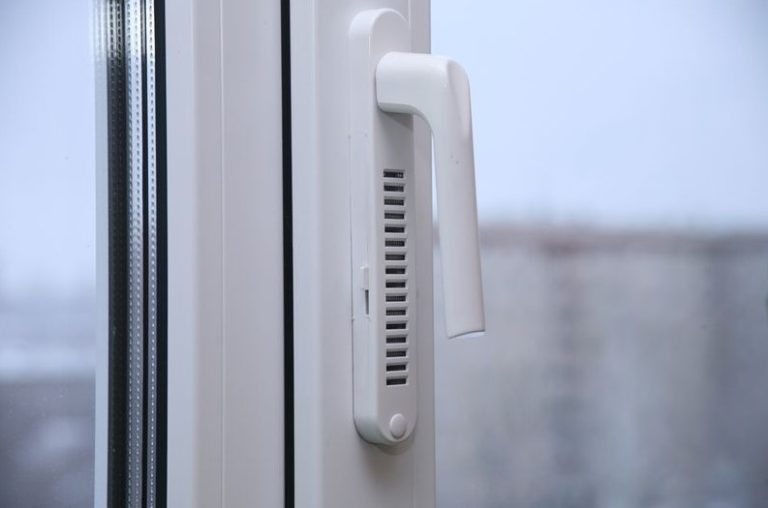
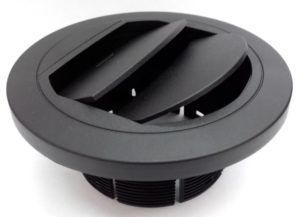
A wall-mounted air inlet valve is an air duct made of pipe that fits into a wall opening. The outside of the duct is covered with a grille, sometimes complemented by a mosquito net. On the room side, a head with a control mechanism and a fine filter is attached.
In this article, I'll explain in detail when to install a wall inlet valve for an apartment or private home. We'll explore the design, operating principle, and pros and cons of this ventilation device. I'll also offer advice on choosing the right model and provide detailed installation instructions.
To install the valve yourself, you need to drill a hole in the wall, insert the air duct, put on the grille and the capIn theory, installation is simple, but to avoid errors, I suggest reviewing each step in detail.
- When is it necessary to install an inflow valve?
- Wall valve device
- The operating principle of the inflow valve
- Pros and cons of installing a valve
- Tips for choosing a supply valve
- The order of installation of the air valve
- Common installation errors and how to fix them
- Answers to frequently asked questions
- Video materials
When is it necessary to install an inflow valve?
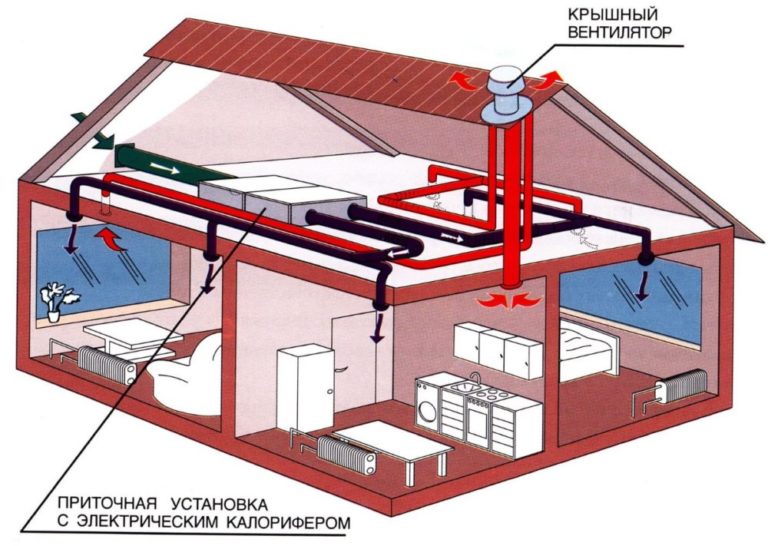
In an apartment or private house, fresh air must constantly be supplied for normal human life and the creation of a favorable microclimate.
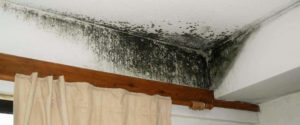
Installing plastic windows and insulating the façade with non-breathable insulation materials creates a thermos effect inside the building. High humidity and compressed air can cause illness and mold growth in the rooms.
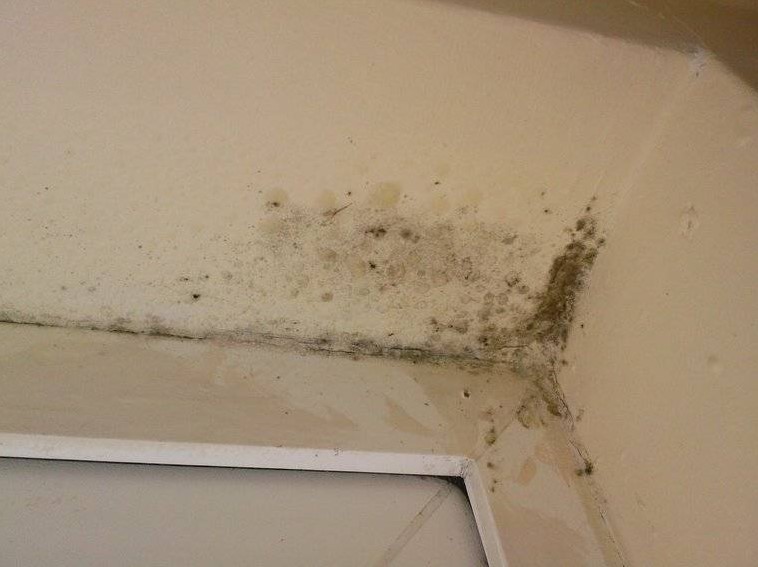
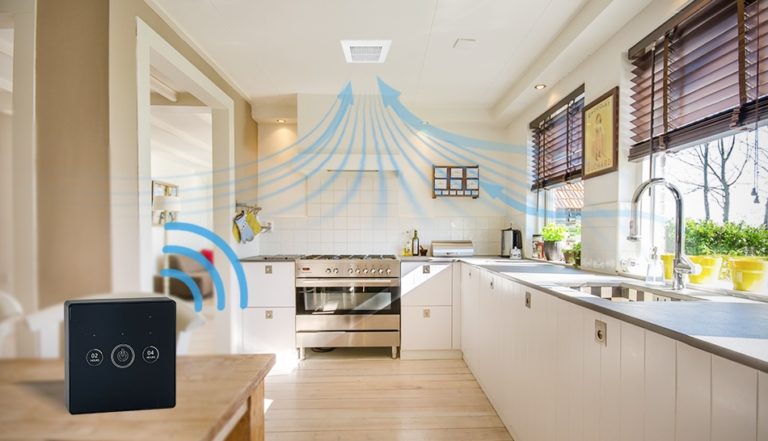
Installing a wall ventilation system with an air inlet improves air exchange. Install a valve if you notice the following negative factors:
By ventilating through open windows you temporarily and partially solve the problem of air exchange.
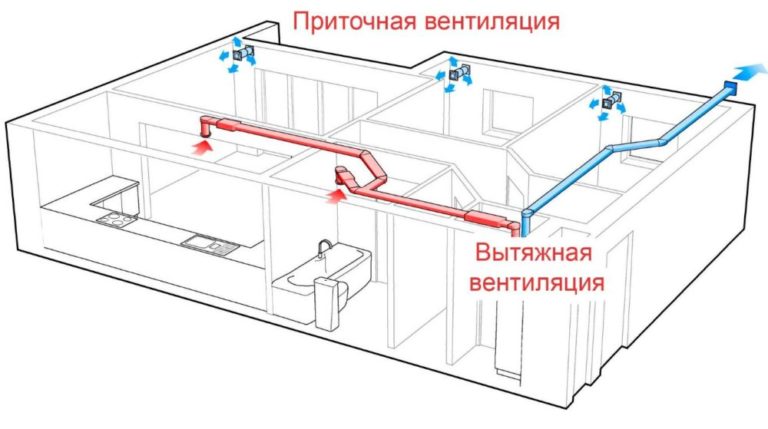
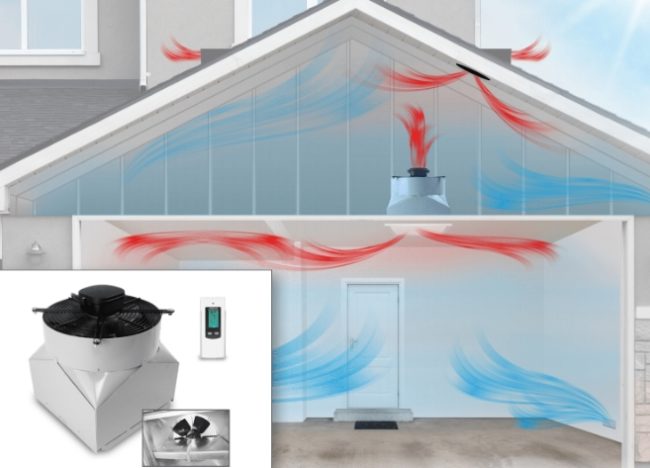
By installing an air inlet valve, you create normal conditions for stable operation. supply and exhaust ventilation.
Wall valve device
Theoretically, a hole in the wall with a damper could be called a supply and exhaust valve, allowing air to flow from the outside into the room and back. This device is ideal for organizing ventilation on the balcony.
From a technical perspective, a ventilation unit consists of structural elements that perform their respective functions. If the unit is a supply unit, it must ensure the flow of air from outside into the premises and prevent backdraft.
The simplest supply ventilation valve consists of the following parts:
- A plastic air duct for insertion into a through-wall opening. The pipe diameter determines ventilation performance—the volume of air flow.
- A decorative grille for installation on the outdoor air duct outlet. A mosquito net can be added. This unit prevents large debris from clogging the air duct and prevents insects and birds from entering.
- A thermal insulation insert in the duct protects the wall from freezing and shifts the critical dew point. The casing also improves sound insulation.
- The plastic head for installation on the air duct from the room side is equipped with a valve and a handle for mechanical control of the damper.
Some models are equipped with a fine filter for dust, bacteria and allergens.
The natural ventilation unit is not equipped with a fan. The approximate air flow through a 125 mm diameter pipe is 50 m.3 at a vacuum of 20 Pa.
The operating principle of the inflow valve
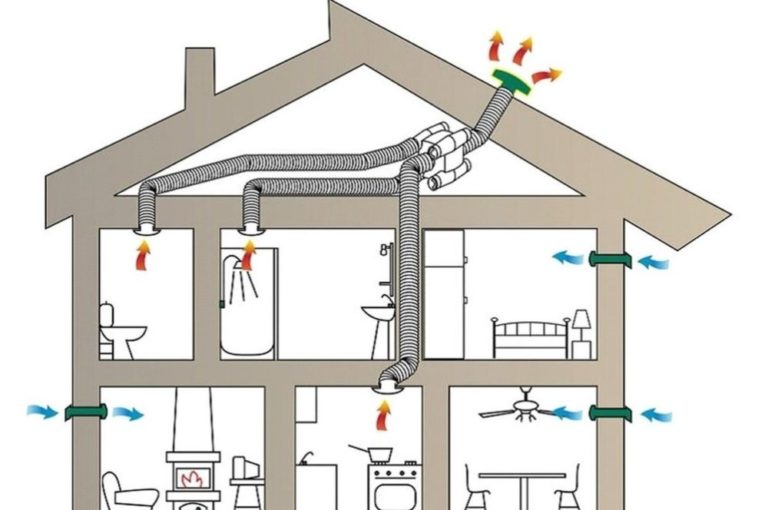
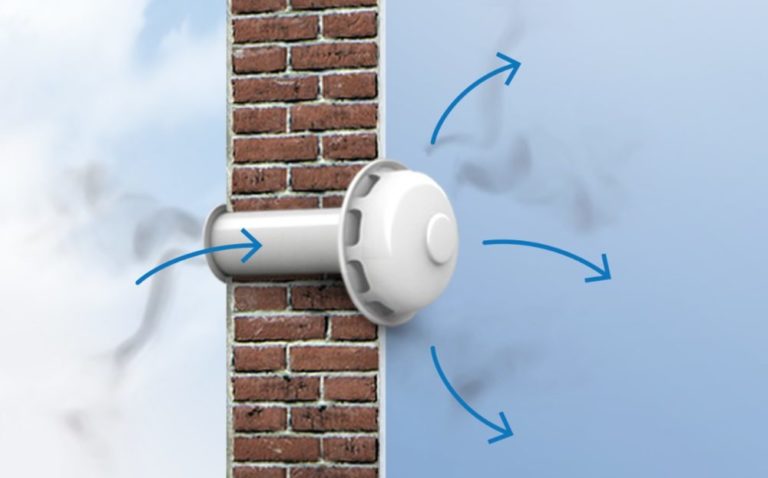
In natural ventilation, the air valve operating in the inflow mode allows freely moving streams of fresh air from the street to enter the room.
The speed of movement depends on the created vacuum, the strength of the wind gusts, and the location of the tributary relative to the wind rose.
By moving the damper, the user regulates the volume of fresh air. When closed, the unit prevents air from flowing. Air passing through filters is cleaned before entering the room.
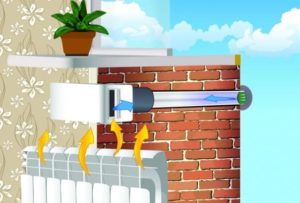
If the valve is installed on the section of wall between the window sill and the heating radiator, the supply air will be additionally heated in winter.
For normal operation of the natural ventilation device, create the correct conditions:
- Install a working extractor fan in the kitchen and bathroom.
- To allow fresh air to flow between rooms, leave 1.5 cm gaps at the bottom of the doors.
- Regularly clean the supply air duct from accumulated dirt and service the filters.
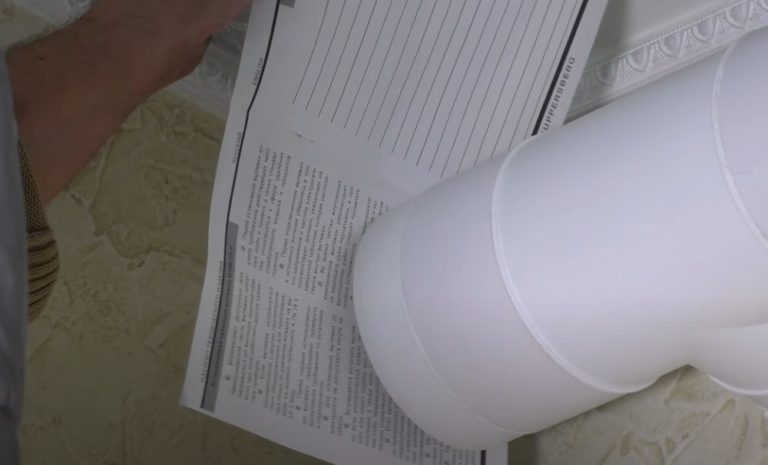
Ventilation works when the room has an air inlet and outlet. Check the operation of the utility system with a piece of paper.
It deflects from the intake vent and adheres to the exhaust hood. For precise performance measurements, use an electronic device – an anemometer.
Pros and cons of installing a valve
You can provide air intake from the outside through an open window, a vent built into the window frame, or another method. Let's explore the advantages and disadvantages of installing a wall vent for reasons why it's more convenient.
Advantages and disadvantages:
- The number of times the window needs to be opened and closed is reduced, which is especially inconvenient in bad weather. Window hardware wear is reduced.
- The capacity of wall valves reaches 70 m3/hour, which is 2-3 times greater than the capacity of a window ventilator.
- The presence of a filter allows you to clean the supply air from dust, allergens, and bacteria.
- The installed control mechanism is convenient for adjusting the volume of air flow.
- The unit's compact head is discreet in the room. The main part of the duct is hidden in the wall. The head can be concealed with a curtain.
- Less heat is lost through an insulated wall duct compared to an open window.
- You can install a supply wall unit in all rooms to increase the performance of the exhaust system and improve air exchange.
- Installation of the device is complicated by the need to perforate the wall. A through hole weakens the building's load-bearing structural element.
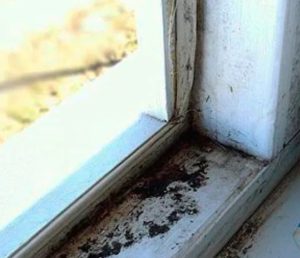
- Installation errors will result in the wall section with the hole freezing. The dew point at the perforation will shift. An incorrectly maintained slope will lead to condensation entering the room.


The supply wall ventilation element operates autonomously and does not require complex maintenance or frequent adjustments.
The filter not only cleans the incoming air but also acts as a barrier to airflow. The internal element, if clogged with dust, must be regularly maintained, and accumulated debris must be removed from the external mosquito net.
Tips for choosing a supply valve
While wall-mounted supply ventilation units are similar in appearance, they have distinct technical parameters. Here are six tips on what to consider when choosing a unit:
If you don't have experience installing ventilation systems, ask a sales consultant to help you select an air supply unit based on your requirements. Review recommended products to ensure they match your design, price, and ease of use.
The order of installation of the air valve
Installing the valve is straightforward for anyone skilled in the use of tools. The simple design of the air handling unit allows for DIY installation without the need for hired labor.
The most challenging part is creating a through-hole to the outside through the wall. Choose a location free from electrical wiring and other utility lines.
Check out this brief step-by-step guide to installing a wall-mounted inlet valve, and below you'll find detailed instructions with commentary and a video tutorial.
Prepare the tools and equipment for drilling the wall. In reinforced concrete, it's easier to cut a hole with a diamond core drill. I recommend a similar drilling method for brick, block, and other sturdy walls. In wood, you can drill a hole with a toothed hole saw.
When drilling into wooden walls, be careful when choosing the location of the perforations. The integrity of the beams of the supporting structure must not be compromised. If a hole saw is not available, drill into the wall using a thin drill bit along the markings for the larger hole. Try to minimize the perforation pitch.
Use a chisel and hammer to cut the space between the small holes. Control your force to avoid damaging the wall.
Now let's talk in more detail about how to install a supply ventilation valve:
- For normal ventilation operation in a private house or large apartment, it is necessary to install a valve with a cross-section of 125-150 mm.
A household drill won't handle a large-diameter hole saw. You'll have to drill the hole in sections. To ensure a neat hole from the outside, start cutting on the wall with a grinder.
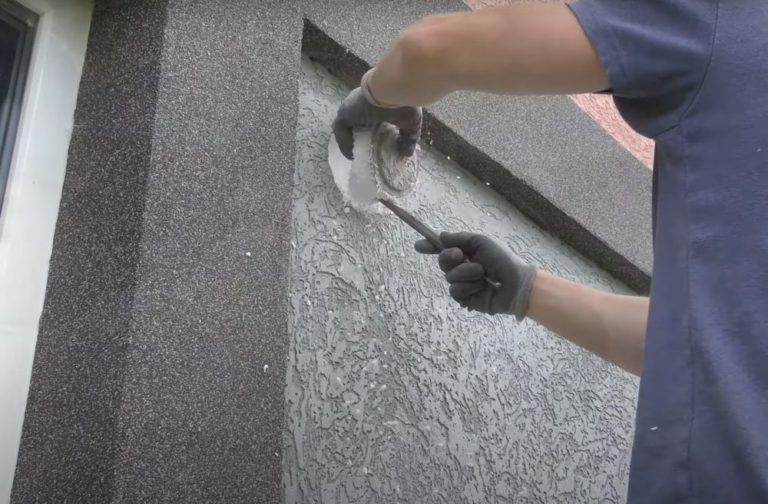
Use a cup-shaped diamond blade of the appropriate diameter (125-150 mm). The cutting depth will be 1-2 cm, which is enough to accurately cut through decorative plaster or other finishing materials on the wall.
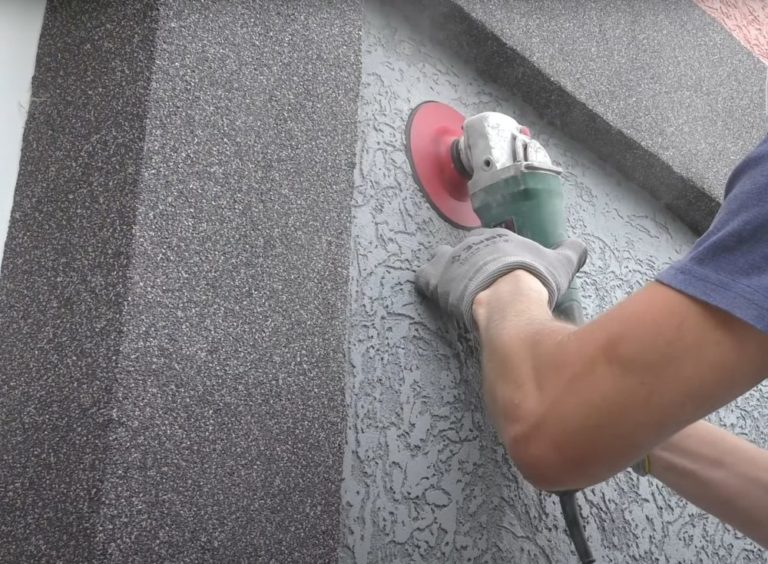
- If the wall is insulated with foam or basalt slabs with thick decorative plaster stretched over it, you won't be able to cut through the layer with just one disc. Use a drill with a standard bit to make a recess along the cut outline.
- Take a metal pin and pry out the drilled-out section. The piece of insulation and decorative plaster will easily come out of the hole.
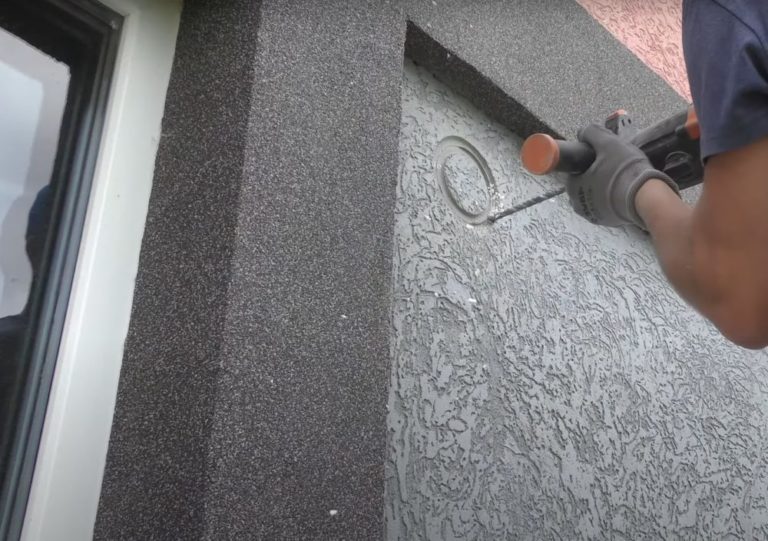
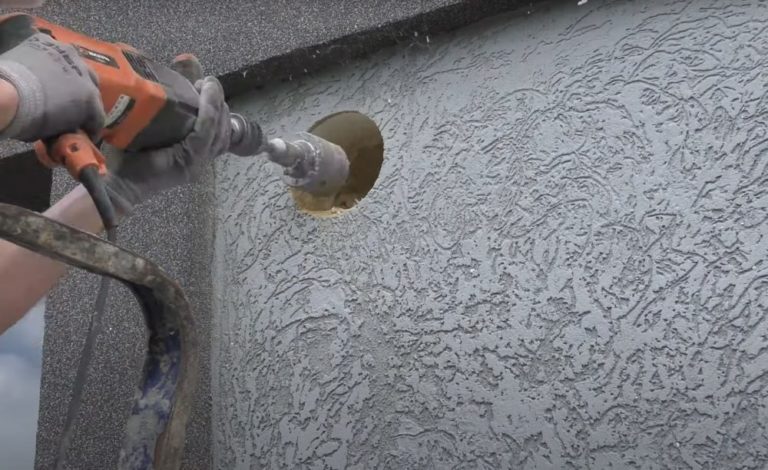
- A neat hole has been created in the façade trim on the street side. Now it needs to be drilled through. Drill into the load-bearing wall material using a long concrete drill bit.
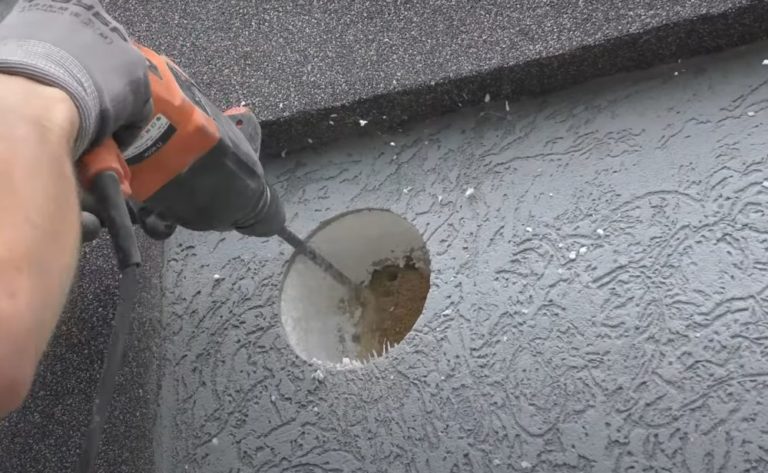
- Remove the perforated section of the load-bearing wall material in sections. You can drill with a small-diameter hole saw or chisel it out.
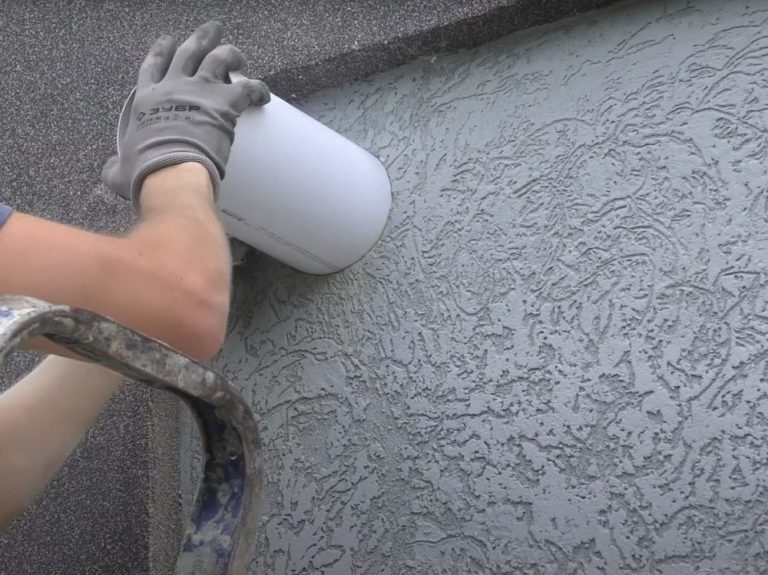
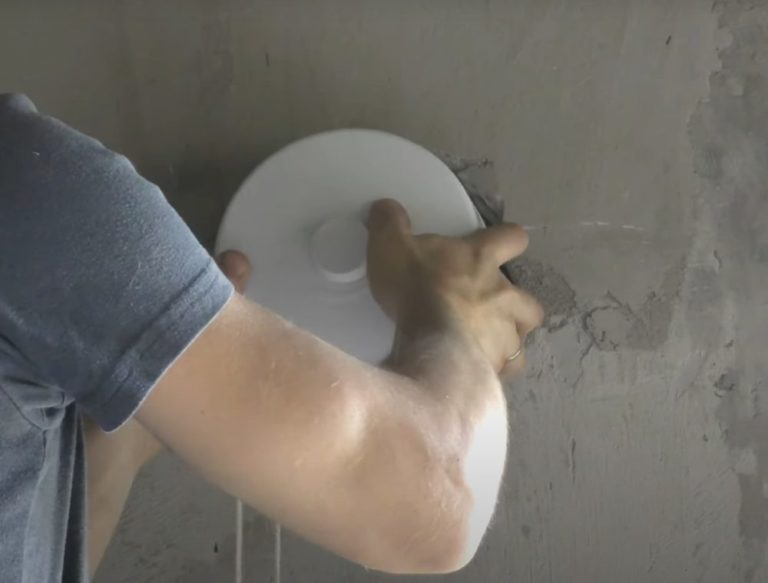
- The supply valve comes with an air duct. Insert the duct into the hole drilled in the wall. Make sure the slope toward the outside is maintained at 1.5-3 degrees.O To drain condensate, mark the section of pipe protruding from the wall with a marker.
- Using a grinder, cut off the excess piece from the pipe along the markings.

- Apply sealant to the outer valve grille flange. The sealant will prevent air from leaking through the cracks.
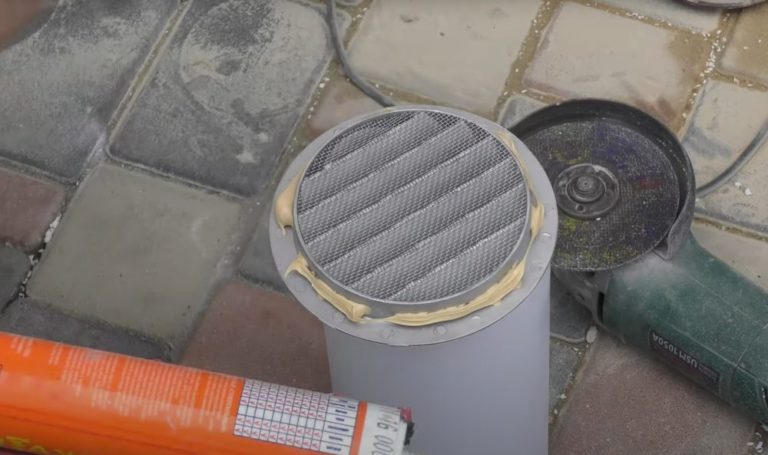
- Install the external grille onto the air duct. The sealant will securely bond the flange to the pipe walls.
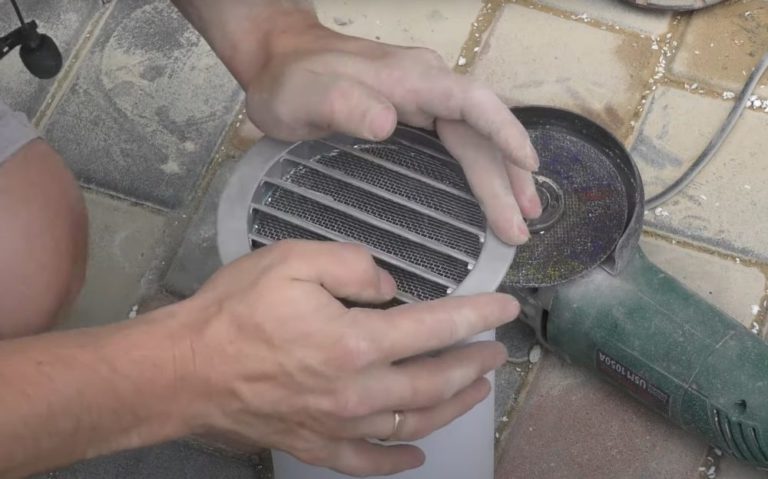
- Insert the pipe with the attached external grate into the through-hole in the wall from the street side. The flange edge should fit snugly against the finished surface of the façade.
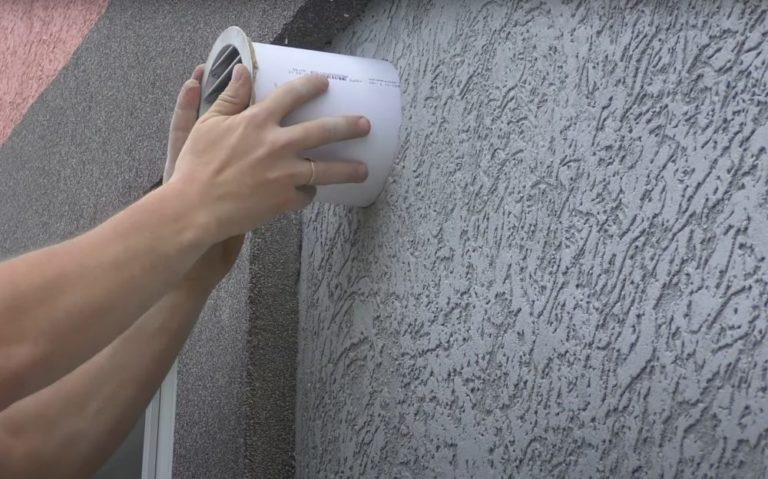
- For added security, you can secure the outer grille with screws. The manufacturer provides mounting holes on the flange.
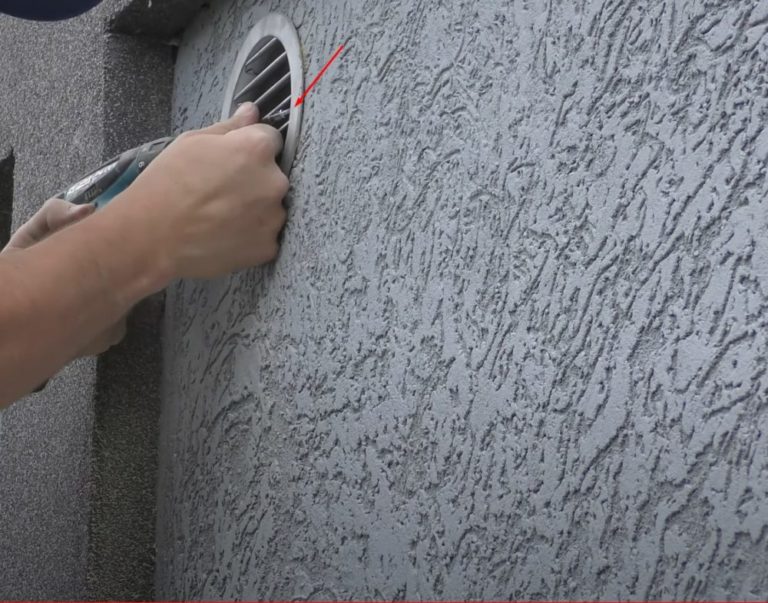
- Install a head with a control mechanism on the air duct from the room side.
The installation principle is the same for all types of wall-mounted air handling units. The details of assembling the valve with the filter and other mechanisms may differ, but they are all described in the manufacturer's instructions.
Watch the video instructions for installing the supply valve.
Common installation errors and how to fix them
The design of the supply unit is so simple that it will work even with the most careless installation.
However, installation errors will manifest themselves during operation as other problems:
If the air duct does not fit tightly into the through hole in the wall, fill the gaps with foam or cement mixture.
A common installation error is improper assembly of the supply air unit. Before installation, read the manufacturer's instructions. Follow every step of the instructions. Do not modify any structural components.
Answers to frequently asked questions
A convenient location for installing the valve is the section of wall between the window and the radiator. Incoming air from outside will be warmed in winter. Ideally, it should be connected to a loggia or balcony.
When open, the wall-mounted supply unit allows fresh air from outside into the room. When closed, the air flow stops.
On PVC windows, air intake devices operate like wall valves. When the valve is open, air flows into the room. When closed, the window ventilator prevents air from entering the room.
According to SNiP 2.08.01-89, a minimum of 3 m³ of fresh air must be supplied per 1 m² of living space. To calculate the number of fresh air inlets, you need to know the capacity of each device and the overall size of the room.
Video materials


