Ducted and combination kitchen hoods are designed to force polluted air out of the kitchen and into the outside air or ventilation system. Recirculation hoods clean the air using filters and then recirculate it back into the room.
Kitchen hoods come in ducted, recirculated, and combined versions, so it's important to remember that installing a kitchen hood requires taking into account the equipment's design features and ventilation standards.
- What you need to prepare for installing a range hood in the kitchen
- What standards must be observed when selecting hood parameters and installation?
- Step-by-step instructions for installing a ducted wall-mounted range hood
- Step-by-step instructions for installing a built-in range hood
- The nuances of installing other types of exhaust equipment
- Commissioning works
- Nuances of installation work
- Answers to current questions
- Video of kitchen range hood installation
What you need to prepare for installing a range hood in the kitchen
To install an exhaust ventilation system in the kitchen of an apartment or private home, first select a hood with the appropriate parameters. Household appliances vary in design, operating principle, performance, and features.
Availability backlighting Simplifies cooking on the hob when the kitchen is dimly lit. An increased number of fan speed settings allow the user to fine-tune the exhaust system.
Determine which equipment to install based on its operating principle, taking into account the stove used in the kitchen.
Due to the lower cost and ease of maintenance, it is more common to prefer to install single-action equipment in the kitchen: recirculation or by diverting it to ventilation.
According to their design, umbrellas are classified as:
- Suspended with ceiling mount:
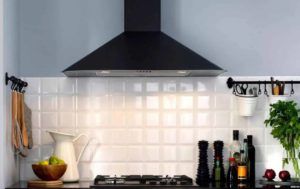
- Wall-mounted straight and corner;
- Built into a kitchen cabinet;
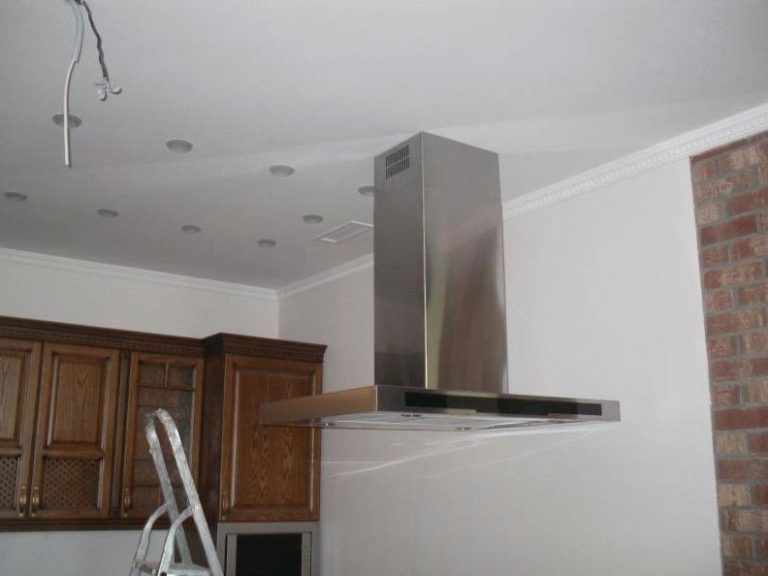
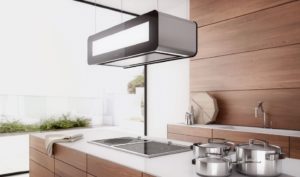
- Island for hanging from the ceiling in the kitchen, where the work area is made as an island in the middle of the room;
- Inclined, horizontal and vertical;
- Dome, canopy, telescopic.
The type of equipment to install depends on installation options, consumer preferences, and kitchen layout.
In addition to the extractor, prepare a tool kit. You will need:
- electric drill or screwdriver with drilling function;
- a set of drills with diamond or carbide tips;
- jigsaw;
- screwdriver;
- laser level;
- roulette;
- pencil.
The list may change depending on the equipment model and the material of the kitchen wall where installation is planned.
Read the article: 21 tips from professionals on how to choose a kitchen range hood.
What standards must be observed when selecting hood parameters and installation?
Air exchange rates are set for each room based on its intended use. In the kitchen: with a gas stove – 90 m3/hour, electric stove – 60 m3/hour. Ventilation standards take into account the volume of the entire room, where air must be renewed at least 12 times per hour.
The performance of household hoods varies from 290 to 1500 m3/hour. Without using complex formulas that take the stove type into account, you can determine the average parameters of a range hood suitable for your kitchen. Multiply the air exchange rate (12) by the room's volume.
The result is that for most standard kitchens, an exhaust system with a capacity of 600-800 m3 is suitable.3/hour.
There are specific requirements and standards for installing an exhaust hood. In apartments, especially in older buildings, a ducted exhaust hood cannot be connected to the main building ventilation duct.
You will have to vent the exhaust to the street through a through-hole in the wall or choose equipment with recirculation.
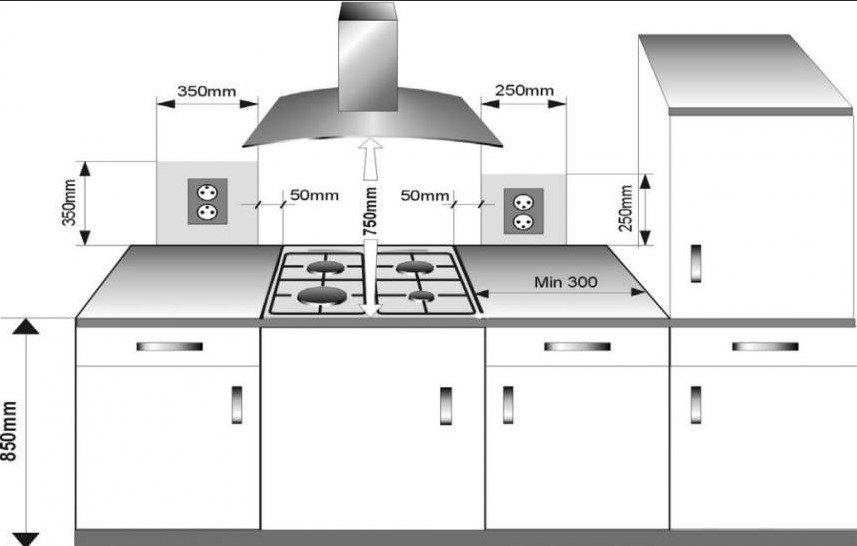
Manufacturers of household appliances provide recommended distances for installing a kitchen hood above the hob:
- The recommended distance between the gas stove and the lower part of the inclined or vertical hood is 55-65 cm;
- The recommended distance between the gas stove and the horizontal hood is 75-85 cm;
- The recommended distance between the electric stove and the bottom of the inclined or vertical hood is 35-45 cm;
- The recommended distance between the electric stove and the horizontal hood is 65-75 cm.
More details about the choice height of the hood installation above the stove depending on different parameters.
To effectively remove dirty air, the hood width should match the width of the cooktop. A 5-10 cm margin of error is acceptable.
Noise sources above 90 dB are considered dangerous to human hearing. Household range hoods range from 40 to 75 dB. The noise level increases with increasing fan power.
Loose fittings of the housing and air ducts can cause additional noise. To prevent discomfort in the kitchen, purchase units with buttons for changing fan speeds.
Check the tightness of fasteners, use elastic gaskets in structural connecting units to eliminate metal rattling.
Step-by-step instructions for installing a ducted wall-mounted range hood
The most difficult type of ducted hood to install in a kitchen is the one that requires installing air ducts and creating a place to remove dirty air flows.
It is better to carry out the work during cosmetic or major repairs if it is necessary to make a through hole in the wall to bring the channel outside.
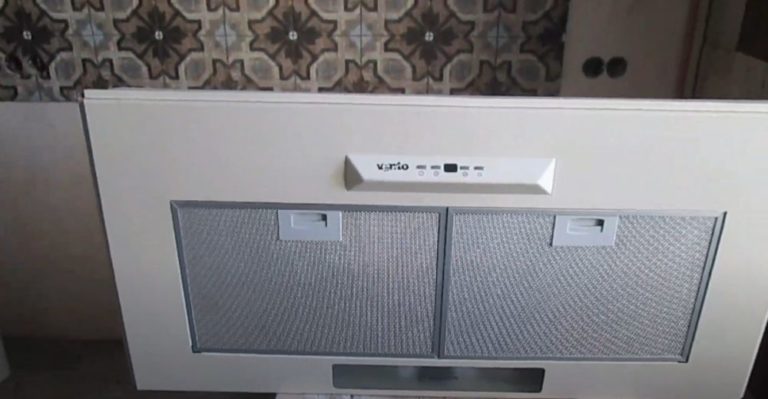
An example of step-by-step installation instructions for the Vento dome hood:
- Unpack the exhaust system. Check the complete package against the technical data sheet and refer to the manufacturer's instructions.
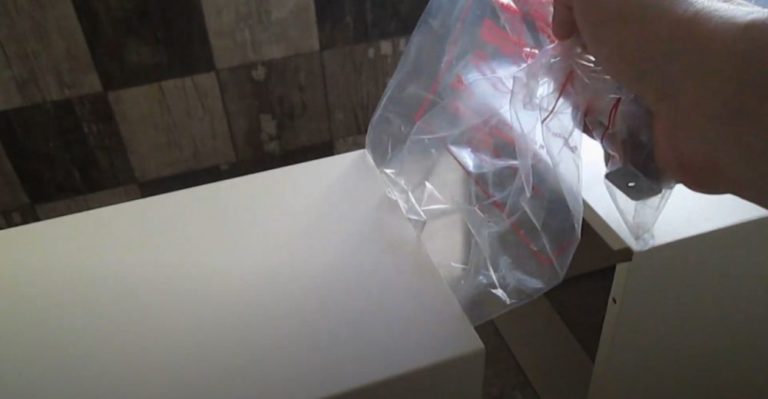
- Check the appliance's functionality. Temporarily install the ventilation duct aligned with the exhaust hood's outlet, leaving approximately 20 cm of space between the elements. Unwind the appliance's cord and plug it into a power outlet.
There are control buttons on the dome umbrella body. Check the backlight. Turn on the fan speed settings one by one.
Insert a sheet of paper or a plastic bag into the gap between the ventilation duct openings and the hood outlet. The airflow should deflect it away from the hood outlet and toward the duct opening.
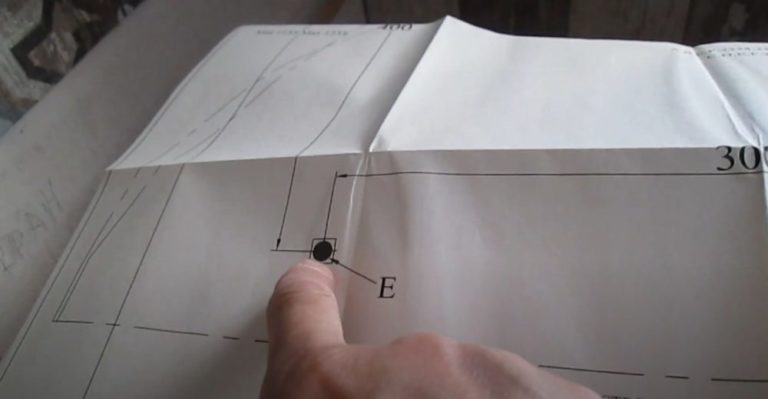
- Manufacturers of branded kitchen equipment typically include installation templates. These templates feature a drawing of the hood's back, in actual size, with locations for drilling mounting holes indicated.
Check if such a template is available. In this example, the kitchen hood comes with a diagram. If a template is not included, draw one yourself by placing a sheet of paper on the back of the hood. Use a pencil to trace the outline of the hood and draw the mounting holes.
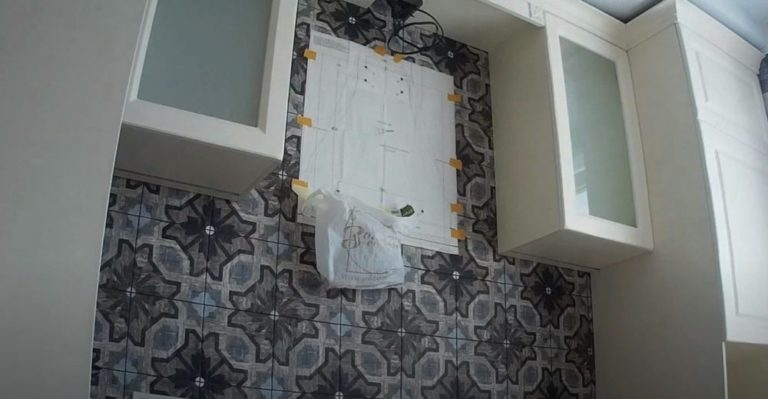
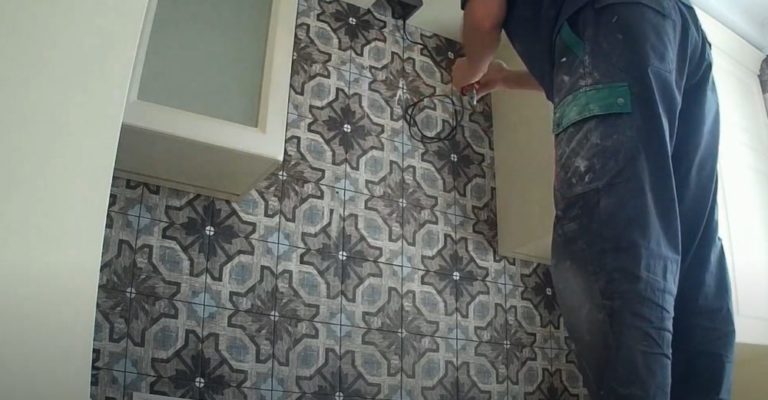
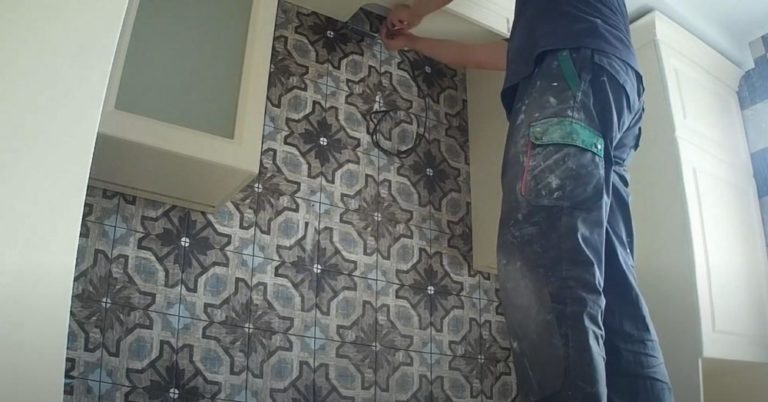
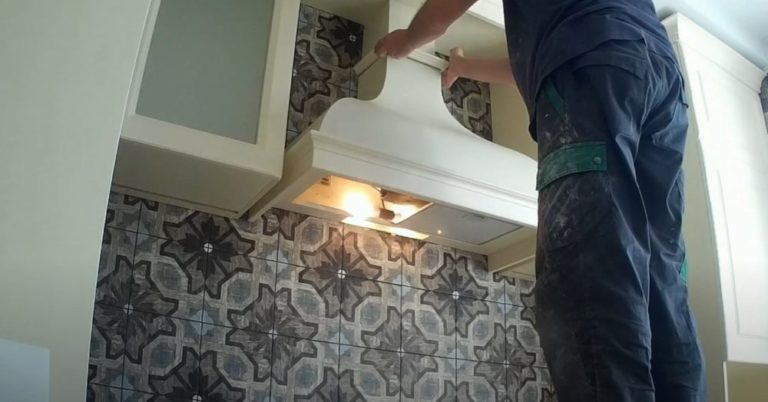
- At this stage, consider how to hang the range hood in the kitchen, directly above the stove. Use a laser level for marking. Using the aligned beam, place the mounting template on the wall.
Attach the paper diagram to the tile with masking tape. Make sure the drawn line of the umbrella's lower body aligns with the laser level beam.
Additionally, attach a plastic bag with tape under the drilling site to collect any falling debris.
- Use a drill with a drill bit or a power screwdriver to drill the holes. Be careful not to chip the tiles. Use diamond-tipped or carbide-tipped drill bits.
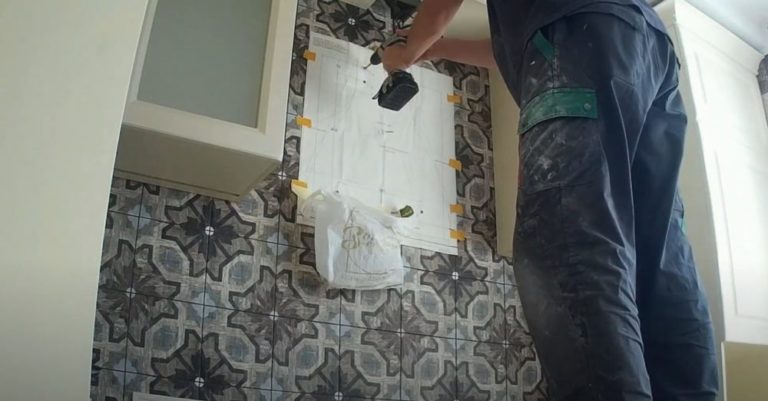
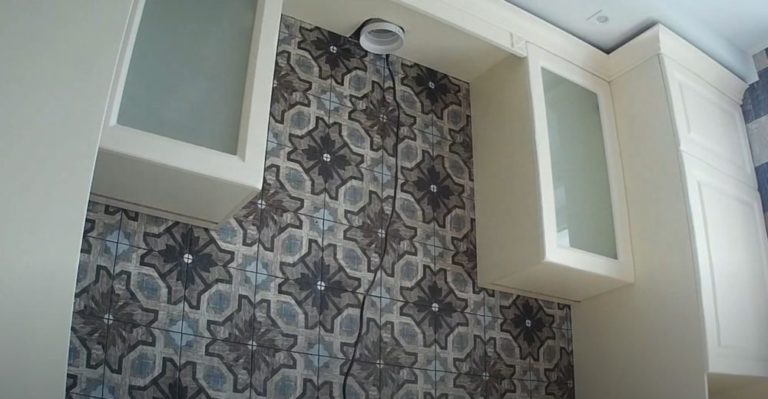
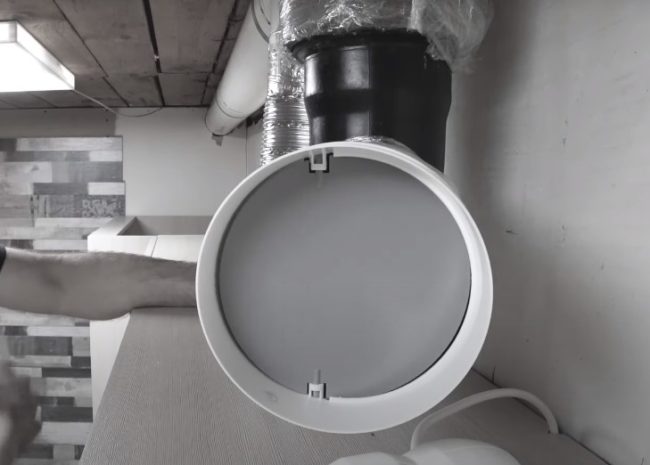
- Once drilling is complete, remove the template from the wall and clear away any debris. Prepare the exhaust vent and wiring for the exhaust hood.
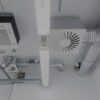
In this kitchen example, the ventilation duct and cable are hidden inside a box under the ceiling. A ventilation hole has already been made above the unit's installation location, with a length of cable hanging down.
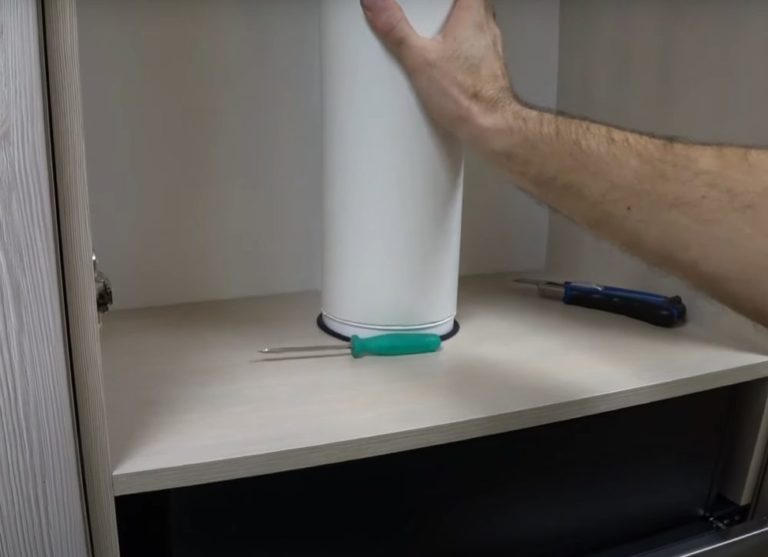
- Insert plastic anchors into the prepared mounting holes. These anchors are used to screw in the screws. Attach a mounting plate above the exhaust vent of the kitchen ventilation box.
- Use the included screws to secure the hood dome to the wall. Use a level to check that the housing is level. Temporarily remove the hood for easier duct installation.
- Install a shaped adapter into the ventilation duct opening where the mounting plate is secured. Be sure to route the wire through the gap between the outer wall of the adapter and the edge of the kitchen ventilation box.
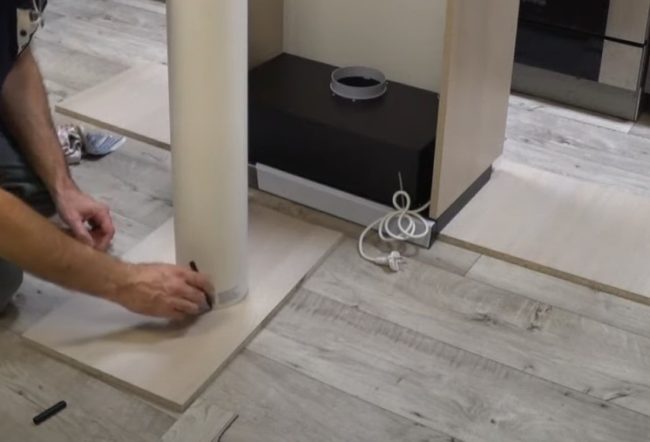
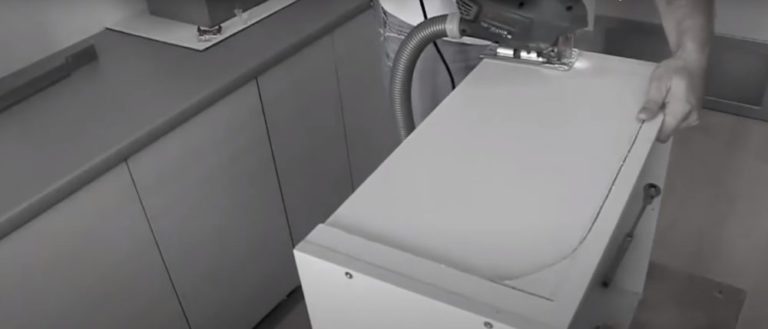
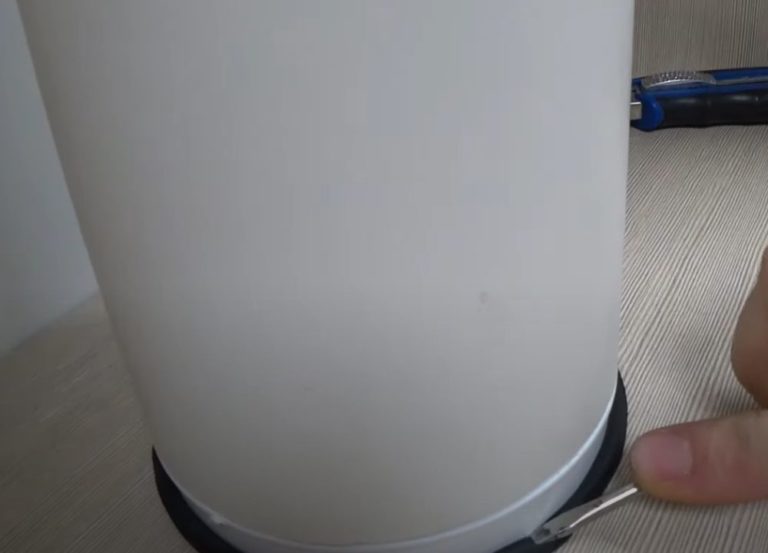
- Adjust the decorative cover that covers the section of ductwork between the range hood and the kitchen ventilation duct to length. If the cover is long, trim it with a jigsaw.
Don't make a mistake with the size; check the required length of the casing taking into account the height of the suspended dome above the stove.
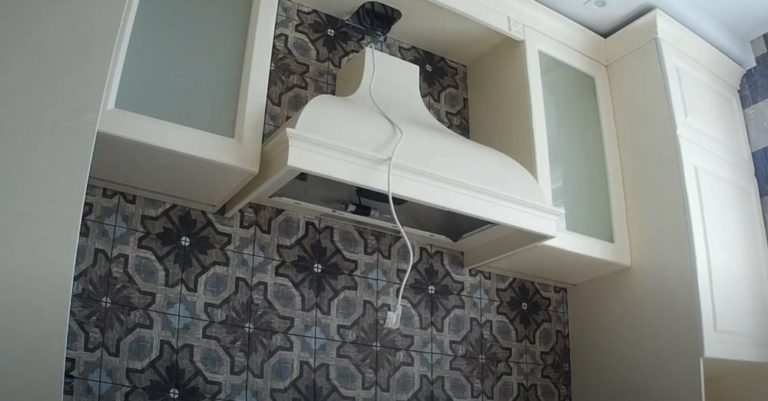
- Using sealant, seal the gap formed between the walls of the shaped adapter in the kitchen ventilation duct opening. Hang the dome on the wall and double-check the level of the housing with a level.
- Connect the outlet to the wire coming out of the kitchen ventilation box. Mount it in a convenient location on the wall. It's best to hide the outlet from view by installing it behind the dome.
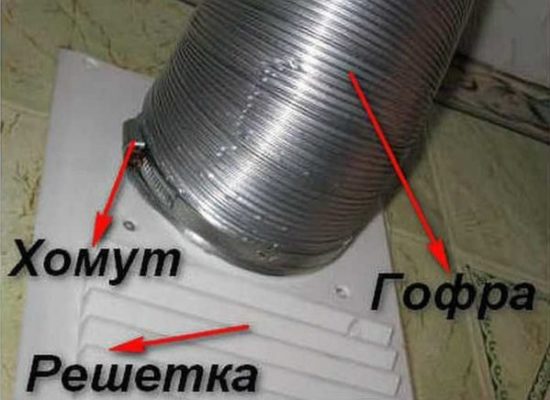
- Connect the dome outlet with a corrugated pipe to the shaped adapter on the kitchen ventilation system. Secure the joints with clamps.
- Cover the connection point with a decorative casing using a corrugated pipe.
Check the equipment's operation, switching the fan speeds one by one. If the hood is correctly sized but still fails to completely remove dirty air, the problem is a lack of airflow.
Allow fresh air from outside to enter the kitchen through a slightly open window. It's best to install a supply air vent in the future.
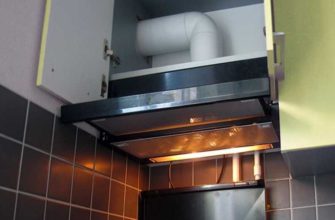
Step-by-step instructions for installing a built-in range hood
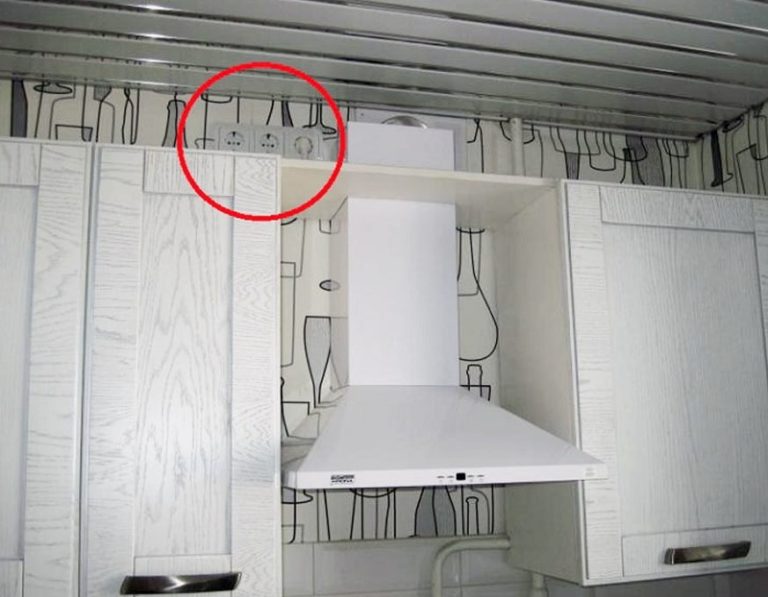
When the upper portion of a kitchen wall is lined with cabinets, installing a range hood over a gas stove is more difficult. A built-in model is required. The installation method involves inserting the hood housing into the bottom of a cabinet hanging above the cooktop.
Let's look at how to properly install a built-in range hood in these step-by-step instructions:
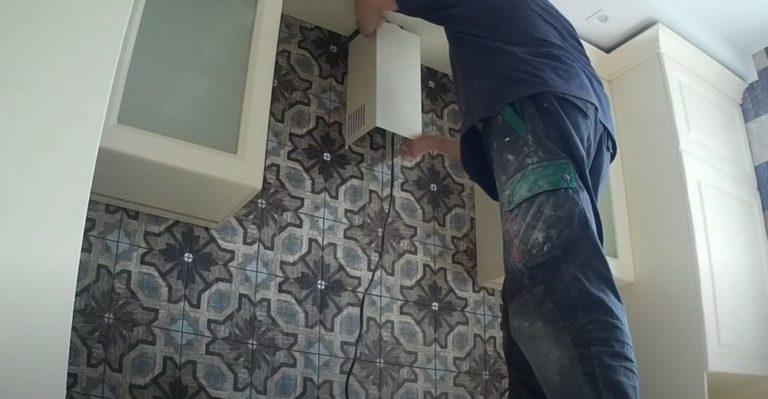
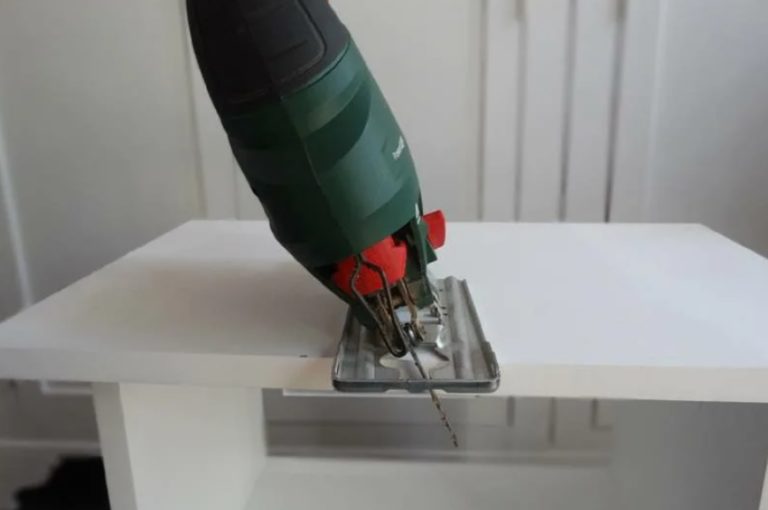
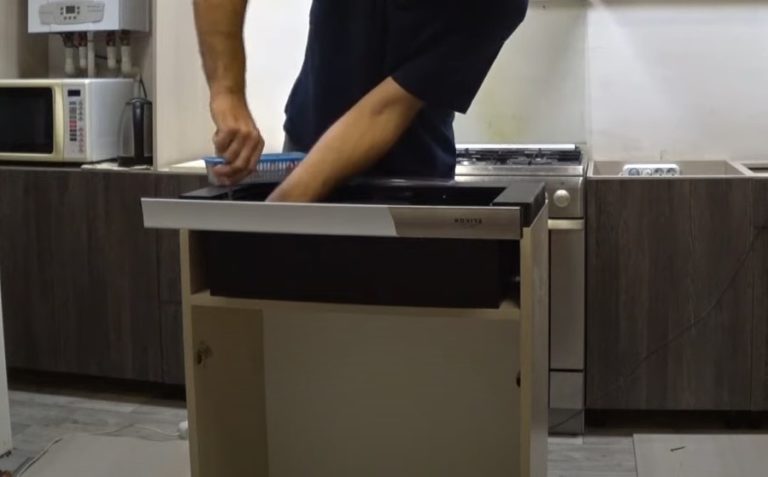
- Mark the area on the cabinet bottom that needs to be cut out for the range hood housing. Use a jigsaw to cut out the bottom section.
- Place the exhaust hood housing inside the cut-out opening on the cabinet. Ensure the unit is positioned correctly, without any distortion.
- The next steps depend on the model of the appliance. If the hood is a recirculation hood, simply attach the housing to the cabinet and hang it on the kitchen wall above the stove. For ducted or combination hoods, you need to prepare a space for the exhaust duct. Mark the opening on all cabinet shelves at the exact location of the hood's outlet.
- Using a jigsaw, cut a hole in each cabinet shelf along the markings.
- Install the shelves into the cabinet. Make sure the holes you cut are aligned.
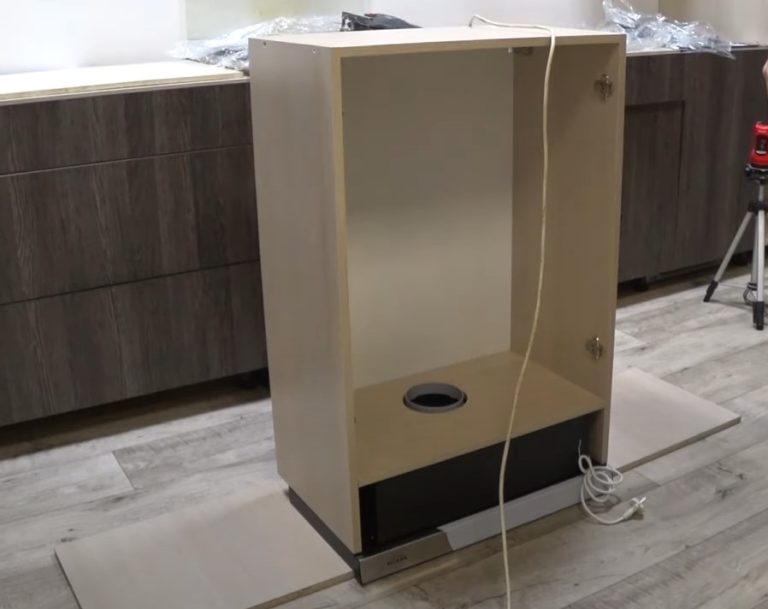
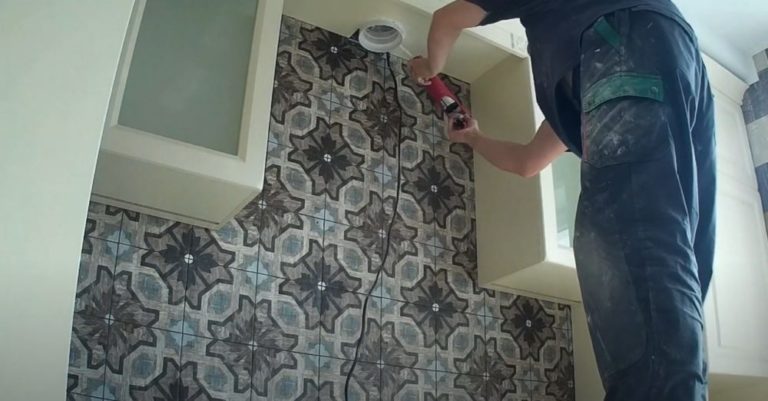
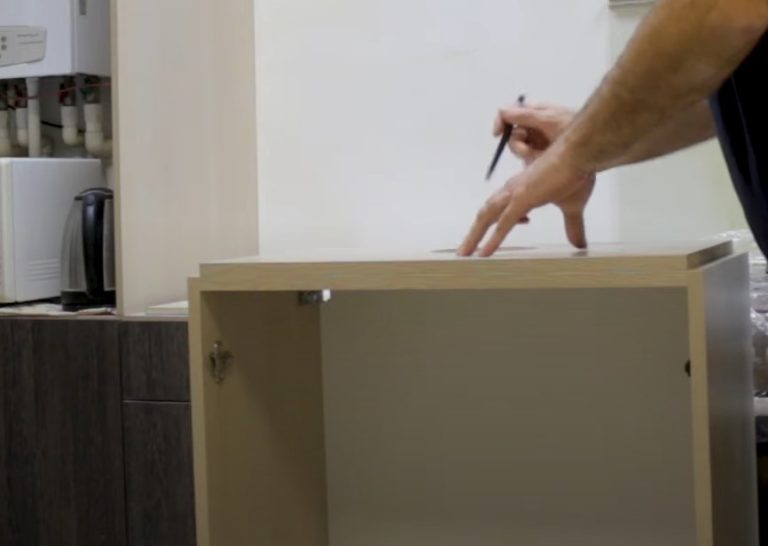
- To route the ductwork out of the cabinet, use a jigsaw to cut a hole in the top cabinet element. You can make precise markings using one of the cut-out shelves. Place the element on the cabinet roof and trace the outline of the hole with a pencil.
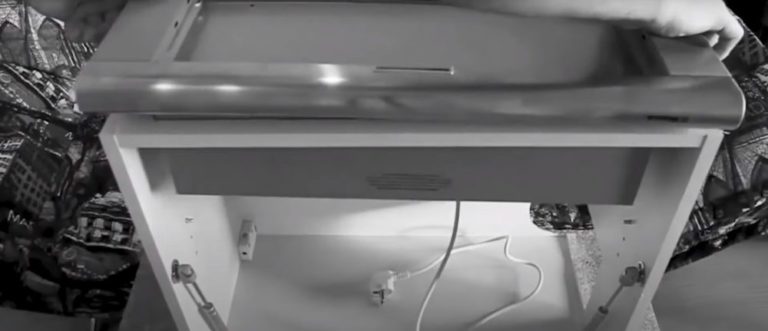
- Once all the parts are prepared, begin assembling the structure. Turn the cabinet upside down. Install the exhaust hood into the cut-out slot and secure it with screws through the mounting holes.
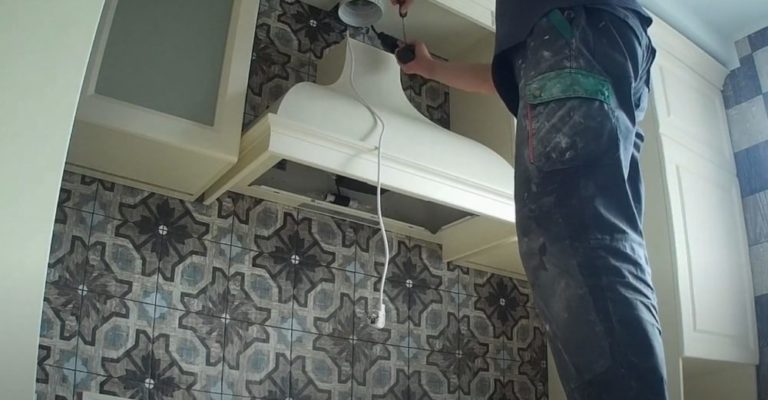
- The principle of mounting a range hood into a cabinet is clear and simple. After completing the installation, hang the unit on the kitchen wall above the cooktop and install the air duct inside. The duct should exit through the roof of the cabinet to connect to the building's ventilation system.
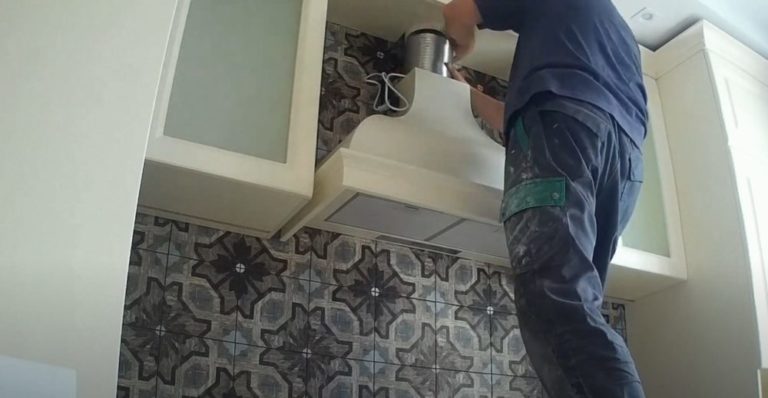
- To prevent the sound of the operating fan from being amplified by the cabinet body, eliminate the gaps between the pipe passing through the holes and the edge of the shelves by installing a sound-insulating sealing ring.
- Connect the duct coming out of the top of the cabinet to the building's ventilation system. Use corrugated pipe or fittings.
Once installation is complete, plug in the built-in range hood. Check the operation of the fans and lighting, and ensure proper draft.
The nuances of installing other types of exhaust equipment
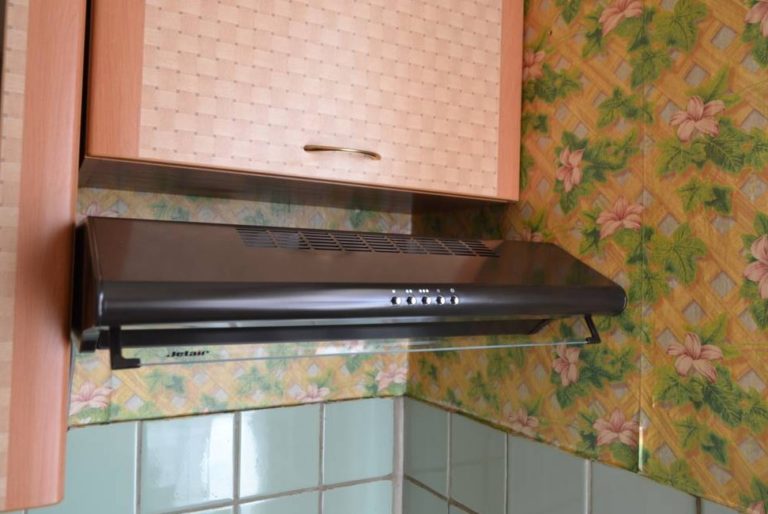
A recirculation hood is easier to install. It doesn't matter what type it is—horizontal, telescopic, tilted, or vertical. No ductwork is required from the hood.
According to the manufacturer's instructions, mount the appliance above the cooktop. Plug the cord into a household electrical outlet.
A suspended hood, whether island or other type, must be secured to the kitchen ceiling. First, install the anchors. Attach the hangers provided with the appliance to the mounting hardware. After hanging the ducted hood, connect the air ducts. Secure the ducts to the ceiling with clamps. If the suspended hood has a recirculation system, no ducts are required.
The installation principle for a combination hood is similar to that of a ducted unit. Ductwork will be required to exhaust stale air to the outside or into the common ductwork.
Commissioning works
Once the hood is secured over the kitchen stove and plugged in, it's time for commissioning. This involves checking the operation of the lighting and fan speed settings.
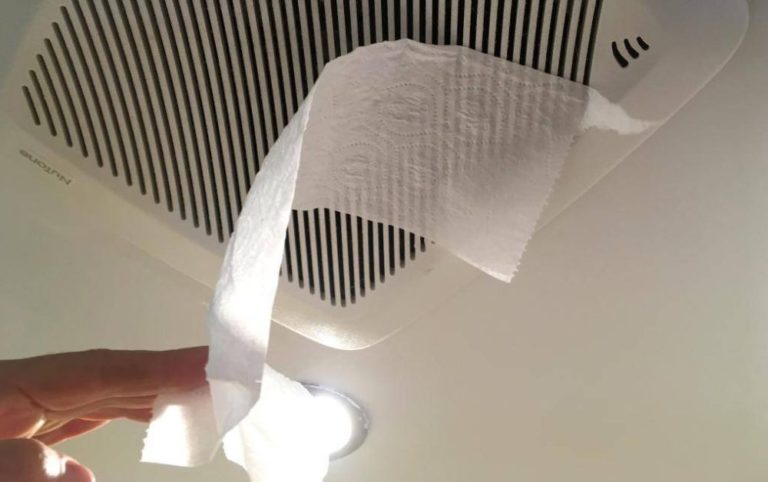
With each speed change, check for an increase in air intake. Place a sheet of paper on the mesh grease trap. As the fan speed increases, the stuck piece of paper will become more difficult to remove.
Nuances of installation work
The building's ventilation system and exhaust hoods differ in design. Installation nuances for individual components arise that require consideration.
All household appliances come with a cord and plug to connect to the power grid. The user simply plugs the cord into a household outlet. Often, the original cord isn't long enough. This problem can be solved in two ways:
The choice of the appropriate connection method is up to the user. A safe option is to install a separate outlet behind the umbrella, hidden from view.
To connect the duct hood, use air ducts of the same cross-section as the appliance's outlet. Air ducts can be metal, plastic, round, or square.
It's easier to install aluminum corrugated hose in bends. Secure the air ducts to the wall with clamps: metal ones with bolts or plastic ones with snaps.
If you plan to mount the frame on a ceiling with a certain indentation, additionally use perforated hangers for plasterboard and threaded studs.
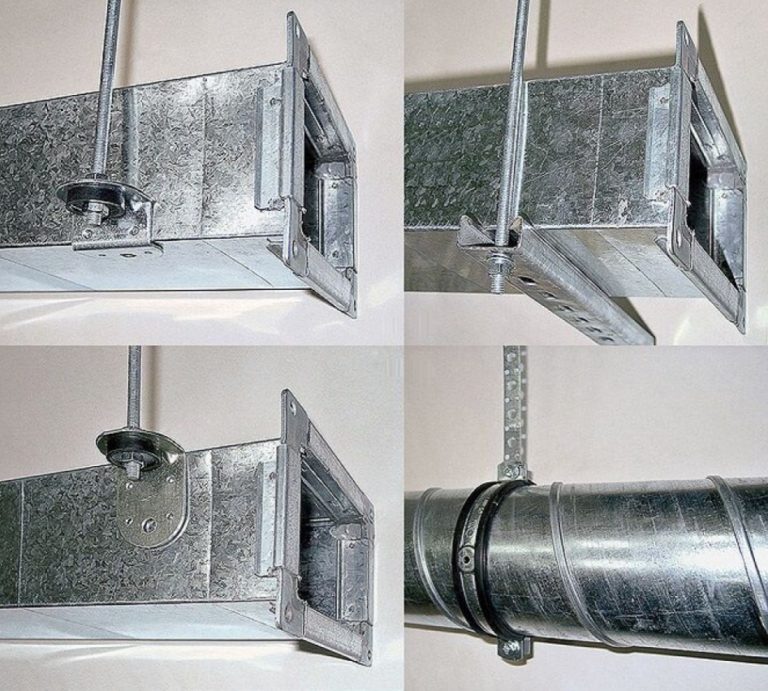
To connect the rigid duct to the combined grille of the common building ventilation duct, use a corrugated pipe adapter. Secure the corrugated pipe joints with clamps.
Answers to current questions
Leave a gap of 55-85 cm between the gas stove and the bottom of the range hood. Maintain a distance of 35-75 cm from the electric stove. The bottom edge of the range hood should not be higher than 90 cm from any type of cooktop.
Please follow the installation rules:
- Attach an exhaust hood with a width equal to or 5-10 cm wider than the width of the hob.
- Maintain the distance between the stove and the exhaust hood as recommended by the equipment manufacturer.
- To prevent fire, move the appliance's electrical outlet as far away from the stove as possible. Hide it behind a hood, a cabinet, or under the ceiling above the kitchen cabinets.
- When laying ducts, try to reduce the number of turns and bends that increase resistance to the exhaust air.
- There are no established GOST standards for hood hanging height. Manufacturer-recommended standards are designed to prevent electrical fires. Please refer to your hood's instructions for more information.
If there is no common ventilation duct, purchase a unit with recirculation or drill a through hole in the wall to the outside.
You can install a device with recirculation, where the air is purified by a carbon filter.
Move the outlet as far away from the cooktop as possible. Hide it behind an hood or above a cabinet near the ceiling.
Ventilation is necessary for air exchange and the removal of gases and combustion products not removed by the exhaust hood. Without a fresh air supply, the hood cannot function properly.


