I often come across the question, Is a waste pipe necessary for sewerage in a private home?? The answer is clear: a vent pipe is necessary, but only in certain cases! Ventilation of the sewer system is essential. when more than three plumbing fixtures are connected or they are installed at different levels.
In this article, I'll cover the purpose, operating principle, and types of ventilation units in more detail. We'll also cover installation requirements, diagrams, and pipe diameters. At the end of the article, I'll provide instructions for installing a sewer exhaust ventilation system. You'll also find an overview of potential installation issues and troubleshooting methods.
- Purpose and operating principle of fan ventilation
- Is a waste pipe necessary for sewerage in a private house?
- Types of waste pipes
- Requirements for installation of a vent riser
- Schemes of waste pipes
- Diameter of sewer ventilation ducts
- Service life
- Self-installation of a waste pipe
- Problems with sewer installation and methods of elimination
- Answers to frequently asked questions
- Video about the waste pipe
Purpose and operating principle of fan ventilation
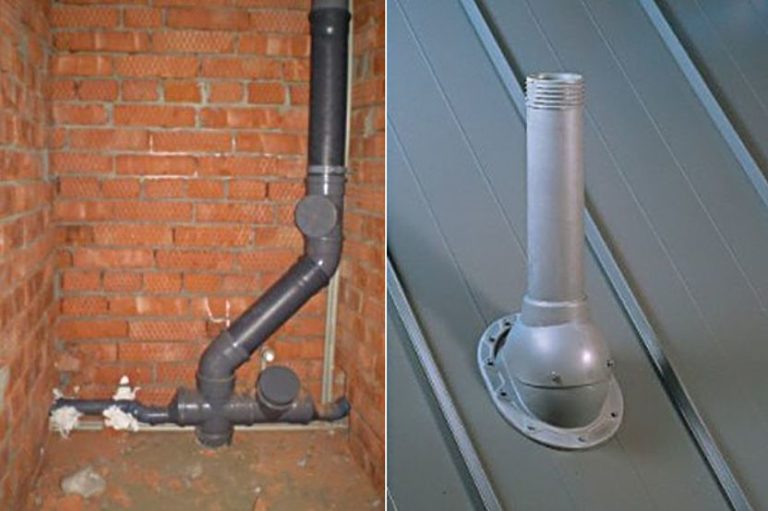
For those who don't know what a waste pipe is, I'll start with a definition. The term "structural unit" refers to the upper portion of a sewer riser that discharges the unpleasant odor of sewage into the atmosphere. In terms of operation, it's exhaust ventilation of the sewer systemThe channel exits through the attic of a private house and rises above the roof.
Besides ventilation, the structural unit has an additional purpose. According to the second definition, a vent riser compensates for lack of pressure in the pipeline.
When a toilet, bathtub, or sink flushes suddenly, the drains block the internal section of the pipe. A waste standpipe installed at the end of the system prevents the formation of a vacuum that could blow the trap's water seal.
Is a waste pipe necessary for sewerage in a private house?
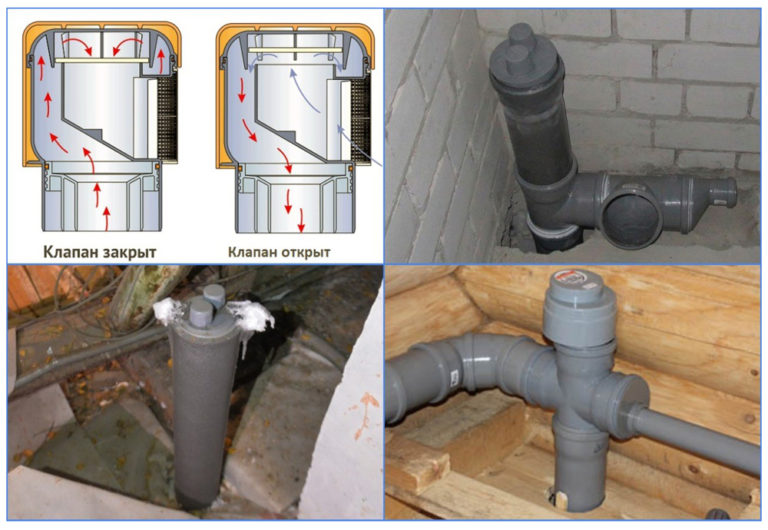
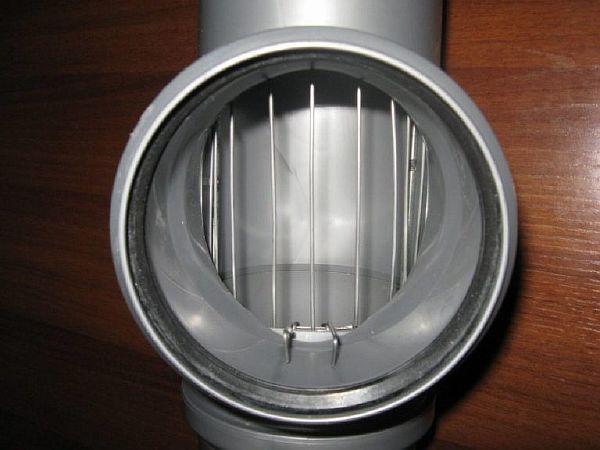
To prevent the water seal from being broken in plumbing fixtures, vacuum valves are designed. The mechanism is activated during a sudden flush of water.
Air from the room enters the pipeline, preventing a vacuum from forming. So, whether or not a waste pipe is needed for a sewer system in a private home—let's think logically. Let's start with the first purpose of the riser—ventilation:
A vent pipe is needed to ventilate an autonomous sewer system in a private house.
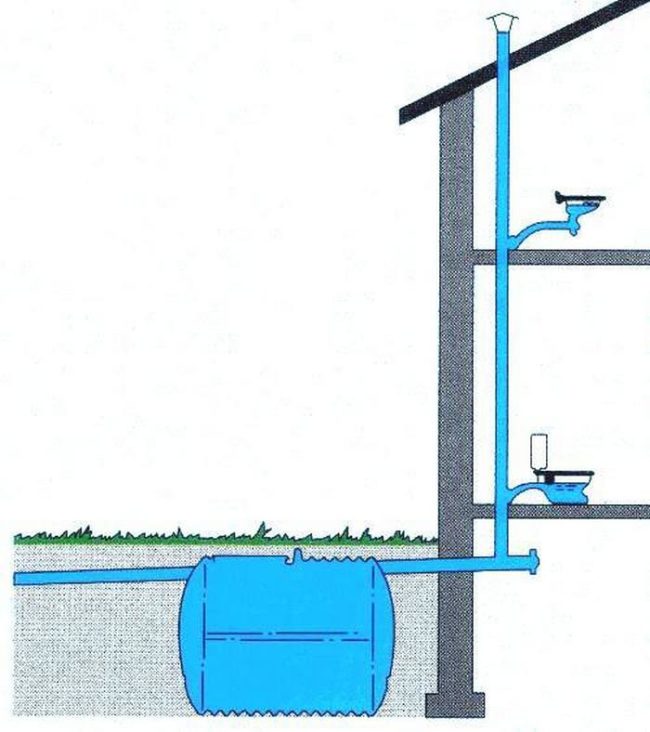
It's time to address the riser's second purpose: compensating for pressure loss in the pipeline. In practice, in small private homes, a roof-mounted sewer pipe isn't always installed. This diagram is appropriate for an outbuilding occupied by one or two elderly residents.
The sewer system is rarely used. The plumbing fixtures include a sink, one toilet, and a shower stall. There are no large-volume wastewater discharges. A vacuum valve prevents the water seal from failing.
A waste riser, used to compensate for the lack of pressure in the sewer network, cannot be avoided in the following cases:
- When a private house is divided into 2 apartments with a large number of residents.
- If a private house has two floors or an attic.
- When the internal wiring of a private house is made of horizontally laid pipelines.
- If more than 3 plumbing fixtures are connected to the sewerage system in a private house and are actively used by residents.

In a private single-family or multi-family building, regardless of the number of floors and number of residents, a waste riser for the sewer system with an outlet on the roof is required:
- When there is no toilet in the house, but the internal wiring from the sinks is connected to a riser with a diameter of 50 mm.
- If the discharge from a swimming pool or bath tub is connected to the general sewer system.
- When a septic tank with live bacteria receives and processes wastewater in an autonomous sewer system.
- If in a private one-story house the plumbing fixtures are installed at different levels, but connected to a common riser.
Owners of private homes are reluctant to install a ventilation riser due to the need to route the pipe through the attic and roof. Installing the structure is not easy, but relying on vacuum valves is unwise, even in a small outbuilding.
To ventilate the system and prevent the water seal from breaking, I recommend installing a waste riser in the house, regardless of the complexity of the sewerage system.
Types of waste pipes
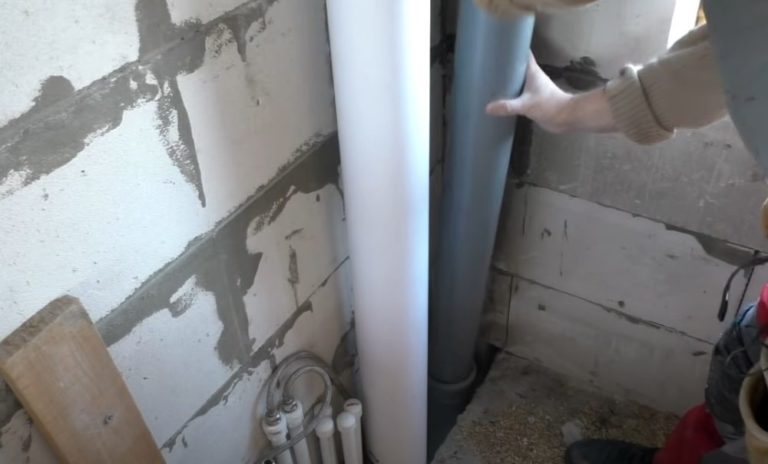
Cast iron and plastic pipes are used for installing in-house sewer systems. Cast iron's advantage is its resistance to mechanical stress and impact. Disadvantages of cast iron pipes include their susceptibility to corrosion, considerable weight, and the tendency to accumulate dirt on the rough interior walls.

Plastic pipes are lightweight and don't require heavy-duty fasteners during installation. The smooth inner walls are resistant to grease buildup, allowing for unimpeded drainage.
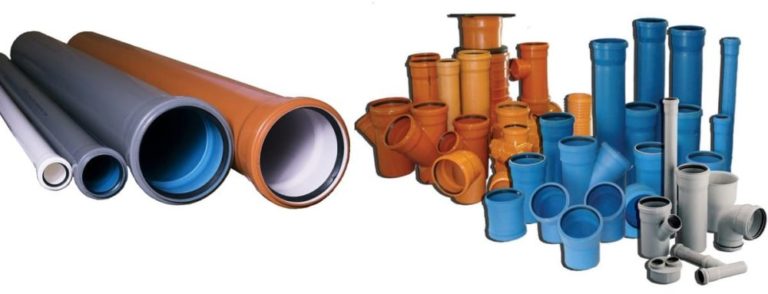 A waste pipe is an extension of the sewer riser. For utility system installation, it is common to use components made of similar materials: cast iron/cast iron or plastic/plastic. A combination of pipes is permitted during sewer repairs. Plastic is considered a universal material, compatible with cast iron.
A PVC vent pipe is lightweight and can be installed on a cast iron riser. Reversing the installation of components made from dissimilar materials is unacceptable. If you install a cast iron vent pipe on a plastic riser, the sewer system will collapse under the weight.
Experimentalists sometimes use metal or asbestos-cement pipes to create roof vents in private homes. This is a bad idea due to the incompatibility of the materials. Homemade adapters are required, creating an unsightly, bulky connection.
Metal and asbestos are heavy, which will place additional strain on the sewer riser. Metal pipes condense and corrode. Asbestos cement is similarly prone to deterioration and crumbling into fine dust over time.
Requirements for installation of a vent riser
The need for ventilation of the sewer system is stipulated in paragraph 17.18 SNiP 2.04.01-85. The definition of a ventilated riser is given in paragraph 3.1.12 SP 30.13330.2020.
Based on legislative documents, designers develop diagrams and calculate the diameter of pipeline layouts.
Schemes of waste pipes
The number and location of roof waste pipes is determined by the sewer system layout and the size of the home. In well-designed one- and two-story residential buildings, plumbing fixtures are arranged to form a single, common riser.
Even in a two-story building, bathrooms for each level are planned to be stacked one above the other. Establishing a single pipe on the roof is more cost-effective, labor-saving, and aesthetically pleasing.
Large buildings with multiple apartments have complex layouts. The kitchen is located far from adjacent bathrooms or separate toilets and bathrooms. Connecting all plumbing fixtures to a single riser via long horizontal pipes is inefficient.
Branches quickly become clogged with fatty depositsLong pipes spoil the interior. This problem can be solved by installing separate risers in the kitchen and bathrooms, which require a corresponding number of ventilation pipes to be routed to the roof.
 It is prohibited to construct an exit into the attic of a private home. This will release moisture from the sewer system, along with unpleasant odors. The vapors will accelerate the rotting of the wooden rafter system. The smell of sewage from the attic will leak into the living space.
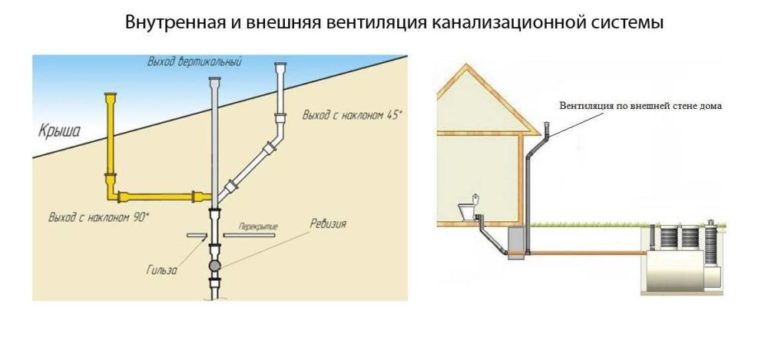
The vent duct is only allowed to exit to the street through the roof or along the exterior wall of the building. To create draft, the section of the pipe running through the cold zone is insulated with mineral wool or other thermal insulation.
The layout of the ventilation channels on the roof is developed in compliance with the following rules:
- The recommended outlet for the channel on a pitched roof is at least 50 cm above the ridge.
- The outlet of the channel on a flat, unexploited roof is permitted to be 30 cm high.
- The channel outlet on a flat exploited roof must be at least 3 m high.
- It is prohibited to connect the fan duct to the general building ventilation and chimneys.
- The ventilation outlet is located at least 4 m away from windows and balconies.
- On the roof, the ventilation channel is made higher than the ventilation ducts leading out of the house.
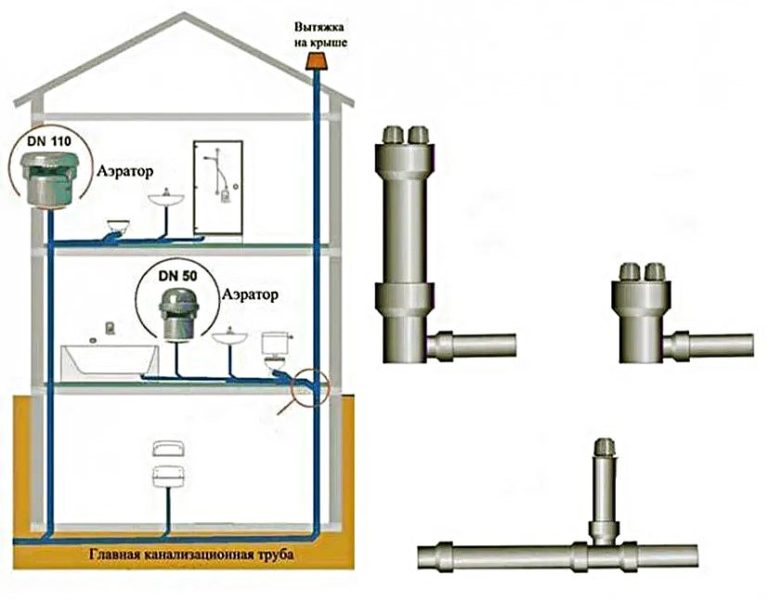
A complex sewer ventilation system may include a check valve. This mechanical unit prevents unpleasant odors from returning through the pipeline into the house when backdrafting occurs due to technical reasons.
Diameter of sewer ventilation ducts
In a private home's sewer system, the diameter of the waste pipe corresponds to the size of the main riser. A larger diameter is permitted, but not a narrower one. Waste outlets with a diameter of 150-200 mm are typical for public buildings and businesses.
In private homes with a toilet installed, the sewer vent outlet is 110 mm in diameter. If a small outbuilding has no toilet, only a kitchen sink and bathtub, a 50 mm diameter waste duct is sufficient.
The sewer ventilation pipe exiting through the roof is always positioned strictly vertically. The supply lines may be inclined with a consistent slope of 1-3 cm per linear meter.
Service life
The waste pipe is not subject to high mechanical stress because it is installed on top of the riser. The internal walls of the channel are subject to minimal wear because air, not waste, flows through them. Plastic and cast iron pipes can last 80-100 years, but there are secondary factors.
Plastic is susceptible to thermal expansion and exposure to high temperatures. The pipe can crack, pop out of the joint, or become deformed.
Cast iron is resistant to thermal expansion, but it is heavy. Under its own weight, risers tend to settle over time. Joints become depressurized, and connections crack.
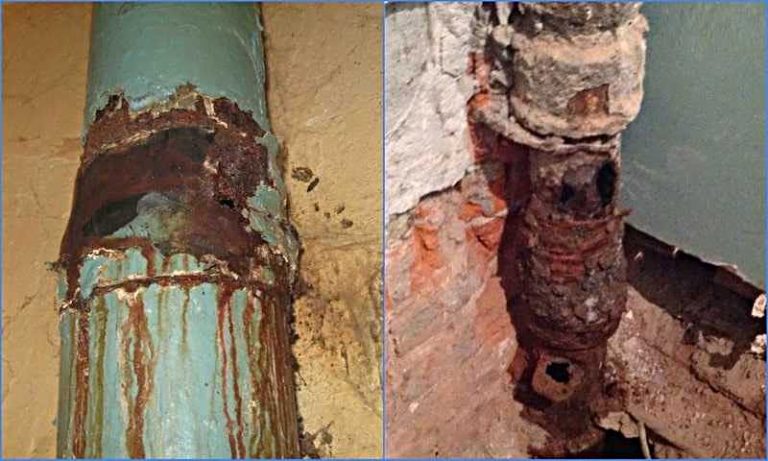
The longevity of cast iron and PVC exhaust ducts depends on proper installation and usage. When it's time to replace your home's sewer system, install a new exhaust duct at the same time.
Don't leave old waste pipes, especially cast iron ones. Replacing internal wiring compromises the strength of the connections between sections of the utility network. As a result, the house will have a new sewer system, but only emergency ventilation.
Self-installation of a waste pipe
If you've managed to install the sewer system in your home yourself, installing the waste pipe shouldn't be a problem. Route the waste pipe through the attic to the roof to prevent rot in the rafter system. Use a plastic pipe with a diameter of 110 mm.
Depending on the complexity of the design, fittings such as tees, crosses, couplings, and elbows may be required. Use clamps to secure the pipe. Provide a sealed outlet through the roof using a pass-through.
Step-by-step installation instructions:
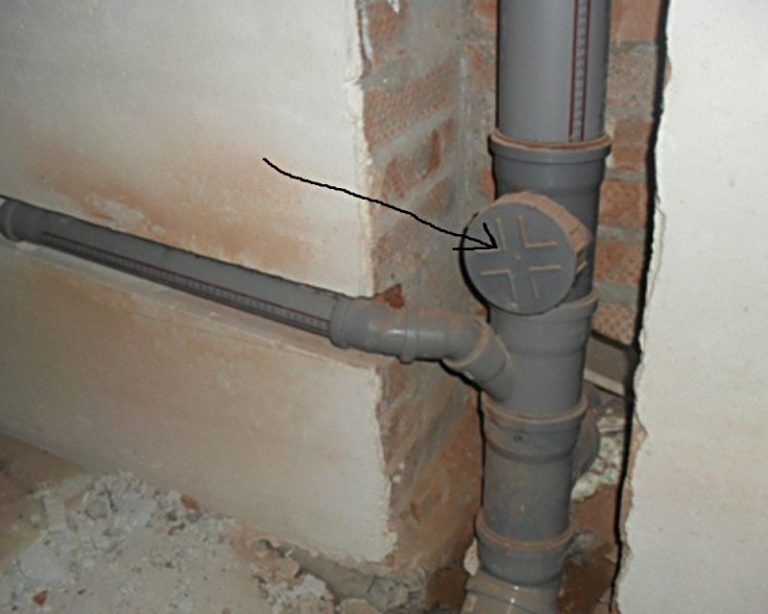
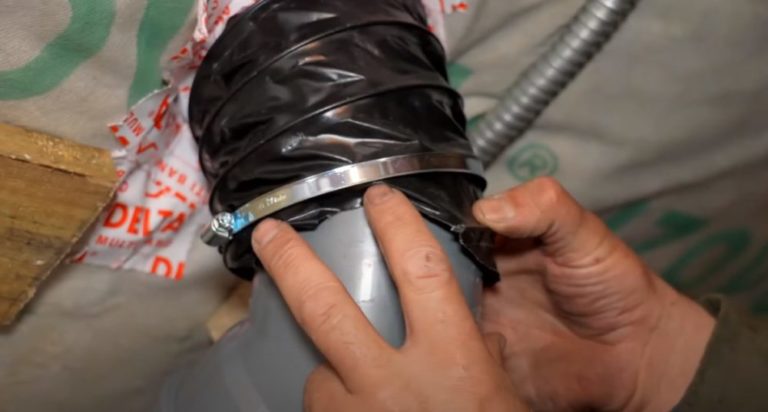
- Install a PVC pipe onto the sewer riser and secure it to the wall with clamps. Route the pipe through the hole in the ceiling into the attic. Don't forget to install a fitting with an inspection hatch between the riser and the waste outlet. This fitting is necessary for clearing out sewer lines clogged with grease deposits.
- Mark the location of the air duct exiting through the roof, aligned with the attic duct. Use a sharp knife to cut through the vapor barrier along the markings. Remove the insulation from the roofing sheet.

- Prepare a through hole in the roofing material for the penetration element. Use an electric drill to mark the edges of the window cut into the insulation on the attic side.
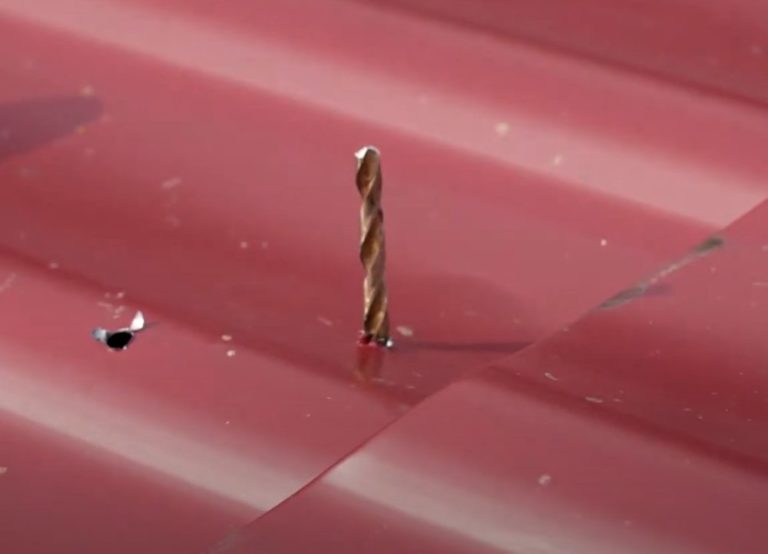
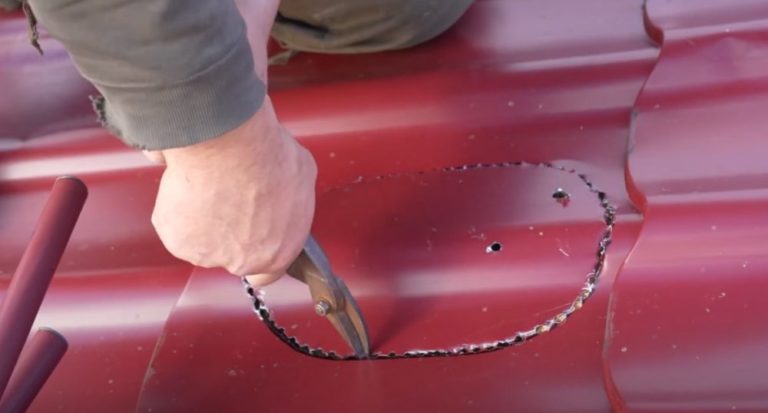
- From the outside, locate the markings on the roof, consisting of 2-4 holes. Lay out the template for the penetration and trace it with a marker. Use a drill to drill frequent holes along the markings. Drill the holes closer together to make it easier to cut out the roofing section.
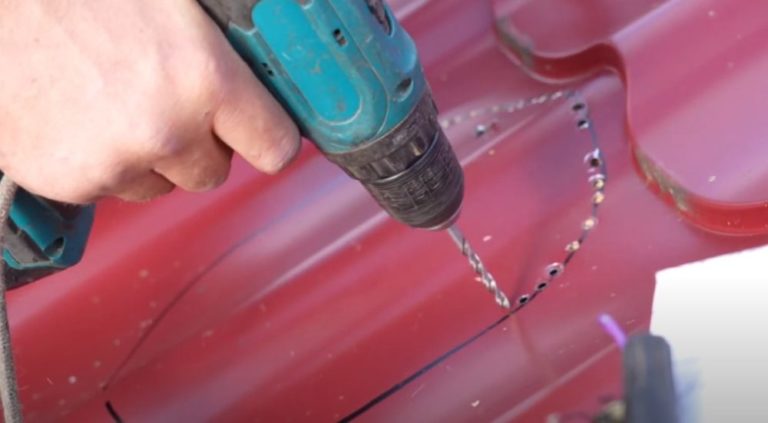
- Use metal shears to cut the remaining spacers between the drilled holes. Remove the cut-out metal tile fragment.
- Remove excess insulation and vapor barrier material to the size of the hole cut in the metal roofing. Insert the plastic part of the water seal from the penetration element. Seal the ring with sealant to prevent rainwater from getting under the roofing waterproofing.
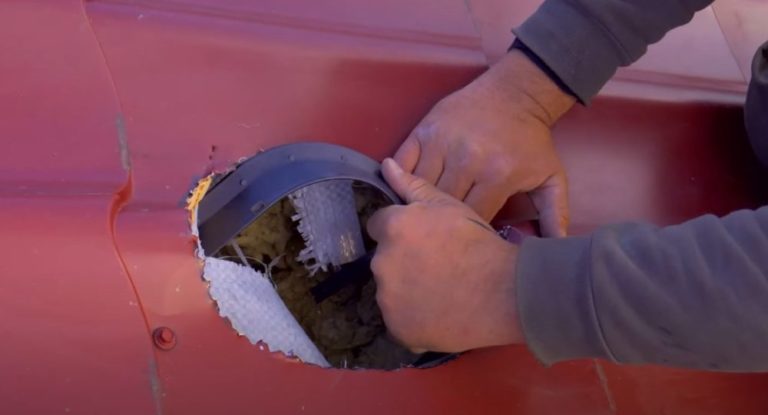
- Install the base of the feed-through element and secure it with screws. Use a flexible rubber lining for sealing. Additionally, apply sealant along the joint contour.
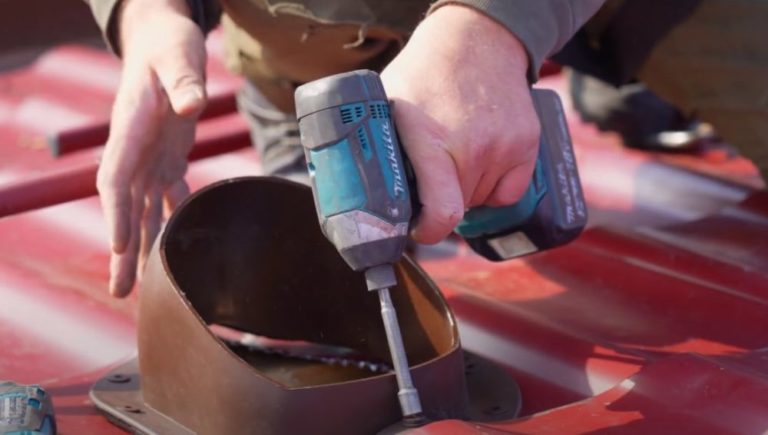
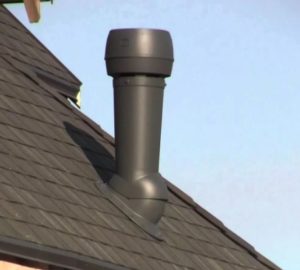
- Install the pass-through element with the deflector on a securely fastened base. Align the pipe strictly vertically using a level and secure it with self-tapping screws and a press washer.

- The external pipe of the penetration element is factory-insulated. Additional insulation of the walls is not required. From the attic side of the penetration element, extend a corrugated pipe through the roof insulation layer to connect to the plastic sewer riser. Fill the gaps with insulation. Tape the edges of the cut vapor barrier to the walls of the corrugated pipe to prevent thermal bridging.
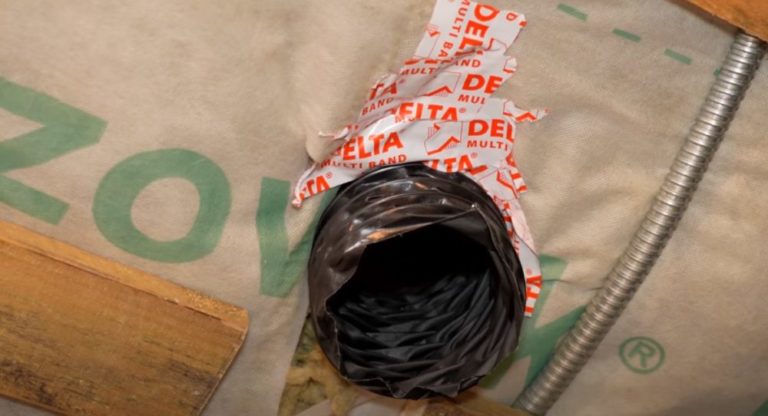
- Connect the corrugated pipe of the pass-through element to the PVC sewer riser, and crimp the joint with a clamp.
- To ensure the pipe is securely held in place, attach it to the roof's wooden battens with clamps or a metal strip. Secure attachment will prevent the joints from separating due to thermal expansion.

- Insulate the attic piping with foil-faced foam polyethylene. You can also use mineral wool or other types of insulation.
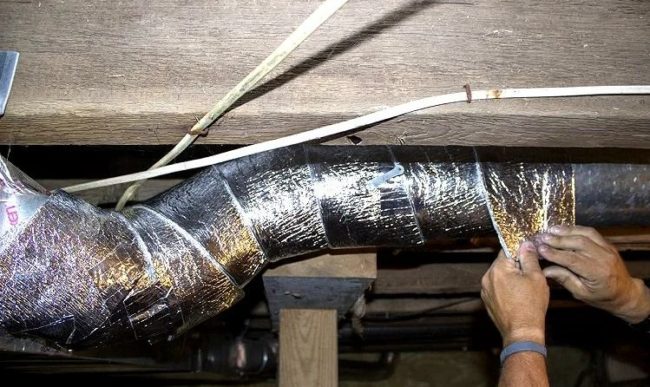
Also wrap the risers running through the house's shaft with foamed polyethylene. The thermal insulation will also act as soundproofing. The gurgling sound of waste discharged through the sewer system will be eliminated in the house.
Problems with sewer installation and methods of elimination
Sewage ventilation works reliably when properly installed. Let's look at a list of possible errors and how to fix them.
- Vacuum formation in the pipeline. This problem occurs when the sewer ventilation system is assembled from pipes of different diameters and many bends are used. To resolve this, try to create as many straight sections as possible. Use pipes of the same diameter. Do not connect plumbing fixtures to the drain using adapters of different diameters.
- Condensation forms and freezes in the ventilation shaft during winter. This problem occurs due to inadequate insulation. To resolve this, use high-quality thermal insulation. Seal any cracks to eliminate thermal bridges. Wrap each riser individually with mineral wool or foamed polyethylene.
- Damage to the ventilation outlet by sliding snow. This problem occurs when the pipe is routed along the exterior wall under the eaves. The solution is to reroof the ventilation outlet or route it above the eaves. Ventilation pipes should not be located under the eaves.
- Unpleasant odors from the sewer system are sucked into the ventilation system. This problem occurs when a "draft reversal" occurs in the combined shaft. To resolve this, install a specially designed chimney cap at the combined shaft outlet, with the chimney and waste stack located above the hood. Combustion products from the boiler and unpleasant sewer odors will be carried away by wind currents, preventing them from reaching the lower level of the general building ventilation deflector.

Unpleasant sewer odors can spread throughout the home from the traps. Don't rush to repair the sewer ventilation system until the cause is determined. The water seal may be broken, or the trap may have dried out due to infrequent use.
Answers to frequently asked questions
If more than 3 plumbing fixtures are connected to the sewer system or they are installed at different levels, a waste riser is required.
The diameter of the waste outlet must match or exceed the cross-section of the sewer riser. The optimal size is 110 mm.
The sewer ventilation outlet is made through the roof to the street or along the outer wall of the building.
General building and sewer ventilation cannot be combined into one system.
A sudden flush will cause the water seals in the traps to break. An unpleasant sewer odor will develop in the house. Water will drain more slowly from plumbing fixtures due to the formation of a vacuum in the system.


