Want to improve your harvest storage conditions but don't know how to ventilate your cellar? First, draw up a diagram and calculate the ductwork size.
For single-pipe Install an exhaust system and arrange the air supply through the door. Double-pipe Ventilation in a large basement or under a garage will consist of an exhaust and supply duct.
We'll discuss the diagrams, calculations, operating principles, and types of ventilation systems in more detail in this article. Below, you'll find step-by-step instructions for installing one-pipe and two-pipe utility systems. You'll learn what materials and tools are needed, how to combat condensation, and how to dry out a damp basement. Answers to frequently asked questions are found at the end of the article.
- Basement ventilation schemes
- How ventilation works
- The difference between ventilation in a basement under a house and a garage
- Which scheme should I choose?
- Air duct diameter
- Tools and materials
- Step-by-step instructions for installing a two-pipe cellar ventilation system.
- Step-by-step instructions on how to ventilate a cellar with one pipe.
- Recommendations for the operation and maintenance of the basement ventilation system
- Conditions necessary for a dry basement
- How to avoid condensation problems
- How to dry out a cellar
- Answers to frequently asked questions
- Video instructions
Basement ventilation schemes
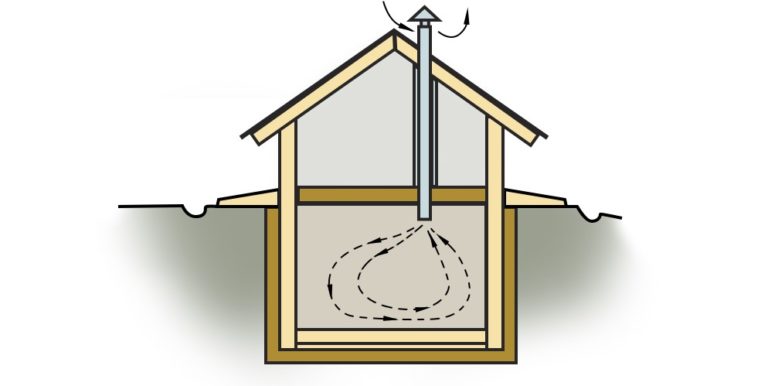
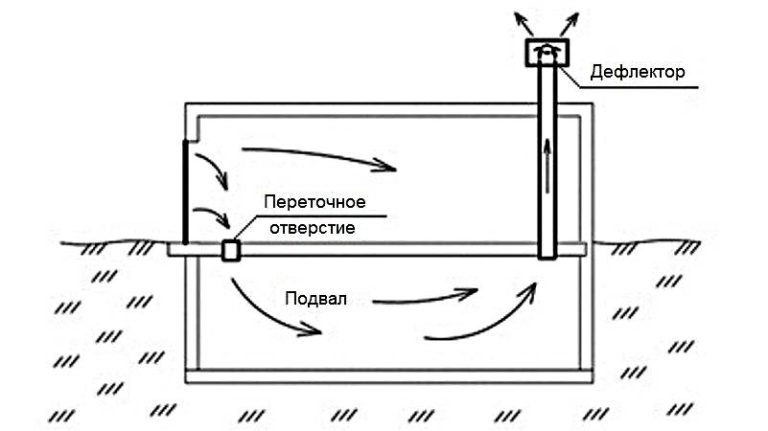
To ventilate a basement under a house, a single-pipe or dual-pipe system is used. The dual-pipe system uses a single exhaust duct. To ensure the single-pipe system works, the exhaust duct is installed on the wall opposite the door.
The pipe is brought out to the street, and a protruding part is left under the ceiling in the cellar. 20-30 cm branch pipeAir inflow is provided through a slightly open door or specially left gaps in the door frame. A window can be cut into the bottom of the frame and a damper can be attached to regulate the air exchange rate.
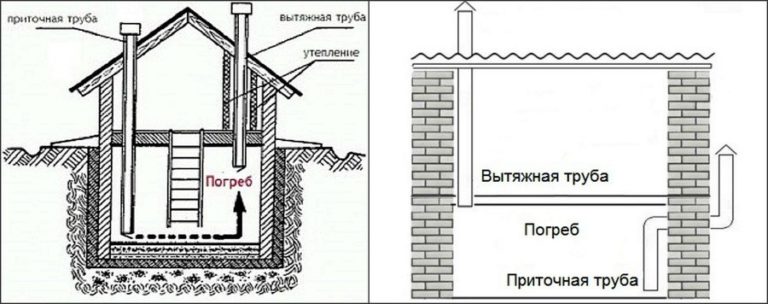
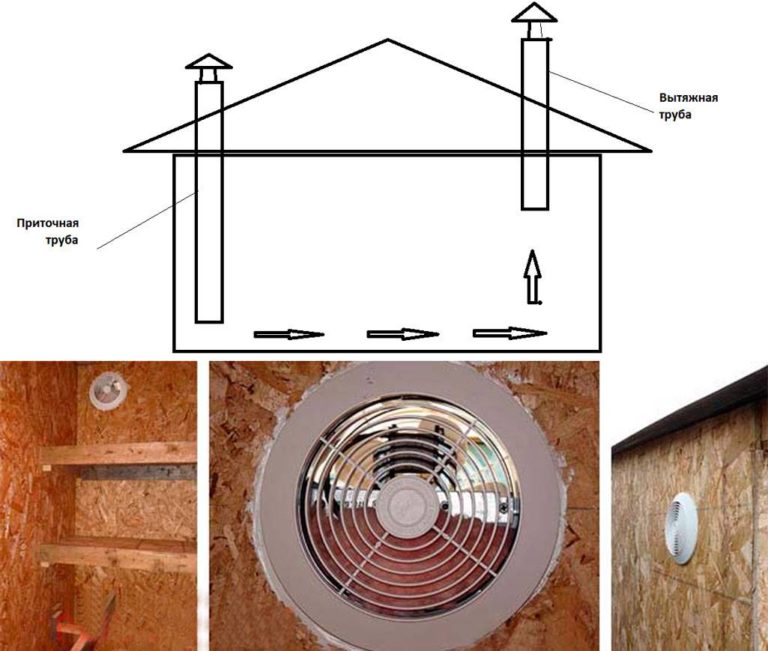
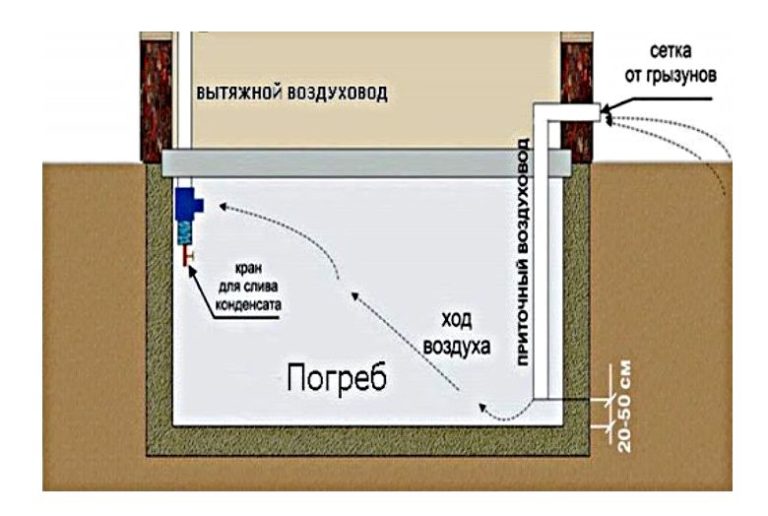
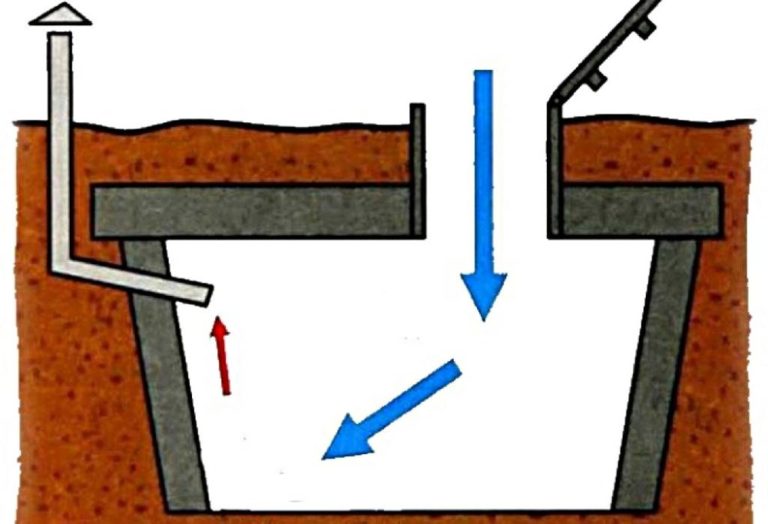
The second option used 2 air ductsFor a two-pipe ventilation system to work, the supply and exhaust vents are located near opposite walls. Circulating air must flow throughout the entire room. The exhaust duct is designed as a single-pipe system.
From the basement side, a pipe of length is left under the ceiling 20-30 cm, and the common pipe is led outside. The supply air duct is also led out of the cellar, but inside the room it is lowered to the floor with a gap. 30-50 cmOutdoors, the exhaust hood is always higher than the supply pipe.
How ventilation works
Regardless of the design, the ventilation process follows the same principle. Fresh air from outside is brought in through the intake. Dirty air containing moisture vapor is expelled into the atmosphere through the exhaust.
One-pipe system The cellar ventilation system receives air through an open door or vents installed on the door. The air passes through the entire room to reach the exhaust pipe.
In a two-pipe system The inlet air enters through a pipe lowered to the floor in the basement. The air similarly circulates throughout the room to reach the exhaust hood cut off near the ceiling.
Regardless of the same operating principle of the circuits, the intensity of air exchange depends on the ventilation device:
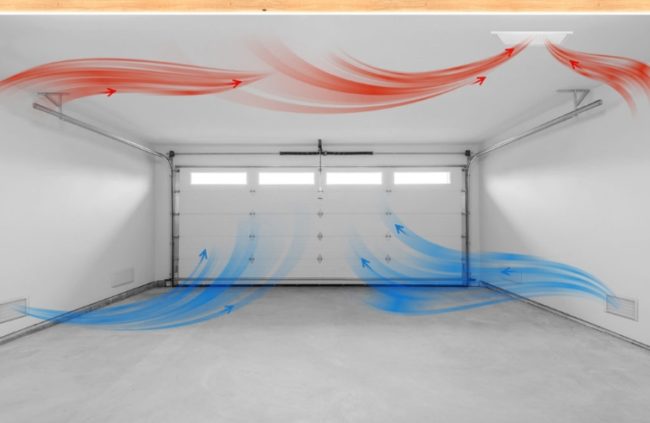
- Natural air exchange is typical for ventilation systems not equipped with ducted fans. Air flows circulate due to temperature and pressure differences. Cold incoming air descends toward the floor. After warming up and becoming contaminated, the air flows up to the ceiling and is exhausted through the exhaust hood.
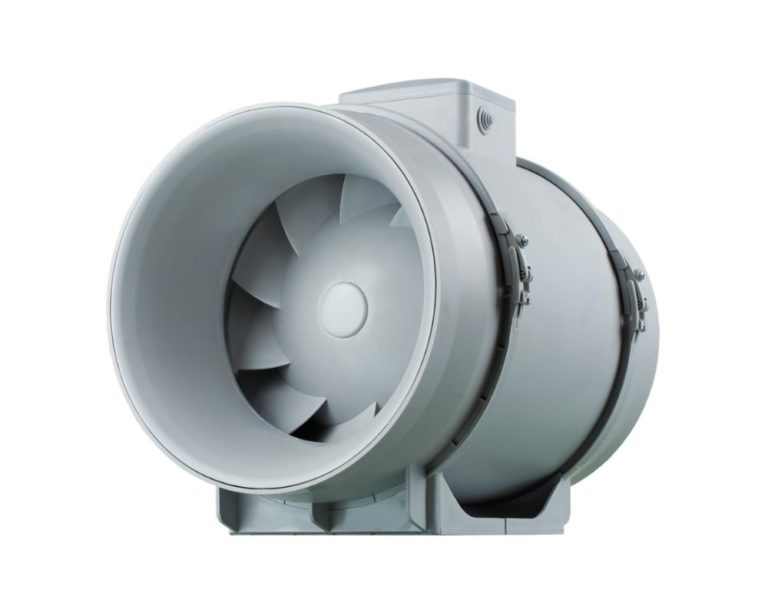
- Forced air exchange is typical for ventilation systems with exhaust and supply fans. Air is forced to circulate throughout the basement, regardless of temperature and atmospheric pressure differences.
Natural ventilation is essential for small home cellars. This system is independent of electricity and easier to maintain and install. Its disadvantage is its dependence on wind direction, atmospheric pressure, and temperature fluctuations.
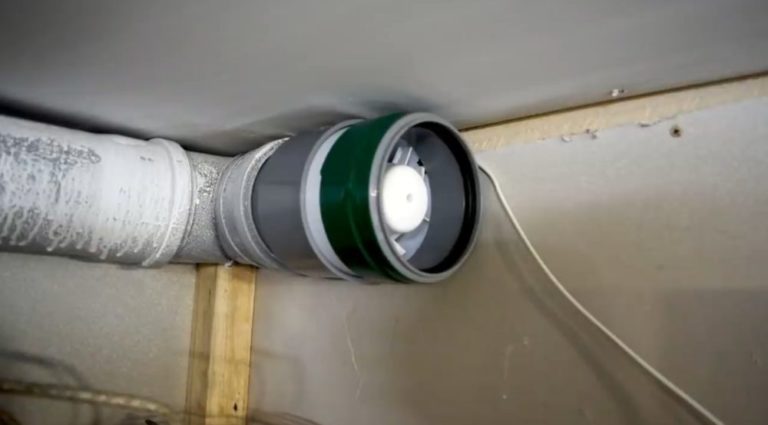
If natural air exchange doesn't remove condensate from the basement, a fan is installed on the exhaust vent. The supply air is supplied naturally. This ventilation system is called mixed or combined.
A forced-air or mechanical system is installed for large basements where natural ventilation is not sufficient to ensure full air exchange. This system is suitable for farms and apartment buildings.
The difference between ventilation in a basement under a house and a garage
In suburban areas, a garage and basement are often combined. These different spaces require individual microclimates. A cellar requires clean, cool, and moderately humid air to preserve the harvest. Exhaust fumes, chemicals, and odors must be prevented from entering.
A garage needs dry, warm air. High humidity accelerates the decay of metal car parts. Cold creates discomfort for car owners when they need to do repairs in the winter.
In a cool room, condensation forms on a hot engine. To protect car parts from corrosion and create a comfortable work area, the owner heats the garage. Heat should not leak into the cellar, where food could spoil.
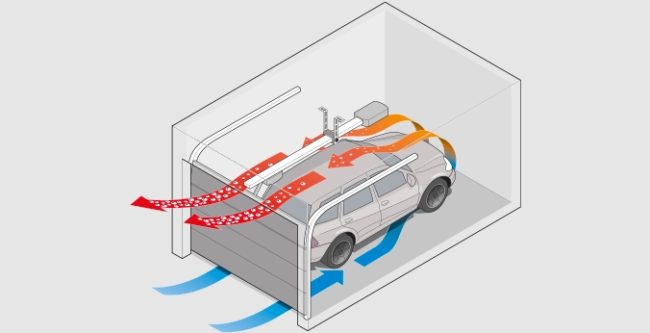
To create a favorable microclimate, the garage basement ventilation system is configured using a combined system. The engineering system consists of two ventilation systems. A two-pipe system is always used for the basement. Two pipes can exit the garage—a general exhaust vent and an inlet vent. The ducts are equipped with tees for air intake and exhaust from the upper room.
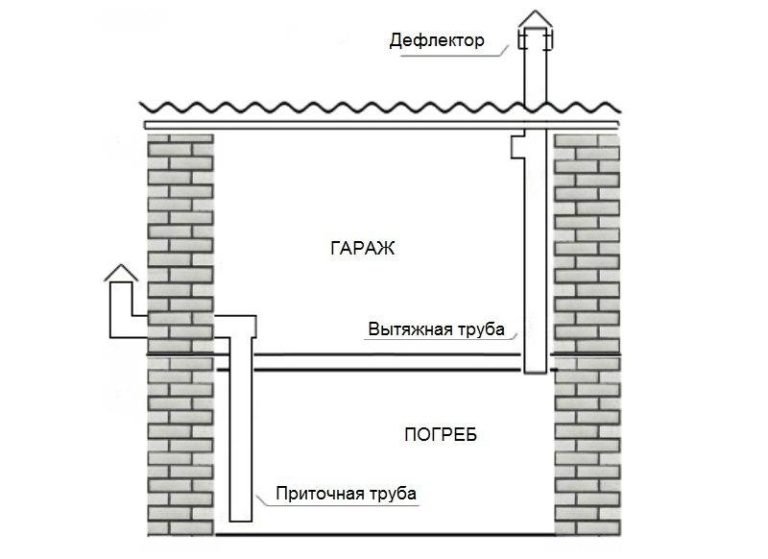
If desired, you can install a single-pipe system in the garage. It's advisable to leave the exhaust hood with a single tee under the ceiling in the upper level. This will reduce the amount of material needed for the ductwork, and you'll only need to cut one hole in the roof.
The most convenient way to bring air into the garage is through gaps in the door or specially installed vents. The openings are cut into the lower part of the wall, set back approximately 50 cm from the floor.
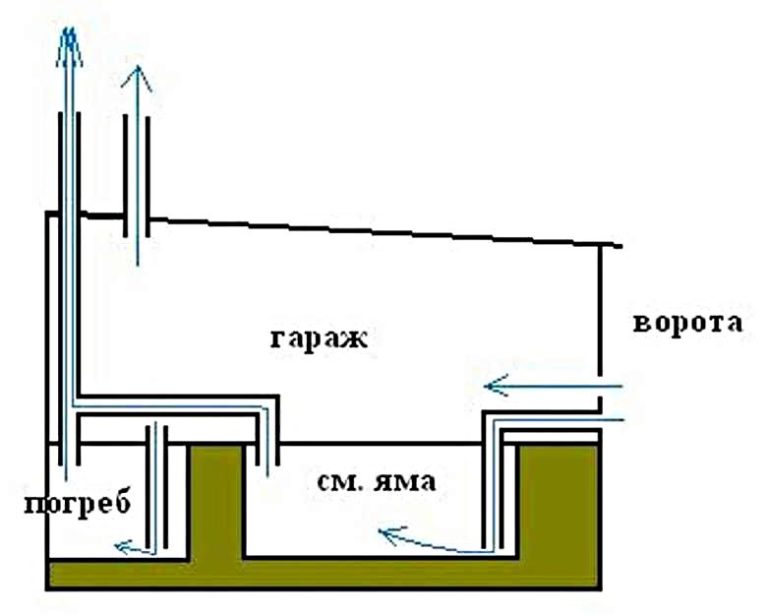
When using a single-pipe system for a garage, the supply pipe from the cellar does not necessarily have to be routed through the roof of the upper level. Route the duct through the floor joist and the garage wall. If the garage has an inspection pit, additional supply and exhaust ducts will be required.
Which scheme should I choose?
While proper ventilation for a basement and garage is arranged using a combined system, the ventilation method for a different type of cellar depends on its location.
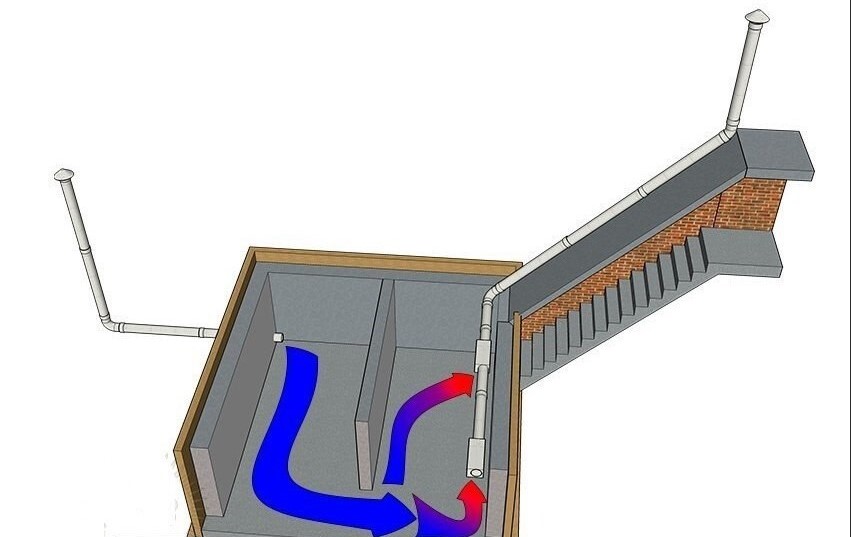
It's more challenging to install a utility system for a food storage area under the house. Basement ventilation is typically a two-pipe system. The exhaust and supply vents are either routed separately or integrated into the building's general ventilation system.
If the cellar is located remotely from the house or beneath a residential building but has a separate entrance from the street, you can set up a single-pipe ventilation system. The pipe serves as an exhaust duct in the basement, with an outlet to the street through the ceiling. The inlet is through an open door or vents in the door frame.
Consider the size of the basement. A single-pipe system is suitable for small food storage areas measuring 3x3 m, 2.5x3 m, or similar dimensions. For basements larger than 3x3 m, a dual-pipe system will be more effective.
When installing a cellar utility system under a private home, adhere to the following rules:
- If possible, route the air ducts through openings in the base, securing them to the outside of the walls.
- The height of the supply pipe on the street should not exceed 1 m.
- The exhaust pipe in the cellar must be at least 2 m high. Consider the location relative to the house's roof ridge. Install the exhaust pipe at least 50 cm above the ridge purlin. If the roof is flat, a 30 cm elevation above the roof is sufficient.
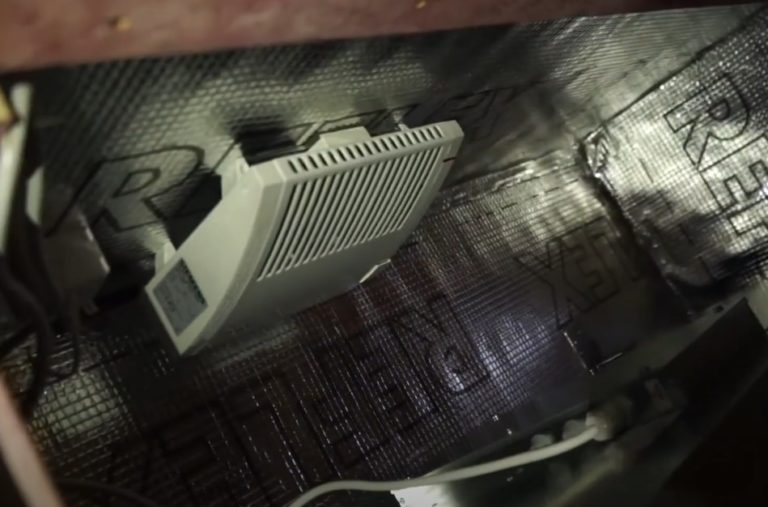
- To ensure normal draft and reduce condensation, insulate ventilation ducts.
A two-pipe system is suitable for food storage facilities built in hot regions. In summer, the outside temperature is higher than inside the cellar. Natural air circulation is slowed down in a single-pipe system.
Even with a fully-fledged dual-pipe ventilation system, air exchange is difficult. Installing ducted fans can solve the problem. Simply install a mechanical exhaust system, and the air intake will flow naturally.
Air duct diameter
In paragraph 9 SNiP 31.01.2003 The parameters for the vents in the basement of a residential building are specified. The total size of the ventilation openings should be 1/400 of the basement area.
If a house is built in an area with high radiation levels, a minimum of 1/150 of the basement area is used. The vents do not necessarily have to be round. Square, rectangular, triangular, and other shapes are permitted.
At 1 m2 The vent area of a basement cannot be reduced below 0.05 meters. In apartment buildings, 1 m2 In the basement, the builders are installing 0.85-meter ventilation openings according to the project. Increasing the vent size requires additional reinforcement to strengthen the base.
In a private home, the diameter of the basement vents is calculated using a simple formula. For every 1 m2 cellars are allocated 26 cm2 duct cross-sections. For example, for a basement with an area of 5 m2 I need 130 cm pipes2The air duct cross-section should not be too small. It's better to install larger diameter ducts and install adjustable dampers to regulate air flow.
Tools and materials
If you want to thoroughly understand how to ventilate a basement without hiring labor, start by preparing the materials. Home basements aren't particularly demanding in terms of aesthetics. To save money, you can use readily available pipes: asbestos-cement, metal, galvanized, or plastic.
If you don't have ducting material, buy ventilation ducts. Ducts are expensive, but the antistatic layer on the inner walls will prevent dust from accumulating and narrowing the air passage.

Additional materials you'll need include clamps, screws, plastic anchors, and foam. For insulating the ducts, use moisture-resistant insulation. Foamed polyethylene or shaped polyurethane foam shells for pipes of a certain diameter are suitable.
For DIY projects, you'll need a hammer drill, an angle grinder, and an electric drill. Also, be prepared with a hammer, tape measure, level, and screwdriver. Determine the exact list of materials and tools based on the scope and specifics of the project.
Step-by-step instructions for installing a two-pipe cellar ventilation system.
Since a two-pipe system is considered the most efficient, we'll begin our review of how to properly install basement ventilation yourself. Before you begin, remember three important rules:
Following the simplest rules will help you design reliable ventilation.
It's time to move on to the step-by-step instructions:
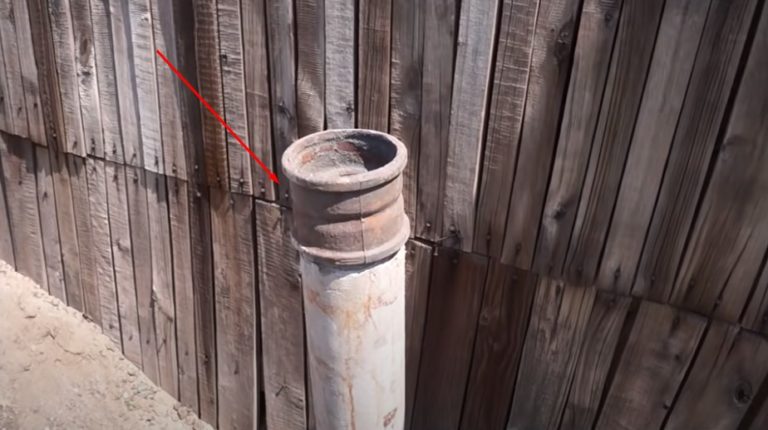
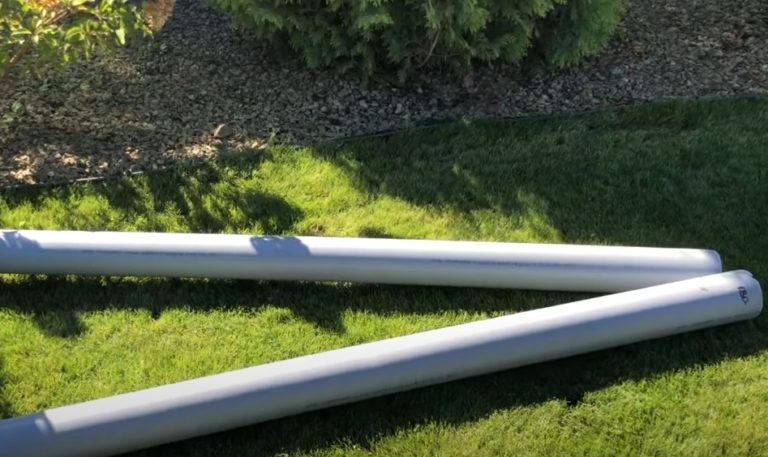
- To maintain the cellar's airtight seal, we'll install the exhaust and supply ducts on the side wall. For the risers, we'll use 110mm diameter asbestos-cement pipes. Sturdy ducts are only needed for the outlet. It's best to extend them with lightweight PVC pipes of a similar diameter. Make oval holes in the side wall, roughly in the center of the asbestos-cement risers, to accommodate the plastic sewer pipes leading to the cellar.

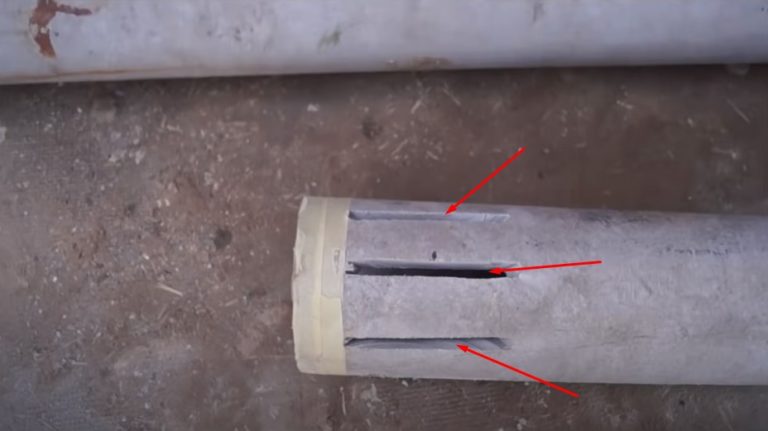
- At the end of the supply riser facing the street, use a grinder to cut longitudinal holes through the asbestos-cement walls. Do not cut all the way to the edge of the pipe to prevent the petals from breaking off. Leave a 3-5 cm wide edge for attaching the cap.
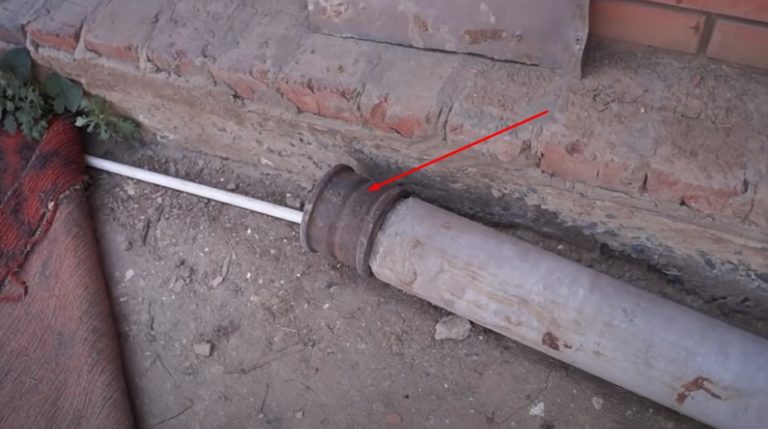
- Attach a cast iron coupling to the end of the asbestos-cement exhaust riser. The adapter is used to add PVC pipes so the exhaust outlet extends above the roof ridge of the above-ground structure.
- Insert the PVC pipes that will extend into the basement into the side openings of the risers for testing. Gently squeeze the ends of the ducts to form an oval shape. After testing, you can remove the plastic pipes from the openings.

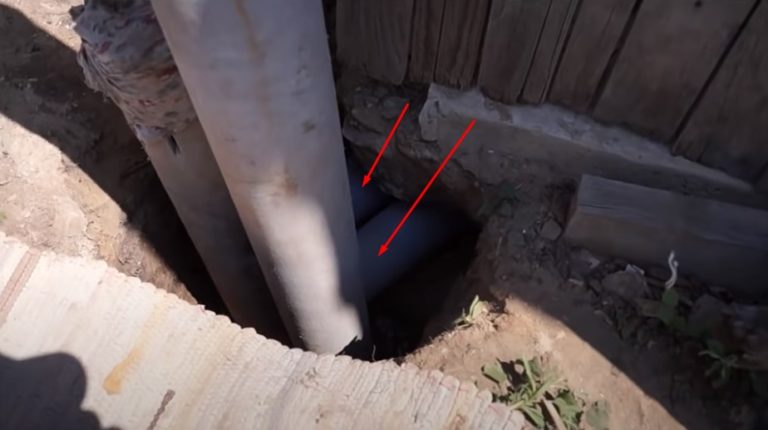
- Dig a pit under the cellar wall, preferably below floor level, to prevent condensation from the risers from leaking into the basement. Fill the bottom of the pit with coarse crushed stone. The fill layer will act as a drain to remove condensation from the vertical ducts. Install asbestos-cement risers in the pit on the crushed stone, with the side openings located under the cellar ceiling. Leave the inlet duct with longitudinal slots raised approximately 50-100 cm above ground level. The exhaust riser with coupling can be raised to any height. PVC pipes will still need to be added to the exhaust duct.
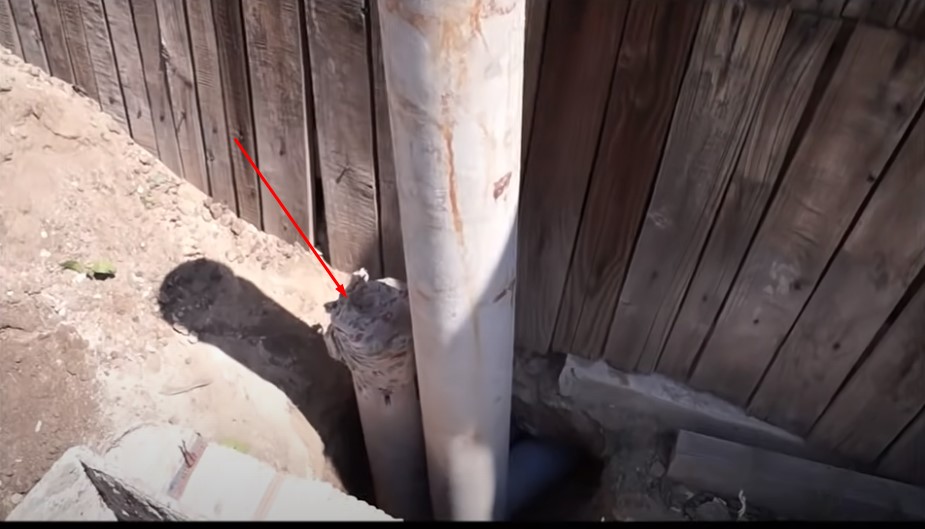
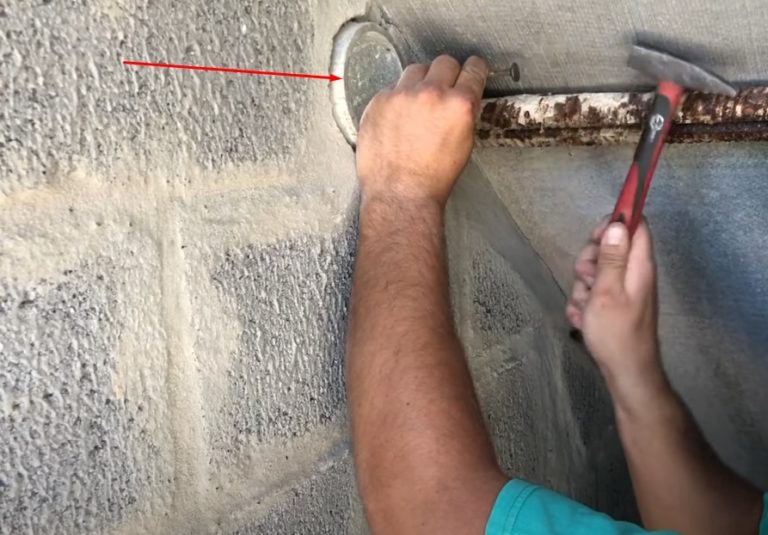
- Insert PVC pipes into the through-hole under the cellar ceiling, prepared in advance of installing the risers, from the room side. Connect the ends of the air ducts to the oval holes on the asbestos-cement exhaust and supply pipes. Seal the gaps with sealant. Insulate the pipe in the ground, and seal the through-hole under the cellar ceiling with cement.
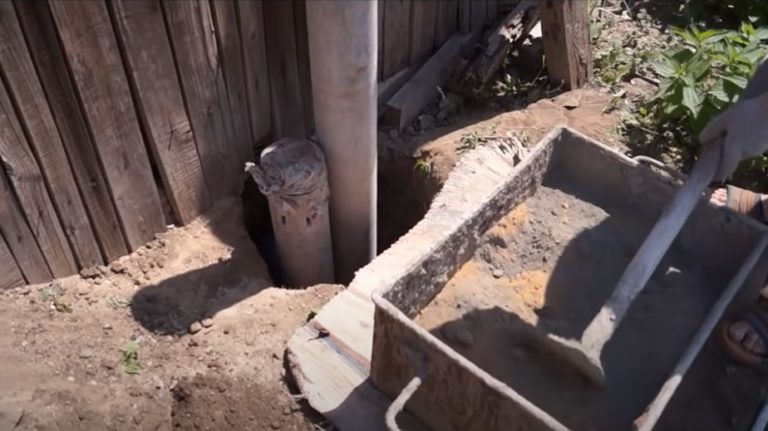
- Prepare a sand-cement mixture. Concrete the hole under the cellar wall where the risers are located.
- From inside the cellar, cut the PVC exhaust pipe under the ceiling.
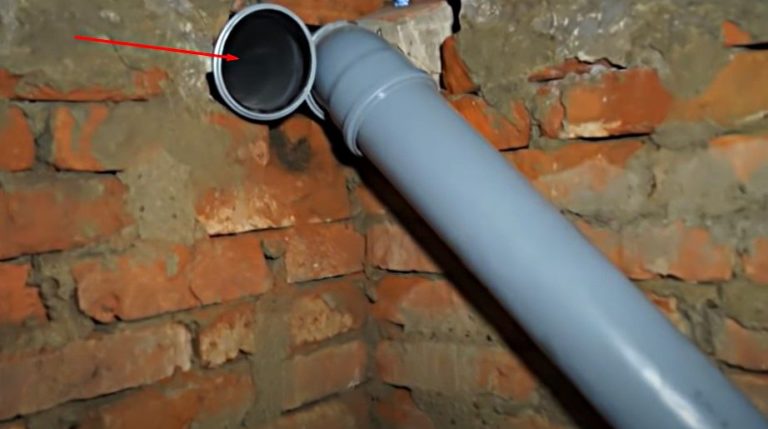
- Connect the supply duct with a PVC pipe to the opposite end of the basement from the exhaust hood. Secure the duct to the wall with clamps, positioning the supply opening approximately 30-50 cm above the floor.

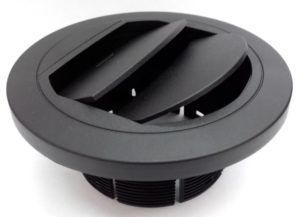
Install a mushroom cover on the street side of the inlet. Increase the height of the hood by connecting the required number of PVC pipes to the coupling, and then place a protective cap on top.
Insulate the risers to reduce condensation. The moisture generated by the temperature difference will drain into the gravel drain, but excess water near the cellar wall is unnecessary.
Step-by-step instructions on how to ventilate a cellar with one pipe.
A one-pipe system includes an exhaust duct. However, ventilation won't work without an inlet. If there's no inlet window or duct in the basement, one will have to be installed.
In our example, we'll assume an inlet duct is already in place. Let's take a closer look at how to install an exhaust duct or upgrade an existing, non-functional duct to remove stale air:
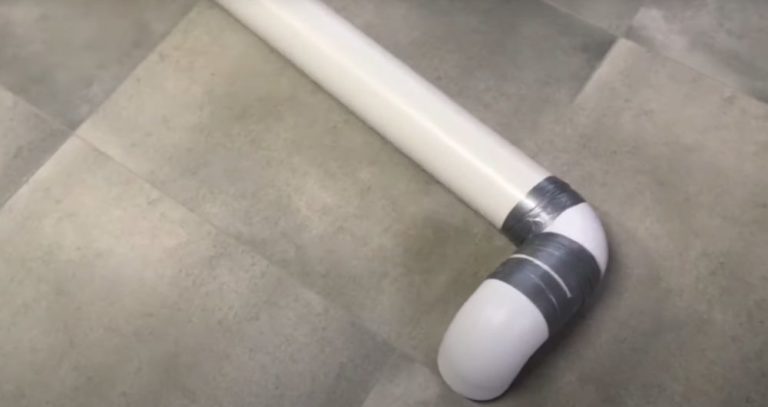
- Prepare PVC pipes for the hood's outlet to the outside. If a vertical riser isn't possible, use elbows. Try to minimize the number of bends to improve draft.
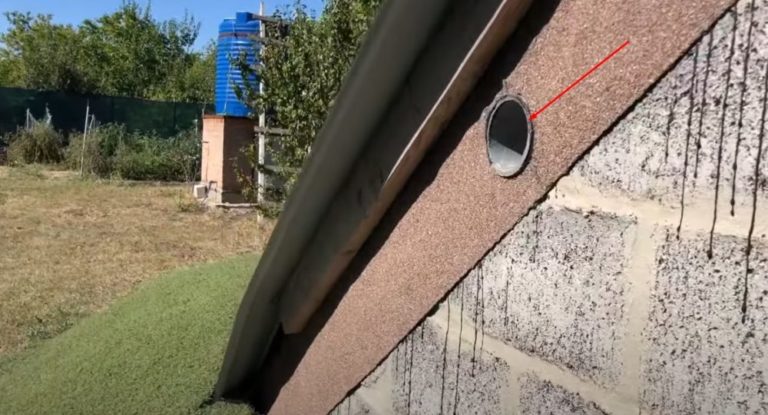
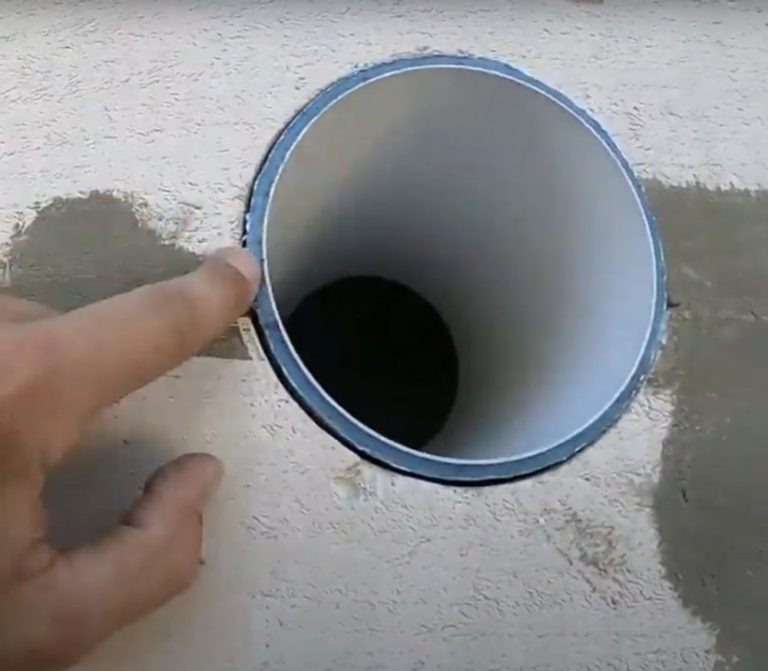
- Install an exhaust vent at the top of the basement wall or ceiling. Try to locate it on the opposite side from the door.
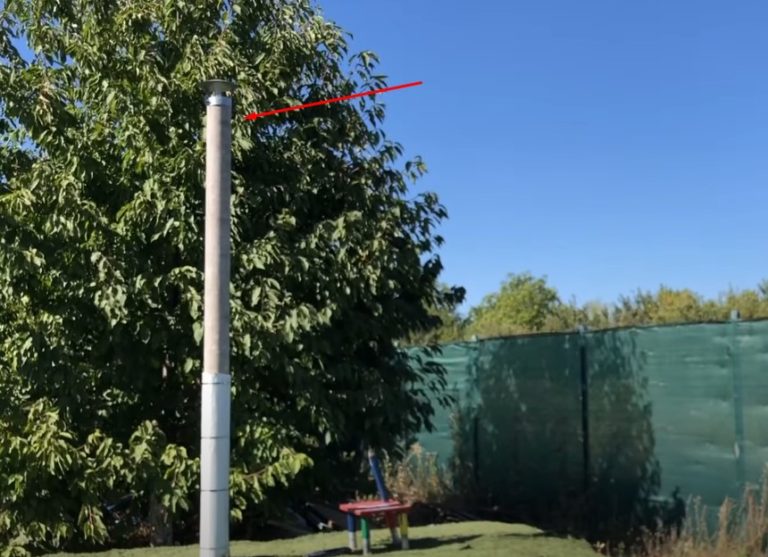
- To properly install a basement exhaust hood, consider mounting the riser on the street side. The higher the pipe, the stronger the draft. You can run a metal or asbestos-cement duct through the earthen fill and the basement ceiling. Install a 2-3 m high plastic pipe on a solid foundation. Attach a deflector or a simple mushroom-shaped hood to the top of the riser.
- Install an air intake vent in the wall near the cellar-side exit. Air will enter the room through this vent when the door is closed.
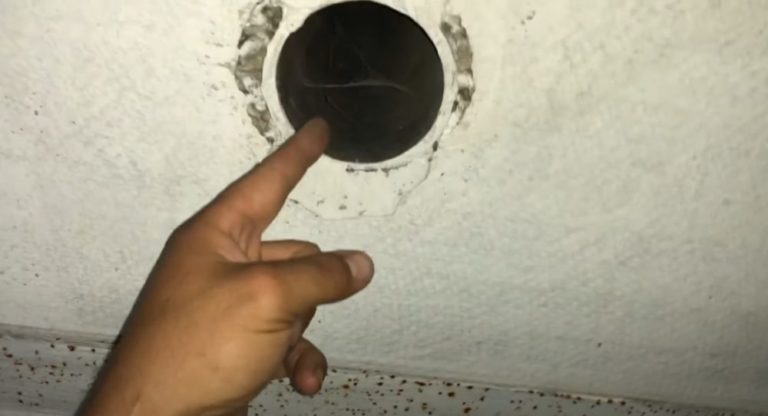
Test the hood's operation by placing a sheet of notebook paper against it. If the hood is working properly, the paper will stick to the exhaust vent.
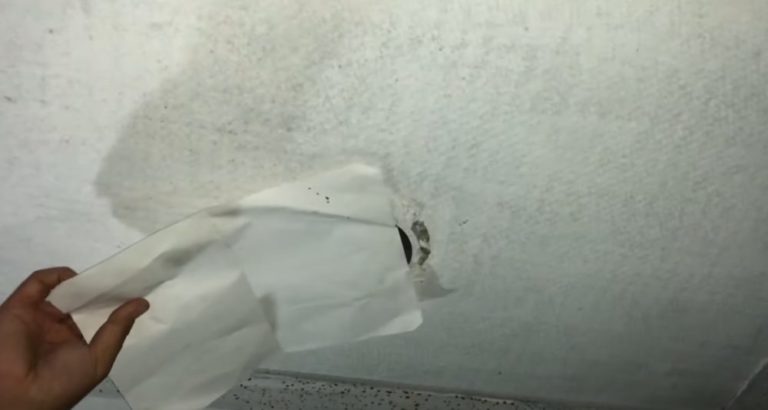
If the air flow is insufficient, single-pipe ventilation will not provide the required air exchange rates. To improve draft from the air intake near the entrance, install PVC pipes into the cellar, lowering them to the floor.
With the addition of a second channel, the one-pipe system will turn into a two-pipe ventilation system.
Recommendations for the operation and maintenance of the basement ventilation system
Periodically check the ventilation operation with a piece of paper. Reduced draft indicates clogged ducts. Clean cobwebs and dust from the pipes. Use a wire brush, a vacuum cleaner, or other cleaning tools. Clean carefully to avoid damaging the duct walls.
In winter, the ground-level tributary is often covered with snow. To restore draft, clear the vent outlet after each snowfall.
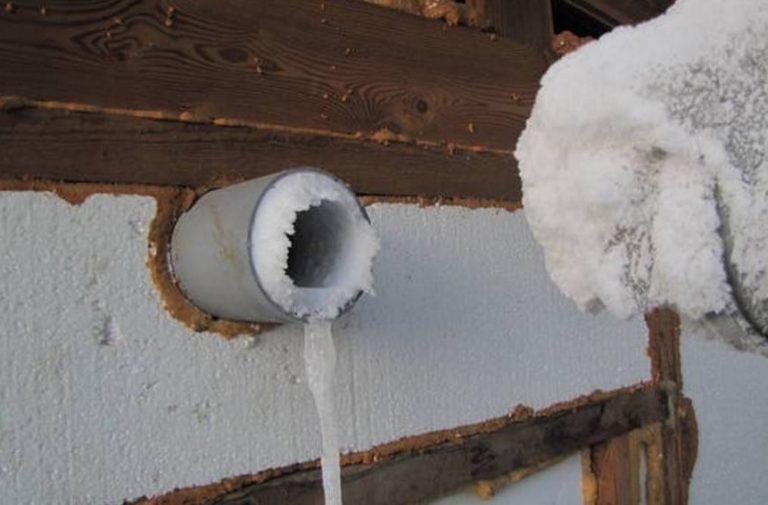
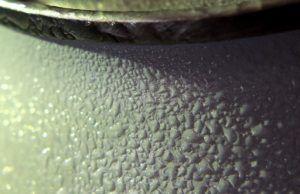
Condensation will form inside the hood even if the riser is properly insulated. To prevent water from dripping onto the floor, place a container under the hood. In severe frost, ice may form inside the hood.
Carefully tap the growths with a rod, or try melting them with a hairdryer. After heating, the ice should fall off in chunks into a container placed under the hood.
Conditions necessary for a dry basement
To keep the cellar dry and prevent condensation, install a two-pipe ventilation system. If natural ventilation isn't enough, install a forced-air system with ducted fans.
Dampness in a basement can be caused by groundwater. Waterproofing the walls and floor will be necessary, along with drainage around the outer perimeter of the cellar walls.
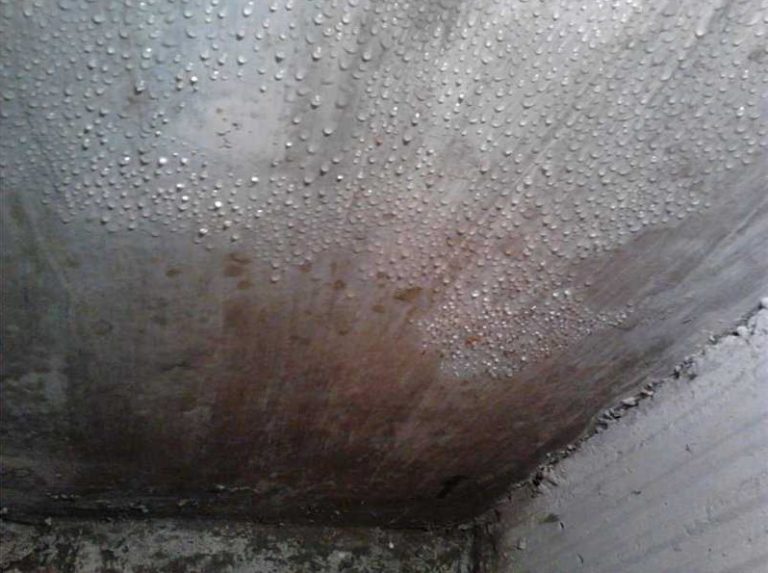
How to avoid condensation problems
In summer, ventilate the basement more frequently. Leave the door open during the day. To prevent pets and intruders from entering, install an additional metal mesh door with a lock.
Ensure proper operation of the ventilation system. Clean the air ducts of cobwebs and dirt.
How to dry out a cellar
To dry out a damp cellar in summer, open the door. Install a fan inside the cellar, directing the air flow toward the door.
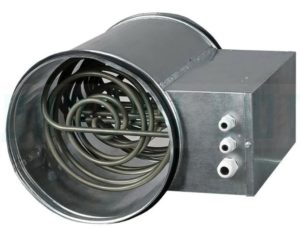
You can speed up drying by heating the room with a heat gun, air heater, or fan heater. As the room temperature rises, the natural ventilation will improve. Evaporating moisture will escape more quickly through the duct.
Answers to frequently asked questions
A two-pipe system is considered effective. If you're installing a single-pipe utility system with an exhaust hood, ensure air intake through an open door or vents.
For a small room, a range hood and air inlet through a door or vents are sufficient. A large basement requires a two-pipe supply and exhaust system. If the basement is located under a garage, install ventilation for each room. Additionally, install ducts into the inspection pit.
Ventilation accelerates air exchange in the basement and removes moisture.
Usually, only one hood is installed, but the pipe cross-section must be sufficient to remove moisture and dirty air.
In winter, ventilation of the basement is necessary, but in severe frosts, the air ducts are temporarily closed to maintain the temperature from +5 to +7 °C.
Increasing ventilation will help reduce humidity. Install a fan on the range hood. Ventilate the room frequently. Turn on a heater to speed up drying.
Video instructions


