When building a country house, it's important to create a cozy and comfortable environment for both relaxation and gardening. This can be achieved with the right heating system.
Today, it is popular to use underfloor heating systems for heating summer cottages, as they are convenient and economical.
However, it should be noted that installing heated floors as the main source of heating for a country house is only suitable if good thermal insulation is in place; otherwise, the heat will not be used efficiently.
Which underfloor heating system should I choose for my summer house?
There are two types of heated systems: hydronic and electric. Each has its own advantages and disadvantages, so choosing a model should be based on operating conditions:
- If the electricity supply at your dacha is poor, you should opt for a water system.
- If you don't plan to live in your garden house in winter, then electric underfloor heating is the ideal option.
All types of heated floors offer a number of advantages over standard heating methods: they are safe, create a healthy microclimate for people, do not take up space, are silent, and are efficient to use.
Warm water floors in the country house
Hydronic underfloor heating is a circuit of pipes containing a coolant, typically water or antifreeze. Heating is provided by an independent heat generator. A pump and control valves are required to move the coolant through the pipes.
Any pipes are suitable for the water circuit: metal-plastic, polyethylene, or polybutene. They are oxygen-impermeable, which reduces the risk of corrosion in the boiler.
The pipes are sold in 5-meter coils, allowing for a seamless circuit. The heating element can be laid in a serpentine pattern, a spiral, or an offset spiral.
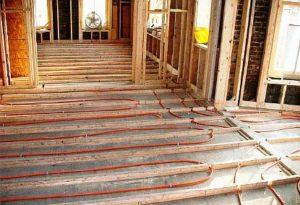
To ensure uniform heating of the floor in a private home, the installation step should be no more than 30 cm.
The warm water flow is regulated using thermostatic and shutoff valves, which are installed upstream of the corrector. Local temperature control within the device is provided by a thermostat, which is located on the distribution correctors.
However, the "heart" of the system is the circulation pump. When connected to the thermostatic valve, it forms a mixing unit.
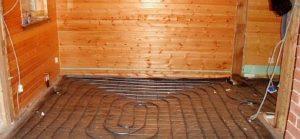
Hydronic underfloor heating works well with any flooring. However, in a country house, maximum heat output will be achieved with ceramic tile flooring. Installing the unit next to laminate flooring is also a good option.
Before pouring screeds on a concrete base needs to be arranged "pie": base, waterproofing, insulation, reinforcing mesh to which pipes are mounted.
The main advantages of a warm water device when installed on a wooden floor are:
- uniform heating of air in a room of any size;
- cost-effectiveness in operation, in comparison with electric types of design, if the coolant is heated by gas, liquid fuel or coal;
- long service life.
The main difficulty in installing this type of heating system in a summer house is the need for design work and calculations before construction begins on the house itself. Furthermore, installing this type of underfloor heating system requires significant installation costs.
Find out how to produce DIY installation of heated water floors in a private home on a concrete floor — step-by-step instructions!
Electric underfloor heating at the dacha
There are several types of electric heated floors: heating cable, mats and infrared film.
Temperature control in these devices is accomplished using a thermostat, which requires a temperature sensor. Electric units can be installed even in rooms with high humidity (with the exception of IR systems).
They can be used in both summer and winter. They pose no risk of flooding, as there is no liquid coolant. The main drawback of all electric floors is their significant energy costs.
Let's take a closer look at the pros and cons of each type:
- Heating cable is installed in a concrete screed at least 5 cm thick, under the flooring. The installation pattern can be serpentine or spiral, as with a hydronic system. Single-core and twin-core cables are used. A distinctive feature of these designs is that the twin-core cable is connected at one end, while the single-core cable is connected at both ends.
Cable flooring works best with tiles, which retain heat well, making it possible to save electricity.
The use of laminate, linoleum, and parquet as flooring is not recommended, as this heating method relies on convection. However, there is no strict prohibition on the use of these materials.
The advantages of cable-based underfloor heating in a country house:
- they are safe;
- easy to install;
- are quite economical.
The main drawback of this system is the need for a cement-concrete screed. Only then will the device operate more efficiently.
In addition, for some, the difficulty lies in the cable installation itself, in which case it is worth giving preference to mats.
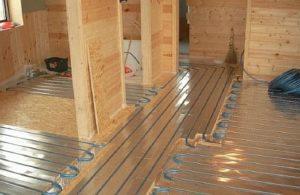
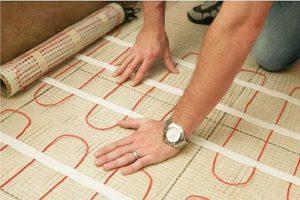
- Heating mats are essentially a cable floor, consisting of a fiberglass mesh with a cable laid on it, simplifying the installation process. Another advantage is that they can be laid within a layer of tile adhesive, eliminating the need for a concrete screed. Therefore, the structure is only 3 cm thick. Furthermore, unlike cable systems, heating mats complement linoleum, laminate, and carpet.
This type of structure is quicker and easier to construct, and even an inexperienced person can install it on a wooden floor at home. The mats are sold in rolls, which also makes installation easier.
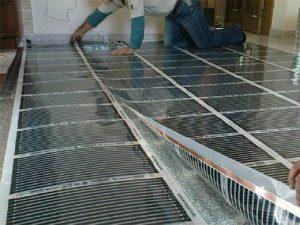
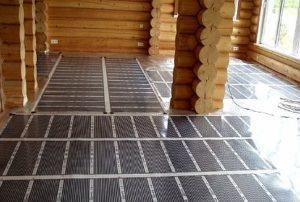
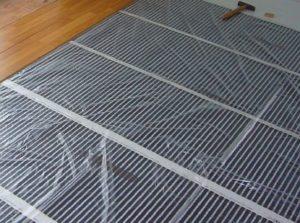
- Infrared underfloor heating has a multilayer structure with carbon plates serving as heating elements, sandwiched between layers of polymer film. The plates are arranged in parallel, so if one component fails, the entire system continues to function. This device is only a few millimeters thick, making it suitable for use in rooms with low ceilings.
When the floor is in operation, it emits infrared radiation, generating heat. As with all electrical devices, operation is controlled by a thermostat. The infrared floor can heat the surface only where needed.
The film is installed without screed. Linoleum is the ideal flooring for infrared underfloor heating on a wooden subfloor. It pairs well with laminate and carpet.
Important! Installing infrared floor heating under tiles is not recommended, as the film has poor adhesion to tile adhesive. This leads to poor tile adhesion, which in turn can damage the heating elements.
The main advantages of such a heating system:
- versatility in application;
- long service life;
- ease of installation.
Furthermore, the floor is energy-efficient, warms up quickly, and can be used as needed. This is especially convenient for heating summer cottages.
The main disadvantages of IR floors are their sensitivity to moisture and the difficulty of installation in rooms with non-standard layouts.
Combined version of underfloor heating
A combined underfloor heating system for summer cottages isn't popular, but it's still worth mentioning. It's essentially the same hydronic system, the only difference being that the coolant is heated electrically (using heating elements).
It's perfectly suitable for detached country houses occupied seasonally. When choosing a heating system, consider not only the installation technology but also the characteristics of the flooring material and the specific features of the space.
But, since country houses often have wooden floors that cannot withstand a heavy concrete screed, the most suitable option is This is an infrared floor.Moreover, the installation process is not complicated and can be done independently.
Step-by-step installation technology for electric (IR) floors
Any construction work should begin with calculating the amount of materials required. And when installing an electrical system, it also begins with calculating the energy costs.
Let's consider installing underfloor heating in a country house, using infrared film as an example, as it is the easiest and simplest option. Savings on this type of installation can be achieved by purchasing a controlled infrared system.
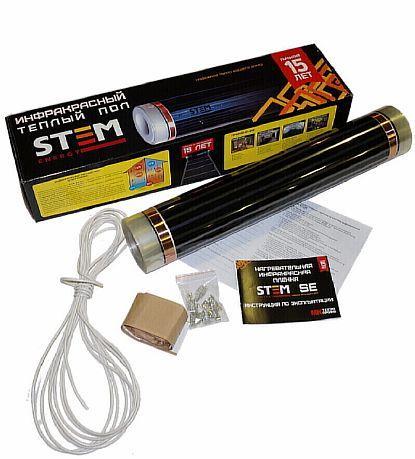
The installation process for infrared underfloor heating in a country house is as follows. You'll need to purchase the necessary materials and prepare the tools. You'll need:
- film heating element;
- terminals and cable;
- special insulating material - bitumen tape;
- temperature sensor to control the heating level;
- control unit - a thermostat, which can be electromechanical or electronic;
- double-sided tape;
- foil backing;
- insulation;
- plywood.
For your information! The film material should be less than the area of the room being heated, as it cannot be installed under heavy furniture. Plywood, thermal insulation, and waterproofing material should be sufficient to cover the entire room.
You can purchase a ready-made kit that contains everything you need to install an IR system, except for the sensor and thermostat.
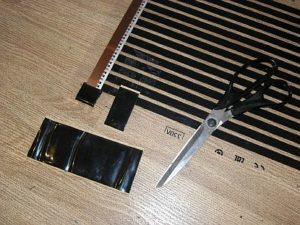
In addition, during the work you will need: scissors, a knife, a screwdriver, and pliers.
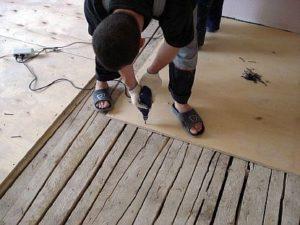
- Preparing the wooden base. Laying the film requires a flat and clean surface, so experts recommend laying the flooring on plywood boards. Plywood with a click mechanism is an excellent option; it creates a flat and virtually seamless surface. The plywood is secured to the subfloor with slightly countersunk screws. If desired, you can place insulation, such as foamed polyethylene, underneath the sheets.
- Laying the insulation. The insulation material is placed on the plywood, foil side up, end to end, and secured with a stapler. The joints are sealed with tape; either construction tape or foil tape can be used.

- Create a film installation plan and determine the thermostat mounting location. It's best to install the device near the outlet and switches.
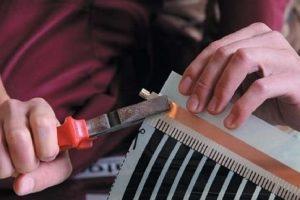
- Preparing the film: Cut it to the required length. Cuts must be made strictly in designated areas.
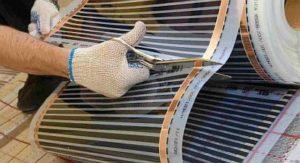
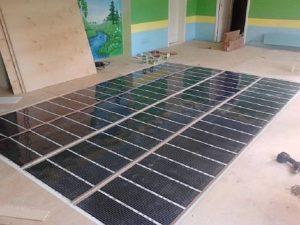
- Installation of the heating element - the panels are laid parallel, with the copper strips facing down.
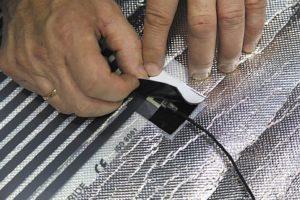
- Cable insulation work. Insulate the film at the cut points with bitumen, except for the areas where the connection will be made.
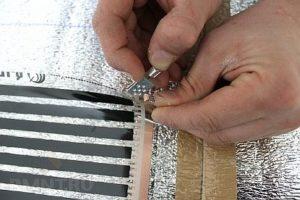
- Contact fixation. The clips are installed on copper busbars where electrical connections are made. One plate is inserted inside the film, and the other on the outside, onto the copper strips. The clip is secured by squeezing it with pliers.
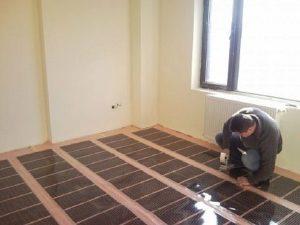
- Securing the film. The strips are joined together using adhesive tape. For a more secure fit, they can be secured along the edges at 500 mm intervals.
- Connecting the system. Connect the terminals to the wire according to the diagram. To ensure a good connection, firmly clamp the connections with pliers.
- Contact insulation. The terminals are sealed with bitumen tape. One piece of insulator is glued to the bottom of the clamp, and the other to the top, after which they are glued together.
- Installing the temperature sensor. It is mounted under the film, on a special black strip. The distance from the edge of the film should be 150 mm. The device and its cable are placed in the grooves in the insulation, which must be made for this purpose, otherwise the surface will not be level. The sensor and cables are secured with mounting tape.

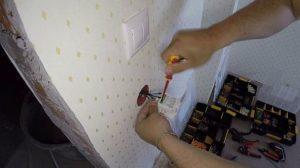
- Thermostat installation. Thermostats can be surface-mounted or mounted in a recess in the wall. The cable can be attached directly to the wall or routed through specially cut channels.
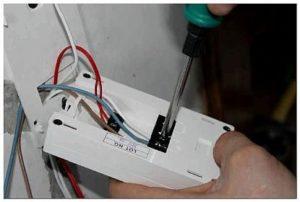
- Connecting the cable to the thermostat. The cable from the infrared floor, sensor, and power source is connected to the thermostat according to the instructions.
Important! Before proceeding further, check the system for proper operation. To do this, set the temperature on the device to no more than 30 degrees Celsius and test each band for proper operation.
- Laying the waterproofing layer. The polyethylene film is laid over the entire surface of the IR floor, overlapping and secured with tape.
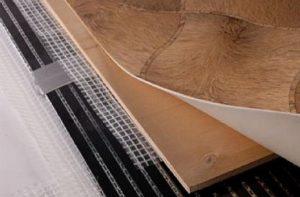
- Installing the flooring subfloor. Plywood is used as the underlayment and is laid on top of the heating elements.
- Installation of the finishing coating. The floor covering is installed over the decking.
As you can see, installing infrared underfloor heating in your dacha is easy, as long as you strictly follow the instructions.
Video instructions
Helpful tips
To ensure that underfloor heating at your dacha doesn't cause you any problems in the future, it's a good idea to follow these tips:
- When installing an electrical system on a wooden floor, thermal insulation should be used with caution to avoid overheating.
- It is not recommended to install cable or film under furniture.
- The thermostat should be installed in places where there is no moisture, so it will last longer.
- It is better if a specialist connects the device to the network.
By following our recommendations and advice, you'll not only be able to choose the right underfloor heating for your dacha, but also carry out the installation yourself.


