Underfloor heating, like any complex device, can break down. Potential causes of failure vary, from minor glitches to serious problems requiring professional intervention.
We will consider main reasons, because of which I stopped work underfloor heating (electric or water type), and how to carry out repairs in each case.
- Electric underfloor heating isn't heating – causes and solutions
- Voltage problems
- Errors during installation work
- The thermostat is not working
- The temperature sensor is not working
- Damage to the heating element
- Infrared film failure
- The equipment was selected incorrectly
- Water-based underfloor heating isn't heating – causes and solutions
- The pipeline is damaged
- Uneven heating due to different circuit lengths
- Electrical equipment is faulty
- Doesn't heat up completely from the boiler
- Problem with the return line
- Poor insulation
- The power is incorrectly selected
- The outline size is too large
- The collector is not working
Electric underfloor heating isn't heating – causes and solutions
Electric underfloor heating systems draw power from the power grid. They stop working when the heating elements—the thermostat or temperature sensor—fail, causing the underfloor heating to stop producing heat.
In this article, we will cover the main problems, although other malfunctions may occur that are not described in this guide.
We'll tell you what to do if your electric underfloor heating isn't working, how to repair it, and how to get it up and running for the first time.
Voltage problems
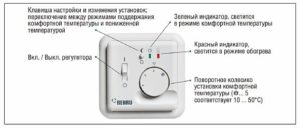
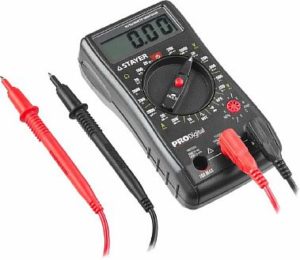
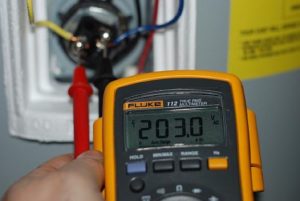
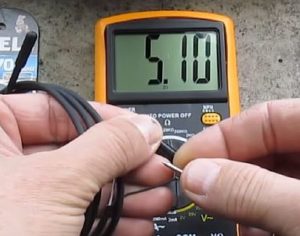
If your electric underfloor heating isn't heating up, first check for power. To do this, look at the thermostat; there's a special indicator light. If it's lit, it means power is being supplied. If it's not lit, visually inspect the accessible contacts and then use a multimeter to determine the voltage.
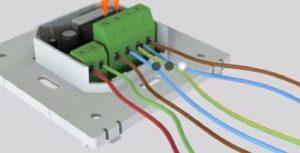
If there is voltage at the input, ensure that the electrical energy is reaching the cable or film. Then, check the settings (the minimum heating may have been incorrectly set) and the reliability of the contacts (the wires are connected to the terminals). If the connection is poor, the floor will stop heating.
After this, the output voltage is determined—where the wires connect to the thermostat. If it doesn't match the network voltage, the thermostat needs to be replaced.
Insufficient heating may indicate low voltage; a voltage stabilizer needs to be installed.
Errors during installation work
If the floor heating is weak, the unit switches on frequently, fails to reach the desired temperature, or has stopped working altogether, the cause is improper installation. In this case, a diagnostic check of all components will be necessary.
If the floor does not heat up above 30 degrees:
- The power is determined incorrectly;
- High heat loss - poor insulation;
- The heating elements are not positioned correctly or the step is not selected correctly;
- Thick screed;
- The temperature sensor is located close to the surface.
If such mistakes are made, then the floor will have to be dismantled and everything will have to be laid again.
The floor may not work effectively if the sensor is located too close to the cable. If it's located in a conduit, simply pushing it further in or pulling it out 5 cm may solve the problem.
The electric underfloor heating will not function properly if the installation rules are not followed, i.e., the heater is placed under heavy objects.
Another point that leads to failure of the device is improper installation (broken wire)Then you'll have to disassemble the structure, find the broken part, and fix the problem.
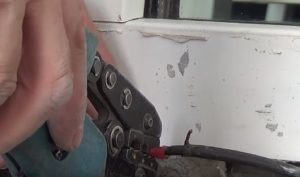
The thermostat is not working
If your underfloor heating won't turn on, the thermostat may be the culprit—a broken relay or faulty electronic circuit. You can determine if the thermostat is faulty by connecting the underfloor heating directly to the power supply. If it heats up, the problem lies with the thermostat.
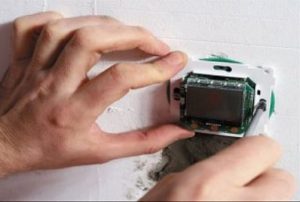
Repairs must begin by removing the device from its mounting location so that the terminals are visible.
Then you need to check with a multimeter or voltmeter whether 220 W is being supplied to the thermostat.
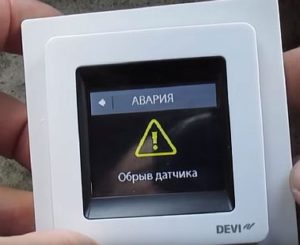
If the required voltage is present, ensure the contacts are secure and the cable is connected correctly. A loose wire may fall out, causing the floor program to display an error message—"Sensor Broken."
If everything is normal, the resistance is measured by connecting the contacts of the multimeter and the thermostat. The resulting readings should be close to the specifications. If they are zero, the thermostat is faulty and should be repaired or replaced.
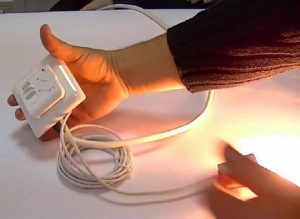
Check if the device is working or not, too. it can be done in the following wayConnect a light bulb to the terminals where the underfloor heating wires are connected. Then apply power while continuously turning the temperature switch. If the unit is working properly, the light bulb will light when the room temperature is reached.
Replacing the device yourself is easy. But first, you need to disconnect the power. Then, open the front panel, install the new thermostat in its place, and connect all the wires to it.
Thermostats do not have short-circuit protection fuses. In electric floors, this function is performed by an automatic transfer switch and an RCD.
The temperature sensor is not working
Another common reason why underfloor heating doesn't heat even though the thermostat is working is a faulty temperature sensor. If it's faulty, the underfloor heating won't shut off, which increases energy costs.
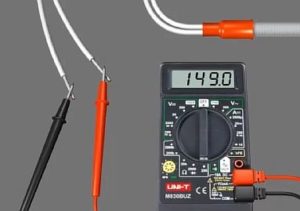
When checking a temperature sensor, measure its resistance and compare the results with the specifications. Minor deviations are acceptable; significant discrepancies require replacement.
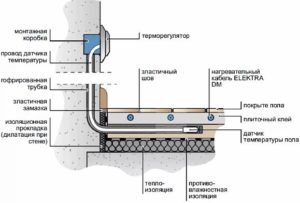
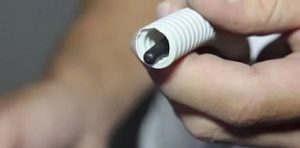
If you installed the sensor correctly—in the corrugated pipe—replacing it is easy. No need to remove the floor or screed; you'll only need to slightly open the wall. The temperature sensor is pulled out of the corrugated pipe and replaced with a new one.
Damage to the heating element
If, after conducting checks, you find that the thermostat and temperature sensor are working properly, and all contact connections are of good quality, then you need to look for the problem in the cable.
A cable break could have occurred during installation. A short circuit can be checked with a multimeter, but more sophisticated equipment is required to locate the break.
First, disconnect the cable from the thermostat, and measure the resistance between the two wires with a tester. It should match the factory specifications—11–700 ohms. The acceptable tolerance is within 5%.
If the value is 0, there is a short circuit. This can occur if the system overheats or if the cable cross-section is incorrectly calculated. If the device displays infinity, there is a broken or burnt-out wire. In this case, check the connections.
If the readings are in the hundreds of ohms range, connect a 2500 V pressure gauge and apply an elevated voltage between the cable braid and the conductors. A reading of 0 indicates a puncture in the cable or a loss of contact in the coupling; the location of the damage must be determined.
To identify the exact location of the fault you will need:
- transformer;
- signal generator;
- electromagnetic sensor;
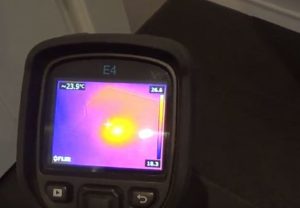
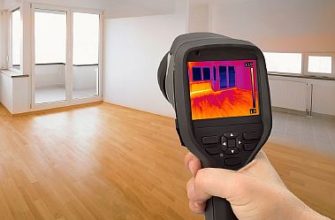
- thermal imager.
The procedure is as follows:
- we burn through the place where the insulation is weak - we apply increased voltage there (10 kV), if there is a voltage of 350 V in the wires, this leads to the formation of a welding arc;
- at the same time, the generator sends signals to the cable;
- We find the breakdown using an electric sensor;
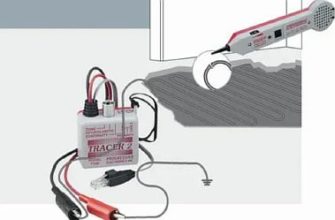
- We carefully inspect the entire area with a thermal imager. The temperature at the burn site will be elevated.
When using heating mats, the search is much easier, because they are closer to the surface.
If after checking with a multimeter (see instructions on how to check) If a short circuit between the wires is detected, there's no need to burn it out. You can immediately connect the generator and locate the fault.
Once the damaged area has been identified, you can begin repairing the underfloor heating cable. The step-by-step instructions are as follows:
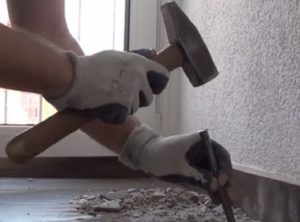
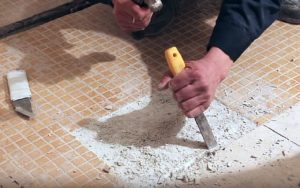
- The floor covering is removed from the area where the damage has been identified.

- The screed or glue is knocked off.
- Most often, the cause is a loss of contact in the coupling. Warming it up with a heat gun will make it easier to remove.
- The coupling is cut off at the break point.
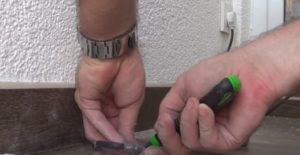
- The wires are cleaned at the break points.
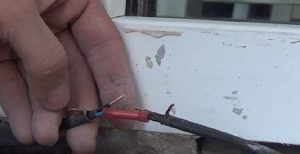
- The contact sleeve is installed, after the cable coupling has been placed on the cable. The connection point should be wrapped with electrical tape.
- The coupling is moved onto the connected section and soldered using a hair dryer to ensure a tight seal.
For a simple cable break, the procedure is the same. There's just no sleeve to cut.
Infrared film failure
Infrared film is an electric floor heating system and may not work for the reasons mentioned above: no power, improper installation, or a broken thermostat or temperature sensor.
However, the film has its own peculiarities: it is connected to the network via wires, which are attached to the copper busbar with clamps. If the connection is poor, the metal oxidizes, causing a break in the circuit.
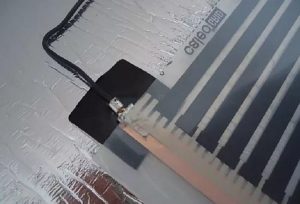
Therefore, if all the devices have been checked, and the floor still does not heat, then the contacts need to be examinedThey should be tightened, or the clamp should be replaced (if it is broken).
The equipment was selected incorrectly
Poor performance of underfloor heating may be due to the wrong model being selected. Before purchasing, determine the purpose of the underfloor heating system—whether it will be supplementary or primary heating.
An energy-efficient model capable of heating the floor up to 30 degrees Celsius is suitable for supplementary heating. If this is the sole heating system, a more powerful model capable of heating the surface up to 40 degrees Celsius is needed.
When choosing a device heat loss should be taken into account and the distance between the heaters.
Water-based underfloor heating isn't heating – causes and solutions
The guarantee of proper operation of a water heating system is correct installation, high-quality components, and components carefully selected according to their power.
As with electric floors, poor thermal insulation will significantly reduce heating efficiency, and correcting this issue requires a complete redesign of the structure. Therefore, the selection and installation of hydronic underfloor heating should be approached with care.
We will tell you about main reasons, which lead to a failure in the operation of the heating water system.
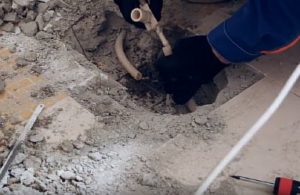
The pipeline is damaged
The main problem that arises when using hydronic systems is leakage. This is caused by a sudden drop in pressure within the pipeline.
To detect a leak, inspect the flooring. You may notice wet spots where the trim meets. If this inspection is inconclusive, perform a thermal imaging scan. Once the damaged pipe is located, you can proceed with repairs, but first drain the system.
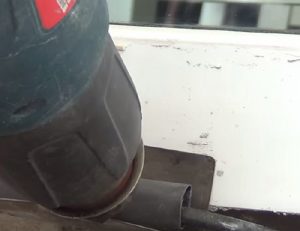
The sequence of repair works is as follows:
- We carry out dismantling of finishing materials.
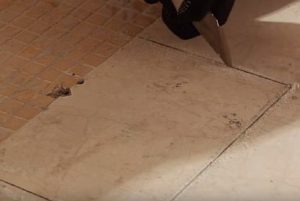
- We remove the screed; it is better to use a hammer drill for this.
- We cut the pipe using a hacksaw at the damaged area.
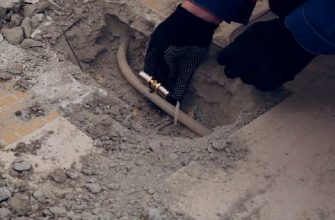
- We clean the pipe from contamination.
- We align the edges of the pipe with a reamer.
- We put a coupling on both ends of the pipe and crimp it with pliers.
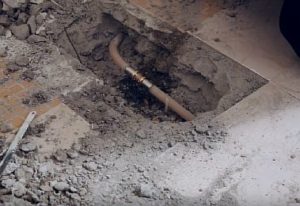
After testing the system for leaks, you can pour the screed and lay the finishing coating.
Uneven heating due to different circuit lengths
If the floor heats up poorly or unevenly, it's likely due to uneven coolant flow through the piping. This occurs due to different loop lengths. Longer loops, with equal coolant flow rates, cool faster.
To correct the situation, It is necessary to adjust the volume and speed of water supply to each branchDepending on the connection diagram, this is done using comb valves or a three-way valve. To determine the effect of these changes, you'll need to wait until the floor warms up.
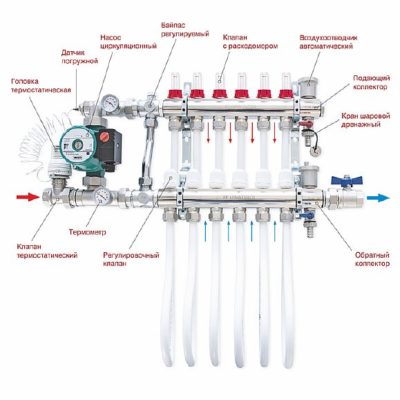
Using automatic devices (a temperature sensor or a servo drive) will significantly simplify the adjustment process. Water flow adjustment will be initiated automatically.
Electrical equipment is faulty
If there is no leak, the fault should be looked for in the equipment that operates from the electrical network - this is the thermostat, temperature sensor and electric pump.
First, check that there's voltage at the temperature sensor and each terminal of the regulator using a multimeter or indicator screwdriver. If the sensor or thermostat is broken, it's best to replace them with new ones.
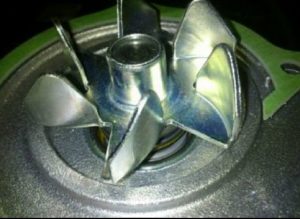
A pump failure is indicated by the absence of sound when it is turned on. Intermittent operation is caused by salt deposits in the water. You can start the motor by turning the impeller with a screwdriver, but you must remove it first. If this doesn't work, the pump should be replaced.
Doesn't heat up completely from the boiler
There are only two reasons why a hydrofloor doesn’t heat:
- The boiler's output is low. To heat one room of the apartment, you need to reduce the temperature in the others.
- An incorrectly sized pump—it doesn't have enough power to pump the coolant through all the lines. The solution is to replace the pump with a more powerful one.
Problem with the return line
There are several reasons why the return line may be cold, which in turn leads to a decrease in the efficiency of the floor:
- Low pressure means the coolant doesn't have enough power to push out the cold water. To resolve this issue, a pump must be installed. It will ensure the required coolant circulation, pushing it into the circuits. The same problem can occur even with a pump, but it's not powerful enough, so calculating the unit's power carefully is essential.
- If the pipes become clogged, they should be cleaned. This can be done in various ways: using a water-pulse mixture and biological agents, or using pneumatic hydraulic shock.
- Undersized pipes: The pipes selected are of the wrong cross-section. The situation can only be corrected by replacing the pipes with ones of the correct cross-section.
- Incorrect installation—the return and supply pipes are reversed. The floor pipes should be connected to the manifold correctly according to the new diagram.
- Air in the system - the presence of air in the system leads to poor flow of the coolant. To remove air from the pipeline, you need to open the air vent.
Poor insulation
Lack of or poorly installed thermal insulation is a common cause of ineffective underfloor heating. Regular polyethylene film is often used as a backing, but it does not provide thermal insulation. 5-10 cm thick polystyrene foam boards are required.
The solution is to reinstall the system. However, this is a labor-intensive process and leads to additional costs. You can set the temperature higher or install more powerful equipment, but consult with a specialist, as this is not safe.
It's 70 degrees after all. — this is the maximum heating limit for the coolant for underfloor heating. And the system can only operate in this mode temporarily; otherwise, it quickly fails.
The power is incorrectly selected
On average, heat loss in a house is calculated as follows: 100 W per 1 m2But sometimes these values are exceeded, and this leads to inefficient functioning of the system.
In this case, it is necessary to recalculate heat losses in all rooms. You can use the online calculatorAfter that, you need to analyze the heat loss in the rooms where the floor isn't warm. Taking this into account, adjust the manifold for the branches that aren't heating.
After reconfiguring, let it sit for 2-3 hours and check the results. If the situation doesn't improve, you'll need to upgrade the heating system.
The outline size is too large
Oversized circuits can also cause poor underfloor heating, or even the longest circuit may not be working. The recommended pipe length is 80–90 meters.
Minor excesses are acceptable. However, if the length of a single circuit significantly exceeds the average standard, the pump cannot ensure fluid circulation in such a pipeline.
The pump can be replaced with a more powerful unit, but if the circuit size is significantly larger, even it may not be up to the task. Therefore, when constructing the floor, it is important to adhere to the recommended circuit length.
The collector is not working
If your underfloor heating isn't heating, another problem could be with the operation of the manifold. There are two main causes of manifold failure:
- Incorrect pump selection if there are two. The pump on the distribution group should have a lower capacity than the pump on the boiler or in the system itself.
- The mudguard is clogged - you need to unscrew it and clean it.
We've covered the main problems that can arise with underfloor heating. In most cases, you can identify and fix the system yourself. If you're unsure, it's best to call in a professional.


I just encountered a problem when the heated floor in my bedroom stopped working. I thought my experience and knowledge would be enough to fix the problem myself, but I couldn't figure it out for a long time. This article was actually very helpful, as the temperature sensor was simply broken, and I'd forgotten to check it initially. Thanks to the author for such useful and interesting content; I'll definitely bookmark this article.
Thanks to the author for a fascinating and informative article. As always, it's written in an engaging and straightforward manner about topics that are quite complex for me. I had a problem with the underfloor heating in my country house, and I was completely puzzled about what the cause was. It turned out to be simple—a clogged sump drain. I never would have figured it out on my own if I hadn't read about it in the article.