Many people are unfamiliar with the chimney cap, a fastening element. Although it does play a specific role: it seals the opening in the roof through which the chimney passes from precipitation.
A kryza is a sheet of stainless or galvanized steel with a hole of a certain diameter in the center. A round pipe of the corresponding size is welded to it.
The roof outlet must match the roof pitch. This is important because it provides the tightest fit between the outlet and the pipe.
Consequently, the risk of moisture and precipitation entering the attic and/or the house is reduced to zero. When the hood is installed correctly, a drip cap is installed above it. This, in turn, protects the hood from moisture.
The initial stage of roof installation requires the preparation of a drawing. This can be ordered from a design company or created independently, or you can find a drawing on our website (see below).


When choosing a hood, it's important to know that the decisive factor is the angle of inclination. There are three types, let's look at them:
- 0-150.
- 15-300.
- 30-450.
- Types of crises and their scope of application
- Principles of installation of the door frame
- Types of seal installation, what is Master Flash
- Straight and corner master flush
- Installation of cuffs on tiles and slate
- We do the installation ourselves
- Mounting the roof with a rigid edging
- Stages of master flash editing
- Additional insulation for Master Flash sealing: expert advice.
- Types of roof penetration insulation
- Types of roof chimney insulation
- On safety measures when working at height
Types of crises and their scope of application
There are the following types of crises:
- ridge;
- single-pitched structure;
- décal;
- non-deckable;
- universal.
Let's take a closer look at some of them.
Skate. It is used during installation work and installations with an outward vent through the roof ridge. This insulation option allows for installation above the roof with an overhang of only 500-600 mm. Importantly, it does not violate wind pressure regulations.
Single-pitched design. In this case, the chimney runs away from the ridge, but the question of waterproofing the open space arises. There are many options, but each has its pros and cons.
Principles of installation of the door frame
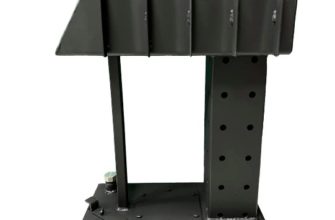
There's no point in discussing installation. The photograph clearly shows the working elements. For more information on installation options, please watch the video provided by our specialists on our website.
Watch the video
The types of seals and their installation require more detailed consideration. The use of silicone seals is particularly important when constructing the structure.
Watch the video
Types of seal installation, what is Master Flash
In some cases, the chimney pipe exiting through the roof comes into contact with flammable materials that lack insulation. In this case, a chimney cap with a special penetration should be used.
The diameter of the ridge should be 70-100 mm larger than the diameter of the pipe passing through it.
Alternatively, you can use a silicone Master Flash. It also protects the element from precipitation and moisture. There are two types of this product:
- Direct.
- Angular.

Masterflash is a mandatory element of the overall structure. Masterflash is a silicone sealant used to seal roof penetrations. Sealing issues arise almost always, whether installing a bathhouse, sauna, fireplace, or stove.

It's important to secure the access area where the pipe is to be installed. It needs reliable protection from moisture, humidity, snow, rain, and ultraviolet rays. Master-flash (roof penetration) provides reliable protection from external irritants.
Let's take a closer look at each of them and determine the nuances of the product and fasteners.
Straight and corner master flush
Direct. Its use is relevant for roofs with a slope of up to 200It is equipped with a silicone flange. The most secure attachment is achieved on roofs covered with metal tiles. It must first be sealed with sealant, and then secured with screws.
Angular. In this case, a roof with a slope angle of more than 20 would be better suited.0The structure is attached to a flange made of flexible aluminum coated with silicone. The pipe seal with metal roofing provides excellent corrosion resistance.
Watch the video
It adheres well to roofs covered with slate and/or sheet materials. Why? The principle of fastening is to tuck one edge of the sealant under the sheet. The remaining edges can be sealed with sealant.
Installation of cuffs on tiles and slate
It's important to understand that a rubber chimney seal is suitable for insulated structures: double-walled pipes with a working diameter of no more than 320 mm. It can be successfully used to seal the passage of ventilation pipes.

A common question is why experts recommend using a roof seal for a chimney penetration. Is a metal roof cap really not a reliable option? Not at all; it's just that in some of the cases we've discussed, using a roof seal is recommended.
It interacts perfectly:
- With roofing materials: rubber, metal, plastic and tiles.
- Suitable for perforated roofing, where the process of sealing the penetrations is carried out regardless of their location.
- The material is elastic and can easily withstand t0 changes.
- All-weather product is easy to install.
An attractive price also tips the scales when choosing, as stated by the majority of buyers surveyed.
We do the installation ourselves
Our team always strives to save money, and this is encouraged. Therefore, we'll discuss DIY master flash installations. The work is preceded by a preparatory process, which includes:
- Purchase of self-tapping screws, 6 pcs.
- A screwdriver or a screwdriver.
- Purchasing sealant.
- Scissors.
- Chimney conductor.
The photo clearly shows the step-by-step installation process of a flexible flange seal, which you can read about below.
Let's consider the algorithm of sequential actions. Step #1. Trim the top of the cone as shown in position #1. Make sure the cut diameter is 20% smaller than the chimney opening; this will ensure a tighter fit.
Step 2. Take a rubber chimney seal and thread it onto the top end of the pipe. Then, with careful movements, push it down toward the base of the roof.
Step 3. Applying sealant. This is used to attach the lower part of the flash master seal base to the roofing surface.
Stage 4. The final stage of installation: securing the protective product with self-tapping screws.
Having completed all 4 steps, we can say that the gap between the edges and the wall of the pipe is hermetically sealed.

Mounting the roof with a rigid edging
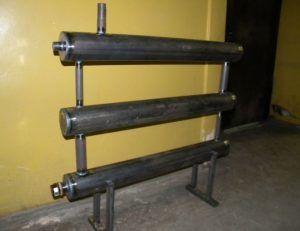
 A common question is: how to seal a chimney? When installing a gord with a rigid edging, an additional roofing sheet is used for sealing. It is lowered onto the gord from below and then tucked under the ridge from above. Sealing this method can also be done independently, observing personal safety regulations. Alternatively, you can make your own gord, as shown in the photo below.
Stages of master flash editing
Installation is not without its challenges. Master-Flash can be used on both flat and pitched roofs. If installed on a flat roof, the lid should be installed with the cone axis perpendicular to the base plane. When installed on a pitched roof, lid installation options are used where the cone axis is at an angle to the base plane.
Watch the video
If the roof is corrugated (such as slate), the top portion of the Master Flash sealant is placed under the adjacent sheet, and the bottom portion is secured with screws. This prevents water from seeping into the joints.
If the roof is covered with corrugated sheets or slate, water flows naturally along the corrugated roofing waves. Consequently, there's no need to use screws to attach the master-flash roof seal, which uses silicone as the adhesive. At least, that's what experts say.
What's the catch, or why should you pay close attention to designs that use silicone? The fact is, silicone is practically unprotected from the harmful effects of ultraviolet radiation. This problem can be overcome.
Take galvanized steel and make a mold similar to a plate but without a bottom. It's placed on a universal master flash. This will provide effective protection against ultraviolet radiation. It's important to consider and select the correct diameter to prevent it from wobbling in the wind. When installing the structure on the roof ridge, the top section should be tucked under the ridge cap.
It is not recommended to use a large number of screws for fastening. The roof surface may become hot, and the temperature may rise to 600°C.0 as a result, the seal may melt.
There's a way to get around this problem. You need to use bitumen, which you then "wrap" around the problematic section of the pipe. Place it on top of the bitumen. a metal sleeve made of galvanized steel is put onThen the master flush dimensions are adjusted to fit. Alternatively, sandwich pipes can be used. This combination is possible with a multi-layer chimney.
Additional insulation for Master Flash sealing: expert advice.
If any doubts arise regarding the temperature of the house gases at the level where the seal is installed, it is necessary to duplicate the chimney insulation.
Expert advice! Wrap the chimney passage with basalt fiber and place a metal sleeve over the insulation. Preferably galvanized roofing sheet. Master Flash is selected based on the sleeve size, as it is protected from high temperatures. Fill the top edge with silicone and install a drip cap on top.
Types of roof penetration insulation
Additional insulation for the Master-Flash seal. If there is any doubt about the temperature of the house gases at the seal installation level, double the chimney insulation.

The installation of a special box is carried out as follows: Where the chimney pipe passes, an opening 250-350 mm larger than the diameter of the pipe itself must be made.
Protective measures such as asbestos or metal sheets should be installed around the edges of the opening. It is recommended to fill the space remaining before the tube with insulating material. For a more secure structure, it can be supplemented with heat-resistant sealant.
Types of roof chimney insulation
Insulation must be done using several insulating materialsThe most affordable insulation products include the following types:
- Thermal insulation.
- Waterproofing.
Experts recommend using both types in combination to achieve a greater insulating effect.
Important! Even following all the proper fire protection procedures does not relieve you from the need to periodically clean the air duct of soot, ash, and other combustion products. Comprehensive measures will ensure fire safety and protect your home and work structures from potential problems.
Waterproofing. In our case, waterproofing means sealing the pipe where it (the flue/exhaust structure) exits through the roof. This area poses a high risk of water penetration into the living space. Water can subsequently cause rot and deformation of the building's structures. This primarily affects the structure, the ceiling, and the chimney itself.
On safety measures when working at height
Installing any structure at height requires knowledge and use of protective and personal safety equipment. This includes proper tools, a reliable ladder, and a safety harness. It's advisable to work with an assistant who will monitor the work and assist with installation.
The most important thing when working on a roof is teamwork and worker safety. Don't neglect basic safety rules. Installation is not recommended during cold weather, when the roof is covered in snow and/or ice. Avoid performing maintenance during precipitation. A wet roof can become a death trap.
Watch the video
The installation process can be accomplished in a variety of ways. It's important not only to choose the right roofing system based on the roof's configuration. It's also important to consider the nuances and anticipate the consequences of improper installation.
You can do the work yourself. To do this, it's best to familiarize yourself with the technical literature and videos available on our website.