The installation of the valve is necessary to prevent the formation of back draft in the ventilation ducts.
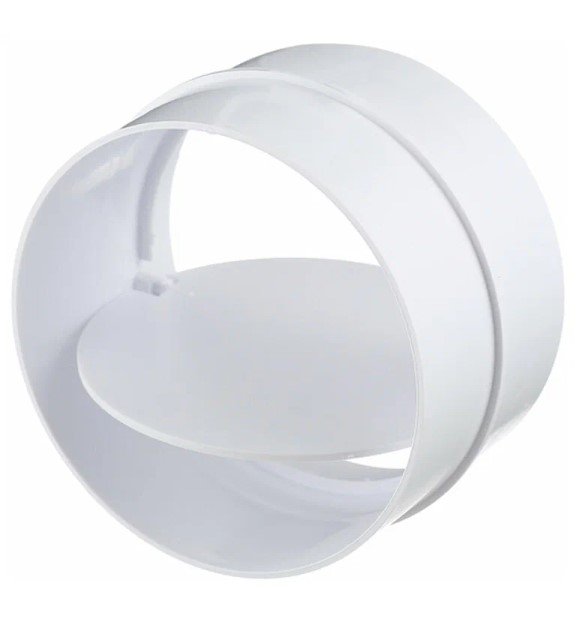
The installation method depends on the type of device. A check valve can be installed in a ventilation system by inserting it into the duct, attaching it to the ventilation duct opening, or using a tee.
In this article, we'll take a detailed look at the installation steps and options for building a DIY ventilation unit. We'll also review the types and ratings of popular models. We'll also examine the valve's operating principle, pros and cons, and sanitary ventilation standards.
- Purpose and installation locations of the valve
- The design and operating principle of a check air valve
- Pros and cons of installing an air valve
- Types of reverse draft devices, model ratings
- Petal models
- Era 150 OK
- RSK-125
- Single-leaf models
- ERA d100 mm
- Throttle valve DK 100
- Membrane models
- 10BV 100 mm
- Era 12.5BV D 125 mm
- Inertial lattice
- BZC RNI 500x300
- ERA Street line
- 2 ways to make a check valve for ventilation
- Step-by-step instructions for installing a check valve with a tee on a ventilation system
- DIY video editing
- Answers to frequently asked questions
Purpose and installation locations of the valve
An air, check, or non-return valve for an exhaust hood is the same technical unit under different names, designed for installation in an exhaust duct to prevent the formation of back draft.
A ventilation element is installed in the kitchen, separate bathroom and toilet, and combined bathroom. If exhaust from specific rooms is provided through a single duct, intermediate air dampers are installed in the main air duct to prevent unpleasant odors from penetrating from one room to another.
Manufacturers sometimes equip household exhaust hoods with an anti-return device installed after the fan.
However, another tee with a check valve for the hood is cut into the kitchen ventilation network as an additional element.
The unit's damper is closed when the hood fan is operating above the cooktop. Once the motor is turned off, forced air extraction through the hood ceases.
An additional ventilation check valve for natural ventilation is activated, allowing freely circulating airflow through the opening damper. However, air exchange occurs only if fresh air enters the kitchen.
Sanitary ventilation standards are established for each room in an apartment or private home. Tabular values are freely available, so let's look at the basic data as an example:
- combined bathroom – 50 m³/hour;
- separate bathroom or shower and toilet – 25 m³/hour;
- kitchen with gas stove – 90 m³/hour;
- kitchen with electric stove – 60 m³/hour;
- utility rooms – 25 m³/hour;
- living rooms – 30 m³/hour per person.
The operation of the non-return valve is invisible, but the installation of a check valve on the ventilation system is necessary precisely to maintain sanitary standards in premises of various purposes.
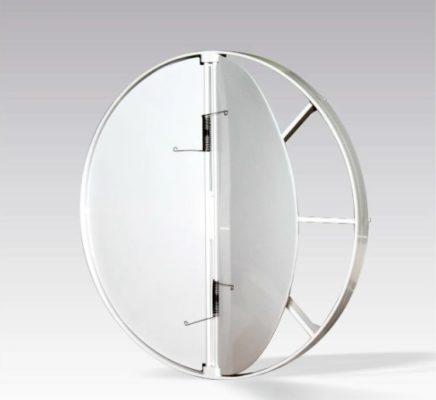
The design and operating principle of a check air valve
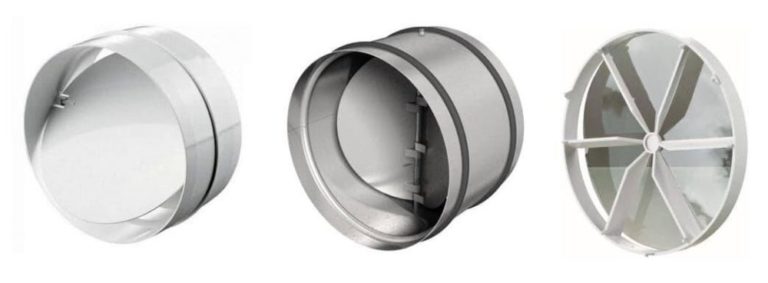
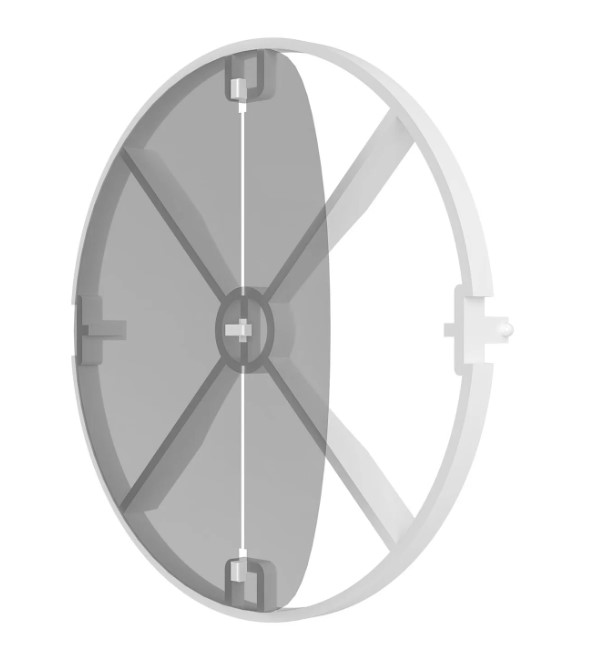
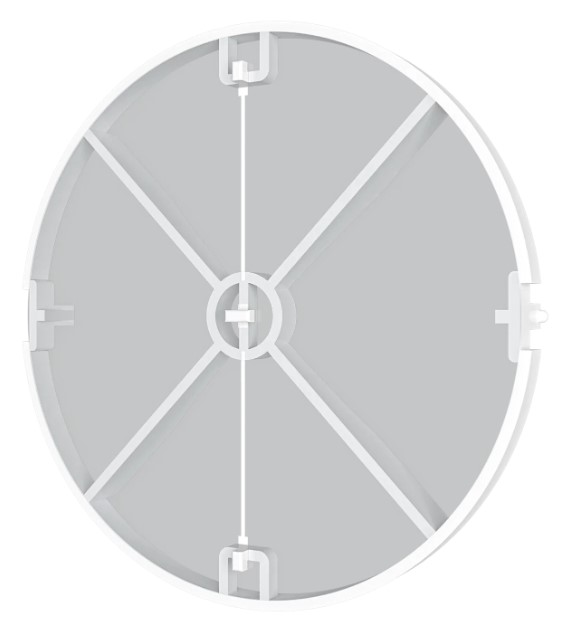
The non-return ventilation unit consists of a housing with a damper. The damper is a membrane, louver-like blades, and a round section, either one-piece or two-piece.
Regardless of the type, all reverse draft devices operate on the same principle:
- When dirty air is removed from the room to the street by forced or natural draft, the damper is open.
- Once the air exhaust from the room has ceased, the damper closes. The damper fits tightly into the housing. Reverse airflow through the closed damper is prevented from entering the room.
The benefits of installing a hood with a backdraft damper are noticeable when the ventilation ducts of adjacent rooms are connected to one channel.
If, for example, the exhaust fan in the kitchen is turned off, the forced removal of dirty air with unpleasant odors will not enter the room from the toilet or bathroom.
Pros and cons of installing an air valve
Installing a backdraft preventer on the hood is essential for proper ventilation. Regardless of its design, a backdraft preventer offers the following advantages:
- prevents the formation of back draft and the penetration of dirty air from one room into another adjacent room through the common air duct;
- operates silently and does not create discomfort for people in the room;
- does not require complex maintenance or replacement of consumables due to their absence, as in the example with a carbon filter for a hood;
- low cost;
- The simplicity of the design allows you to install and manufacture the reverse traction device yourself.
- The only downside to installing a reverse draft ventilation unit is its poor quality execution.
Cheap plastic models are prone to the flaps falling out spontaneously. This problem can be solved by simply modifying the design yourself or purchasing a high-quality model.
Types of reverse draft devices, model ratings
A kitchen hood installed above a cooktop can be equipped by the manufacturer with a petal or single-blade backdraft device. However, backdraft devices come in other designs, depending on their installation location.
Find out everything about the device and its purpose ventilation grilles with a check valveHow to install it yourself
Petal models
The device consists of a housing and a circular flap consisting of two semicircles. The petals are connected in the middle by a spring mechanism. Air pressure causes the semicircular flaps to open.
Once the flow stops, springs return the dampers to their closed position. The movement of the petals resembles the movement of butterfly wings, which is where the model's popular name comes from.
The advantage of the butterfly valve is its tight closing. A spring mechanism prevents the valve from sticking open when backdraft occurs.
Disadvantages include the inability to install on a ventilation system with natural air exchange. The butterfly petals expose the forced airflow created by the fan.
Era 150 OK
Among the inexpensive plastic models, the Era 150 OK does the job quite well. You can buy it on Yandex Market. for 255 rublesThe petal model is designed for installation in a round 150 mm diameter forced supply and exhaust ventilation duct.
The petals are resistant to sticking inside the housing and are held tightly in place by springs. The parts are made of impact-resistant white plastic. The total weight of the product is 200 g.
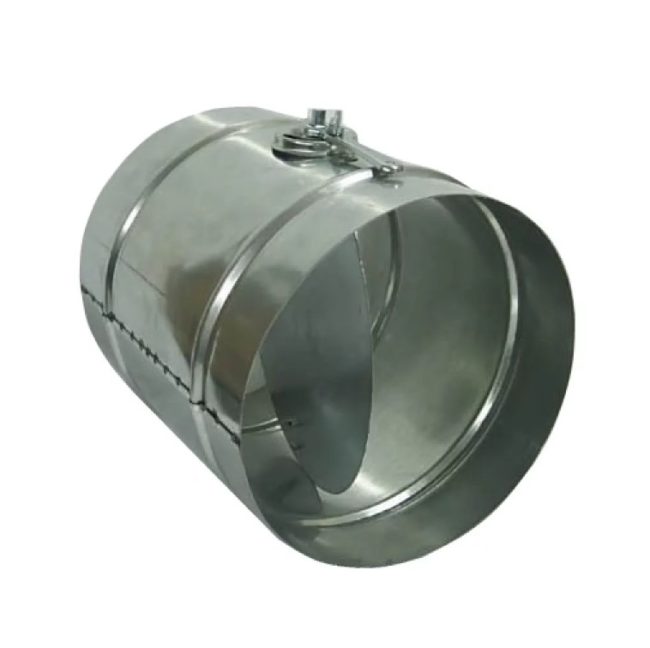
RSK-125
For installation on metal air ducts, consider the wear-resistant RSK-125 model. The housing is made of galvanized steel.
The damper blades are made of lightweight aluminum. The damper is operated by stainless steel springs and forced ventilation airflow. Price on Yandex Market – 698 rubles.
The reverse draft device is designed for installation in horizontal and vertical round air ducts with a diameter of 125 mm.
The recommended operating temperature range is from -20 to +60OC. When hot air is removed from a gas stove, metal parts are not prone to deformation.
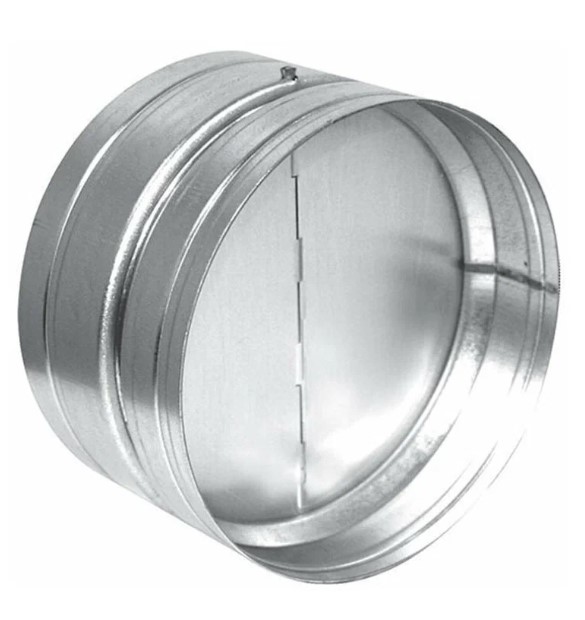
Single-leaf models
Natural and forced ventilation can be installed with a single-blade check valve. This device differs from the petal model in that it has a single-piece damper without a spring.
The damper opens with the airflow and closes under its own weight. Inside the housing, the flap axis can be centered or slightly offset.
The advantage of a single-leaf gravity device is its simple design and the possibility of installation in a natural or forced ventilation network.
Disadvantages include a loose fit, sticking, or the sash falling out. Installation must be strictly vertical or horizontal. If there is any movement, the resulting counterweight will cause the sash to stick.
ERA d100 mm
The plastic connector for round air ducts is equipped with a single-leaf damper. The mechanism is activated by airflow in both natural and forced ventilation systems.
Installation of the device does not require any special fasteners. The connector is simply inserted into the pipe until it reaches the stop marked on the housing.
The material used for production is impact-resistant white plastic.
When heated, the housing may become deformed and the valve may stick. Not recommended for use in hot air exhaust systems.
Average price on Yandex Market – 191 rubles.
Throttle valve DK 100
A distinctive feature of the single-door model is the manual adjustment mechanism. The shutter is connected to a lever on the housing.
The user has the ability to manually set the throttle valve's capacity and lock the mechanism in the desired position.
The body, damper, and other components are made of galvanized steel. The damper's rotation shaft is mounted on polyamide bushings.
The throttle valve is designed for installation on round metal air ducts with a diameter of 100 mm. The average price on Yandex Market is 370 rubles.
Membrane models
Of all the non-return valve types, diaphragm models are the most sensitive. The shutoff element responds to light airflow. The flexible diaphragm is equipped with stiffening ribs that prevent deformation of the elastic material.
An advantage of these models is their ability to be installed in both natural and forced ventilation systems. The sensitive shut-off mechanism operates in enclosed spaces with poor air circulation.
The disadvantages include the possibility of deformation of the membrane when exposed to a forced powerful air flow.
10BV 100 mm
The device's housing is made of impact-resistant ABS plastic. A polyester film is used for the membrane. Installation is carried out in a round air duct with a diameter of 100 mm. The device is typically used in conjunction with an axial fan.
On Yandex Market the model is sold at a price 375 rublesUsers note reliable operation with forced ventilation.
Natural draft is not always sufficient to close the membrane tightly.
Era 12.5BV D 125 mm
The membrane model is designed for installation in round forced and natural ventilation ducts with a diameter of 125 mm.
Best performance is achieved when paired with an axial fan.
The housing is made of impact-resistant ABS plastic. The membrane film is made of polyester.
The membrane model is available on Yandex Market 426 rublesSuitable for axial fans Diciti, Era, Auramax.
In natural ventilation, the membrane does not always work reliably when the draft is weak.
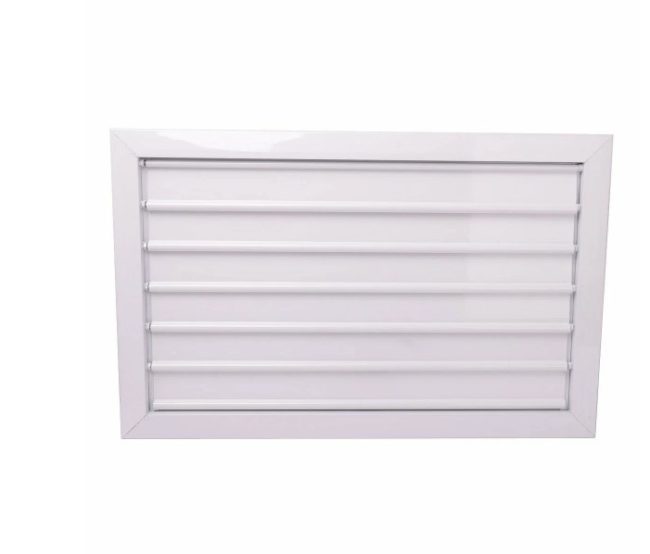
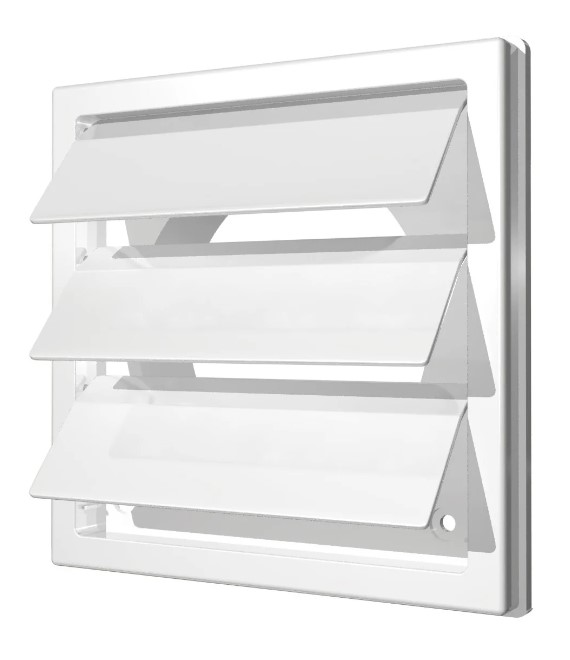
Inertial lattice
Because of the slats on the housing, the anti-return device is called a "blind." The slats, arranged one above the other, are easily activated by airflow. The lightweight slats are made of non-ferrous metal alloys or plastic.
The advantage of the inertial grille is its resistance to moisture and temperature fluctuations. The device is designed for installation on a ventilation opening in both natural and forced ventilation systems.
Disadvantages include the possibility of icing in winter. For the blinds to function, insulation or heating is required.
BZC RNI 500x300
The grille body and louvers are made of a lightweight metal alloy. The slats are easily actuated by passing airflow. The grille is designed for air conditioning, forced ventilation, and natural ventilation systems.
The ventilation unit is installed on rectangular air ducts.
There are no loud sounds when the metal slats are activated.
The inertial grid is available on Yandex Market 520 rubles.
ERA Street line
The lightweight, inertial grille is made of durable ABS plastic. The slats are resistant to deformation from warm air and sunlight. The housing is equipped with a flange with guides for precise installation within the air duct.
The grille is designed for square 190x190 mm air ducts. Installation is provided with adhesive or screws.
The presence of a decorative edge on the body allows you to hide the unevenness of the ventilation opening.
There's a plastic grille on Yandex Market 445 rubles.
2 ways to make a check valve for ventilation
An air valve for installation on a ventilation system is easier to buy. The technical components are inexpensive and readily available. If you're looking to do it yourself, I suggest considering two simple, interesting methods.
Instructions for making a check valve for the exhaust grille of a common-house duct in an apartment:
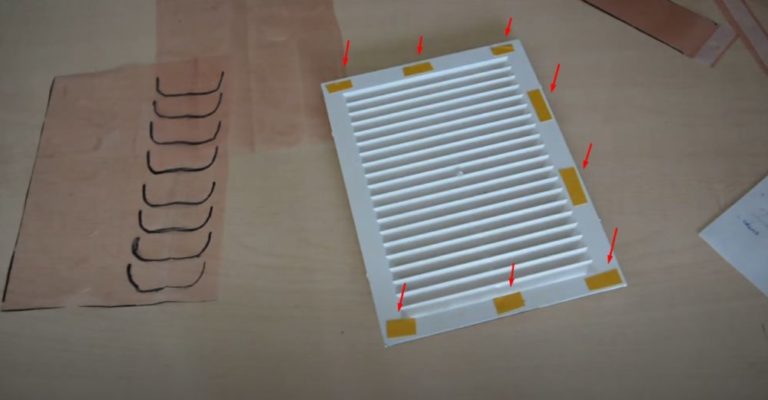
- Remove the grille from the exhaust vent. Cut a piece of thick polyethylene to its size.
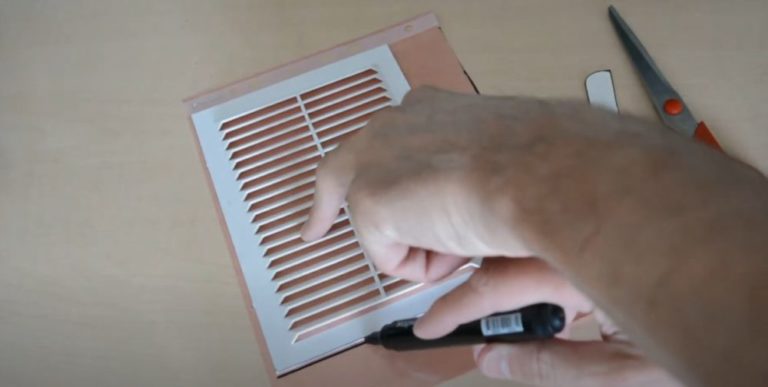
- On the cut-out piece of film, you need to cut out the petals that will act as the sealing membrane. To mark the area, make a cardboard template in the shape of a rectangle with two rounded corners.
Make the template width match the size of the ventilation grille slat. Measure the length 3-4 cm shorter than half the grille width to ensure two rows of petals are cut into the film.
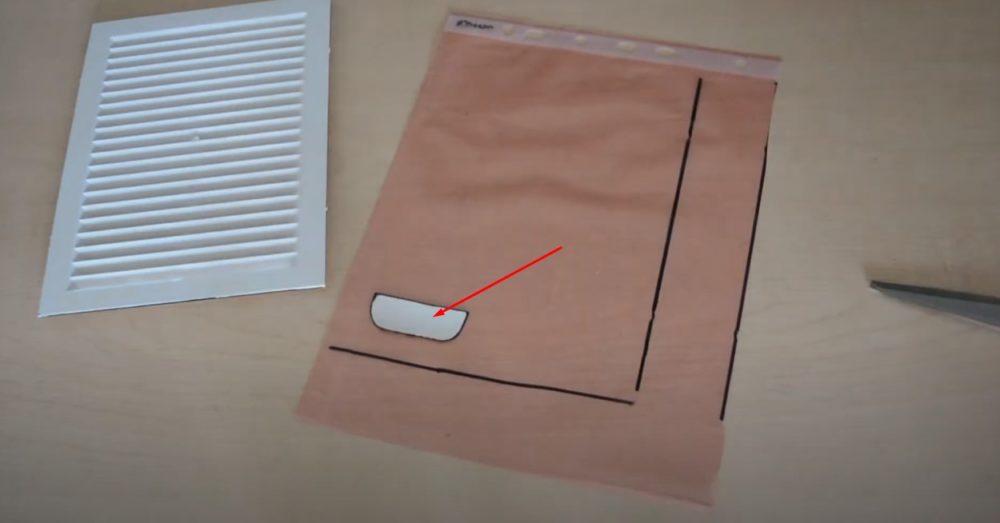
- Place the template in the lower left corner of the film, leaving 2-3 cm margins from the edges. Place the rectangular piece with the cut corners facing down. Trace the template with a marker.
Draw two columns of petals, exactly the same number as the number of slats on the lattice. You can draw one column, and then fold the film in half with scissors to match the slits on the other row when cutting. If the lattice slats are narrow, make one petal for every two slats.
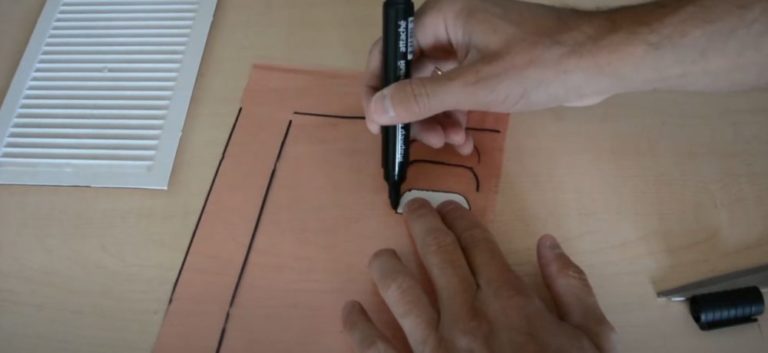
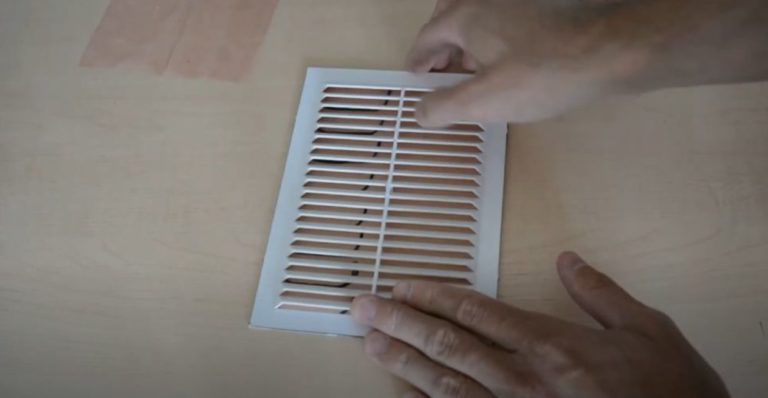
- After marking the entire column, apply the film to the grating. Check that the tabs align with the slots between the slats.
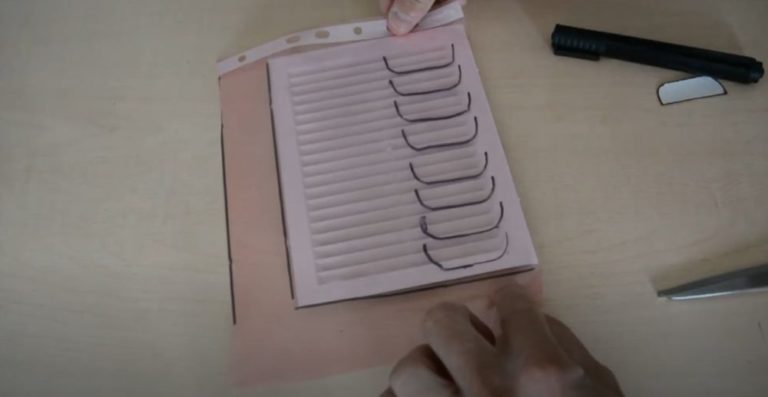
- If you drew a single column, fold the film in half vertically. Cut the petals horizontally using scissors, following the markings. Leave only the top portion of the rectangles with sharp corners uncut. This area will hold the petals in place on the film.

- To ensure the petal film stays securely on the grille, attach it with double-sided tape. Place pieces of adhesive tape around the perimeter of the edge on the back side.
- Attach the film with the petals to the tape, with the slits facing down. To prevent wrinkles during gluing, place the film on the table and press the lattice onto it with your hands.
- Install a grille with petal valves on the exhaust opening of the common duct of the apartment.
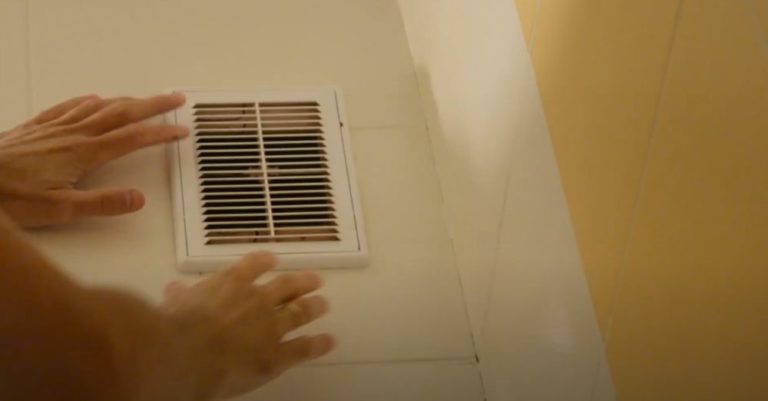
The operating principle of a petal membrane is simple. When the hood is operating normally, the film petals are folded into the duct by the airflow.
If backdraft occurs, the film valves are pressed against the grille slats. Once the slits are sealed, dirty air from the common air shaft no longer enters the apartment.
You don't need to buy a check valve for installation with a duct fan. Plastic models are unreliable, flimsy, and often fail. I suggest making your own petal-shaped valve. in 5-10 minutes.
Instructions for making a check valve for an exhaust duct fan:
- Determine the fan's location on the duct. Attach a metal bracket to the edge of the housing, in front of the impeller on the outlet side, to secure the blade damper. You can glue the bracket in place with a hot glue gun or tape.
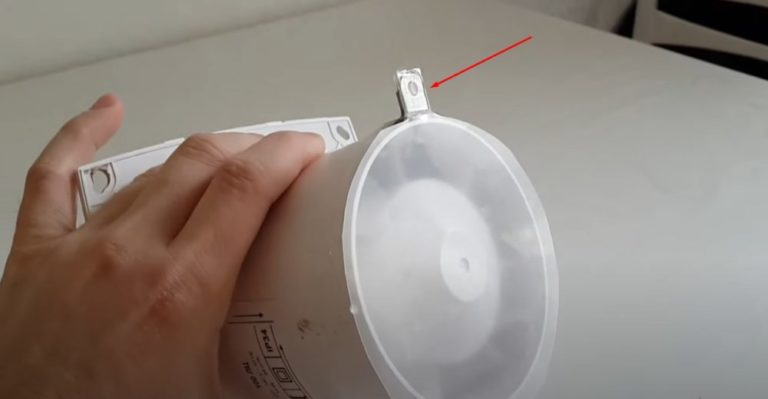
- Cut a circle out of thick polyethylene. It should be 2-5 mm larger than the fan housing diameter to ensure a tight seal. Leave two tabs on the polyethylene circle, opposite each other.
Attach the flap to the bracket on the fan housing using one tab. Check the tightness of the polyethylene circle against the end of the exhaust unit.
- Glue a piece of plastic or several layers of film to the second opposite tab. This will serve as a weight for the lightweight film tab.
Install the duct fan into the air duct and check the damper operation. After turning on the motor, the blade should be deflected by the air flow.
When a backdraft occurs inside the duct while the exhaust fan is inoperative, the film damper will stick to the housing. A homemade damper will block airflow through the exhaust fan into the room.
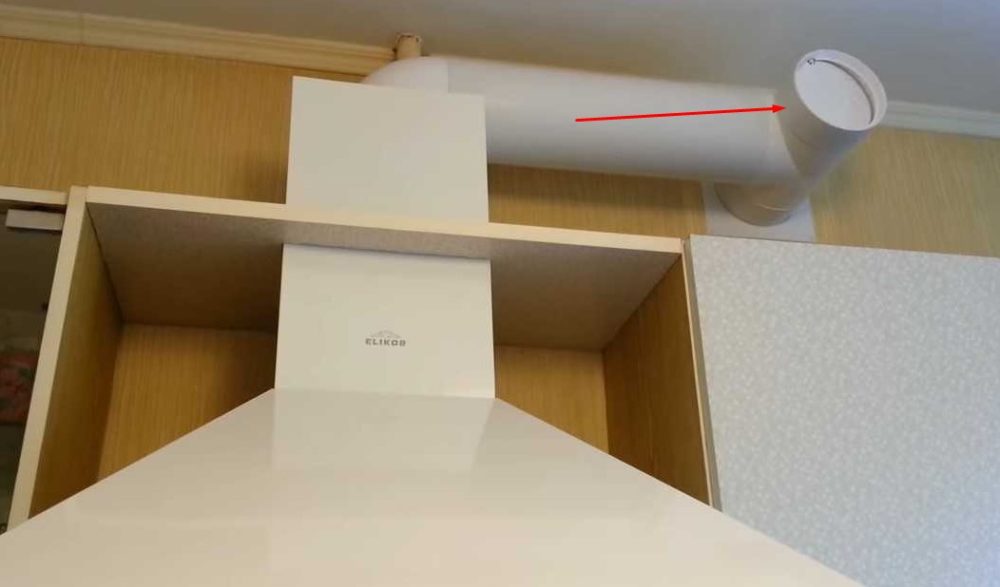
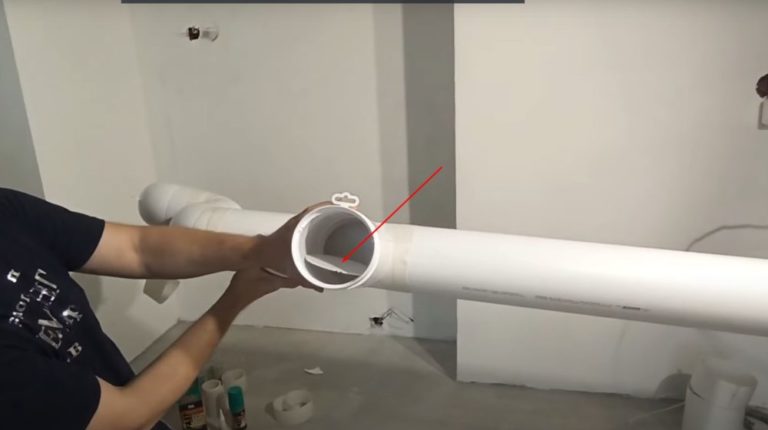
Step-by-step instructions for installing a check valve with a tee on a ventilation system
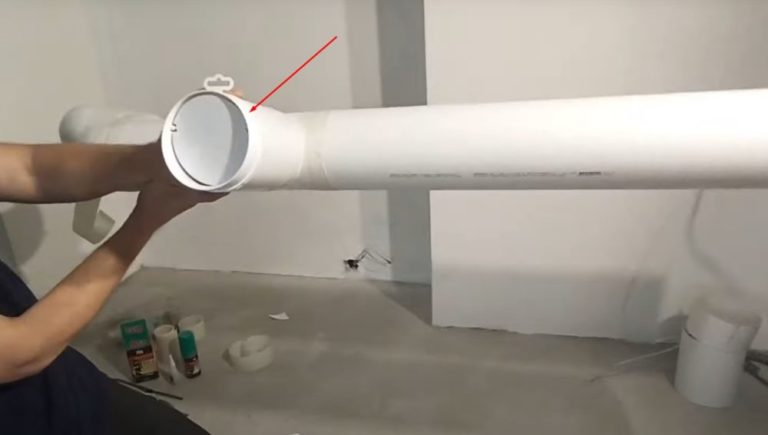
Installing a check valve is so simple that the entire process can be described in two sentences. First, cut a tee into the main ductwork for the kitchen range hood, sealing the joints with sealant.
Insert the valve into the side opening of the fitting. At this point, the installation appears to be complete, but it's not that simple. There are some pitfalls, which we'll discuss now.
Plastic anti-return devices aren't always of high quality. The valve is the weak point of the device. The round piece dangling inside the housing can fall out spontaneously.
If the damper came off during ventilation assembly, it's easier to replace. If the damper flapped off while the hood was running and fell into the pipe, you'll have to disassemble the entire ventilation duct.
Let's take a look at how to properly install an air valve with a damper upgrade yourself:
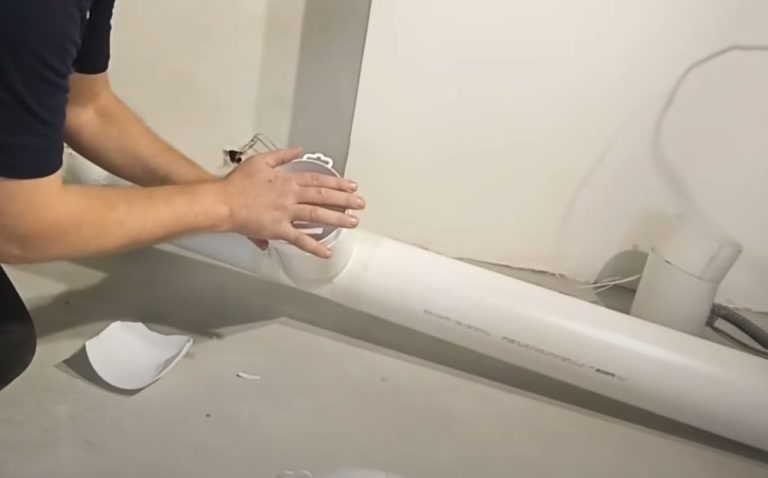
- According to the ventilation plan, assemble the exhaust duct from the air ducts on the floor. Don't forget to install a tee under the check valve.
- Install the non-upgraded anti-return device into the side opening of the tee.
- Let me explain why upgrading the damper is necessary with an example. Pick up the assembled air duct. Tilt the tee opening toward the floor and gently shake the assembly. The plastic damper will pop out of its seat. A similar situation will occur if you gently squeeze the flexible plastic valve body with your hand.
The damper will instantly fly off its socket, fall to the floor, or collapse into the duct. To prevent this from happening while the hood is running, we'll improve the damper mechanism.
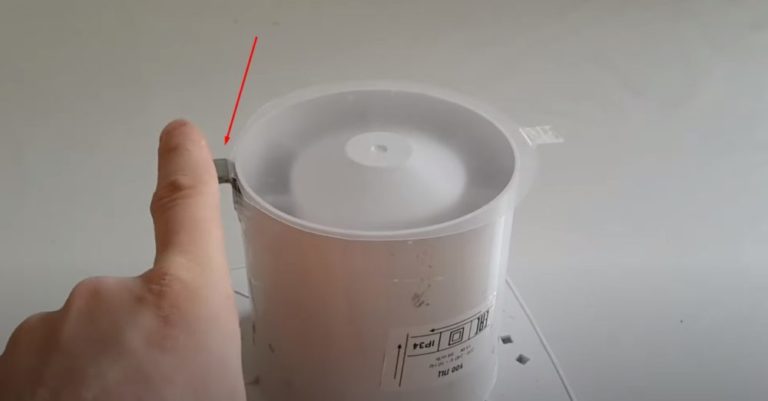
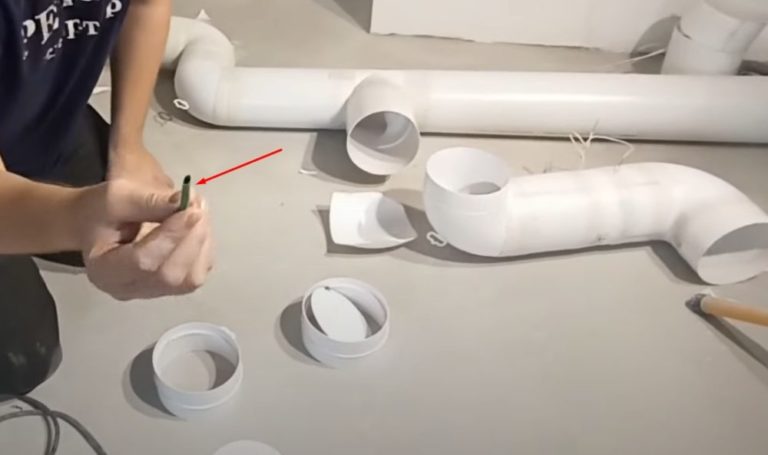
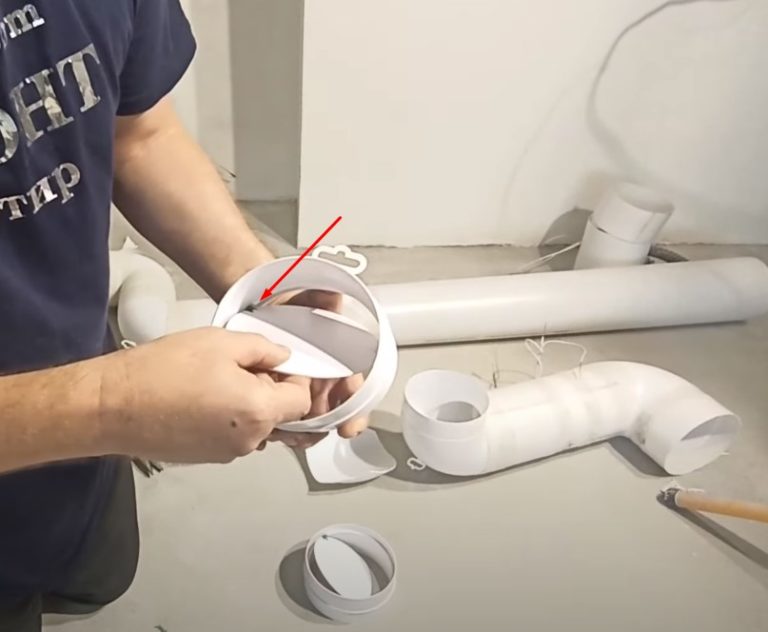
- Grasp the new plastic valve and gently squeeze it. Remove the flap that has fallen out of its socket. Prepare some 6 mm diameter heat shrink tubing. Using a sharp knife, cut two 4 mm long rings.
- Take the anti-return device housing and look inside. On the side walls, opposite each other, you'll see two slotted protrusions. These protrusions act as the valve holder. When turned, the valve tip slips off the protrusions due to a large semicircular cutout.
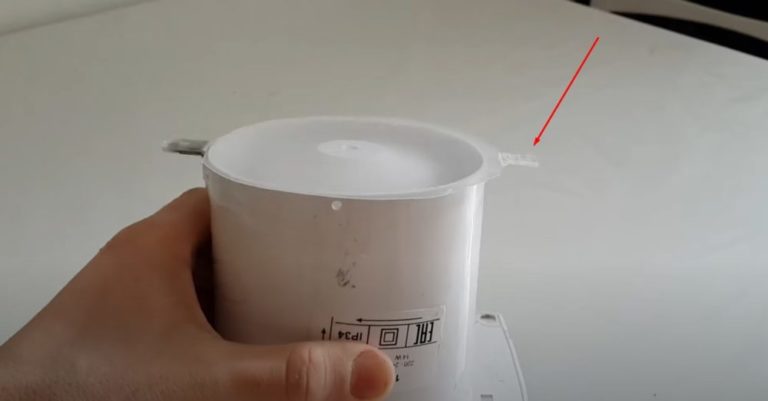
To ensure the damper is securely held in place by the pins, place rings cut from the pipe onto the pins. This will create sockets with holes rather than semicircular cutouts.
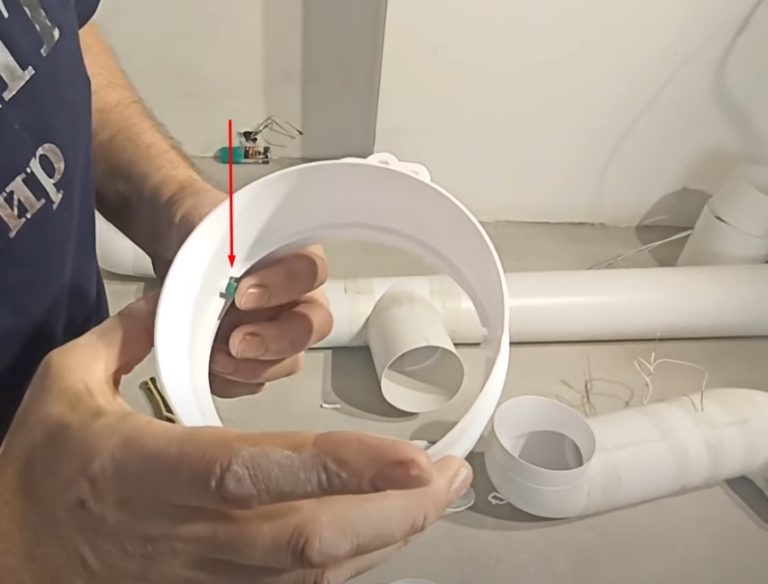
- Take a hair dryer and set it to a heating mode of approximately 140ODirect a stream of hot air onto the heat shrink tube rings.
When heated, they will shrink, tightly gripping the valve holders. Be careful not to overheat, as this will deform the plastic air valve housing.
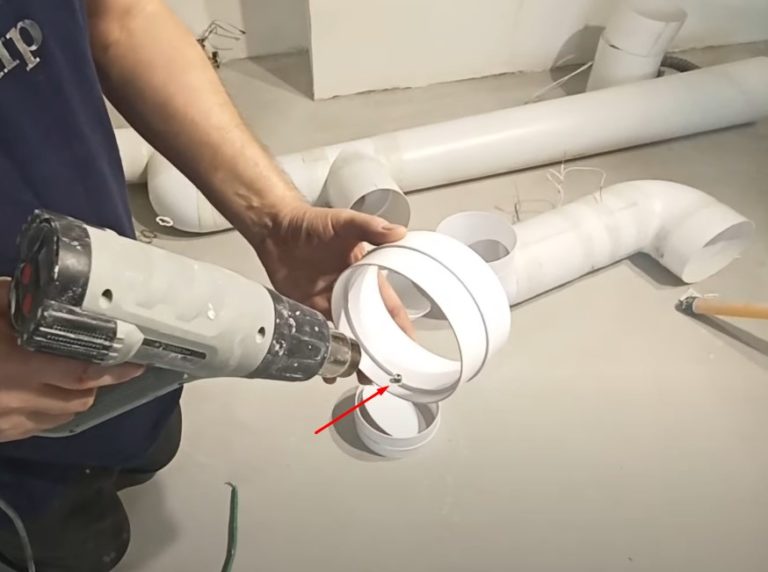
- To insert the valve into the holes of the upgraded pin holders, squeeze the valve body with your hand. The round element will take on an oval shape.
Align the shutter pins with the holes in the holders and release the housing by hand. The expanded oval will return to its original circular shape. The shutter pins will securely lock into the holes in the holders.
After upgrading, install the non-return valve into the duct tee. Check the damper for free movement. Continue assembling the ventilation ducts according to the developed diagram.
DIY video editing
Answers to frequently asked questions
At the outlet of natural ventilation, a valve must be installed to prevent backdraft.
The installation location of the check valve is determined by the ventilation diagram. In a natural ventilation system, the unit is installed at the outlet of the ducts to prevent backdraft. In a forced ventilation system, two valves are installed in the kitchen: one immediately after the exhaust hood, and the other on a tee before the outlet to the common duct for additional natural ventilation when the fan is not operating. In the bathroom, a valve should be installed at the outlet of the exhaust duct. If the toilet and bathroom are separate and connected to the kitchen via a single duct, an additional non-return valve is installed between the lines to prevent dirty air from being blown into adjacent rooms by the fan.
The technical unit closes the exhaust duct when a back draft occurs when the fan is not working.
When the exhaust fan is turned on, the check valve flap opens, allowing air to pass through. When the motor is turned off, the damper closes the duct, preventing dirty air from entering the room through the exhaust.
To enhance natural ventilation, install additional inlets. Extend an exhaust pipe through the roof above the ridge. Increase the diameter of the air ducts and reduce the number of bends and turns in the ducts.


