Why is ventilation necessary in a chicken coop? It's necessary to remove moisture and ammonia vapors produced by decomposing bird droppings.
In small home sheds it is important to arrange natural ventilationPoultry farms and large poultry farms are equipped with forced and mixed ventilation.
To prevent the engineering system from becoming a source of heat loss in winter, the air ducts are equipped with adjustable dampers, install sensors temperature and humidity.
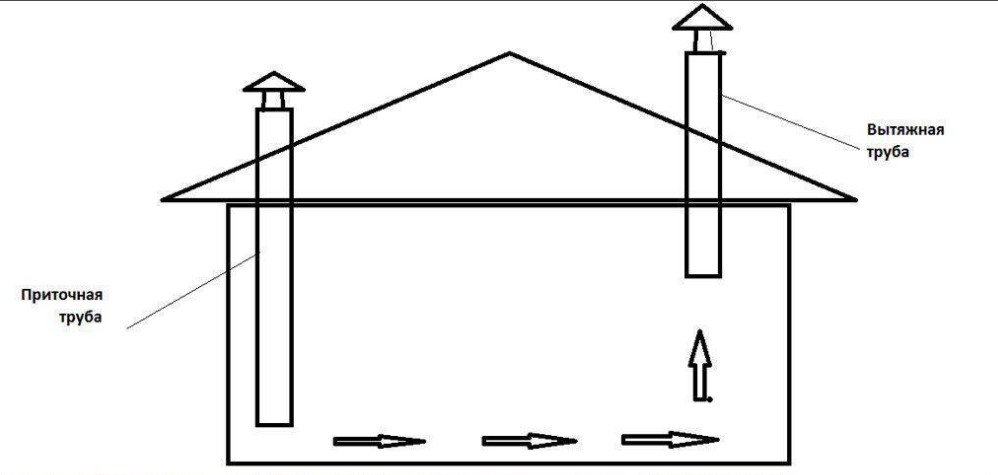
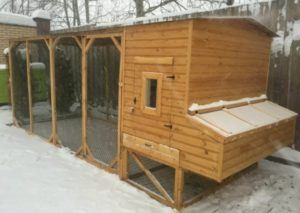
Natural ventilation in a chicken coop can be created by installing at least two plastic pipes at different ends of the room.
The exhaust duct is cut off at the ceiling and vented through the roof. The supply pipe is also vented outside, but in the shed, it's lowered to the floor. Mechanical ventilation will require the installation of fans.
- How important is ventilation in a chicken coop?
- What type of ventilation is appropriate for chicken coops?
- Features of winter ventilation of a chicken coop
- Ventilation calculation
- Instructions for installing mixed ventilation in a chicken coop
- Installation instructions for natural ventilation
- Video editing
- Answers to current questions
How important is ventilation in a chicken coop?
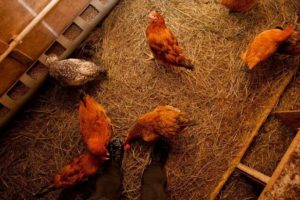
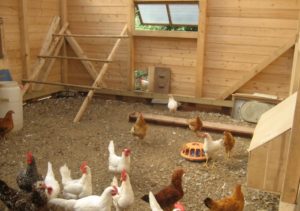
Chicken hardy bird, but if kept in poor conditions, they are prone to disease, weight loss, and cessation of egg production. Health issues are particularly acute in poultry houses with poor ventilation.
You can't just keep a chicken in an unequipped barn, even if you clean out the droppings daily. Organic waste decomposes and is processed by bacteria, resulting in high concentrations of moisture and ammonia.
Dampness is dangerous for poultry joints. Over time, limping and falling-on-the-legs individuals appear in the flock. The mortality rate among young birds increases.
During the cold season, dampness increases the risk of chickens contracting colds. Ammonia vapors are hazardous to the respiratory tract, along with carbon dioxide and hydrogen sulfide.
When harmful fumes enter the respiratory system, hens' appetite decreases. As their bodies weaken, growth and egg production decline.
Ventilation removes harmful fumes and moisture from the coop. The birds receive fresh air that's beneficial for their development. During hot summers, the ventilation system cools the coop.
It is more pleasant for a poultry farmer to enter a dry, clean chicken coop with fresh air than to be inside a damp barn with eye-stinging ammonia.

What type of ventilation is appropriate for chicken coops?
Based on the air exchange method, there are three types of ventilation systems. Natural ventilation is an inexpensive option for DIY installation.
The utility network operates due to the difference in temperature and pressure, which leads to the creation of draft.
Natural ventilation can be easily achieved by cutting vents with dampers or laying PVC ducts. This option is suitable for a small barn housing up to 20 chickens.
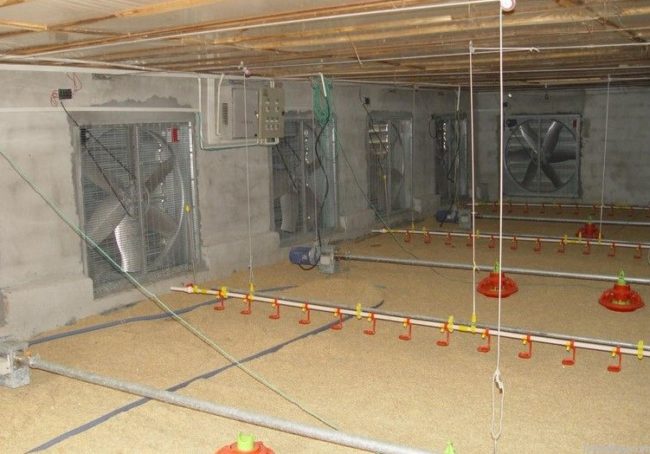
Mechanical – this is a duct ventilation with fans installed on the exhaust and supply air ducts.
Air exchange is forced and is independent of air temperature and pressure. The utility system is expensive and difficult to install on your own. Forced ventilation is recommended for farms with more than 50 hens.
Mixed – This is a combination of natural and mechanical ventilation. The fan is typically installed as an exhaust fan, while the air intake is natural.
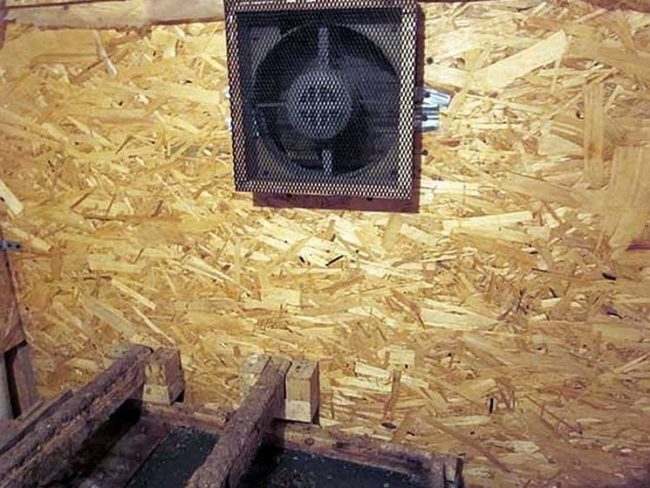
Depending on the design, utility lines can be ducted or ductless. In the latter case, the exhaust fan is simply installed in the chicken coop window.
The net is inexpensive and easy to make yourself. It's suitable for a coop containing 20 to 50 hens.
Features of winter ventilation of a chicken coop
In summer, the doors and windows of the coop are open. The chickens spend most of the day outside, allowing them to get plenty of fresh air.
As cold weather approaches, you need to think about what kind of ventilation you'll need in your chicken coop in winter to ensure your chickens have fresh air and don't increase heat loss.
Depending on the size of the poultry house and the number of birds, choose natural, mixed, or mechanical ventilation. Equip air ducts and vents with dampers so they can be closed during severe frosts.
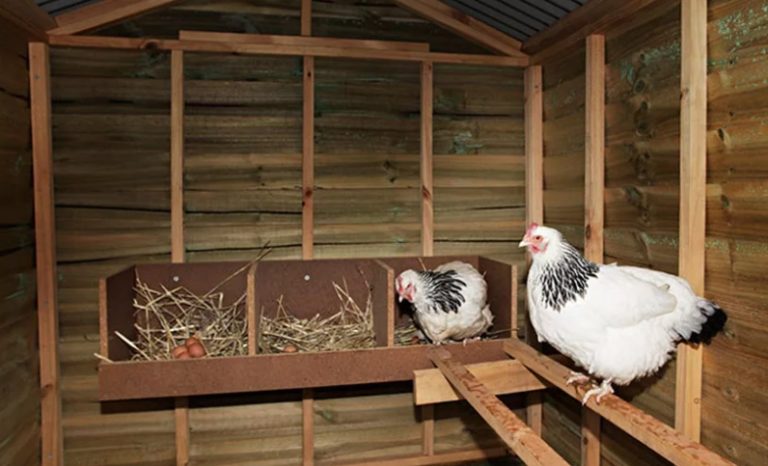
Install electric heaters to warm the air. Avoid creating air inlets near perches, feeders, and nests to prevent colds and frostbite in the birds.
Ventilation calculation
Leave complex calculations to engineers who design mechanical ventilation systems for farms and industrial poultry farms. Determine air exchange parameters for a domestic poultry house using a simple diagram.
To calculate the overall ventilation capacity, multiply the recommended air exchange rate by the live weight of the entire herd. Based on these calculations, select the ventilation equipment capacity.
Instructions for installing mixed ventilation in a chicken coop
In a mixed system, you can install a forced-air exhaust or intake vent yourself. If you carefully analyze the indoor atmosphere of the chicken coop, you'll notice a significant accumulation of moisture on the ceiling.
High concentrations of ammonia are also observed in the upper part of the shed. The pungent odor intensifies as one moves away from the floor and toward the ceiling.
A simple study reveals that a mechanical exhaust system is recommended to remove moisture and ammonia. Natural ventilation into the coop can be left as is.
A mechanical exhaust system consists of a common duct, a ventilation unit, and exhaust vents under the ceiling. To install it yourself, you'll need:
- centrifugal fan;
- 2 PVC tees;
- air valve diameter 110 mm;
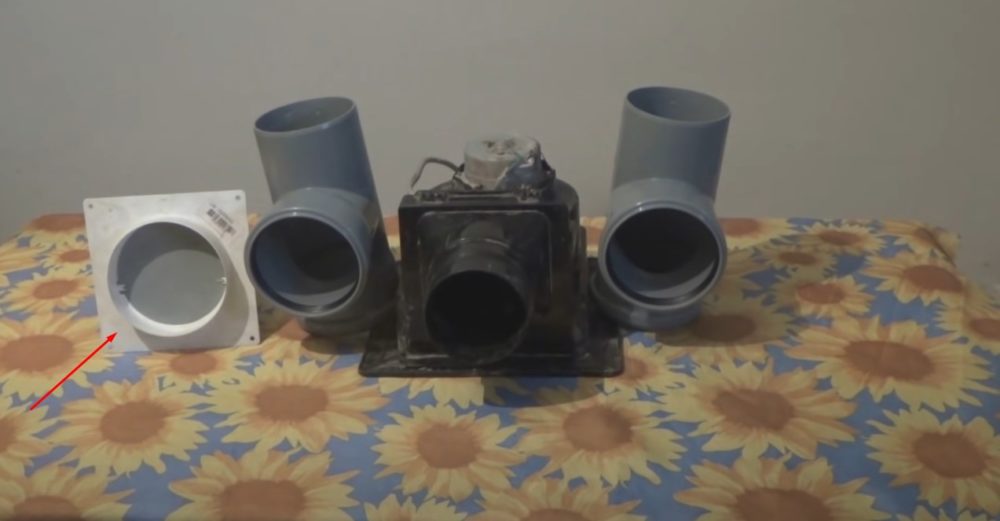
- 2 transitions 110 x 124 mm;

- 3 pipes with a diameter of 110 mm and a length of 150 mm;
- 3 plugs with a cross-section of 110 mm;
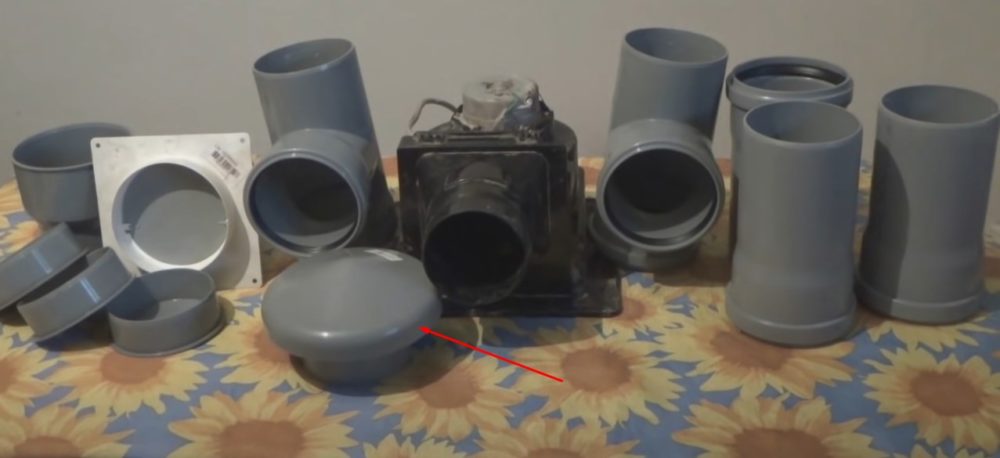
- a cap on an outdoor exhaust duct that acts as a deflector;
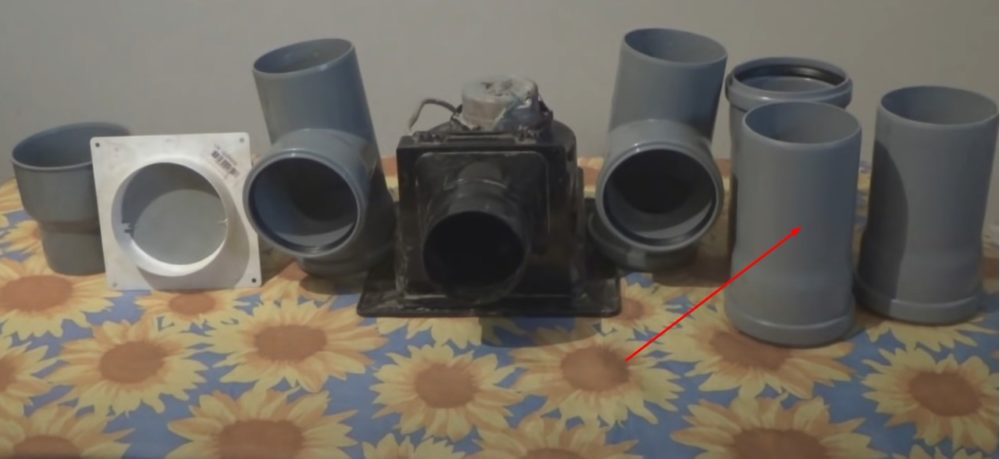
- clamps for fastening PVC ducts with a diameter of 110 mm (the number of fasteners depends on the length of the air duct);

- 2 pipes 110x500 mm and 110x1000 mm;
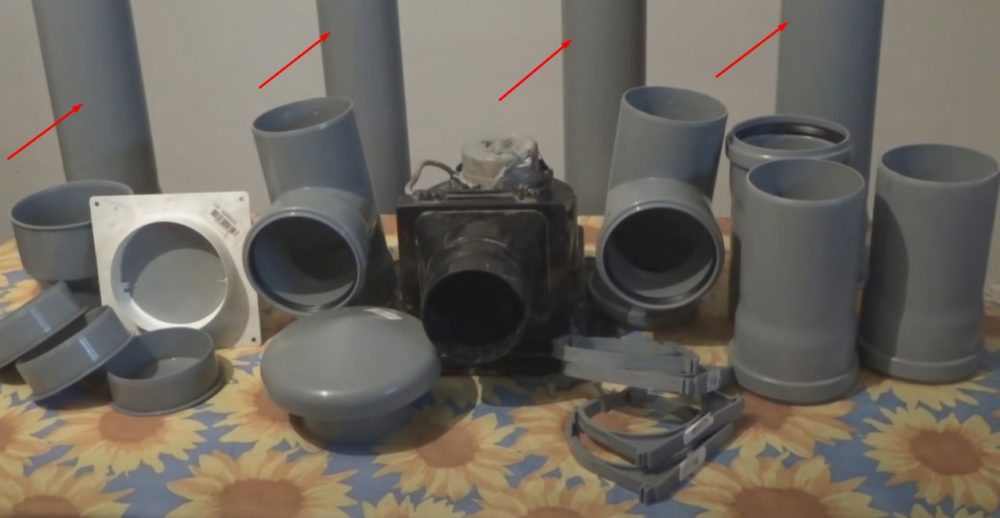
- coupling for connecting air ducts with a diameter of 110 mm;
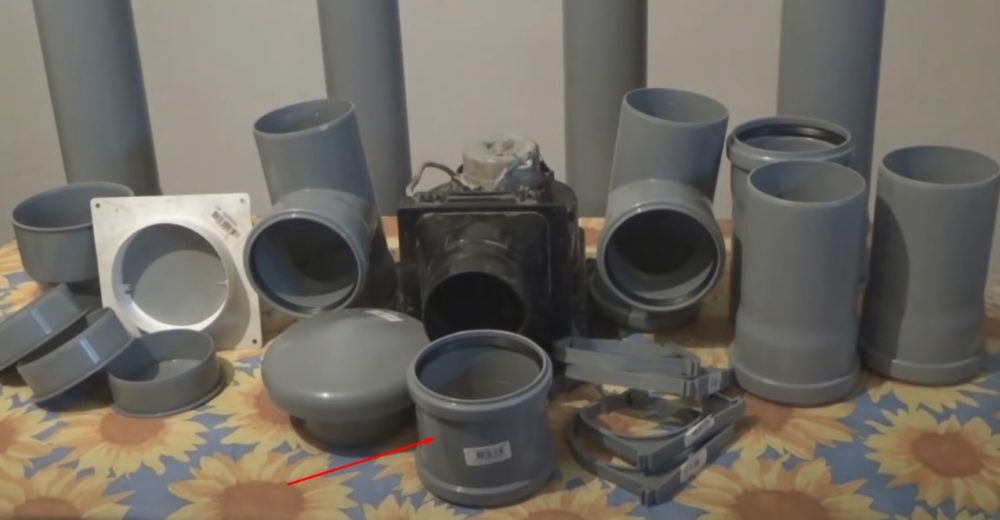
- thermostat and cable;

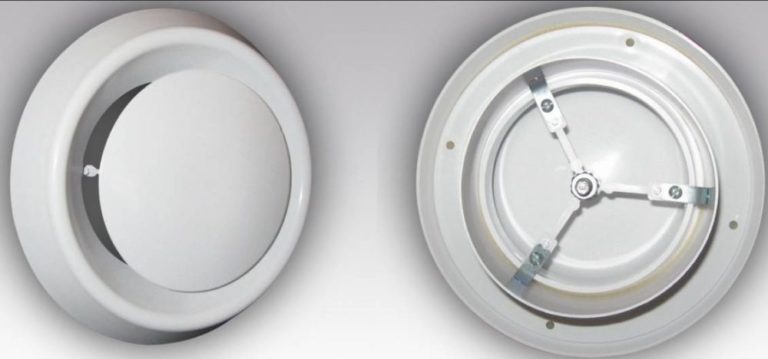
- exhaust anemostats (the quantity depends on the calculations of the ventilation scheme, but it is desirable to have at least 3 pieces).
During installation, you may need additional parts or pipes of different lengths. This depends on the size of the chicken coop. Basic tools include a grinder, screwdriver, and electric drill.
Let's take a closer look at how to ventilate a chicken coop with an exhaust fan:
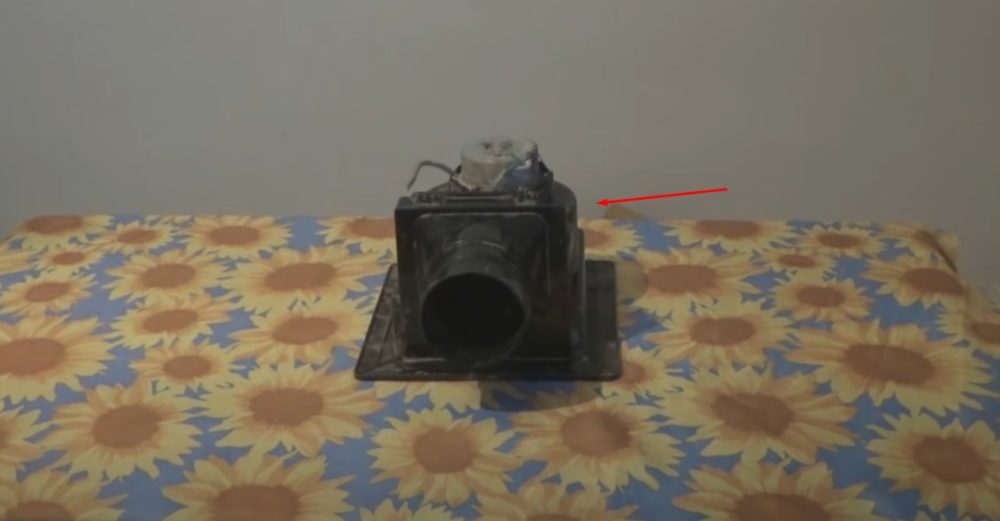
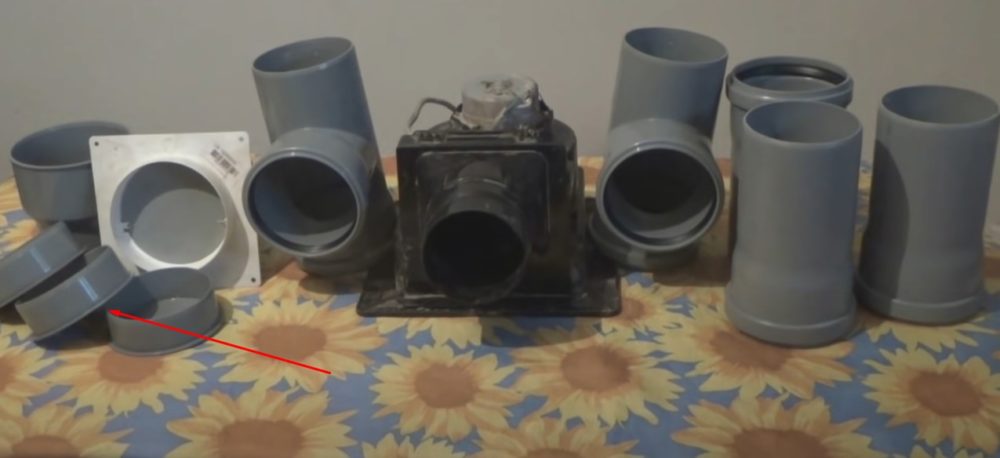
- To understand how the exhaust system works, first assemble a scaled-down version of the diagram on a table. Attach a PVC coupling to the outlet of the centrifugal exhaust fan.
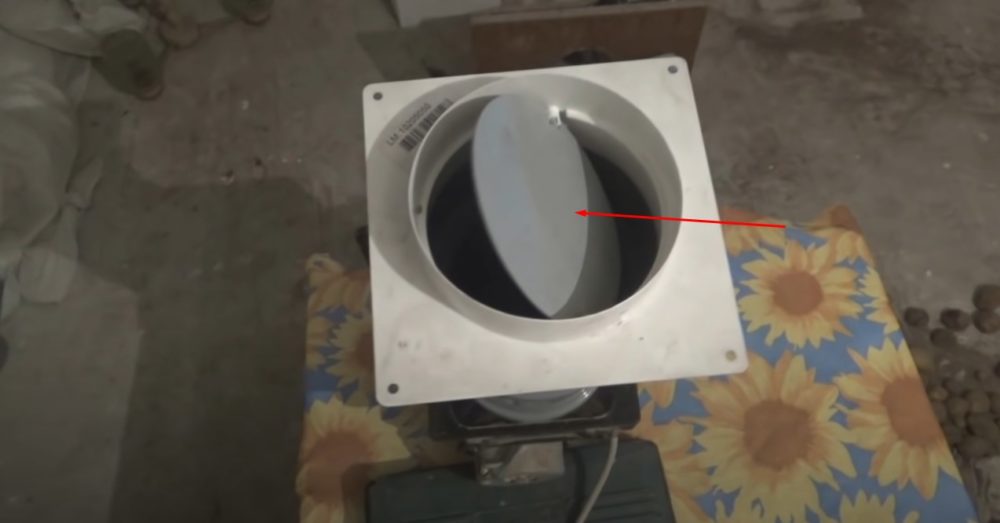
- Connect a 110 x 124 mm adapter with an air valve to the coupling.
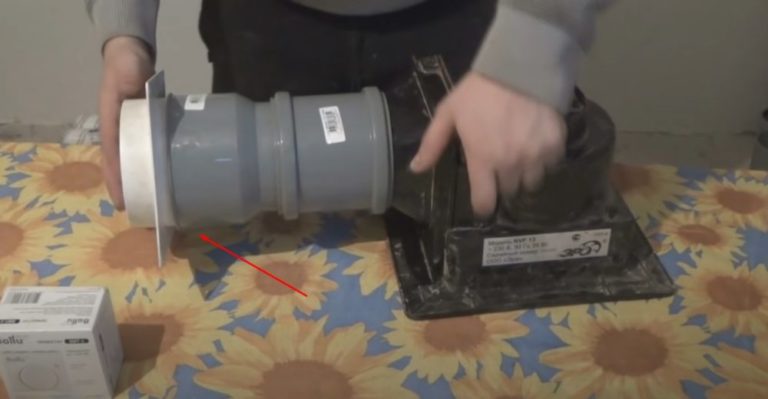
- Plug the fan into a power outlet and check the valve operation. The damper should open with air flow. When the fan is turned off, the damper will close automatically.
The air valve will prevent cold air from entering the chicken coop through the ventilation duct in winter.
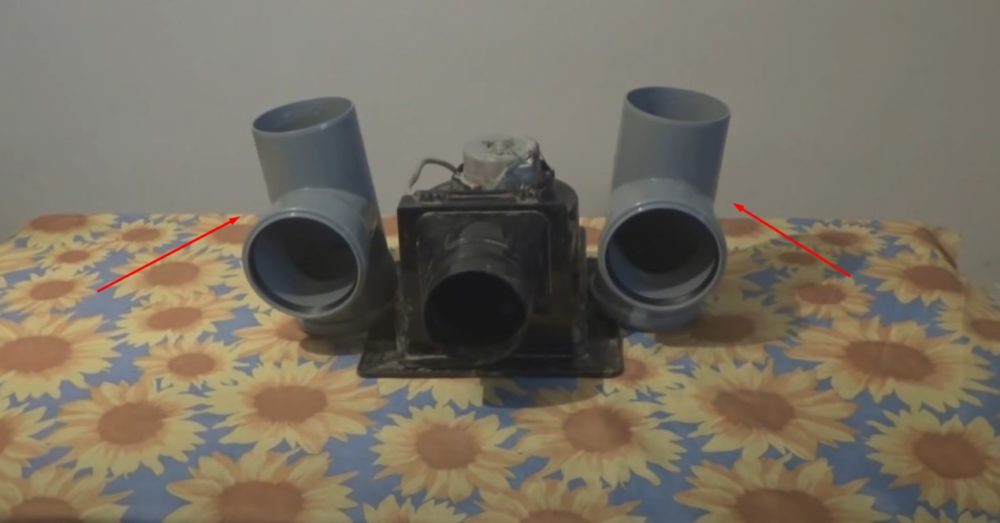
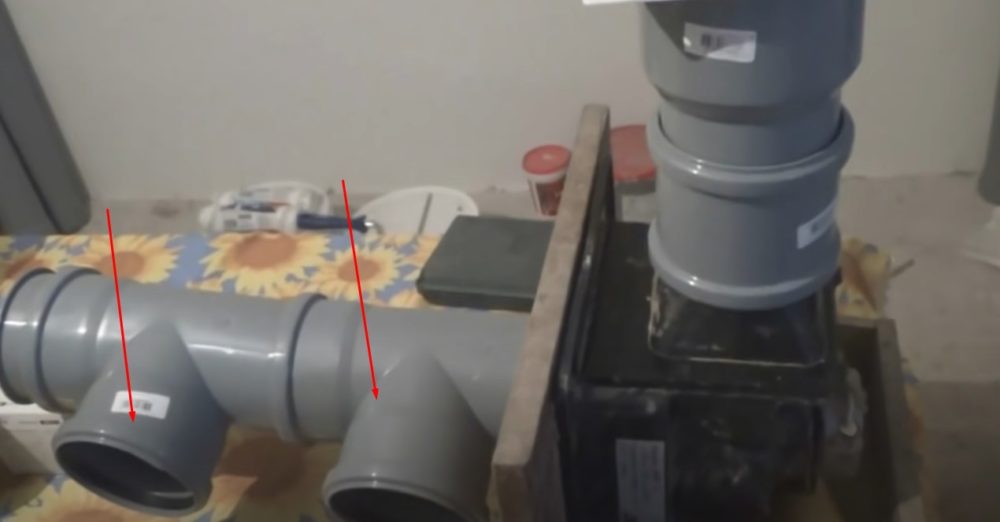
- To further test the system, assemble the input of a scaled-down version of the circuit. The installed valve with an adapter will be connected to a pipe that exits through the roof of the chicken coop and goes outside. Connect two tees in series to the input of the centrifugal fan.
Close the end hole on the straight section with a plug. Leave the side holes of the tees open. They will vent from the attic through the ceiling into the coop to capture stale air.
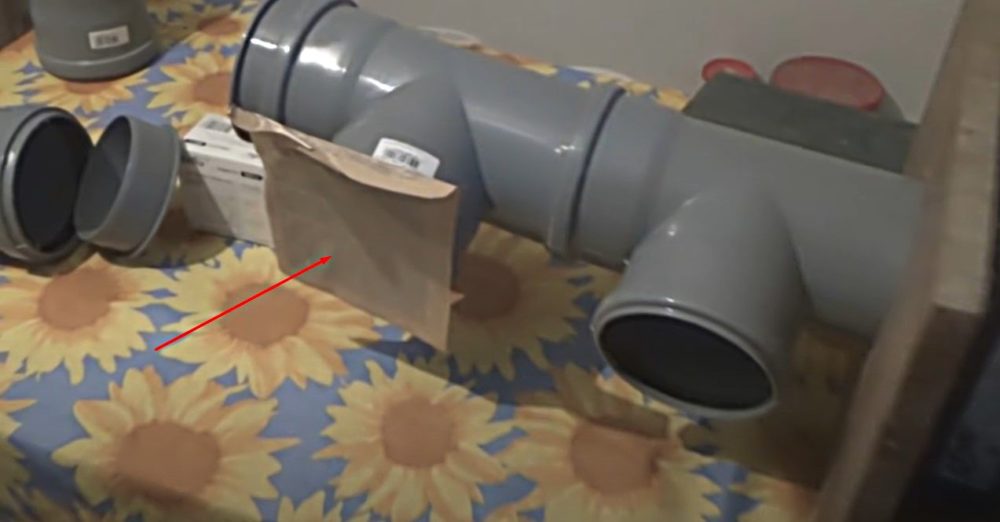
- Turn the fan back on and check for air suction through the side tee openings. Place a piece of paper against the opening. It should stick to the opening and be held in place by the air flow while the fan is running.
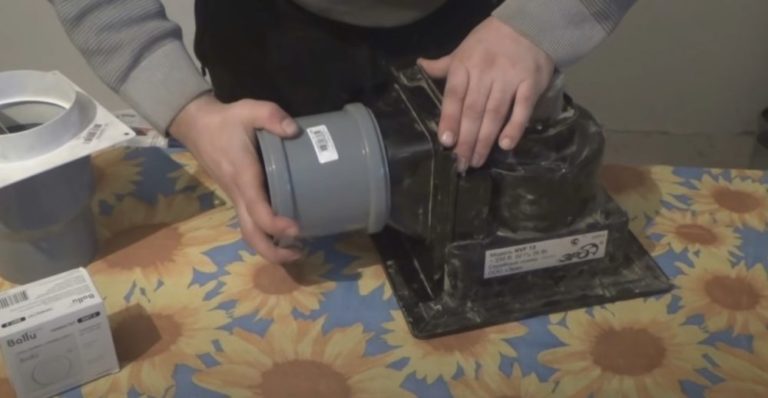
- After testing the system, begin assembling the circuit at actual dimensions. To prevent damage and fire, do not place the fan unprotected in the attic. Find a box for the electrical equipment or build one yourself from scrap plywood.
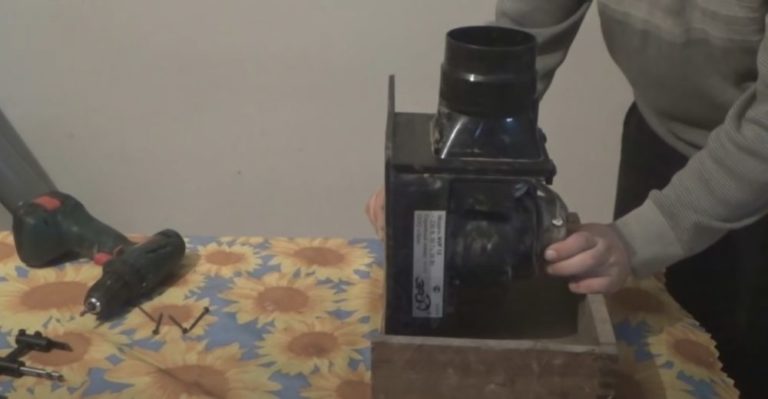
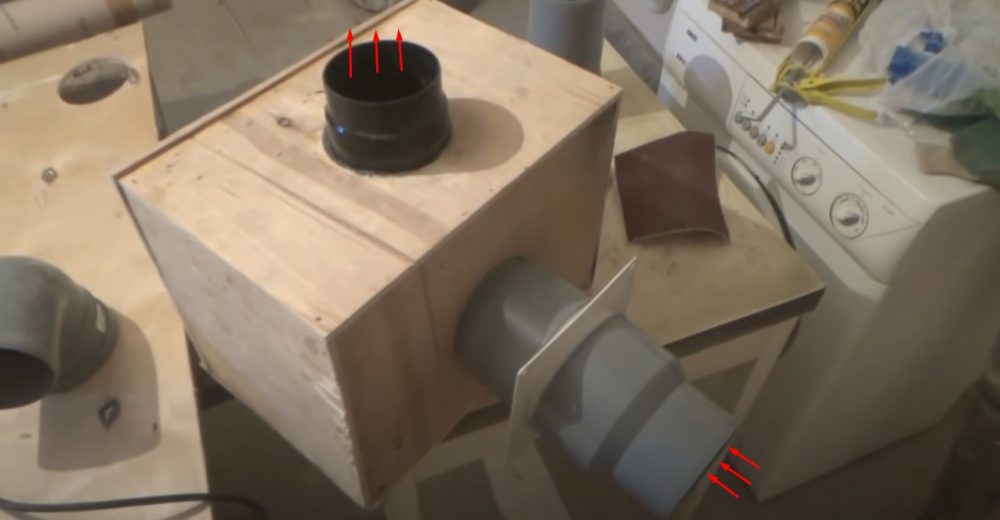
- Securely fasten the fan to the box. Seal the joints between the sides of the box with sealant. Route the PVC fittings through the cut holes. The outlet should be at the top and the inlet at the side.
- Begin installing the equipment in the coop's attic. First, use a drill with a hole saw to drill holes in the ceiling. Arrange the holes in a single row to reduce the number of turns.
Each bend creates ventilation resistance. Install a fan box in a row behind the last opening. Make sure the outlet is located in a convenient location for the exhaust duct.
A more efficient way to exit is through the roof. If you don't want to cut through the roofing, you can route the duct from the attic through the eaves.
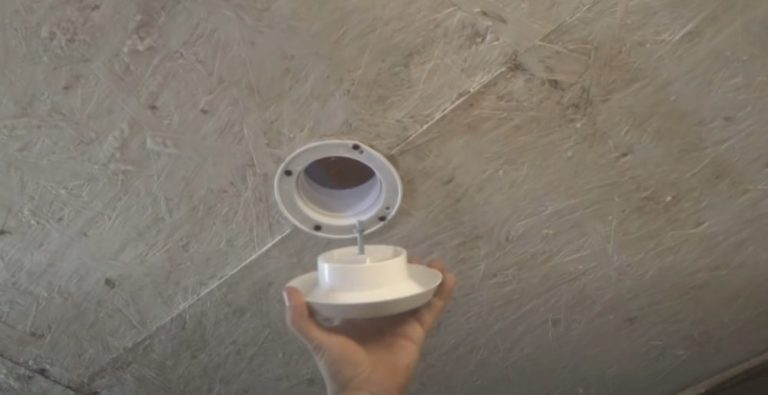
- Install exhaust air diffusers into the holes drilled in the ceiling. Secure the housing with silicone to prevent air leaks.
Convenience use of anemostats This is explained by the presence of a disc valve. By unscrewing or tightening it, you can regulate the amount of air passing through, which is convenient in winter for reducing heat loss.
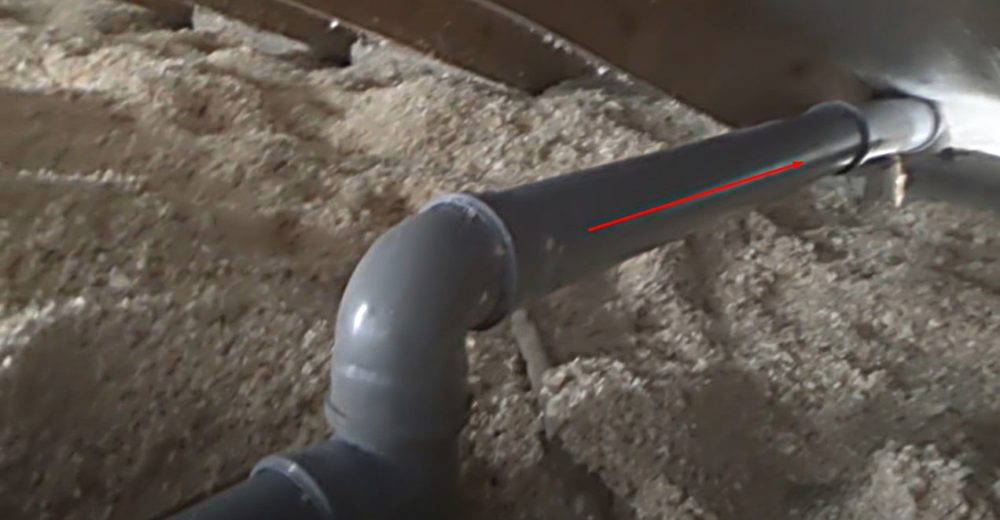
- From the attic, begin assembling the main air duct yourself, connecting it to each air diffuser. The PVC drainage fittings are 110 mm in diameter.
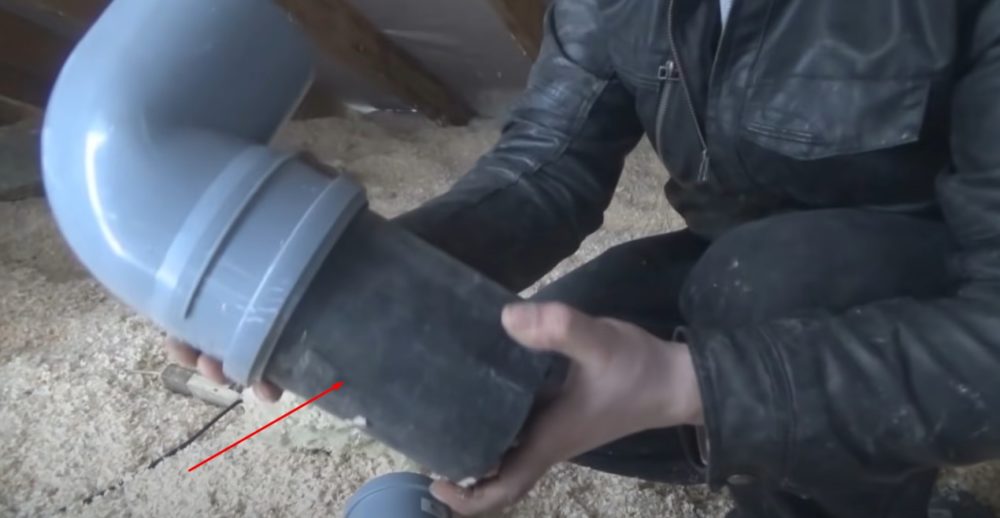
The anemostat spigot may have a 100 mm diameter. To ensure a tight connection between the two parts, it's also convenient to make your own adapters by cutting 100-150 mm long pieces from a 100 mm diameter HDPE plastic pipe.
It will enter the shaped sewer element from the inside and fit tightly onto the anemostat branch pipe from the outside.
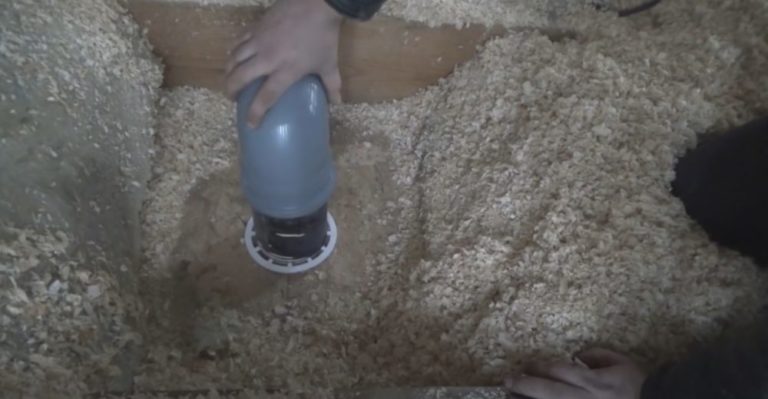
- Using homemade adapters, connect the fittings to the diffusers. It's easier to install a tee with a plug on the farthest opening from the fan.
When you need to increase the length of the air duct, you can remove the plug and add a pipe with an additional anemostat to the tee.
If you're confident in your calculations or the chicken coop's dimensions don't allow for an extension, install an elbow on the outermost, remote opening. Turn the elbow toward the other diffusers to connect them with a pipe.
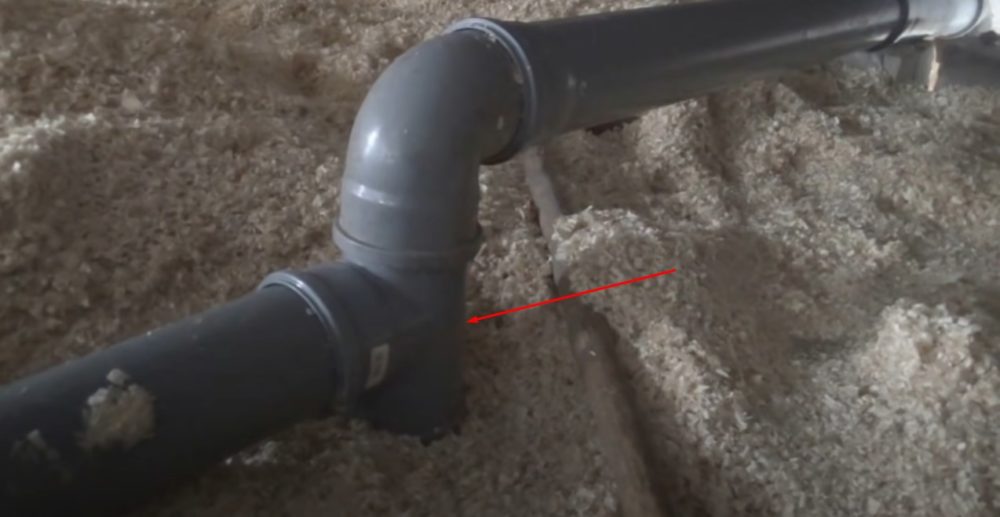
- Attach tees to each subsequent diffuser in the row using an adapter. Connect them with PVC pipe. This should create a straight duct with branches leading to the diffusers. Connect the free end of the duct to the centrifugal fan inlet in the box and connect it using a shaped adapter.
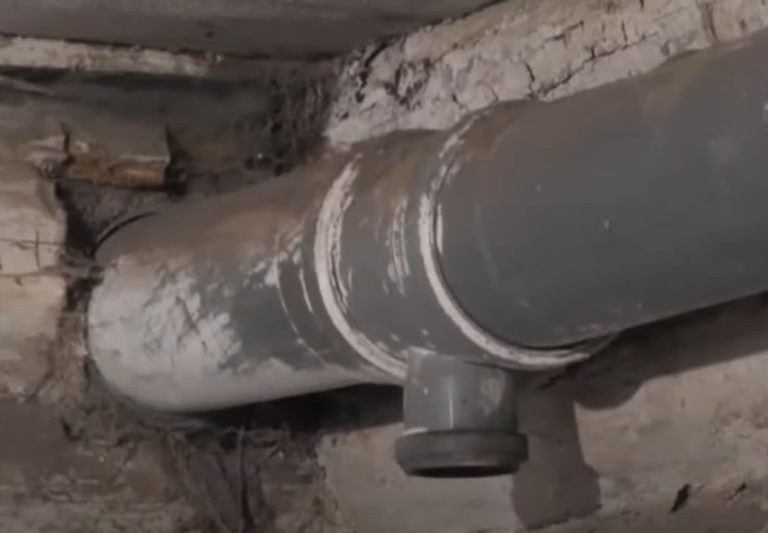
- Attach a condensate collection tank to the fan outlet using a pipe and a tee. Close the bottom opening with a plug. To make draining the condensate from the tee easier, install a 15 mm diameter water tap into the plug.
- From the top opening of the sump tee, extend the exhaust pipe to the outside. If you're making a horizontal outlet near the eaves, install the duct at a slight slope toward the outside.
To connect to the tee, use an elbow. If you decide to extend the pipe vertically through the roof, install a cap on the end to protect it from precipitation and debris.
Seal roof joints securely to prevent roof leaks. Use universal penetration fittings.
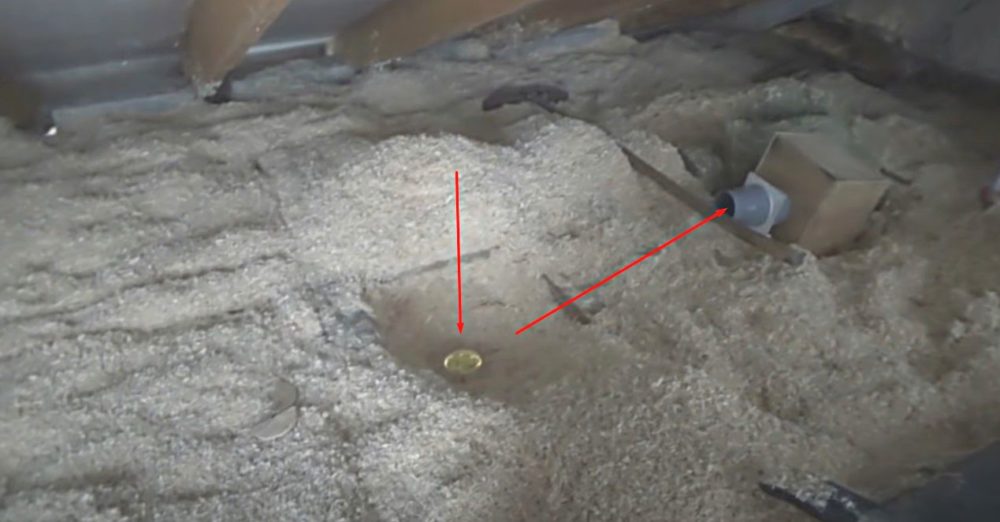
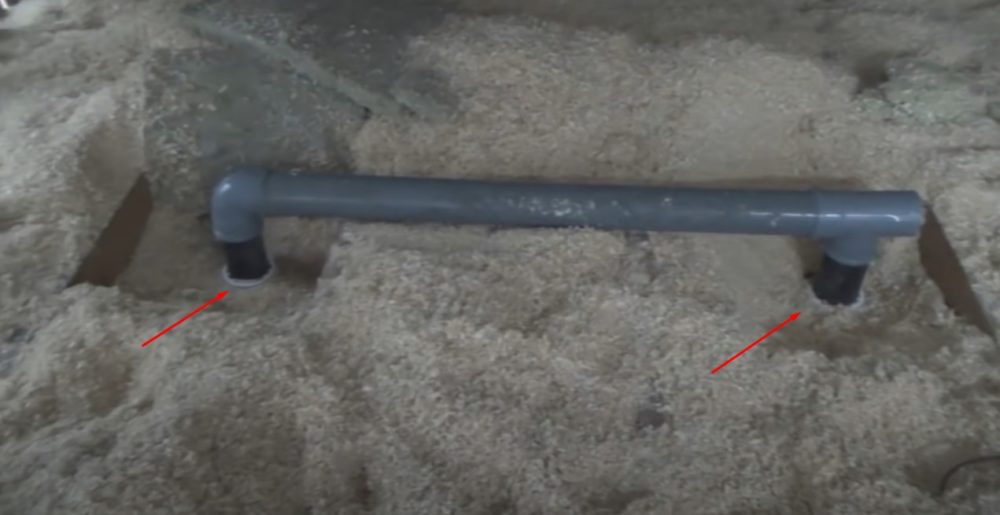
- Insulate the ventilation duct in the chicken coop attic. It's easiest to fill the duct with sawdust or wood shavings. Additionally, insulate the barn ceiling.
Run a cable to the fan and connect the wires. Run the wiring in a metal sleeve. Bring the other end of the cable into the coop through the hole in the ceiling to connect to the outlet.
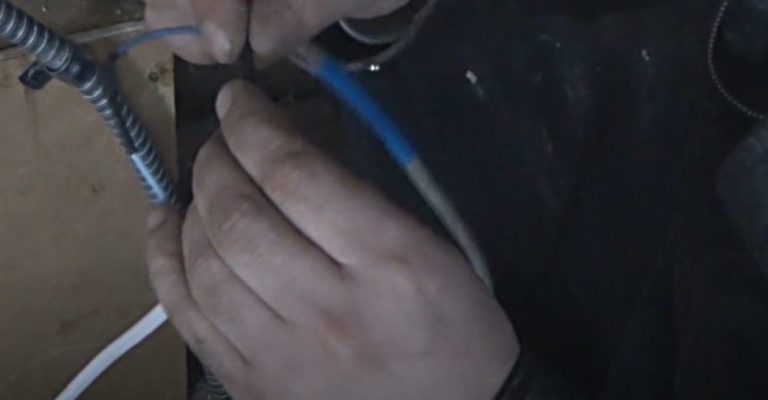
- In the chicken coop, cut the cable hanging from the ceiling to the required length to reach the outlet. Connect the plug to the wires. Connect the fan to the outlet using a thermostat with a timer. The device will automate the ventilation.
Check to see how well your homemade chicken coop ventilation works in a couple of weeks or a month.
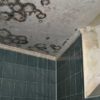
If the system is able to remove moisture and ammonia vapors, the barn will be dry and the manure odor will be faint. If the ventilation system doesn't completely remove dirty air, water droplets containing mold will form on the ceiling.
It's stuffy inside the chicken coop and hard to breathe because of high concentration of ammonia.
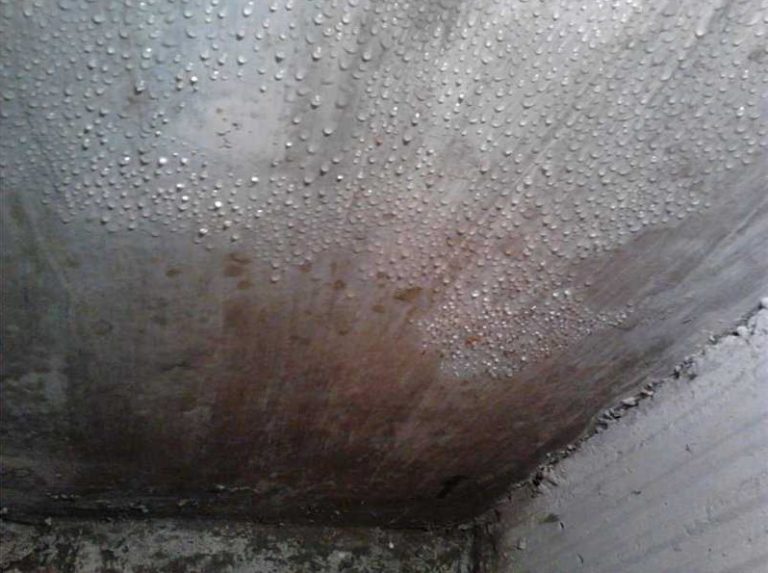
Condensation, ammonia, and mold on the coop ceiling indicate poor ventilation. The DIY utility system will need to be upgraded.
To improve ventilation performance, add air diffusers and install a more powerful centrifugal fan. The problem may be weak air flow. Install air intake windows with dampers on the lower part of the wall yourself.
Installation instructions for natural ventilation
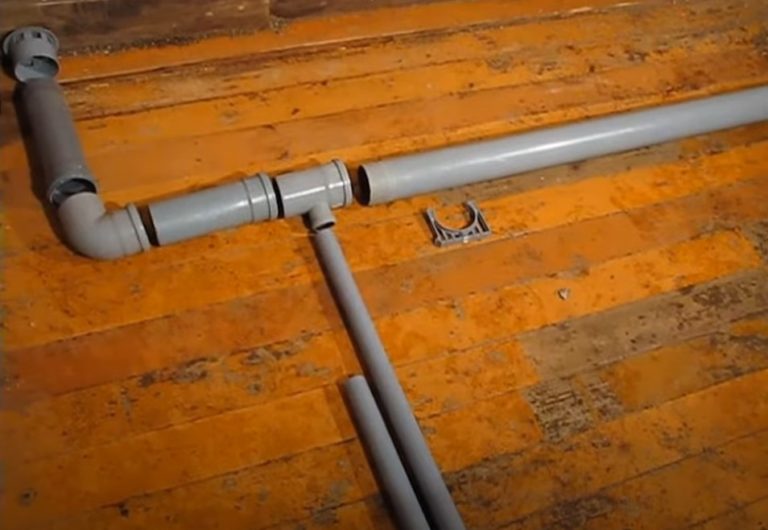
Let's take a closer look at how to properly create natural air exchange in a poultry house by assembling a DIY ventilation network from PVC ducts:
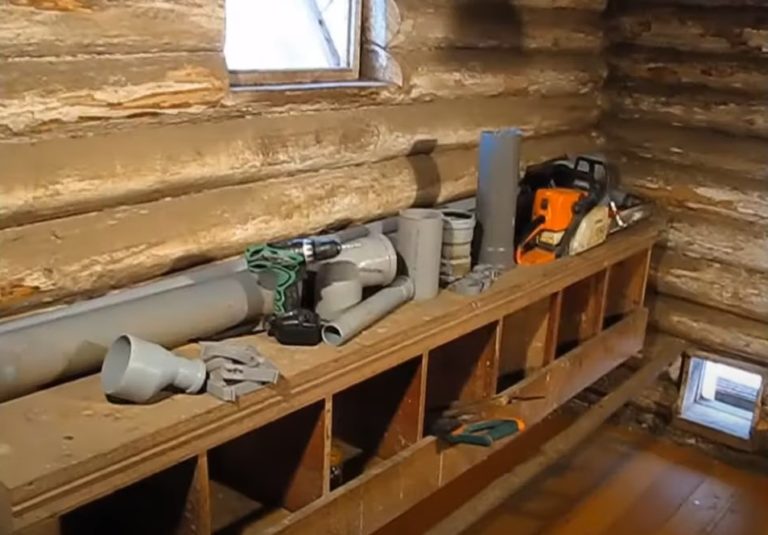
- For a simple exhaust system, prepare PVC sewer pipes and fittings. Make the main duct under the ceiling 110 mm in diameter.
To connect the pieces, use tees with 110 mm center holes and a 50 mm side outlet. Pipes with a diameter of 50 mm will extend from the connecting pieces to the floor.
A plug will be needed for the end of the duct in the shed. For the outside outlet, prepare an elbow, a 110 mm pipe, and a cap.
- In the chicken coop, determine the location of the duct's mounting and exit to the outside. Mark a spot on the top of the wall for the through-hole.
Place the main duct, made of 110 mm pipe, under the shed ceiling. First, assemble a diagram of the components on the floor, adjusting the elements to the actual size.
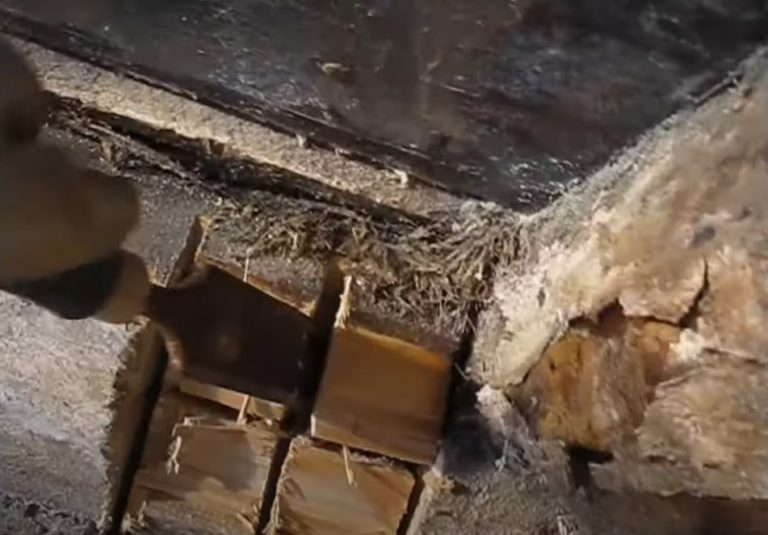
- Prepare an opening for the exhaust duct to exit to the outside. It's easy to cut a window in a wooden wall with a chainsaw. Use a sharp chain saw. Don't cut all the way through, but in sections.
Cut the pieces of wood with a chisel and hammer. Make the hole 1-2 cm larger than the pipe diameter to make it easier to fill any gaps with oakum.
- Trim the walls of the hole to remove any sharp wood splinters that could damage the PVC pipe. Route the exhaust duct from the coop to the outside through the prepared window.
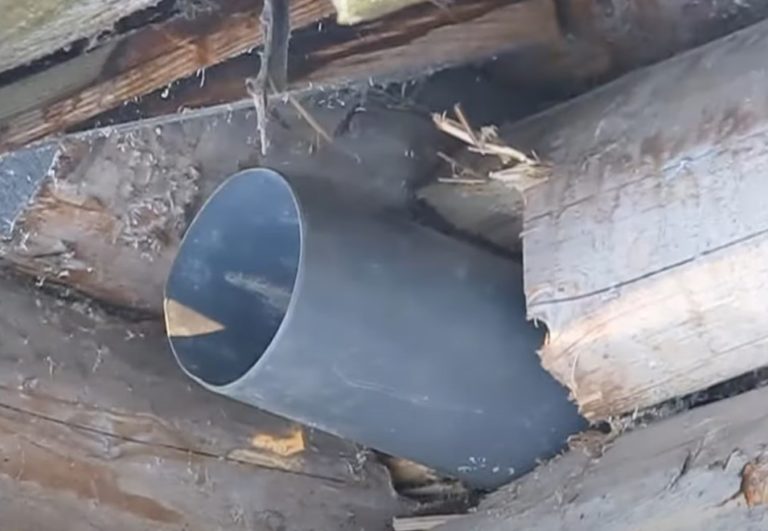
- There will be gaps between the walls of the hole and the pipe. Fill the gaps with oakum around the perimeter, pushing it in with a chisel or other tool.
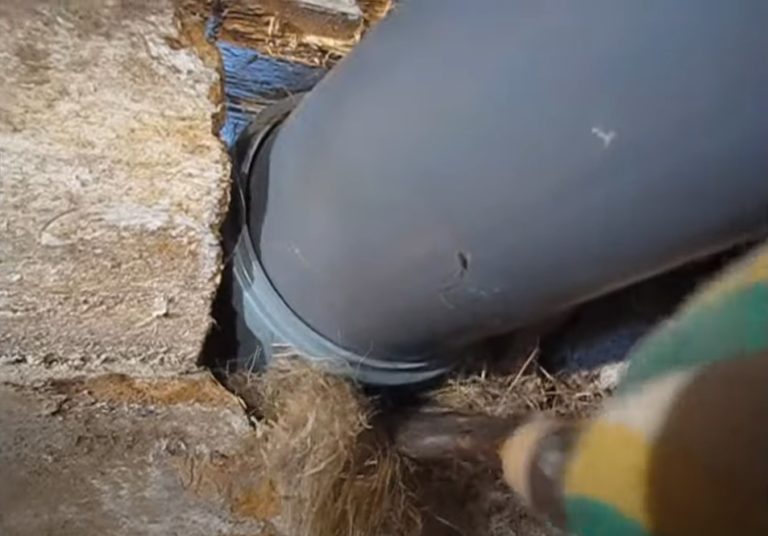
- Start assembling the exhaust duct inside the coop using the pipe leading outside. Secure the ducts to the wall with clamps. From the side openings of the tees, make 50 mm pipe runs, leaving a 300 mm gap from the floor.
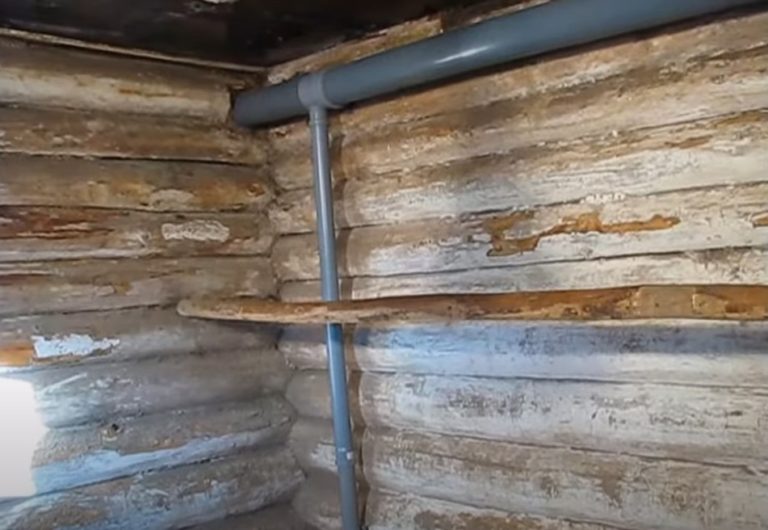
- Attach an elbow to the pipe coming out of the wall on the street side. Point the opening upward. Place the pipe and cap onto the elbow.
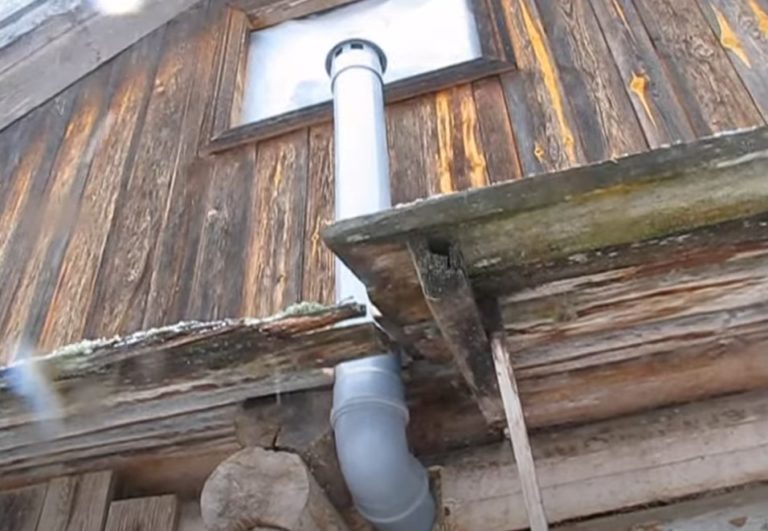
Natural ventilation performance is variable and depends on weather conditions. In summer, the outdoor riser does not require insulation. Condensation does not form inside the pipe at above-zero temperatures.
Insulate the outdoor air duct during the winter season. mineral wool or foamed foil-clad polyethyleneDue to the lack of thermal insulation, condensation forms where warm and cold air mix. Ice builds up inside the pipe, blocking the exhaust duct.
Assess the effectiveness of natural ventilation based on the atmosphere in the coop. If you observe dampness and ammonia buildup, the utility system requires adjustment.
To increase draft, add height to the outdoor riser. Draft will improve if the pipe extends at least 500 mm above the ridge. If 50 mm diameter ducts lowered to the floor aren't working in your case, try removing them.
Leave some openings on the main duct's tees under the ceiling. At the bottom of the wall, create your own supply vents with dampers to regulate the air flow.
Natural draft should improve, but don't overdo it. Chickens don't like drafts and are prone to colds.
Video editing
Answers to current questions
Provide air inlets at the bottom of the wall using windows with dampers. For the exhaust, hang a 110 mm diameter PVC pipe with tees from the ceiling, leaving open side openings for stale air exhaust. From the outside, route the exhaust duct vertically through an elbow above the roof ridge, and cover the opening with a deflector.
Chicken coop ventilation should be combined with supply and exhaust. In a small barn for 10-15 chickens, natural ventilation is sufficient. Larger farms require mixed or mechanical ventilation.
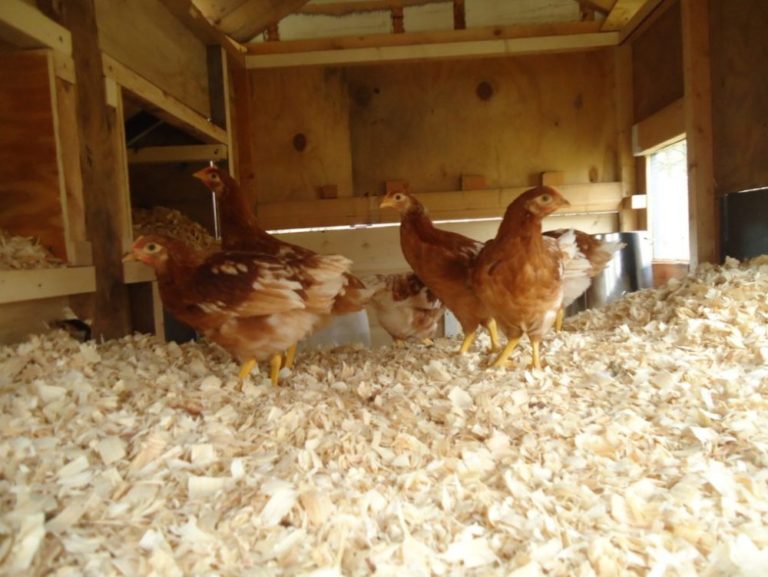
Ventilation removes moisture from the chicken coop. Dampness indicates inadequate air exchange. Increase ventilation and change the litter more frequently.
The recommended airflow rate per 1 kg of live weight is 4 m³/hour. The minimum airflow rate is 1.12 m³/hour. To calculate the total ventilation capacity, multiply the recommended air exchange rate by the live weight of all hens.
To eliminate ammonia odor, keep the coop litter dry. Improve ventilation. Clean the floor of droppings more frequently or use deep litter with fermentation bacteria.


