Homeowners are increasingly opting for underfloor heating systems in lieu of standard radiators. These systems consist of a number of components, but the most important is the distribution comb. Without it, the system will not function properly and maintain a comfortable temperature.
By reading our article, you'll learn about the different types of manifolds, their design, and operating principles. Using this information, you can assemble and install a mixing and distribution unit for underfloor heating yourself.
- Purpose of a comb for underfloor heating
- Device
- The operating principle of a two-way valve
- The operating principle of a three-way valve
- Manufacturing companies
- Selecting a comb
- Assembly of a factory comb – instructions
- Making a comb for underfloor heating with your own hands
- Installation of the device
- How to adjust the comb
- Temperature regulation
- Adjusting the coolant flow rate
Purpose of a comb for underfloor heating
A heated floor comb is not a standalone unit, but a set of components that form part of a manifold assembly. It is responsible for the operation of the heated floor.
Most often, a warm water floor includes several circuits., which have different lengths, require different amounts of coolant. Therefore, without a distribution unit, the device will not function properly.
Without a manifold, hot water will flow directly from the boiler into the floor pipes, with most of it flowing into the smallest loop. As a result, the smaller loop will overheat, and the larger one will be underheated.
If the coolant is supplied by the central heating system, its temperature rises above that required for underfloor heating. If it enters the circuits undiluted with chilled water, overheating is guaranteed.
For this, a mixing unit is required, where the liquid is mixed to the required degree.
The device allows you to adjust the amount of coolant supplied to each loop and its heating level. This helps ensure the required temperature level.
Device
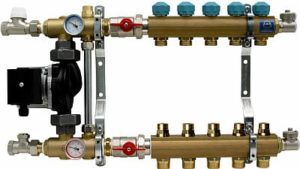
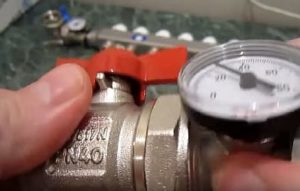
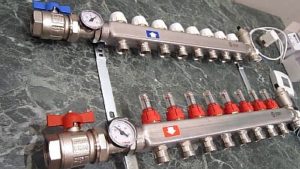
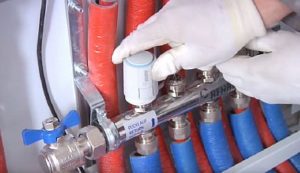
A hydronic underfloor heating manifold consists of two horizontal pipes—supply and return—with outlets for connecting the floor branches. The coolant is supplied from the ends.
Valves are located on one pipe to adjust the amount of fluid entering the loops. The comb can be adjusted manually or automatically using servo drives. Flow meter bulbs are located on the branches of the second manifold to monitor the coolant volume.
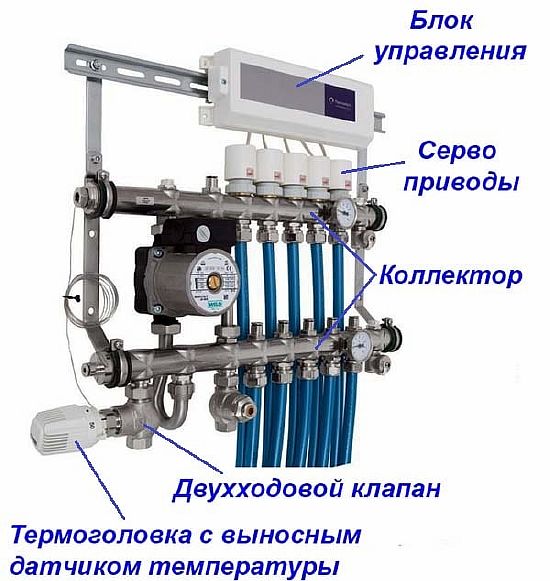
A comb for heated floors is:
- feed and outlet pipe;
- shut-off valve at the inlet and outlet;
- fasteners for assembly;
- thermostat;
- coolant drain tap;
- air bleed valve;
- valve for supplying water from a source;
- mixing unit;
- pump.
The collector is attached to the wall using metal brackets.
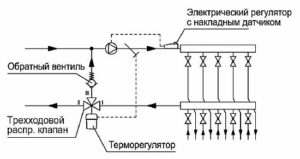
The operating principle of a two-way valve
When using a two-way valve connection diagram for underfloor heating, the manifold is equipped with a temperature sensor located on the return line. The valve can be in either an open or closed position, depending on the valve stem controlled by the thermostatic head.
The operating principle of the device is determined by the opening of the valve, resulting in the flow of heated liquid from the boiler into the comb.
There, it is diluted with the cooled coolant and then directed into the supply pipe. At this point, a thermometer measures the liquid's temperature level; if it is below the required level, the stem remains open.
Once the desired temperature is reached, it closes, stopping the hot water flow. As the underfloor heating cools, the thermostatic valve lifts the plunger, thereby opening and resuming the flow.
A two-way valve is reliable, and the risk of failure of the shut-off element is virtually zero, minimizing the risk of excess heated fluid entering the underfloor heating system. However, it's worth noting that the control process—smoothness and precision—is inferior to that of a three-way valve.
A manifold with a two-way valve can heat a room with a limited area—no more than 200 m². The device is not suitable for heating larger rooms.
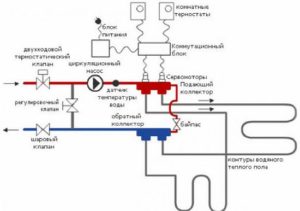
The operating principle of a three-way valve
A three-way valve differs from a two-way valve in that it has three outlets instead of two. One is connected to the supply valve, another to the outlet manifold, and the third to the return line containing cooled water.
Let's look at how the comb works:
- At the start, the mixing unit is closed, and the supply valve from the heat source is open. The heated coolant flows into the manifold.
- The sensor signals when the temperature rises. The valve stem moves, partially closing the hot water supply and opening the mixing line. The cooled coolant is then mixed with the heated coolant.
- The water temperature level has returned to normal - the valve remains in this position.
- After passing through the loops several times, the liquid cools below normal, and the sensor alerts you. The mixing line closes, the hot water supply is fully opened, and the cycle repeats.
Mixing of the coolant occurs not in the comb, as with a two-way device, but in the valve itself.
This scheme is more accurate and the adjustment process is much smoother.It can heat a large room—from 150 m2—but the element is less reliable and frequently fails. This can lead to excessive hot coolant flow into the pipeline, which can damage it.
Manufacturing companies
Various countries and companies produce these devices. The highest-quality devices come from European manufacturers, but their prices are very high—ranging from $1,000 to $1,200. Chinese manufacturers' products are inexpensive, but they don't last long. However, there are companies that produce high-quality models at affordable prices.
List of manufacturers of underfloor heating combs to consider when choosing a distribution unit:
- Millennium — the Chinese-made comb is functional and affordable.
- TIM (China) — a manifold with flow meters for underfloor heating. A high-quality, reliable product manufactured on European-class equipment.
- Oventrop Multidis — stainless steel distribution structure with forced circulation, ensuring a long service life. Country of origin: Germany.
- Stout — an Italian-made device with flow meters. Reliable, made of high-quality materials.
- Valtec (Italy) — nickel-plated brass manifold. The outlet comb is equipped with valves to control the coolant flow.
Selecting a comb
When choosing a comb, you need to know the need for its functional purpose and performance; it must have a reserve so that it can withstand sudden pressure changes.
In addition, it is necessary to take into account:
- Material: Brass, plastic, and stainless steel are available. A plastic manifold is inexpensive, but it's not durable. A welded stainless steel manifold is durable but susceptible to corrosion. Brass manifolds are the highest quality and most reliable, but they are expensive.
- The number of valves needed to connect the floor circuits is best determined by installing a manifold with a number of outlets equal to the number of floor circuits. If there are more outlets, the excess will have to be sealed.
- Level of automation – equipment now connects to thermostats and programmable controllers. These simplify the process of adjusting and monitoring the temperature and flow of the coolant.
When purchasing a distribution unit, it's best to choose a product from a reputable company, even if the price is higher—it will pay for itself over time. Proper warranty documentation is essential.
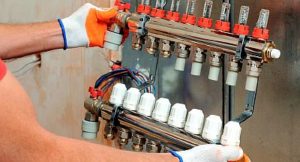
Assembly of a factory comb – instructions
Most often, when installing underfloor heating, a brass factory model or a stainless steel one is used.
Let's take a step-by-step look at how to assemble the comb:
- The equipment is unpacked and checked for integrity and completeness.

- All the parts are laid out on the floor one by one, just as they will be assembled.
- Small elements are assembled - a thermometer and shut-off valves supplying water from the source to the comb.
- Small elements are connected to the collector.

- The comb with small elements is fixed to the wall (we have described the detailed installation process below).
- A two- or three-way valve, pumping equipment, and other components are installed. The system is connected to a boiler or other hot water source.
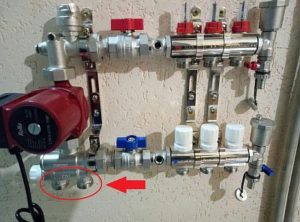
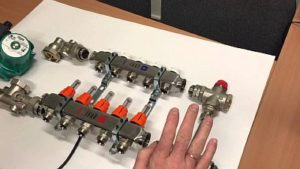
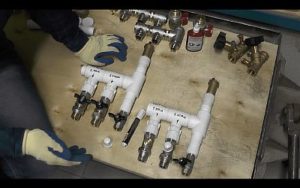
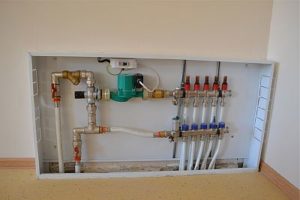
This is what the assembled comb for underfloor heating with a pump looks like; now you can connect the pipes to the taps.
Making a comb for underfloor heating with your own hands
You can assemble the device yourself from individual components—an alternative to a factory-made model. Components—temperature sensors, shutoff valves, and other parts—are purchased separately, and polypropylene pipe is required to construct the supply and return manifolds.
Step by step, the assembly of the distribution unit looks like this:
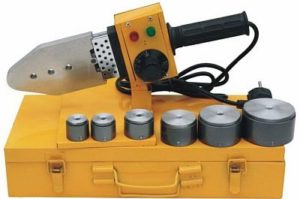
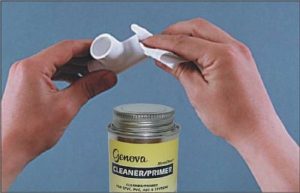
- Prepare the material—polypropylene tubing and tees designed for high-temperature operation, as well as fittings. Tools include scissors for working with polypropylene pipes, a soldering iron with attachments (you can use them to solder the parts together), and a tape measure. Wear protective gloves when using the soldering iron.
- A soldering iron is placed to heat up, and at the same time the edges of the pipe and tee are cleaned and degreased - this will ensure a high-quality soldering.
- The inner side of the fitting is heated by placing it on the soldering iron nozzle.The polypropylene pipe is heated from the outside.
- The pipe is connected to the tee without twisting.
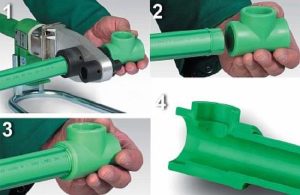
- The pipe is cut off, leaving a small piece to connect another tee, which is installed in the same way.
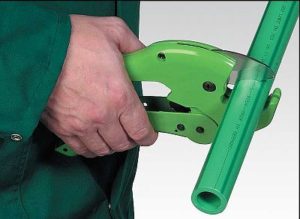
- Couplings are connected to the tee branches to connect floor hoses, shut-off valves and an air vent.
At this point, the process of assembling the homemade comb is complete; you can move on to connecting the underfloor heating loops to the manifold.
If you want to know more details, To learn how to make a manifold yourself, we suggest you read this article..
Installation of the device
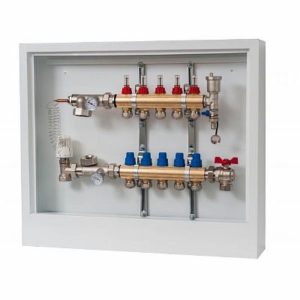
Typically, this structure is mounted in the middle of the wall, but closer to the floor. It's best to install the manifold assembly in a metal box with holes drilled in it for the pipe to exit.
A mandatory requirement when installing a comb for underfloor heating is the ability to bleed air from the heating system; this will simplify the repair process.
After the comb is assembled, it is secured in place. The process is as follows:
- The bracket used to secure the comb to the wall is unpacked and checked for completeness.
- The collectors are fixed to the bracket by placing them on a large bracket and securing them with a small one on top.
- Recesses are drilled in the wall, and a manifold is installed in this place along with a thermostat, shut-off valves, and valves for draining water and releasing air.
After this, the remaining elements are connected: two- or three-way control valves, a pump and other components.
How to adjust the comb
Once the manifold has been installed and the underfloor heating pipes have been connected to it, you can begin regulating the temperature level and coolant flow rate for each loop.
Temperature regulation
The temperature control of the floor surface can be adjusted automatically (if a servo drive is present) or manually.
The servo-driven system operates: thermostats located in the room detect the temperature and transmit it to the control unit. Depending on the heating level, the servo-drive opens or closes the valves on the manifold. This controls the heating level of the underfloor heating.
Manual adjustment is a series of actions:
- the bypass valve is set to a maximum of 0.6 bar;
- the position of the balancing valve is calculated - for this, the temperature of the water at the inlet and outlet is used;
- The pumping equipment is adjusted - it is possible to set the minimum flow rate while slowly increasing the speed;
- The branch is balanced by fully opening the node and then smoothly closing it in the desired position.
This action is carried out with each contour.
Adjusting the coolant flow rate
Regulating the coolant flow is a longer, more complex process, as each circuit has its own length. It consists of:
- removing the cap from the tap of one circuit;

- closing the valve using a special Allen key until it stops;
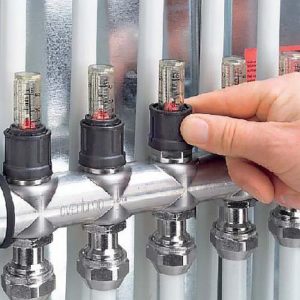
- determining and setting the minimum number of revolutions for a given branch;
- placing the protective cap in place.
This action is carried out for each loop separately, after assembling the comb.
If you decide to install underfloor heating in your apartment or house instead of a radiator, you need to choose the right model carefully. If you're unsure of how to assemble the unit yourself, it's better to purchase a factory-assembled unit with automatic controls. This won't be cheap, but it will guarantee high-quality operation.


