Many people try to expand the usable space of their apartment by using their balcony. In warmer climates, they even remove the door, combining the loggia with the living space.
However, simple insulation is not enough to ensure a comfortable temperature, so it is recommended to install underfloor heating on the loggia. This will help maintain an optimal microclimate and use the additional space for a relaxation area, dining room, or study.
In this article, we'll look at the types of heating systems that are suitable for balconies, their pros and cons, and how to install them yourself. We'll also describe ways to retain heat on your balcony by insulating the walls, ceiling, or floor.
- What type of heated floor is best to use on a balcony?
- Water floor - its characteristics
- Advantages and disadvantages
- Installation
- Heating mats and their types
- Pros and cons
- Installation
- Heating electric cable
- Installation
- Infrared heated floor
- Advantages and disadvantages
- Installation
- Mounting a temperature sensor
- Insulation of the balcony floor
- Insulation with expanded clay
- Styrofoam
- Extruded polystyrene foam
- Insulation of walls and ceilings
- Mineral wool
- Styrofoam
- Expanded polystyrene
- Features of operation
What type of heated floor is best to use on a balcony?
What type of underfloor heating is best for a balcony or loggia? This is a question many owners of these spaces ask. There are different types of underfloor heating—water, cable, and infrared film.
- Water is the most expensive device, consisting of pipes, it is often mounted in a screed.
- Electric cable—in this case, the cable acts as the heating element. The "pie" is also filled with concrete.
- Infrared film - heating is produced by carbon plates that emit ultraviolet waves.
A balcony is a protruding slab that can't support heavy loads, so a heavy hydronic structure isn't suitable. Installing electric underfloor heating under a concrete screed on a balcony is also not recommended. Infrared film is considered the most suitable option; it's lightweight and easy to install.
In loggias, a water or electric model under a screed can be considered if the load on the slab is acceptable for the specific case. To do this, it is necessary to calculate the load level in advance.
Electrical transformer substation on the wall? Is it possible or not, what type to choose and what installation to do.
To determine which heated floor is best to choose, we will take a detailed look at each model.
Water floor - its characteristics
Water floor — a type of heating system. It consists of pipes with a circulating coolant inside. This can be antifreeze or water. The heating elements are arranged in a "snake" or "snail" pattern.
The floor "pie" consists of a base, a layer of hydro and thermal insulation, pipes, a concrete screed, and a finishing coating.
Advantages and disadvantages
Despite the significant installation costs during operation, this type of flooring is the most economical, providing excellent heating for the room and not taking up useful space.
It connects to the central heating (but this requires permission, which takes time and money), or is connected to an autonomous source.
However, since the hydrofloor is usually poured with screed during construction, it is not recommended for installation on a balcony due to its heavy weight. Also, adjusting the entire system in such a space is difficult.
Due to pressure surges in the pipeline, installing a pump is required, which is quite complex. Another disadvantage of water-based systems is the risk of leaks, as it's difficult to find the cause and fix it in such conditions.
A disadvantage of the system, if connected to a common riser, is that it cannot be turned on during cold weather. You'll have to wait for the building's main heating to come on or use a cold room.
Installation
Although it's not recommended to install a water-heated floor on a balcony, it's possible to install one on a loggia. Unlike a balcony, a loggia is equipped with two supports underneath, making the structure capable of supporting a heavier load.
Watch the video on how to connect to central heating.
Before work, you need to stock up on materials, tools, and also develop a layout scheme for the heating elements.
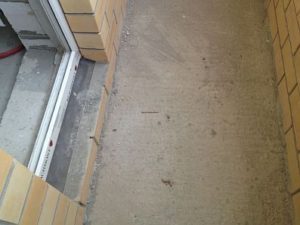
The reinforced concrete slab must be level, without any holes or protrusions. If there are any uneven surfaces, the installation process should begin with this.
Step-by-step installation of water heating with your own hands looks like this:
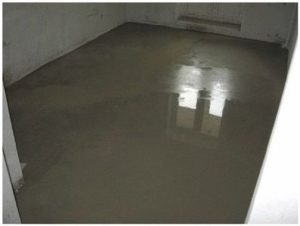
- A thin leveling screed is poured.
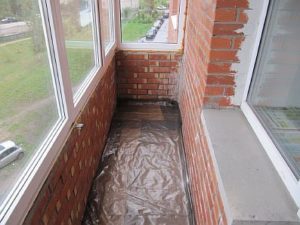
- A layer of waterproofing (technical polyethylene) is laid; it must be laid with an overlap on the walls.
- Thermal insulation is installed - extruded polystyrene foam boards 30 - 50 mm.
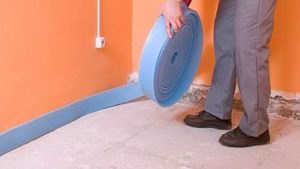
- A damper tape is glued around the perimeter of the loggia - it will compensate for the temperature expansion of the screed.
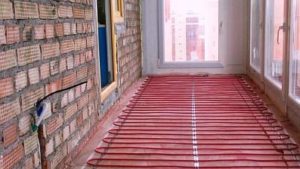
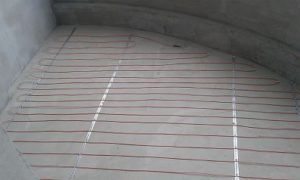
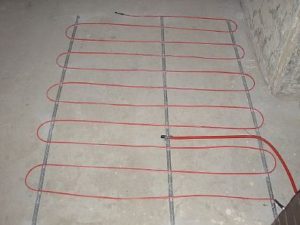
- The pipes are laid out according to the planned layout, but a "snake" pattern is more suitable for loggias; the standard pipe diameter is 20 mm. The pipes are secured into the grooves of the slabs or with special fasteners. Seamless metal-plastic pipes are required. They should be laid 50 mm from the walls, with a pitch of 100-150 mm.
- Connection to the heating system or an independent source is carried out.

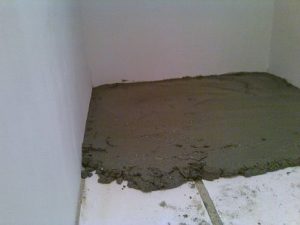
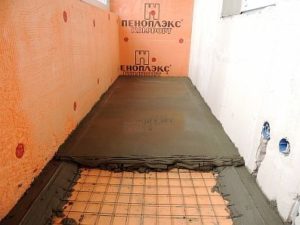
- A concrete screed is poured.
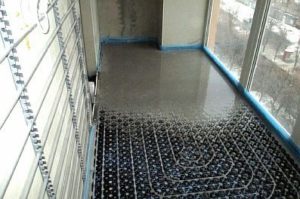
- The finishing coating is installed (only after the concrete has completely hardened) - a material with high heat transfer; the floor can be covered with linoleum, laminate, or tiles.
Before pouring concrete into the structure, the system needs to be tested.
You can install water-heated floors on joists, which will be much faster and easier.
The joists are spaced 30-40 cm apart. Waterproofing is placed underneath them, and thermal insulation material is placed between them. The pipes are placed in the grooves, and plywood sheets are laid on top of the joists. The finishing coating is then laid on top of this.
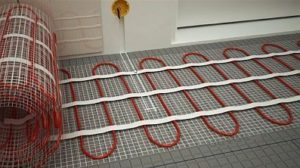
Heating mats and their types
Heating mat — essentially the same as an electric cable floor, but the cable is already secured to a fiberglass mesh. Mats range from 50 cm to 3 meters in length and are usually 50 cm wide. These heated floors operate on 220 watts of electricity. The unit uses cables with diameters of 2.5 and 4.5 mm.
Electrical mats use two types of wire:
- Single-core cable—both ends are connected to a thermostat, making it more difficult to install heating systems with this type of cable. The downside of this cable is its electromagnetic field emission, making it not recommended for use in rooms where people spend a lot of time. The upside is its affordability.
- A twin-core cable is a more advanced option, suitable for balconies. When installed, it eliminates the need to connect both ends to the controller. This cable emits minimal electromagnetic waves, making it safe for people.
Electrical mats with any of these types of wires can last for many years.
A single-core cable is thinner than a two-core cable, has greater power, and therefore heats up faster.
Pros and cons
The main advantages of electric heating mats:
- they do not take away the height of the room, since the thickness of the “pie” is only about 2 cm;
- economical - electricity consumption is not significant;
- easy to install.
But the cost of mats is higher than the price of a regular cable floor.
Mats are recommended for short-term heating; they are not intended for continuous use. The product cannot be shortened. Therefore, when choosing a mat-type underfloor heating system, it is necessary to measure the area of the balcony first.
Installation
Electrical mats must be installed carefully to avoid damaging the cable.
The process consists of:
- drawing up a project - it reflects the wiring diagram, the locations of the temperature sensor and the controller;
- preparation of the subfloor - leveling and filling in any uneven areas, cleaning away debris.
- laying thermal insulation is necessary to prevent heat loss;
- pouring the screed - the concrete layer will serve as the base;
- placement of mats according to the diagram;
- installation of the thermostat and connection of the system;
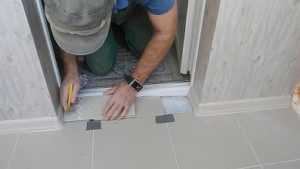
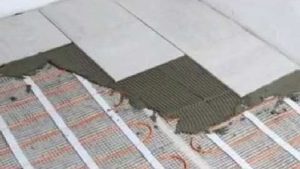
- Applying 2-3 mm tile adhesive and fixing the tiles - the adhesive must be applied evenly to avoid the formation of air pockets.
If you plan to lay a wooden covering on a balcony or loggia, then foam plastic is laid on top of the mats, on which the boards are laid.
Heating electric cable
The heating element in the electric cable floor is a two-wire shielded 5 mm cable, and the system is controlled by a regulator. The device operates on 220 W and heats the surface from 25 to 32 degrees Celsius.
The wire is laid in concrete mortar or a mixture of tile adhesive, although it can also be laid using the “dry” method.
Advantages of heating cable:
- the size of the electromagnetic field emanating from the system is small and not dangerous to humans;
- since the design uses low-power cores, the service life is significantly increased;
- The presence of a shielded film ensures electrical and fire safety and protects against damage.
A good choice for placement on a loggia or balcony would be electric heated floors with a tiled finish.
The disadvantage of a cable installation filled with concrete mortar is the weight of the structure and the time required for installation.
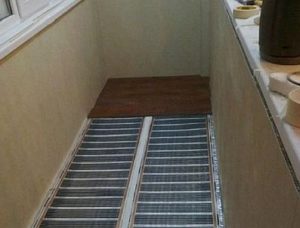
Installation
The principle of installing an electric cable floor on a balcony is similar to the process of laying cable mats:
- you need to start with preparing the rough surface - cleaning and leveling;
- then you need to make thermal insulation - lay extruded foil-coated polystyrene foam 20 - 30 mm thick;
- pour a concrete screed over the thermal insulation with a thickness of 10-15 mm - there will be no contact between the material and the insulation, and the risk of overheating will be reduced to a minimum;
- lay the mounting tape and spread the cable according to the planned scheme - the wire is fixed with tape;
- install a thermostat and a temperature sensor - for the wires running from the floor to the control unit, it is necessary to make grooves;
- lay the finishing coating only after the screed has dried.
The cable should be installed on a well-insulated balcony, otherwise you'll simply be heating the outside air. Before pouring the concrete, test the system for proper operation.
Infrared heated floor
An infrared electric floor is a popular model, especially for balconies. It consists of two layers of polyester film with carbon fiber plates inside.
IR floors generate long-wave infrared rays. Films come in different types, varying in power, heating temperature, thickness, and area of application.
When choosing the thickness of a strip floor for a loggia, consider the characteristics of the finishing material. For higher thicknesses, ceramic tiles are recommended.
Advantages and disadvantages
The main advantages of the film:
- environmental friendliness and safety for humans;
- the device does not degrade air quality, as it heats objects, not the air;
- does not emit electromagnetic waves;
- does not affect the height of the room - the film thickness is only 0.3 mm;
- if one section is damaged, the entire film continues to function;
- Durability, practicality, no repair required.
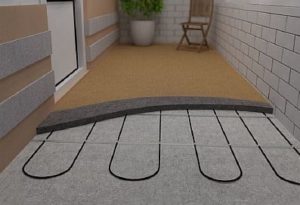
Due to the flexibility of the fabric, it can be easily installed in any room shape and is easy to remove. Installation is simple and quick, as there is no need for a screed. It is suitable for heating open spaces, such as balconies, even in winter.
The main drawback of infrared floors is energy costs, but since balconies are often small, these costs are not significant. The inability to place heavy furniture on the film is also a drawback.
Installation
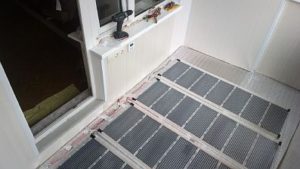
The film floor is installed on the loggia in several stages:
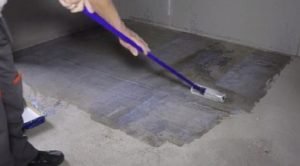
- the base is being prepared - it is important that it is level;
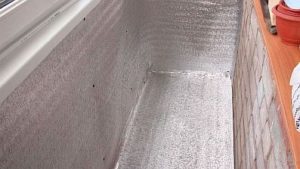
- insulation with a reflective layer (foil-clad isolon) is laid, the joints between the sheets are sealed with tape;
- openings are cut in the insulation for the contacts and the sensor so that there are no protrusions;
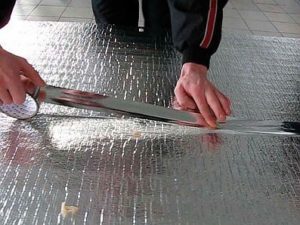
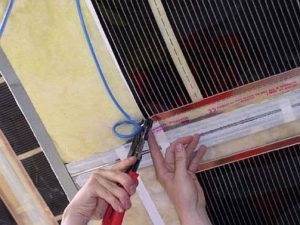
- Infrared film is installed and, if necessary, it is cut strictly along special lines;
- the contacts are connected and insulated with bitumen tape;
- a regulator and a temperature sensor are installed;
- lay polyethylene over the film with a slight overlap;
- the floor covering is being laid.
This heating system can be used immediately after installation.
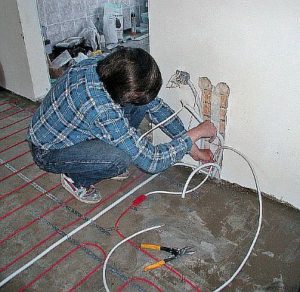
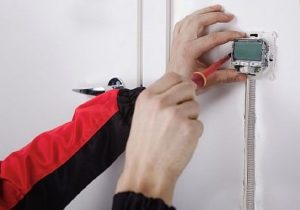
Mounting a temperature sensor
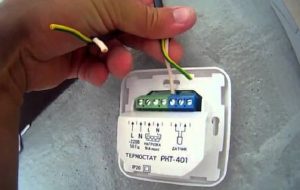
To regulate the temperature in a room heated by electric floors, you need a temperature controller and sensor. Connecting the devices is simple and the same for all systems; the main thing is to follow the instructions.
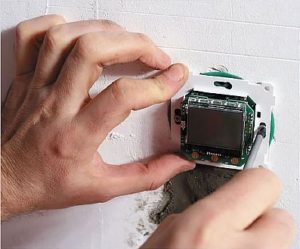
To install this device, you need to:
- make a recess in the wall for the box;
- cut grooves for the wire in the wall from the floor to the place where the regulator is installed;
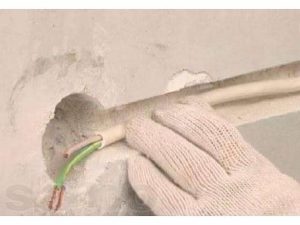
- install the device in the prepared opening;
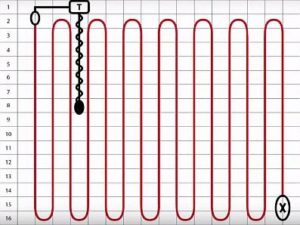
- insert the sensor into the corrugated pipe and place it between the heating elements;
- connect the sensor and cable from the floor to the controller.
The regulator should be placed close to the wiring - this will save on wiring.
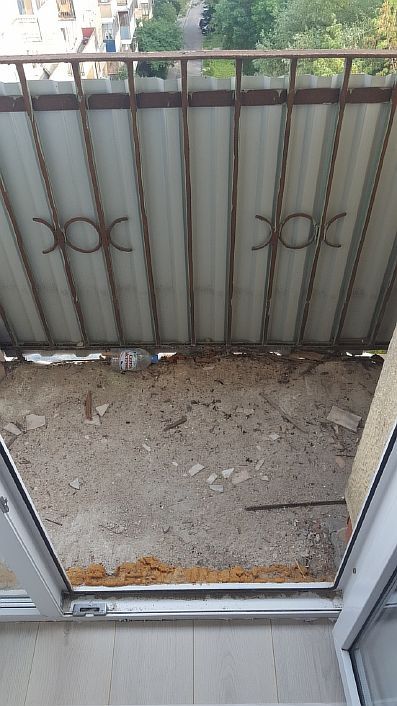
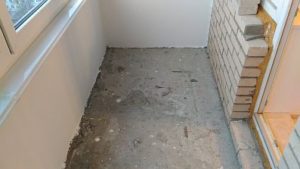
Insulation of the balcony floor
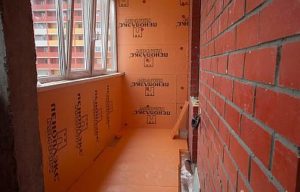
When underfloor heating is in use, a lot of heat is lost through the base slab. And if the neighbors below have an unheated balcony, these losses will increase significantly. Therefore, insulating the balcony floor slab requires careful consideration.
Thermal insulation technology and materials are selected based on the balcony's characteristics and ceiling height. In private homes with high ceilings and loggias supported by columns, there are many options, and any method will do.
In apartments, when choosing a material, one must take into account the design features, even if this affects the quality of heating.
Insulation with expanded clay
To achieve the desired effect from insulating a balcony slab with expanded clay, its layer should be at least 5 cm, and preferably 20 cm.
Expanded clay is a hygroscopic material; when wet, its thermal insulation properties are lost, and it takes a long time to dry. There are several types, depending on the particle size (from 5 to 20 mm)—sand or gravel. It has long been used as a thermal insulation material because it is inexpensive and its performance is virtually equal to modern insulation materials.
The larger the fractions, the higher the thermal properties of expanded clay, but the degree of shrinkage is greater.
Styrofoam
Foam plastic is an artificial material made from polymers that is not afraid of moisture and is not destroyed by external factors.
However, due to its lower density, its thermal insulation properties are inferior. Foam plastic is less durable and therefore not recommended for flooring, although it is often installed due to its low cost.
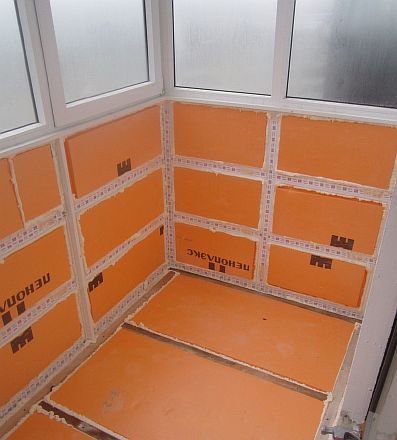
Extruded polystyrene foam
Extruded polystyrene foam is a rigid sheet insulation material, typically 3–5 cm thick. The boards are durable and can support the weight of a person. This material is easy to install beacons and heating elements on.
Penoplex doesn't reduce ceiling height much, but it's significantly more expensive than expanded clay and polystyrene foam. However, since the average balcony is 3 square meters, the cost won't be significant, so it's better to use it.
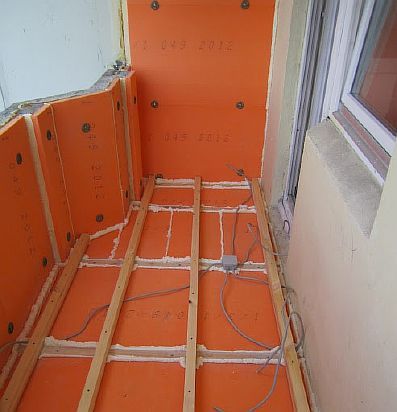
The process of insulating a balcony slab with expanded polystyrene is not complicated; it's similar to installing any thermal insulation, so it's easy to do yourself:
- the slab is leveled - large protrusions are cut off, and depressions more than 3 mm deep are filled with cement mortar;
- polyethylene is spread as waterproofing;
- A damper tape is glued around the perimeter of the balcony, its width is 10 cm - it compensates for temperature expansion;
- sheets of polystyrene foam are laid;
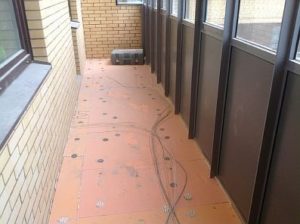
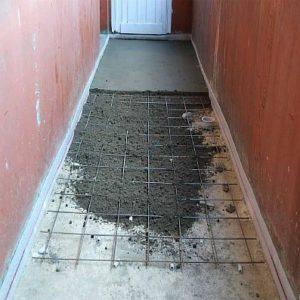
- A 5 cm thick layer of reinforcing concrete screed is poured, and a plastic mesh is used for reinforcement.
Once the screed has dried, you can proceed directly to the installation of underfloor heating.
Insulation of walls and ceilings
To maintain comfortable conditions in the loggia without wasting heat, it is essential to insulate the walls and ceiling.
For this, you can use various thermal insulation materials: mineral or polymer, sheet or roll, hard or soft.
Mineral wool
Mineral wool is made from basalt rock. Its advantages include low thermal conductivity, fire resistance, and affordability.
However, it is hygroscopic and requires additional protection, so it is not recommended for insulating walls and ceilings on a balcony.
Styrofoam
Polystyrene foam is produced by foaming synthetic materials, resulting in a light and porous product.
It has a low level of thermal conductivity, does not rot and is easy to install.
Expanded polystyrene
Expanded polystyrene is a type of foam plastic, but a more modern and advanced model. It is an excellent thermal insulator, easy to install, lightweight, and inexpensive.
Today, polystyrene is one of the most commonly used thermal materials, so let's look at the process of insulating the walls and ceiling on a balcony or loggia made from it.
The method of attaching insulation to walls depends on their finishing:
- on PVA glue or another composition that contains an aggressive solvent;
- using special wedging fungi;
- on wooden slats or metal profile.
The following finishing is possible over the insulating material:
- installation of reinforcing mesh, with puttying, painting or wallpapering;
- cladding with plastic panels or siding.
Features of operation
There are several points to consider when installing underfloor heating on a balcony to extend the life of the system and its efficiency:
- Do not install heated floors on an uninsulated balcony; insulate the floor tiles, walls, and ceiling—this will prevent heat from being wasted;
- use lightweight thermal insulation material and install from inside the room;
- apply a moisture-resistant finish coat.
To summarize, the most suitable models for balconies are electric ones—infrared film or cable mats. However, other types are also suitable under certain conditions.
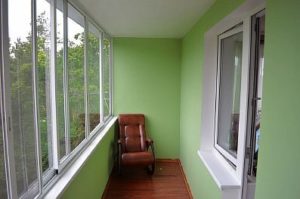
Nowadays, to increase the usable area and improve the functionality of a balcony, people not only glaze it but also insulate it and install underfloor heating. With the right heating system, you can use your balcony any time of year.


I was thinking about installing heated floors on the loggia, but I didn't know how feasible it would be, but here you explained it so thoroughly and step by step, the fourth method will definitely suit me.
I chose hydronic underfloor heating for the simple reason that it's the most energy-efficient. However, that didn't mean installing it and obtaining all the necessary permits for this modification in the apartment was a real hassle. Advice: connecting it to the main riser may seem like a good idea, but it's not a good idea, because you'll have absolutely no control over how it turns on and off. 😉