Modern technology makes our lives increasingly comfortable, and this also applies to flooring. Heated floors are currently in high demand. Therefore, manufacturers have developed new flooring options and improved existing ones.
Laminate has long been popular, and demand for it in the construction market is huge. Although this material is considered warm, its temperature is not sufficient to create comfortable conditions. Therefore, underfloor heating systems are now installed under laminate on concrete floors.
You can also read the article in more detail - How to choose a covering for a heated water, electric, or infrared floor.
- Types of heated floors under laminate flooring on concrete
- Which underfloor heating should I choose for laminate flooring and why?
- Advantages of laying on a concrete base
- Step-by-step installation instructions
- Warm electric floor with heating cable or in the form of mats
- Infrared film and rod heated floors on concrete
- Water-heated flooring under laminate flooring on a concrete floor
- Laying laminate flooring on a concrete heated floor
- Video instructions
Types of heated floors under laminate flooring on concrete
Manufacturers offer two options for underfloor heating under laminate flooring that can be installed on concrete:
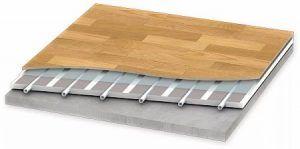
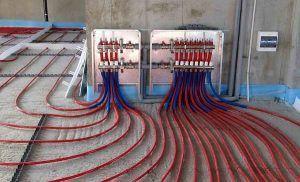
- Hydronic underfloor heating is a safe and reliable heating method when installed correctly. It consists of pipes through which water circulates. This model evenly heats the subfloor, ensuring a long life for the laminate flooring. No additional heating medium is required; the existing one is used.
- Furthermore, water-heated floors are ideal for installation on a concrete base. However, the process is labor-intensive, as a concrete screed must be poured. The optimal temperature is set at around 31 degrees Celsius. Overheating of the floor is prevented, as the water continues through the pipes and does not transfer heat to the already heated base.
2. Electric – more convenient and easier to install, as no screeding is required. It comes in several types:
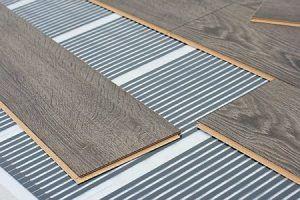
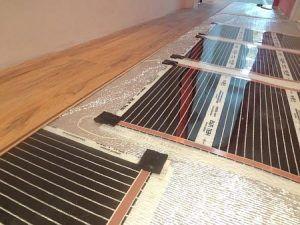
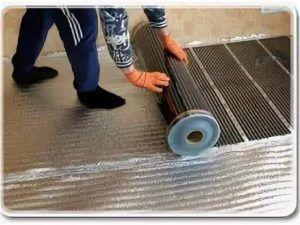
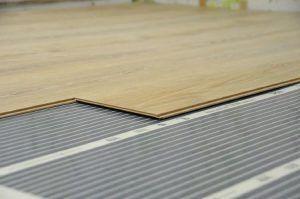
- Film infrared is the most popular model, providing optimal surface heating using electromagnetic pulses. It consists of a film with heating elements placed on it. The uniform distribution of heating elements across the surface of the laminate helps protect it from cracking.
- The infrared rod heater consists of 3mm thick carbon rods connected by a cable. It's both economical and safe.
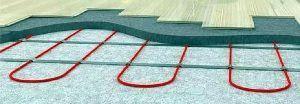
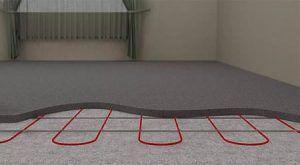
- Cable-based flooring is a cable that is laid in a specific manner under the flooring. It is mounted on a reinforced mesh or a special tape with fasteners. A concrete screed is also required. This system consumes a lot of power, which is its main drawback. Cable-based electric flooring is rarely installed under laminate flooring.
- Heating mats are also a cable-based type, but the heating elements are embedded in special mats, and the cable is thinner. The advantage of this type is that there's no need to calculate the spacing, as the elements are already fixed at a predetermined distance.
We invite you to read the article: Electric heated flooring under laminate flooring - types, which one to choose and install
Which underfloor heating should I choose for laminate flooring and why?
Concrete and laminate flooring offer the flexibility to choose any type of underfloor heating. However, it's important to consider the type of laminate, as it's 90% wood, so it shrinks when exposed to heat. Laminate flooring for underfloor heating and concrete requires a special type; any type won't work.
It is produced for underfloor heating systems of a certain class, which can withstand the heat of the heating medium. Otherwise, formaldehyde may be released during heating, which can lead to allergic reactions.
Laminate flooring with a thickness of at least 8 mm is ideal for heated floors; thinner sheets can warp with temperature. When choosing a model, pay attention to the packaging. it should have a "Warm" icon on it, which means it's suitable for installation over heated floors. You should also check the flooring documentation, which will specify whether it can be installed over heated floors, and what type of flooring it is.
It's worth noting that, according to expert analysis, infrared underfloor heating is a more effective option for underfloor heating under laminate flooring on concrete in apartment buildings. This design consumes less electricity than cable heating. Furthermore, it's reliable and practical, and if it breaks, it's easy to replace only the damaged part.
No need to pour a screedThe installation process is simple, as the heating elements are already positioned on the film at a predetermined pitch; all that remains is to lay it out. Once laid, you can immediately begin installing the flooring. Another plus - does not reduce the height of the room. The only minus — the model is expensive, but the cost will pay off with a long service life.
For private homes, hydronic underfloor heating is worth considering, despite its more complex installation. It saves energy because it can be heated using the coolant from the heating system.
Advantages of laying on a concrete base
Laying underfloor heating on concrete is practical and quick.
| Pros | Cons |
| Eco-friendly material - does not contain harmful substances. | Concrete is a cold material, so additional insulation is required. |
| Cleanliness - the use of special means during the processing results in a virtually dust-free environment. | Concrete surfaces are difficult to restore, so if there are major defects, a new screed is required. |
| Easy to install - the surface is smooth. | |
| Complete absence of penetration of microorganisms. | |
| Monolithic surface – provides moisture resistance. | |
| It does not deteriorate over the years, as it is not subject to corrosion and does not rot. | |
| Long service life and no need for maintenance. | |
| Strength of the material. |
Step-by-step installation instructions
Each underfloor heating model for laminate flooring has its own installation requirements. Therefore, before beginning installation, it's important to familiarize yourself with the installation instructions and diagram.
Warm electric floor with heating cable or in the form of mats
It's based on a cable whose primary function is heating, converting electrical energy into heat. In residential areas, it's recommended to use a two-wire cable, as it has lower radiation. It's better. take a self-regulating cable that will prevent overheating, and regulates the heating level itself.
The sequence of work is as follows:
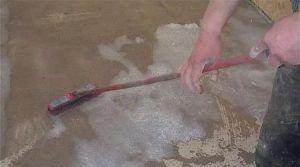
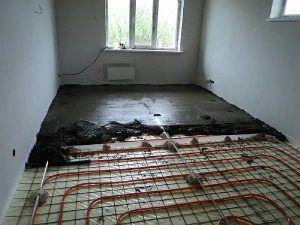
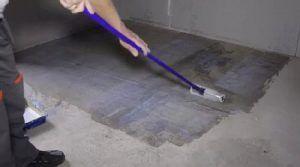
- Surface preparation. The concrete floor is leveled and cleared of debris.
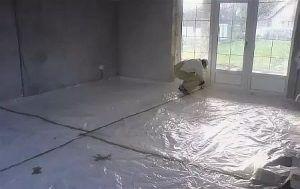
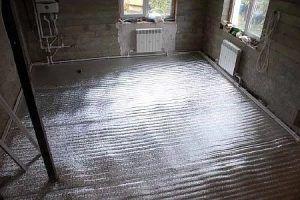
- Waterproofing and thermal insulation. A waterproofing layer is applied, followed by a heat-insulating material with a foil backing. Learn more about foil for underfloor heating – is it necessary or not, what types there are and how to install it yourself.
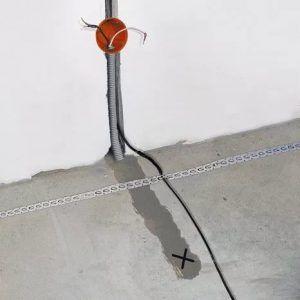
- Install the thermostat. It should be located close to the wiring. If the unit is built-in, cut grooves in the concrete for it and the wires leading to it. If the unit is surface-mounted, a plastic conduit must be installed.
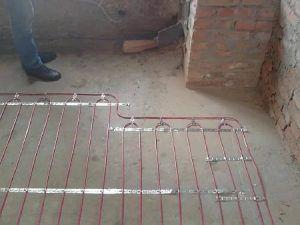
- Cable installation. It should be laid strictly according to the manufacturer's instructions, evenly throughout the room.
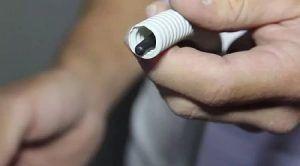
- Connecting the wires. For protection, the internal sensor is placed in a corrugated tube. The tube and the wire connected to the sensor are located between the corrugations of the cable.
- Checking the system for functionality is a mandatory step before pouring the screed.
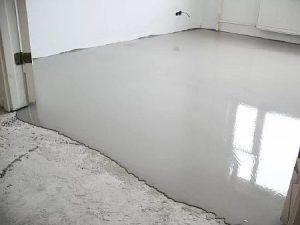
- We pour the screed. The screed is made of cement-sand mortar 3-10 cm thick.
The laminate flooring is laid after the screed has dried, about a month later.
Using mats significantly simplifies the installation process, as the cable is already secured to a special base. Therefore, the mat is simply rolled out onto the heat-insulating material, and the screed is poured on top.
Infrared film and rod heated floors on concrete
Installation of infrared film, as well as rod-type underfloor heating, is easier and faster, since these types can be installed directly on the concrete floor, but it is better to make a small screed.
The process looks like this:
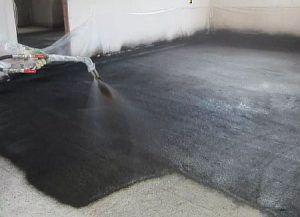
- Pouring a thin concrete screed will protect the heating elements from damage.
- Installing a heat-reflecting screen. Penofol with aluminum foil is suitable, but it must be insulated with a dielectric material or a lavsan film. This material is secured with adhesive tape.
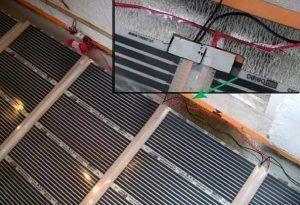
- Installing an infrared floor. Infrared heating elements are attached to film or as rod mats on top of a heat reflector. They should be placed only in a clear area where no furniture is planned, and spaced 20 cm from the wall. The copper busbars should be positioned downwards. Clamps are installed at the ends of the copper strips, to which the wires are subsequently connected. The clamps must be well insulated.
- Installing the temperature sensor. A corrugated pipe extends from the wall controller near the switch. This device will be installed into it; it is necessary for measuring the floor temperature. The sensor is connected to the black strip located at the bottom of the film.
- Checking the system's operation. Before installing the flooring, it is imperative to check the system for proper operation and absence of short circuits.
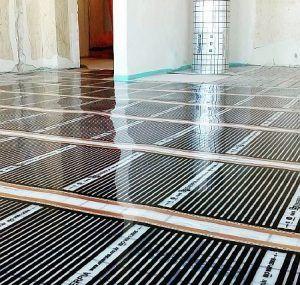
After this, the entire structure is covered with polyethylene film, and you can begin laying the laminate. An important clarification: the infrared underfloor heating can be turned on immediately after installation.
Water-heated flooring under laminate flooring on a concrete floor
Water-heated floors under laminate flooring consist of flexible pipes through which water moves, filled with a concrete screed.
The system is installed in several stages:
- Surface preparation. If there are any defects on the concrete base, they are repaired with primer or putty.
- Waterproofing. A waterproofing layer is laid on a level surface. Waterproofing is especially important for water-based systems, as a leak in the pipes will damage the foundation, and if such a structure is installed on a floor other than the ground floor, there is also a risk of flooding the floor below. There are different types of waterproofing: bitumen, cement, and polymer.
- Thermal insulation. The next layer is thermal insulation; foam plastic can be used for this. The thicker the better, but it significantly raises the floor level, so it's important to consider the floor height throughout the apartment. A heat reflector is essential; penofol or a 2-3 mm thick material covered with aluminum film is suitable for this.

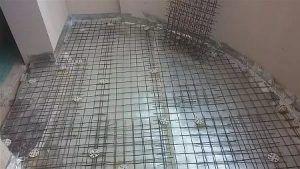
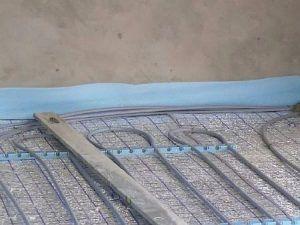
- Reinforcing the screed. A steel or polymer mesh with 5-10 cm mesh openings is installed to secure the pipes. It should be secured to the foundation to prevent movement.
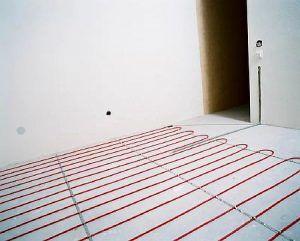
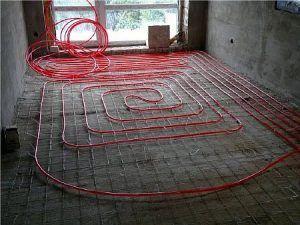
- Pipe installation. Plastic or metal pipes, which can withstand high pressure, are laid on the mesh. The pipes are distributed evenly, minimizing the number of joints. The installation can be either serpentine or spiral. The pipes are secured with clamps located on the mesh or with special dowels.
- Pipe routing and system connection. The pipes, pre-inserted in a corrugated pipe, are routed and connected to the radiator or heating system. A temperature sensor, also housed in a corrugated pipe, is installed on the wall near the switch. It is necessary for detecting the temperature of the underfloor heating system.
- Installing a damper tape. This is necessary to compensate for thermal expansion of the concrete and laminate. The tape is laid around the perimeter; its thickness should be at least 10 mm and extend 15 mm beyond the height of the screed, underlay, and laminate. Any excess is trimmed off after the flooring is installed.
- We're laying the screed. The hydronic underfloor heating is poured with concrete. The screed should completely cover the pipes and be 3-4 cm higher than them.
Once the concrete has dried, you can begin laying the laminate on the water-based floor.
Laying laminate flooring on a concrete heated floor
Regardless of the chosen underfloor heating model for laminate flooring, the installation process for the final layer—the flooring—is the same. It depends only on the type of laminate flooring used.
If you plan to install the tiles yourself, it's best to use a locking system. The installation principle is simple clicking.
A foamed polyethylene underlayment is laid over the entire heated floor. It is secured with adhesive tape. The panels are installed starting from the entrance door. The laminate is clicked together by hand, but for greater security, you can tap it with a mallet. Once the installation is complete, any excess damper tape is trimmed around the perimeter.
After finishing work, it's best to wait a day for the floor covering to settle before turning on the system. Turn it on gradually, building up the temperature to maximum over several hours.
Underfloor heating under laminate flooring will not only modernize your interior but also create a comfortable atmosphere.
Laying laminate flooring


After reading the article, my husband and I decided to install laminate flooring over heated floors in our garden house ourselves. It turned out to be so simple and convenient, especially after watching the videos in the article.