Underfloor heating is gaining popularity these days, especially in private homes, as it's more energy-efficient than electric systems, which rely on a cable for heating. However, not everyone knows how to properly turn on the system for the first time, which is an important and crucial step.
If the underfloor heating system is filled incorrectly, malfunctions will occur, requiring the structure to be dismantled, which will lead to additional costs at a minimum.
If the floor is laid on joists or using a screed, it can be turned on immediately after the pipes are filled. When installing a heating unit using a screed, the initial startup is more complex and time-consuming.
Starting a water-heated floor
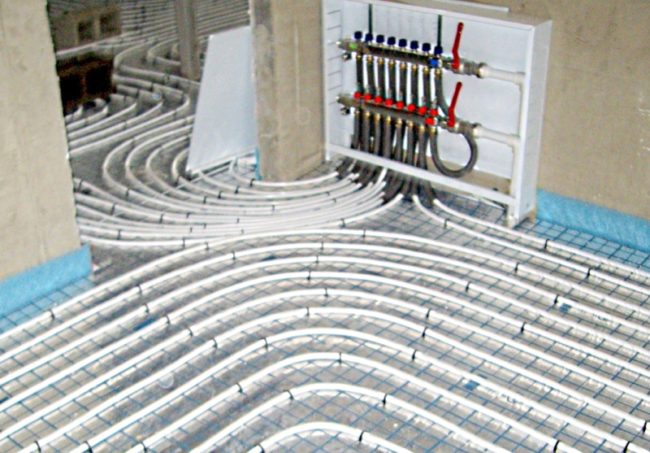
Hydronic underfloor heating is a multi-layer system. Therefore, even the seemingly simple commissioning process has its own unique challenges. Before installing the system, it's important to understand how to properly fill and turn on the system, and to read the operating instructions.
The initial startup includes filling, flushing, draining, adjusting the system, and warming and drying the screed. The operating principle depends on the coolant used and the type of heating system; it can be either closed or open. Furthermore, it's important to ensure fluid circulation and remove any air pockets from the system when starting the floor.
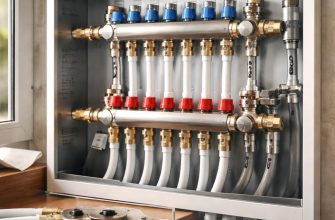
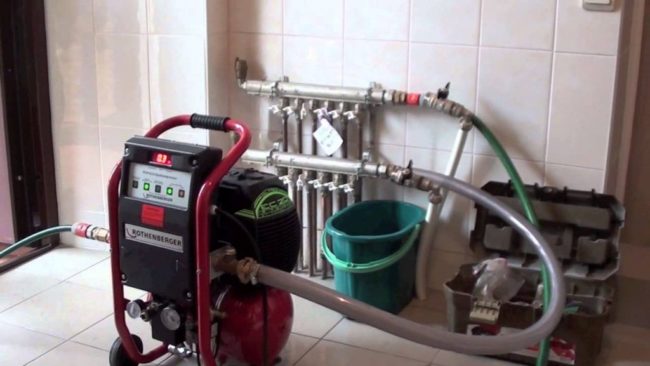
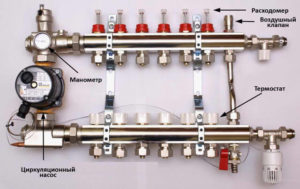
To properly commission a hydronic underfloor heating system, the outlet manifold must have a special valve. A pressure testing machine, necessary for testing the floor, is available for rent.
But if you're pumping water into the pipeline, not antifreeze, it's better to have your own device. You'll need to use the device frequently, as it's recommended to replace the coolant annually, which means testing the system.
Which coolant should I choose?
A liquid heat transfer fluid circulates through the pipes of a hydronic underfloor heating system. It comes in several types:
- Plain water is the cheapest option. It's environmentally safe and poses no harm to humans. It transfers and releases heat well. In case of a leak, its volume is easily replenished.
However, water also has its downsides, but they are not significant:
- contains salts that settle inside the pipes, which reduces heat transfer, but since the same liquid moves in the circuit, the amount of salts is not large;
- it contains oxygen, it leads to corrosion, but there is not much of it;
- it freezes, increasing in volume and can damage the pipeline;
- It needs to be replaced once a year, but this does not require financial investment.
- Antifreezes are made from ethylene glycol and propylene glycol with additives that reduce the activity of the fluid. Their main advantage is that they practically never freeze in winter, or only at very low temperatures.
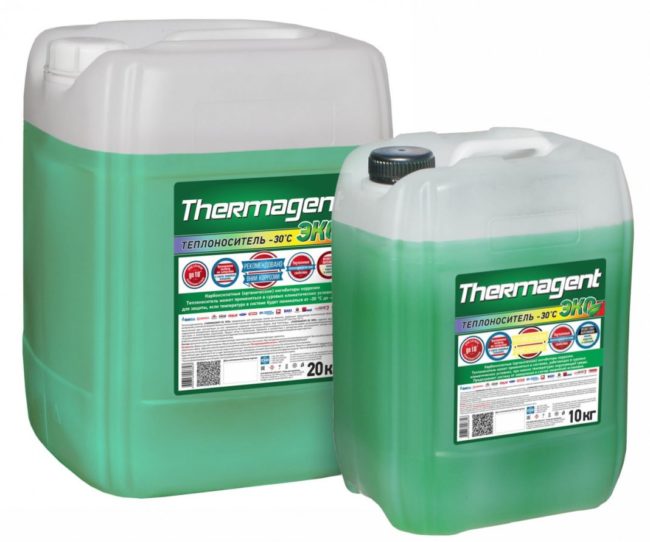
Among the disadvantages is the high cost, especially for propylene glycol-based fluids. Ethylene glycol is fluid, toxic, corrosive, and does not tolerate overheating well.
- Distilled water is a good option, but only if you live in the apartment full-time, or if the floor is only turned on in the summer, as it freezes quickly.
To summarize, the best option is to fill the underfloor heating system with tap water. It's inexpensive, safe, and, what's more, water is an excellent heat transfer medium.
The article provides detailed information, Which liquid is better to choose – water or antifreeze?.
Filling the underfloor heating system with water
Before turning on the underfloor heating system for the first time, the main line must be filled. The filling method depends on the type of system and the type of heating medium. In our case, we'll use the most common type—water.
If water is used, it must be replaced annually, i.e., refilled. The underfloor heating system's water supply must be flushed before each use. Water is supplied to the main line and drained until the water comes out clean.
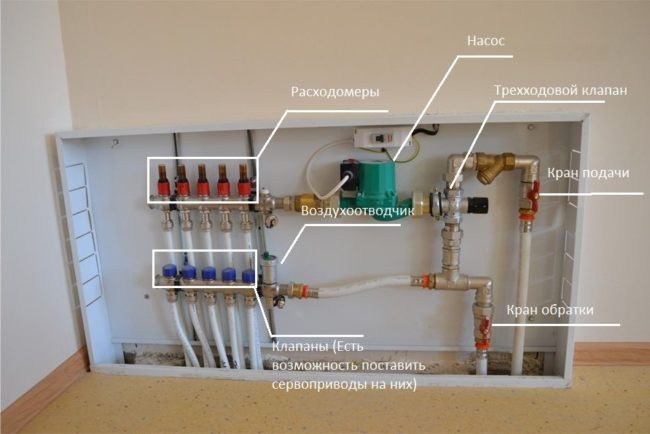
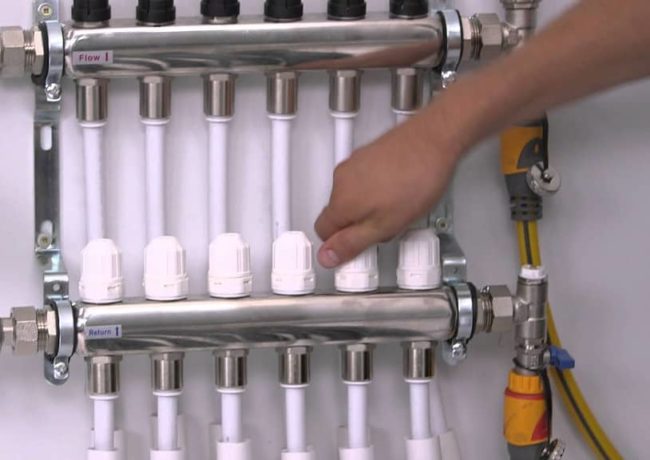
There are two ways to fill a heated floor system with water. Let's look at how to fill a closed-loop heated floor system with water through a manifold:
- All taps are opened, such as:
- manifold valves;
- shut-off valves on pipes;
- three-way valve of the distribution unit;
- all air vents.
If the three-way valve has a thermostatic head, it should be set to the highest setting. If there is no thermostatic head, the valve should be turned to the limit setting.
You should wait until all the air has come out of the line.
Opening the taps will be accompanied by the noise of water moving through the pipes and air escaping.
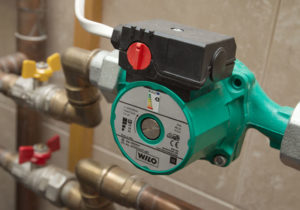
- The circulation pump turns on. The air vent starts up again, and you'll hear the sound of air passing through it. The pump should run for about 3 minutes—this is enough time for most of the air to escape.
- All valves are closed, leaving only one open. This is necessary to concentrate the pump on one circuit, allowing any remaining air to escape.
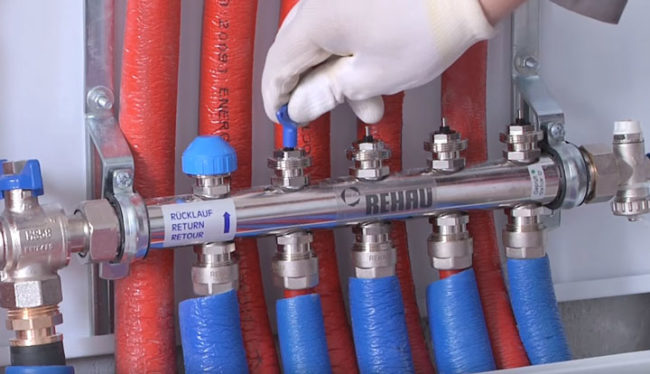
- When the air is exhausted from a given loop, the next circuit opens, and this one closes. This process is repeated for all valves.
- After the air has been released from the entire system, the pump is turned off.
- The taps on all circuits (inlet and outlet) are opened, and the water is pumped until the last remnants of air are released.
Once this procedure is completed, the underfloor heating system is filled and you can begin setting it up and turning it on.
Another option is to fill the open main line. This device is equipped with a special tank that allows the coolant to be added as it evaporates. There's also a drain valve at the bottom, which allows the floor to be filled from the water source using a hose.
However, the floor must first be filled through a manifold valve, which is connected to the pipes via a hose. The operating principle is the same as with a closed system. This technology differs in that it eliminates the need for a pump, and air is exhausted under pressure from the water supply system.
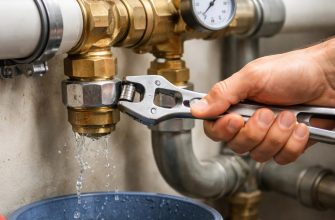
Rules for pressure testing heated floors
Pressure testing is a test of the heating system's functionality and the presence of leaks under pressure. This procedure is performed immediately after the underfloor heating circuits are filled and before the concrete screed is laid.
Since crimping is performed without a clamp, the pipes may straighten out under pressure and pop out of the grooves if they are poorly secured. Therefore, secure fastening is required; additional fasteners may be installed during crimping.
The crimping process has its own characteristics, depending on the material from which the pipes are made:
- If the system has a metal-plastic circuit, cold water is supplied and a pressure of 6 bar is applied. The test is conducted for 24 hours, and if the pressure does not drop during this time, the procedure is considered successful.
- When using cross-linked polyethylene (X-PE) piping, testing is performed at either 6 bar or twice the working pressure. Additionally, as the pressure decreases, the pressure is increased three times every 30 minutes. The final test is filled with water and left for 24 hours. The test is considered successful if, after this time, the pressure has decreased no more than 1.5 times.
In addition to the pressure test, you can check the floor's operation at the maximum temperature (85 degrees Celsius). The test lasts no more than half an hour. If no leaks are detected and no steam is released during this period, the unit has passed the test.
There's another method of pressure testing—the "dry" method—where air is pumped into the line. This method isn't entirely reliable, so it's not recommended for under-screed installations.
If any problems are detected during testing of the warm water floor, then after they have been corrected, the test should be repeated.
Launch
After pressure testing and elimination of possible defects, the structure can be filled with concrete screedThe underfloor heating system is started only when the concrete screed has completely dried.
The water temperature must be raised slowly over several days. An initial temperature of 20 degrees Celsius is established, and then increased by another 10 degrees each day until the operating temperature is reached. Only then can the flooring installation begin.
In addition, the rate of temperature rise is affected by the size of the heated room. If the room is small and the concrete layer is thin, the process of reaching the required temperature can be accelerated.
Important! However, don't rush to turn on the underfloor heating. If the heating is too rapid and uneven, there's a risk of cracks in the screed and damage to the structure.
Setting and adjustment
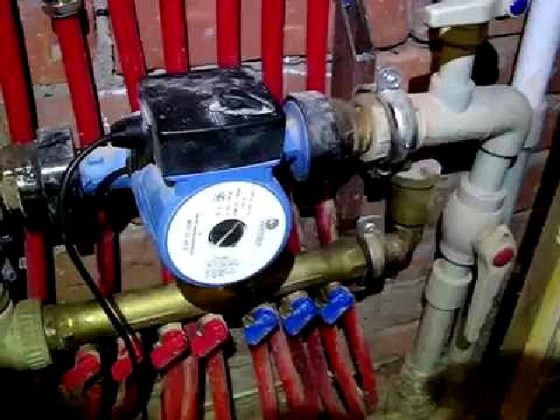
After filling the floor, set the three-way valve to its minimum position. If the manifold unit is equipped with flow meters, the coolant flow distribution should be performed. This should be done while the circulation pump is running.
Please note! Underfloor heating has a flow resistance, so the pump's power may not match the manufacturer's stated capacity. Therefore, the obtained results should be slightly underestimated.
When assembling a distribution unit yourself, regulating valves must be installed to control it. During initial setup, the size of each loop is taken into account. Circuits that run cooler are increased in intensity, while those that run excessively hot should be turned off.
After making the adjustments, wait 2-3 hours to allow the concrete surface to heat up. This procedure should be repeated until the concrete surface heats up evenly.
The temperature of the fluid moving through the pipes is regulated using a thermostat. While a mechanical thermostat is considered the most cost-effective, the most accurate are electronic thermostats from Schneider and Salus.
But if budget allows, professionals recommend using programmable thermostats. They're expensive, but they can provide comfortable conditions without much effort or human intervention.
Draining the coolant
If you need to shut down the system, it's not difficult. However, before doing so, you should take a few steps. It's also important to remember that the drainage process is affected by the type of underfloor heating connection—whether it's from the central heating system or from the boiler.
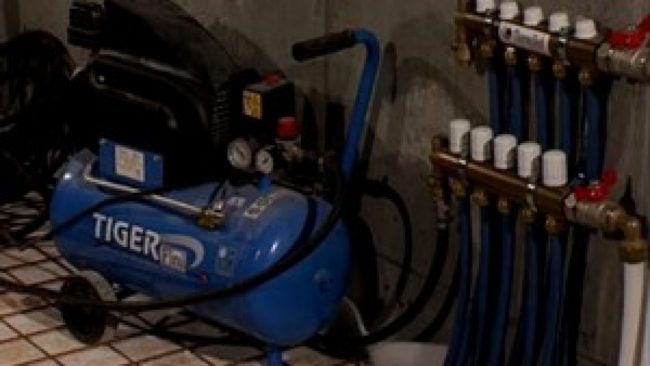
If the installation of underfloor heating is carried out correctly, there will be no low point or valve in the system. Therefore, a compressor will be required to drain the water coming from the central heating system.
It should be connected to the inlet valve of the distribution unit. To do this, remove the air vent from the water inlet valve. Install an adapter in its place, and connect the compressor to it. A hose is connected to the return drain valve and discharged into a container or sewer.
Then, all shut-off valves are closed except for the valve on one loop. The compressor turns on, and the pressure causes liquid to escape. It should only be turned off once a mist of air begins to form. The valves on that loop are closed, the valves on the other loop are opened, and the compressor turns on again. This process is repeated for all circuits, thus draining the water from all loops.
After draining, droplets of liquid remain inside the pipeline. Since the pipeline is often long, its total volume will be considerable. Therefore, it is recommended to repeat this draining procedure again after some time.
If the manifold is factory-made, it's equipped with devices that prevent water from flowing backwards (the return line). If an error occurs and the compressor is connected to it, the fluid won't drain, but the distribution unit may fail.
If the underfloor heating is powered by a boiler, the same valves are used to drain the coolant, but on the boiler pipes. Find out How does a water-heated floor work?: operating principle, device of different types.
As you can see, anyone can properly install a hydronic underfloor heating system. However, if you don't have experience with this type of work, it's best to hire a professional. After all, the efficient operation of the system and the comfort of your home depend on it.