Frame houses are becoming increasingly popular in our country. As a result, new technologies are being developed that improve the functionality of such spaces and enhance their comfort.
Underfloor heating is one such innovation, specifically for frame buildings, as it was previously not installed there due to the weight of the structure. Now, underfloor heating systems (electric and hydronic) are available that are adapted for these types of buildings.
If you're considering building a timber-frame house with heated floors, this article is for you. It will teach you how to install heated floors in a timber-frame house, the pros and cons of these systems, and which finishing coating to choose.
- Features of the installation and installation of underfloor heating in a frame house
- Which type to choose, advantages and disadvantages
- Benefits of heated floors for timber frame homes
- Cons
- What type of underfloor heating should I choose?
- Installation of underfloor heating
- Laying in screed
- Installation without tie
- Laying electric flooring
- Cable floors
- Heating mats
- Infrared film
- Choosing a finishing coat
Features of the installation and installation of underfloor heating in a frame house
Warm floors come in:
- Electrical - the heating element is a cable;
- Water-based – heating is produced by a coolant that moves through pipes.
In a frame house, as in any other room, the installation of heating devices is permissible, but the technology for their construction has its own peculiarities.
Among other things, the exterior walls need to be properly insulated and any cracks sealed. Without this, achieving a comfortable temperature will be impossible, as the walls in such a room are thin.
Since frame houses are built on piles, pouring a cement screed over them is not recommended. This will significantly increase the weight of the structure and the load on the floors. If you decide to use this technology, ensure that the foundation can support the weight of the entire structure.
When choosing a heating system, it is worth considering:
- climatic conditions;
- geological characteristics of the area;
- design features of the house;
- heat loss indicator.
A water-based design is considered more energy-efficient. However, it is quite expensive to install, as it requires numerous components, but this quickly pays for itself during operation.
When installing a water system, it is important to correctly calculate heat loss and floor power, even at the stage of pouring the strip foundation and building the house.
Which type to choose, advantages and disadvantages
Frame structures are lightweight structures; they do not have a solid foundation.
Since such structures are mounted on piles, cold air circulates freely under the floor, requiring high-quality thermal insulation. Installing underfloor heating will ensure a comfortable atmosphere.
Benefits of heated floors for timber frame homes
Advantages of underfloor heating for frame houses:
- uniformity of heating;
- safety;
- efficiency;
- the ability to regulate temperature;
- there are no radiators that spoil the interior.
This type of heating can be either additional or primary.
Cons
Besides the pros, there are also cons:
- high price of components;
- carrying out hydraulic calculations, which is difficult for a non-specialist to do;
- limited choice of screed and floor covering types.
However, there are still more advantages, and most importantly, the main goal is achieved - creating a comfortable atmosphere in the house.
What type of underfloor heating should I choose?
The heating efficiency depends on the correct choice of heating system type (electric or hydronic). Therefore, when purchasing a device, consider:
- area of the premises;
- climatic conditions;
- purpose - main or additional heating source;
- cost of construction and operating costs.
When selecting a heating system, you should calculate the required power. If the room is large, or heating will be the primary function, then the equipment will need to be more powerful. The layout and furniture arrangement in the room should also be considered.
Hydrofloor heating is considered a practical and effective heating system for frame houses. Lightweight models are available for frame houses, which don't put significant pressure on the foundation. Electric models are more often used on upper floors or when hydronic underfloor heating is not feasible.
Installation of underfloor heating
There are two installation methods for underfloor heating in a timber-frame house: screed installation and floor-mounted installation. The system is connected to the central heating system or a boiler.
Laying in screed
Before pouring a concrete-cement mortar into the water circuit, ensure the structure can withstand the load. The average weight per square meter is 400 kg. The concrete layer thickness should not exceed 5 cm.
The process of laying a warm water pie with a screed in a frame house is as follows:
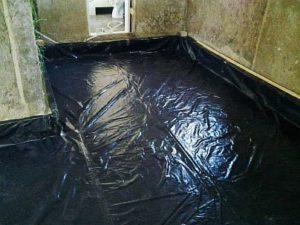
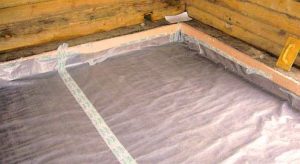
- The foundation is prepared by pouring a thin layer of rough screed. A polyethylene sheet should be laid underneath it to protect the wooden base from moisture contained in the raw material (concrete mix).

- A waterproofing layer—polyethylene film or a PVC-based product—is laid to prevent moisture penetration. The film is laid with an overlap on the walls, and the seams are sealed with tape.
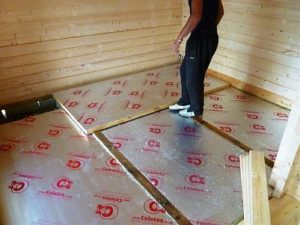
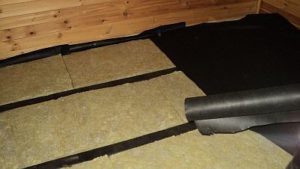
- Thermal insulation (10 cm) is installed - expanded polystyrene in tiles or rolls.
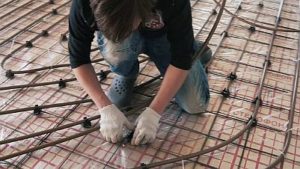
- A reinforcing mesh is laid - it is necessary to give rigidity to the structure and to evenly distribute the load.
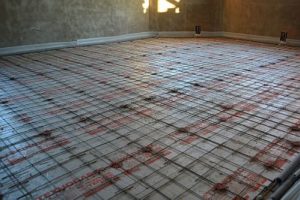
- A damper tape is applied around the perimeter of the room. Its purpose is to prevent the concrete surface from deteriorating when heated.
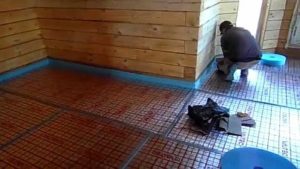
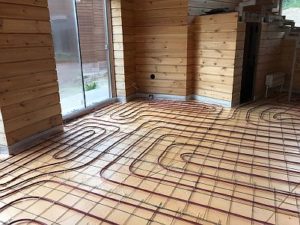
- The water floor pipes are placed - the distance between the circuits is from 10 to 30 cm. The installation is carried out according to a prepared pattern - "snake" or "snail"If the room is large, it should be divided into several sections, each with its own circuit. The pipes are secured to the fittings with clamps.
- The system is tested to ensure the device is functioning properly. To do this, the pipeline is filled with water and pressure tested for 24 hours.
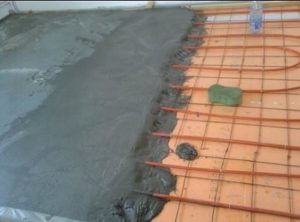
- The screed is poured - a concrete-cement mixture 5 cm thickBeacons are installed beforehand to facilitate pouring and leveling the mortar. Once the screed has dried slightly, they are removed. Pouring should begin from the far wall and proceed toward the door.
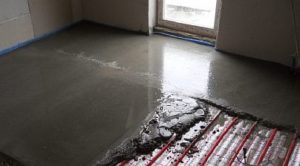
Since the screed does not come into contact with the floor or walls, it will not negatively affect wooden structures during use.
- The finishing product is laid - ceramics, linoleum, laminate.
The heated water floor should be turned on after the screed has completely dried.
Installation without tie
When installing hydronic underfloor heating without a screed, the structure is placed on a subfloor. This method involves creating a subfloor for the pipes.
Let's look at the step-by-step process of completing the work.
- The rough wooden base is covered with a waterproofing material - polyethylene film or foil-clad polystyrene foam.
- The boards that will house the pipeline are prepared. Grooves must be cut into them.
- A framework for the water circuit is being constructed. Boards are laid on a base coated with waterproofing material at intervals of 10-15 cm.
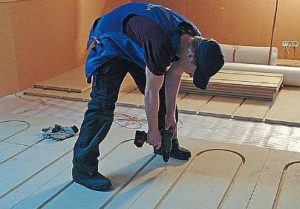
- Pipes are placed in the grooves and covered with a metal sheet, which will facilitate an even distribution of heat.

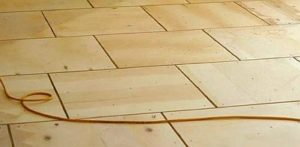
- The entire structure is covered with OSB or plywood.
- The final layer is the finishing coating.
Before laying the floor covering, the water system must be checked for functionality and the absence of leaks.
Laying electric flooring
Electric heated floors come in: cables, heating mats and infrared filmTechnological processes for laying each type in a frame house have been developed.
A general requirement for electric floors is powerful wiring, as it increases the load on the electrical system. This is especially important for wooden buildings, as there is a risk of fire. For complete safety, it's best to install a separate cable for underfloor heating and install an RCD system.
The main drawback of electric heating devices is their high energy consumption, which increases financial costs. Furthermore, such floors are not suitable for installation under heavy furniture.
Cable floors
For cable-type heated floors Two types of wire are used: double-core and single-core. Double-core is recommended for living spaces, as it poses less of a health risk.
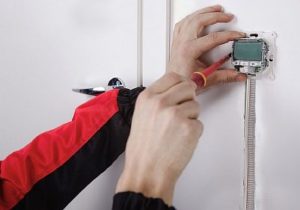
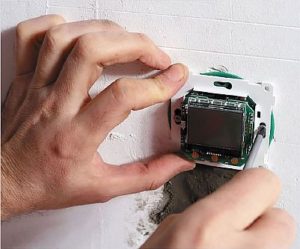
It's essential to equip such heating systems with a thermostat. To do this, you first need to prepare a place for it—a recess in the wall, at least 30 cm from the floor to the niche. From there, grooves are cut down to the floor for the wires.
If the room where the devices will be installed has high humidity, the thermostat should be moved to an adjacent room.
The installation of the cable floor itself consists of the following stages:
- The subfloor is covered with a waterproofing product—a polyethylene film—that extends up to the walls. The sheets are secured together with tape.
- Insulation is laid on top of the waterproofing - polystyrene foam boards or another thermal insulator.
- The perimeter of the room is covered with damper tape.
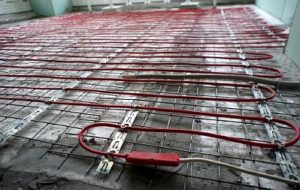
- A reinforcing mesh is laid - it will make the structure stronger, and the cable will be attached to it.
- The heating cable is laid out according to the planned pattern—a "snake" or "snail." It is secured to the reinforcement with cable ties or nylon cable ties. The installation pitch is 10–15 cm.
- The cable is connected to the thermostat, and the system’s functionality is checked.

- The screed is poured using pre-installed markers. The pouring technique is the same as for installing water circuits. It is best to use a mixture with added plasticizers for the screed. The thickness of the mortar should not exceed 5 cm.
The final coating is applied only after the solution has completely hardened.
Heating cable installation in a panel house can be done using the flooring method - on joists, with hydro and thermal insulation material placed underneath.
The joists must have cutouts for the wires, and foil is inserted into them. Plywood sheets and flooring are laid on top of the system.
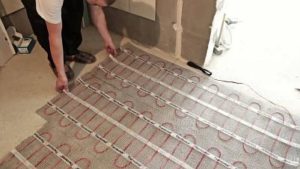
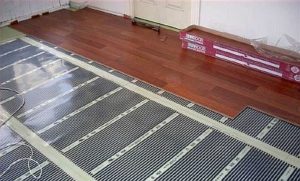
Heating mats
The process of arranging heating using matsIt's similar to installing cable heating, but much simpler and faster, as the wire is already secured to a special mesh with a predetermined pitch. The mat can be laid in screed or tile adhesive.
As with the installation of any electric floor, you need to start with installing the thermostat.
Then a groove is made in the floor for the tube in which the temperature sensor and the cable from it will be placed.
In a frame house, heating mats are laid directly on the finished floor, which is then covered with polyethylene film for waterproofing. The mats are laid according to the developed plan and are not placed under heavy furniture. They are secured to the floor with adhesive tape.
After connecting and testing the system, the structure is filled with concrete or tile adhesive. Once the mortar has dried, the flooring can be installed.
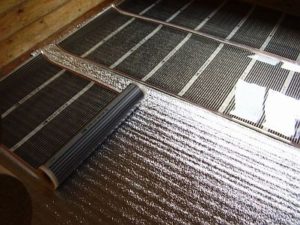
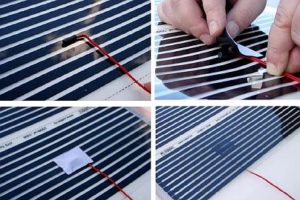
Infrared film
The process of installing infrared film In a frame house, this is the easiest option for installing a heated floor pie, since there is no need for a concrete screed.
Let's consider the algorithm for connecting an infrared floor.
- The location for installing the thermostat is determined. Its presence saves 30-40% energy. It is mounted either on the wall or in a recess cut into the wall. The device is connected to the power supply.
- The subfloor is being prepared - it must be level and free of cracks.
- The film is laid on a floor covered with heat-reflective material. The sheets are laid end to end, without overlapping. If necessary, the film can be cut into strips of the required size along the designated lines.
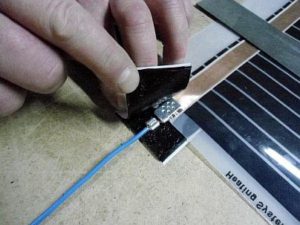
- The film is energized by installing contact clips on the copper busbars and connecting the wires. Each section is connected separately. If one section fails, the entire system remains operational. For reliability, the contacts should be clamped with pliers.
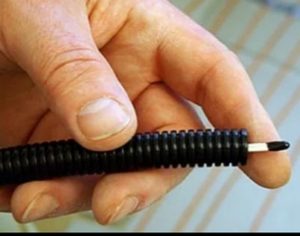
All power wires are routed to the film via a corrugated pipe across the wooden floor. This is because they could melt, which could cause a fire.
- All cuts and terminals are insulated using bitumen tape.
- The temperature sensor is installed and secured to the film using a special black strip. Pre-grooved slots are made in the base for the sensor and its cable so they don't stand out from the floor surface. The sensor's cable, housed in a corrugated conduit, is connected to the thermostat.
- Testing is mandatory.
- The infrared film is covered with polyethylene to protect it from moisture.
- It might be a good idea to lay plywood sheets on top - this will extend the service life and protect the film from wear and tear.
- We lay the finishing coating - any material that is compatible with heating systems.
Choosing a finishing coat
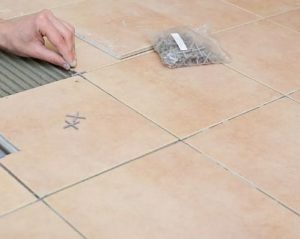
In frame houses, it is possible to lay almost any finishing material on heated floors: laminate, parquet, engineered wood, linoleum or carpet.
Ceramic tiles can be laid, especially on floors with screed. They are recommended for bathrooms and toilets because they are moisture-resistant, but they must be secured with a special adhesive. For a more secure bond, plywood can be replaced with gypsum fiber sheets. If the tiles are being laid on heating mats, the amount of adhesive should be increased.
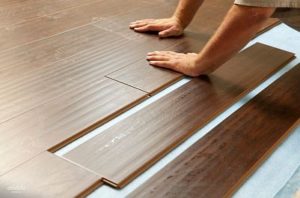
In other rooms, laminate flooring is popular. The process for installing laminate flooring over heated floors in a frame house is the same as for a regular surface.
The surface on which the slats will be installed must be dry and level. This can be a concrete screed or plywood sheets. Polyethylene film is laid on top of these, overlapping the walls slightly. The excess polyethylene film is then trimmed off.
Next, lay out the underlayment; any thin material will do. Lay the planks on it, with the short side facing the window, to make the joints less visible. It's essential to leave gaps between the wall and the tiles. The installation of the second row should begin with a plank of a different size. All remaining rows are laid in the same order.
It's up to you to decide which coating to choose, the main thing is that it is specially designed for heating systems.
Installing underfloor heating in a prefabricated house will ensure comfortable living conditions. However, uniform heating is only possible with proper installation of the heating system. Therefore, if you plan to do the work yourself, you should familiarize yourself with the principles of selecting and installing such systems in advance. And if you're unsure of your abilities, call in a professional.


