Installing a chimney in a sauna using sandwich pipes is the most optimal option for a metal flue system. This lightweight and compact structure is almost indispensable in situations where the original plan for a flue system was lacking.
This installation project isn't difficult to implement. All you need to do is attach the main parts and auxiliary elements in the correct sequence.
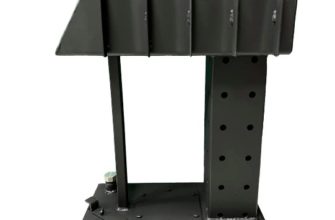
 It's also important to consider some of the nuances of this design. Without them, it's impossible to properly construct a complete and airtight structure. Such a structure would look like this:
Sandwich structures, made of three layers, got their name from a famous Englishman. Bathhouse chimneys bearing this name are no exception.
A distinctive feature of these pipes is that an insulating layer is placed between the metal outer shell and the identical inner shell. This insulating layer is typically made of basalt materials.
Additional elements for installation:
- a pipe equipped with an inspection hole;
- crimping clamps;
- brackets and other parts:

This kit helps ensure the proper functioning of the flue gas exhaust system.
A sandwich chimney in a bathhouse has a number of advantages.
- The circuit inside the sandwich pipe tolerates high temperatures and the effects of condensation well.
- During installation, the insulating material creates reliable protection for the external circuit from overheating..
- Structural features create obstacles to water penetration into the insulation.
- The required thrust limit is created, and the gases are discharged.
The outline inside these materials most often made of stainless steel, and this option is known to have high anti-corrosion properties. For cost-effectiveness, the external contour is often made of less durable galvanized material.
Thus, the consumer is faced with the problem of choosing a material: to prefer long-lasting stainless steel or an option that allows for some savings.
IMPORTANT! The material for the sandwich pipe's interior is selected based on its ability to withstand high temperatures. The outer contour must be made of a rigid material, otherwise its configuration will not remain unchanged.
Also used during installation:
- Brackets on the wall to hold the structure.
- The revision consists of a window for cleaning, and also includes a stand.
- Set of adapters.
- Tees.
- Elbows that allow you to change the direction of the structure by 45 degrees or at a right angle.
- Clamps for fastening separate parts.
- Unloading platform. It allows for accurate calculation of the structure's weight and the removal of the load from its foundation.
- To install a chimney through the roof you will need crime, rosette and capercaillie.
Installation and assembly
Installing a sandwich chimney in a sauna is the simplest way to install a flue gas system. The small, lightweight components of the structure can be easily assembled using auxiliary elements.
Before constructing such a structure, the following requirements should be taken into account:
Video
The pipe is installed vertically, without any steps. A deviation of 30 degrees from the vertical is allowed, and the maximum lateral deviation is one meter.
If the distance from the roof to the head of the structure exceeds one and a half meters, it is necessary to install a guy wire to secure it.
If flammable materials are laid on the roof, a spark arrestor mesh should be installed at the end of the smoke exhaust structure. The mesh size of such a device should be 0.5 x 0.5 cm. On a flat roof, the smoke exhaust should be raised more than one meter above the roof level.
The horizontal part of the chimney should not exceed a distance of more than one meter.
The joints between the elements must be visible and not enclosed within the roof deck.
It is not recommended to place cleanouts and horizontal outlets in the attic; in this room, such a structure should run in an upward direction.
This type of sauna chimney is very easy to assemble, using the same construction kit principle. One end of one piece is "slid" into the next piece:

To achieve this, the volume of each element on one end is slightly larger than the corresponding volume on the other side. Clamps enhance the reliability of such connections.
Video
This type of work involves using a starting cone. One end of it is placed on the furnace nozzle, and the other is connected to a straight section of the structure.
Often, a chimney in a bathhouse is a simple structure consisting of a pipe extending from the stove to the outside. It passes through the roof and ceiling with a few turns and auxiliary fittings.
Exhaust through the ceiling
 Installing a chimney through the ceiling in a sauna is done as follows. A special unit is installed in the ceiling to provide a secure connection and high fire safety:
Although such a pipe is a two-layer structure with non-flammable thermal insulation in the middle, to increase the level of safety, a hole is made in the ceiling opening for the chimney for the installation of a small pipe, which is 15-20 cm larger in diameter than the diameter of the chimney.
 The bottom of this hole is sealed with a sheet of steel. The part that ends up in the attic is filled with a non-combustible material. For this, you can use:
- basalt wool;
- sand;
- expanded clay.
Large-volume rolled pipe assortment for sandwich flue insulation allow you to replace the box with non-combustible materials:

A sandwich flue is inserted into the box, and the empty space is also filled with non-combustible material:

The video provided provides a detailed description of how such work is carried out.
How to install through a wall
 Installing a chimney through a wall in a bathhouse is used in situations where it is easier to exhaust the device from the stove through an adjacent wall.
This solution reduces the number of necessary joints required to penetrate the structure through the ceiling. A significant advantage of this method is that cleaning such a structure is much easier.
The maximum horizontal section of such a chimney should be one meter. Increasing this distance will reduce draft. If a longer horizontal section is used, forced ventilation must be installed.
Video
When installing a smoke exhaust system through the wall of a log sauna, it must not only be installed in accordance with fire safety regulations but also properly secured. For this purpose, two steel sheets are installed on both sides of the wall.
Installation of a chimney
Installing a sandwich chimney in a sauna yourself is, as experts say, "as easy as pie." The key is the simplicity of this design. The video provided clearly demonstrates this assembly.
I run a small piece of uninsulated sandwich pipe from the stove to the boiler. This should be taken for granted. No matter how strong the pipe, it will quickly burn through directly next to the stove.
Video
A special feature of sandwich-type chimneys in this situation is that they are installed with the inner pipes facing upward. This prevents condensation from escaping beyond the flue. The outer shell is joined in a different order. This also prevents combustion products from entering the home.
Most experts recommend sealing the joints during this type of work, as significant amounts of air suction will reduce draft and can sometimes stop it altogether.
Preparation of the PPU (ceiling-passage unit)
The name PPU was given to the ceiling section, otherwise it is called the ceiling-passage unit:

The polyurethane foam chimney installation in a sauna is carried out with the understanding that the sandwich structure will not pass through rafters or beams. The most suitable option is to install the ceiling after the chimney is installed.
Often, the flue gas duct has to be installed in an already constructed log sauna. In this case, the exact location of the duct is determined, and then it is cut to the required size.
You can purchase and install a ready-made box. It's best to buy it at the same time as the rest of the overall design.
The installation of the pass-through unit of the system in the bathhouse is carried out in the following order.
- Using a plumb line, find the center point on the ceiling. The string is pressed against the ceiling board, and the weight should stop in the middle of the sandwich pipe exiting the stove.
- Then turn the box over and place it on the frame. Align the center of the box with the same spot on the marked point, and make marks for cutting.
- After this, the first section of the elbow and the damper piece are assembled. It is placed on the joint. The pipe extending from the ceiling to the attic is attached to the transition piece.
- The edges of the box are secured to the ceiling with self-tapping screws.
- Next, work is carried out in the attic. The empty space in the box is filled with a material with low thermal conductivity and flammability.
When installing a pass-through unit correctly, you need to remember a few simple rules:
- Regardless of the thickness of the floor, the cutting must be 10 or more centimeters higher.
- In situations where polyurethane foam is filled with insulation, it is not permitted to attach two structural elements in such a place.
- The connection of two parts of the flue above the ceiling can be performed at a height of at least 0.3 m.
Passage of the chimney through the roof
 When installing a bathhouse chimney into the roof, it's important to do so using a cutout and taking into account the roof's slope. It can be 15-35 degrees or 35-55 degrees.
After this, the exact location for the flue gas outlet is determined. The dimensions are determined, and an opening is cut from the inside. Then, an opening is made in the roof, and the flue gas outlet is installed.
The prepared opening is first cleaned using a roofing sheet, and the roof flashing is installed on the outer part of the structure. The slope angle is determined based on the conical part of the flashing, and the edges are tucked under the roof ridge. Insulation is installed along the pipe walls. It is applied only to the internal cavity.
Video
Is insulation necessary and how to do it yourself?
Video
The insulation prevents the formation of large amounts of condensation in the sandwich, which is an additional advantage.

How you can do this yourself is described below.
- For insulation you will need two rectangular pieces of galvanized metal, which are rolled into a cylindrical shape.
- The lower pipe should be wrapped with insulating material. A larger pipe is placed on top and joined using a flare.
- The clamp, cut from a sheet of iron, should be 20 cm wide and equal in length to the section of the chimney being covered. It is used to secure the chimney at the top and bottom.
- The manufactured pipes are connected according to the diagram.
This simple sandwich structure installation scheme can be used both when first constructing a smoke exhaust system and when replacing its parts if they burn out over time.
The sandwich technology is quite simple in its design and requires virtually no special skills.
How to make a cap yourself
To protect the sandwich chimney, it's necessary to install a special cap around the chimney outlet. This will help avoid having to replace the stove system in the coming years.
Video: DIY weather vane, cap, and chimney cap
Sequence of work
The cap can have different shapes, among which the most common are curved, conical and flat round, square or rectangular surfaces.
To install a rectangular cap, please refer to the diagram below.
")
Stainless steel sheet metal (galvanized, copper and zinc-metal alloys can be used).
- Tools for work.
- Gloves.
- Weather vane.
When making a hat yourself for the first time, it's best to practice first on some cardboard. After creating one or two such blanks, you'll get a clear understanding of the process.
Video: DIY Cap
Drill a narrow hole 3-4 mm in diameter in the center of the design on the galvanized sheet. Trim off any excess with metal shears.
Using a sheet metal bending machine, it is necessary to bend all the parts in stages in order to obtain the desired shape.
If you don't have this device, you can do it with improvised tools. Be careful not to leave any dents in the hubcap.
A 1 cm wide edge is folded inward at a 45-degree angle. To avoid ripples at the corners, start there and gradually work your way toward the center.
Next, fold the top 2 cm of the structure back at a 90-degree angle. Next, fold the center line.
Now it's time to check for levelness. To do this, place a straight, thin stick under the center of the resulting figure and push it into a bowl of soil. If assembled correctly, there won't be any imbalance in either direction.
Once all the main corners have been cleaned, finished, aligned, and leveled, the cap needs to be secured to the base. For this, the pieces are joined using a special construction adhesive.
Video
Final steps
At this stage, the flue is fitted with an adjustable apron and the flue structure is extended to the required dimensions.

Installing a chimney in a sauna using sandwich pipes will be done correctly if the ratio of its diameter, height, and volume is calculated correctly. The type of stove and its power are also important in this case. These factors directly affect the draft and proper functioning of the chimney.
Flue pipes in a classic Russian banya must be fireproof and free of many bends and turns. Follow professional recommendations for all installations, and the steaming heart of the banya will function reliably for a very long time.
If there are any remaining uncertainties in your calculations, it's worth seeking professional advice. The investment will be fully compensated by a well-functioning smoke-extraction sandwich device, and therefore, your good health.