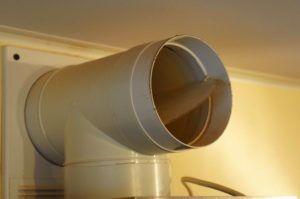
To connect the range hood to the ventilation system, bend the corrugated pipe at the kitchen cabinet outlet and insert the end into the ventilation shaft. Plastic pipe connectors can be used. Seal the joints with silicone. When completely sealed, the ventilation system's efficiency will be 100%.
Connecting the hood to the ventilation in the kitchen is done with using a plastic air duct or aluminum corrugation.
During installation, consider the following: hood type, ventilation features, power supply, room size, and stovetop surface area. For safety, install protection against current and grounding.
- Let's consider the types and principles of operation
- Classification of hoods
- Criteria for selecting exhaust equipment
- Checking the ventilation duct
- Markup
- Installation features depending on the type of fastening
- How to connect to a ventilation duct yourself
- Steps to connect a range hood yourself
- Grounding and neutralization, installation of sockets
- Installing a supply valve
- Is it legal to connect a kitchen hood to a common house ventilation system?
- Kitchen hood without ventilation connection
Let's consider the types and principles of operation
In an apartment building, the vertical ventilation shaft begins in the basement and extends to the roof. Each apartment terminates in a grate.
There are three types of ventilation provided in buildings:
- Natural air outflow due to pressure differences in the mines.
- Forced draft fans provide air supply and exhaust. With a standalone system, the fan operates on the building's façade. Supply valves are installed. With a centralized network, supply and exhaust units provide 24/7 draft throughout the building.
- Combined options. Air is supplied forcibly and naturally exhausted through the shaft. In the second option, air enters through windows and is exhausted using exhaust fans.
Connecting a range hood yourself disrupts standard ventilation. A hole is punched during installation, but the cross-section of the shaft remains the same. To improve air circulation, a flapper valve is installed. It blocks backdraft when the range hood is running. After the hood is turned off, the flapper valve opens.
Don't know what model What is the best kitchen hood with ventilation connection?, we suggest you familiarize yourself with the rating.
Classification of hoods

When installing, consider the type, features, and mounting method. Exhaust systems operate in two cleaning modes.
- Forced exhaust – contaminated air flows are directed through a pipe from the room into the shaft. Flow-through exhaust hoods are characterized by high performance.
- Circulation of flows – air masses pass through carbon filters.
Kitchen hoods with ventilation connection are installed with two types of bends.
| Type of diversion | Pros | Cons |
| 1. Air duct made of plastic (PVC) | It comes in the form of a flexible tube or narrow elements. It has an aesthetically pleasing appearance, is compact, and can be installed without additional casing. PVC pipe does not make noise and does not resist air currents. | Assembly is complex and more expensive than corrugated tubing. Hard plastic boxes hum and vibrate. |
| 2. Aluminum pipe (corrugated) | The material is easy to install yourself. It bends to fit any opening. It's silent. | Not an aesthetically pleasing appearance. |
Flat, compact units with a filter are easy to install without connecting to the main ventilation system, but have low power. Dome-type "umbrellas" are the most powerful units.
Manufacturers produce fireplace hoods with wall mounts, corner hoods for corner stoves, and island hoods with ceiling mounts for stoves located in the center of a large room. The material is stainless steel or enameled steel, and less commonly, plastic. For small spaces like kitchens, they create built-in retractable panels with a pipe.
It might be interesting - How install the hood yourself (recirculation, combination or duct) in the kitchen.
Criteria for selecting exhaust equipment
Before purchasing, it's important to prioritize comfort or savings. Design, power, sound insulation, and adjustment options significantly impact price. The choice is based on four key criteria.
- Power. Determining this will require a calculation based on the room's dimensions.
- Noise. Turn on the device to assess the noise level. A noise level of up to 50 dB is recommended for an apartment. Silent models are equipped with three fans or a sound-absorbing housing.
- Material and type of air duct.
- Additional accessories: lamps for illuminating the work area, automatic switching on simultaneously with the stove, timer for stopping on time, control panel.
Some models come with a choice of operating modes. If you're planning to purchase a recirculation unit, it's worth choosing one with a filter clogging indicator.
How do you determine the power and performance of a device? The calculation can be done by calculating the volume of air purified in 60 minutes. According to Russian standards, air circulation should occur 12 times per hour. To calculate the power, use the following formula:
S (room area) * H (wall height) * 12 = M
For example, what power is required for a kitchen with an area of 8 m2, with walls 2.8 m high?
8 * 2.8 * 12 = 268.8 m3.
If bends in the pipe or a long shaft are planned, add 30%. Taking into account the power loss, we get:
268.8 m3 * 1.3 = 350 m3.
Checking the ventilation duct
Before starting work, we check the channel's functionality. We hold a piece of paper to the grate. If the system is working properly, it sticksIf the paper isn't sticking, there's a blockage in the ventilation shaft. It could also be partially collapsed. Residents often break the duct themselves to create more space.

Conduct a second check with the windows open. If the sheet doesn't stick, there's no draft, so the shaft needs to be cleaned or repaired.
Markup
The distance from the stove is specified in the instructions. When marking, mark the center of the cooktop. The hood should be positioned along this axis. Different stovetops have different mounting heights.
The lower limit should not be increased due to high temperatures, or, in other words, to prevent the exhaust system from melting. The upper limit is optimized based on the height of the person who will be using the system. It's important to connect to the ventilation duct with a minimum number of bends. Each bend in the pipe reduces draft by 10%.
Read also: types of ventilation in the kitchen, how to arrange it yourself.
Installation features depending on the type of fastening
Watch the video: How to install a kitchen appliance yourself
Wall-mounted, flat-panel hoods are not connected to the ductwork. They come with mounting hardware for the bottom of the cabinet. Mark the mounting locations with a pencil. Drill the holes. Remove the filters to expose the mounting holes. Assemble and attach the hardware. Check the hood with a level. All that remains is to connect it to the power outlet.
 Wall-mounted units are mounted with metal brackets. The housing rests on a frame, which is attached to the wall with screws. Self-tapping screws are used if a gas pipe runs along the kitchen wall. The housing is secured to the stud with a nut at the desired distance. If necessary, the distance can be extended with wooden blocks.
Built-in hoods are mounted in a wall cabinet above the stove or on a shelf in your kitchen. For a test fit, the housing is placed in the cabinet. The distances are measured, checked with a level, and centered. If the fit is successful, the hole locations are marked. The cabinet is removed, and passages for the ventilation outlet are drilled.
Island units are mounted to the ceiling to create draft. If the air duct doesn't reach the ventilation, a recirculation exhaust unit can be installed independently. Regardless of the type of equipment, it's important to create a direct path to the shaft without any kinks.
And if the equipment installation will be done by yourself, then at this point you need to pay special attention.
How to connect to a ventilation duct yourself
You'll need a corrugated pipe (box), a grille, a valve, and tools. For a direct connection, the corrugated duct is aligned with the ventilation duct. A round grille is installed for a clean connection. The corrugated pipe can disrupt the appearance of the kitchen. It can be concealed in a drywall box or duct.
Read the article about Corrugated pipes and their use in kitchen exhaust systems.
Watch the video: How to install a kitchen hood yourself
The kit includes corners, adapters, wall panels, and fasteners. It's important to correctly calculate the size of the plastic structure. Joints and connections are sealed with sealant.

Steps to connect a range hood yourself
Installing built-in cabinet equipment is more complex. To complete the job correctly, follow these steps.
 We manufacture or purchase a non-return valve (clapper).
- We place the enclosure in a cabinet above the electric or gas stove in the kitchen. We secure it in place and seal any gaps with sealant or special foam. We glue the enclosure to the cabinet to neutralize resonance. We install the clapper board. We mark the holes on the cabinet.
- Remove the cabinet. Use a jigsaw to cut out any excess material along the markings in the bottom stack and, if necessary, in the inner shelves.
- We connect the air duct. We trim the corrugated pipe, leaving some excess. We trim the corners and bend them outward. We fill the joints with silicone sealant.
- We're attaching a box above the kitchen cabinet to connect the corrugated pipe to the ventilation shaft. We're filling the joints with silicone and sealing larger gaps with foam.
- We attach the hood using screws or dowels. We put the kitchen cabinet on.
- We secure the corrugated pipe to the hood with a special clamp. The connections are sealed with sealant.

Grounding and neutralization, installation of sockets
Entrust this work to an electrician! When installing the range hood, connect it using three wires: live, ground, and neutral. Grounding protects against voltage surges. It's the yellow wire with a green stripe.
If you have European-standard sockets, use a grounding loop. The wire is connected to terminals with stripes or marked "Ground" (GND). If there is no grounding connector, one can be made from a wire connected to a metal part of the housing.
Not all apartments have European-style sockets. For grounding, the wire is connected to a solid neutral in a pipe or busbar under the electrical panel. The neutral wires are located on a pin. A multi-channel cable (with a cross-section of at least 2.5 mm) is extended from it.2). The hood is connected to a 6.3A circuit breaker.

Danger! Do not disconnect wires connected to the grounding system. Place the new wire over the old ones and tighten it with a nut. On a smooth surface, you can secure the contacts with a clamp. If you are not an expert, consult a professional!
When selecting an outlet, consider that most range hoods have three-wire cords. Place the outlet in the kitchen above the cabinets at a height of two meters. It shouldn't be located near the sink or stove, or obstructed by appliances. If exposed, conceal the outlet in a special box.

Installing a supply valve
When installing a supply valve, the general building ventilation should not be blocked. Therefore, a grille with a valve and a place to secure the air duct is installed. A check valve with an anti-return mechanism is suitable instead of a grille.
 When the valve is closed, the kitchen is ventilated as usual through an opening or window. When the fan starts, the flapper closes it. Air is trapped in the duct, preventing backdraft. A spring regulates the flapper's movement. The flapper can be purchased, or sometimes homemade from aluminum, galvanized steel, or sheet metal.
When preparing the hood openings, we cut a square in the top wall of the cabinet ourselves, adding a 3-5 mm allowance for the flapper. We install a check valve in the vent. we treat the edges with sealant.
Is it legal to connect a kitchen hood to a common house ventilation system?
Builders of older high-rise buildings didn't consider that future residents would install exhaust systems many years later. Therefore, they didn't provide individual kitchen ventilation ducts. Connecting exhaust systems in such buildings changes the pressure in the system. People cook or smoke in the apartment, and the odors carry to the neighbors. What does the law say about this?
SNiP 41.01.2003 permits combining different ventilation methods. Mixed systems can coexist with natural and mechanical ventilation. Connection to an individual apartment exhaust duct is permitted.
If the entire system is functioning properly, no foreign odors should reach the neighbors. Problems arise due to installation errors. The legality of the connection is beyond doubt, but a ventilation specialist should be called beforehand.
Kitchen hood without ventilation connection
 Flat or suspended hoods with a filter serve in two modes. The air is passed through a filter (recirculation) or exhausted outside.Filters are changed every six months. Kitchen hoods without ventilation are easy to install. Just examine the fasteners and mark the mounting locations on the walls, taking into account the distance. Drill holes, install anchors, and screw in the hinges. The equipment is then secured to these.
Filtered hoods have low performance. To increase the power, you can install an additional fan into the duct yourself. Install adapters and a power cord. The built-in fan can eventually be replaced with an external one, which can produce up to 2,000 m³.3/h.
Kitchens are equipped with air flow devices, such as window fans and ventilators. In older buildings, sealed windows and doors impede natural ventilation. Draft is lost, and mold and moisture build up. A ventilator is mounted on a window or wall. It allows a limited amount of air through, creating a healthy indoor climate.


I'll show this article to my husband. We're planning a renovation and installing a range hood. I hope he'll figure it out and handle it himself. Especially since everything is described in detail.
It was worth searching for information on installing a range hood. I hadn't even thought to check the ventilation duct, but it turns out mine is clogged (not drawing air). I'll have to deal with that separately. Otherwise, the installation doesn't seem all that scary, and I can do it myself.
I want to buy
How to get