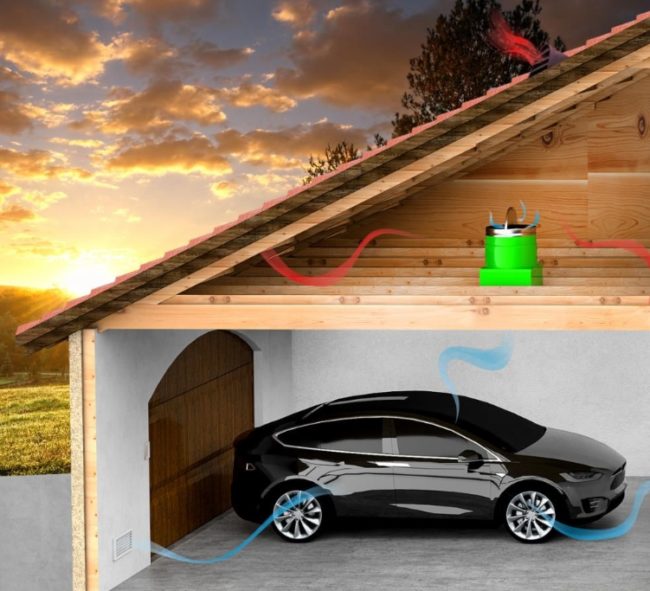
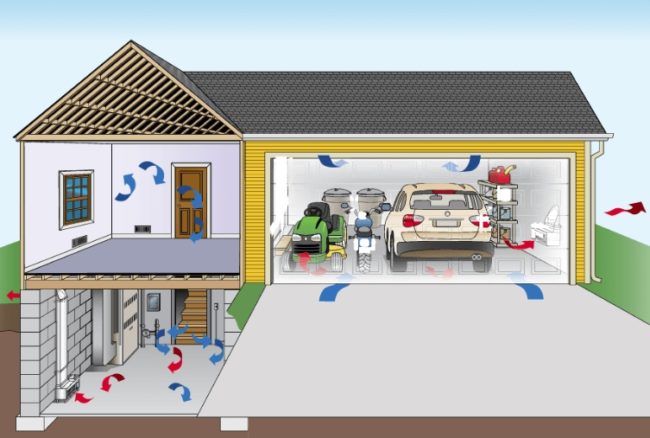
To ensure air exchange and moisture removal, effective ventilation with natural or forced air circulation is required in the garage.
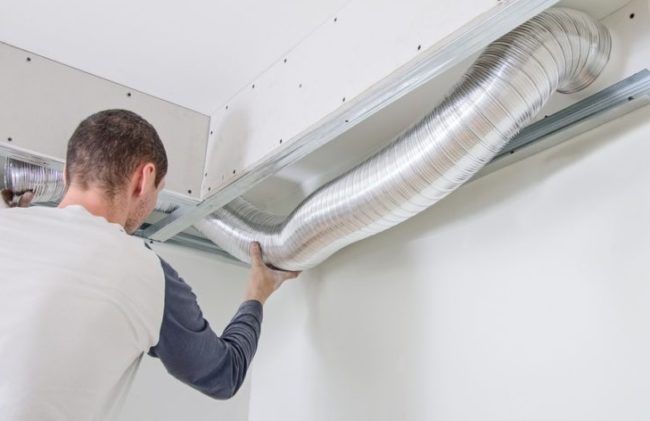
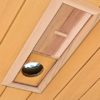
You can assemble a simple hood yourself from a PVC sewer pipe, securing the air ducts to the ceiling.
Use gaps in doors and windows for ventilation. If there's a basement or deep inspection pit beneath the garage, build a supply and exhaust system from PVC or asbestos pipes, with ducts running in both rooms. I'll explain how to create a simple and inexpensive ventilation system with a step-by-step description of each process.
- What is the best ventilation system for a garage?
- Natural ventilation with supply and exhaust
- Forced ventilation
- Combined ventilation
- Standards and calculations for garage ventilation systems
- What is needed for ventilation installation?
- Assembling a combined ventilation system in a garage with an exhaust fan
- Assembling natural ventilation in a garage with a basement
- Answers to the most pressing issues
What is the best ventilation system for a garage?
There are three ventilation systems: natural, forced, and combined. The choice depends on the garage's parameters. For a small, dry space with or without an inspection pit and basement, a simple natural system is sufficient.
If the garage is constantly damp, opt for forced or combined ventilation.
This system is often suitable for spaces with a basement and an inspection pit, as low-lying areas remain damp even during hot summers. Let's explore the pros and cons of choosing the right system. This system will help eliminate moisture. DIY dehumidifier.
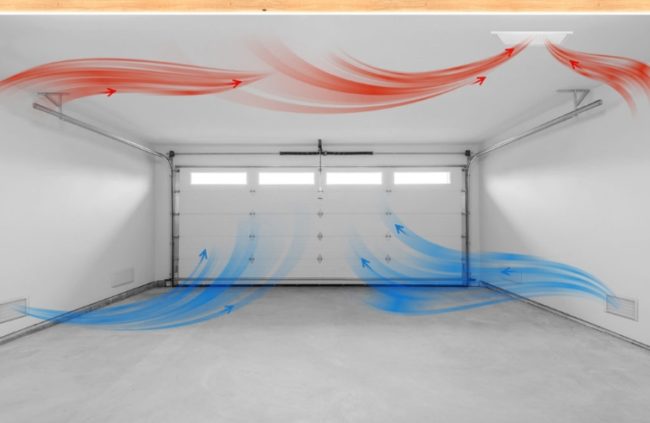
Natural ventilation with supply and exhaust
The simplest system circulates air flows due to the temperature difference and pressure differential between the outside and inside the garage. The system consists of two elements:
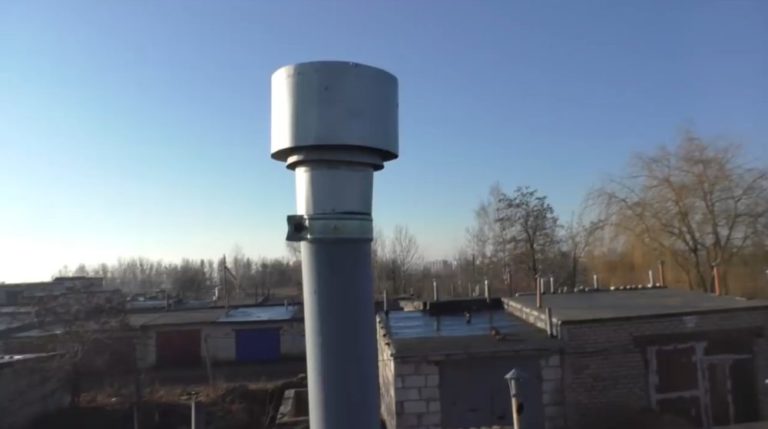
- An exhaust hood for removing air and moisture. The pipe exits to the outside through the roof or the upper section of the wall. In the simplest version, the duct is located under the ceiling. A more complex design for a garage with a basement requires the other end of the pipe to be lowered to the ceiling of the lower-level room. An additional duct is provided under the ceiling of the upper-level room. A dual-duct hood will remove moist air from the garage and basement.
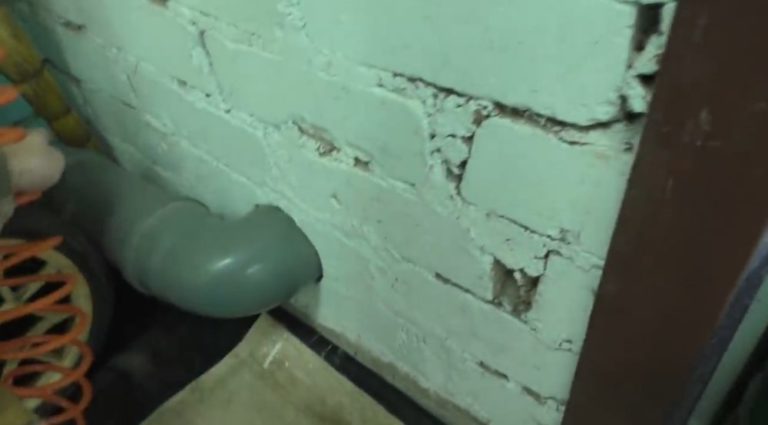
- An air duct for fresh air supply. The pipe exits to the outside at the bottom of the wall, approximately 20-30 cm from the floor. If the garage has a basement, an additional air duct should be installed, extending to the floor of the lower level.

Natural ventilation is inexpensive. Even a teenager can assemble air ducts from PVC sewer pipe. An additional advantage is that the system doesn't require electricity. Air exchange occurs continuously.
Natural ventilation is often better than forced ventilation for garages because the air ducts are not equipped with fans. When they are turned off, the blades become an obstacle to air flow.
Air exchange in a forced ventilation system stops until the garage owner turns on the equipment. Besides the advantages, you'll also encounter some disadvantages of a natural ventilation system:
- In summer, it's warmer outside than inside the garage. Cold air, due to the laws of physics, remains at the bottom of the room and doesn't rise to the ceiling to be exhausted through the exhaust hood. Circulation slows or stops completely. You'll encounter a similar problem in winter, when it's thawed outside but cold inside an unheated garage.
- Due to sudden pressure changes, natural ventilation becomes a source of drafts in the garage.
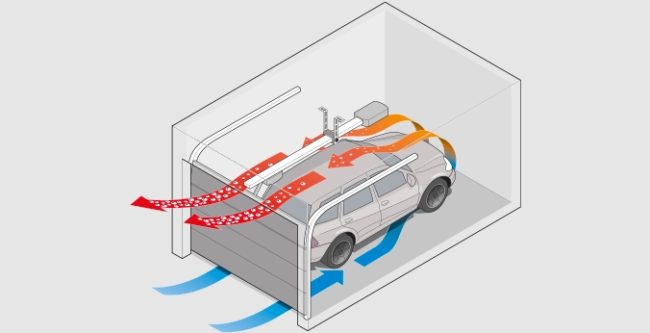
Forced ventilation
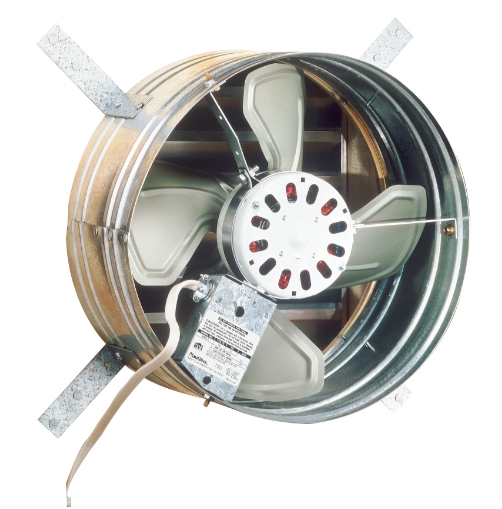
The system similarly consists of supply and exhaust ducts, but air exchange is achieved through forced air circulation by fans. Axial or ducted equipment is located inside the ducts.
Advanced systems for service stations are designed with a recuperator. This unit can heat or cool air flows, filter them, and distribute them through ducts.
Advantages of the forced system:
- the ability to automate the process and regulate air flows to prevent drafts.
- stable operation regardless of the difference in temperature or pressure outside and inside the garage;
- the ability to filter, heat in winter and cool the supply air in summer;
The disadvantages include the high cost of the equipment and the difficulty of DIY installation. The system is dependent on electricity.
You'll have to pay for the kilowatts you use. If the power goes out or the equipment breaks down, air exchange slows down.
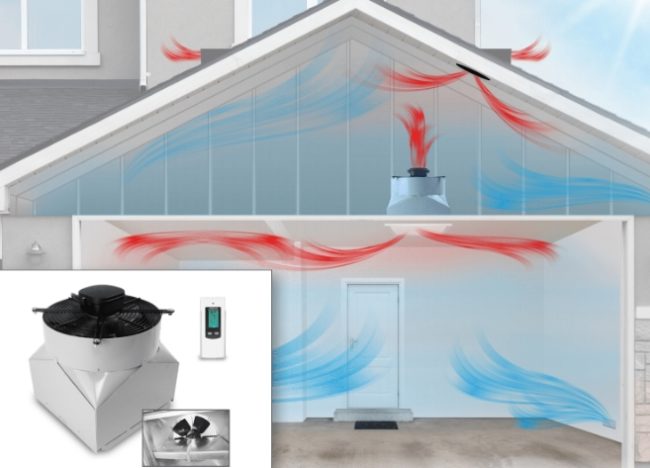
Combined ventilation
In terms of complexity, efficiency, advantages, and disadvantages, a combined system is somewhere between natural and forced ventilation. The system consists of air ducts and a single fan.
An exhaust system or a blower system is installed on the exhaust hood or on the supply hood. A fan is most often mounted on the exhaust hood. Air from outside enters the garage naturally through the supply vents. A fan removes the exhaust air from the room through the exhaust duct.
 Combined ventilation system with an exhaust fan
Advantages of the combined system:
- independence of air circulation from temperature and pressure differences;
- easy to assemble by yourself;
- affordability due to the minimal amount of equipment.
The downside is the dependence on electricity. You have to pay for the kilowatts, and when the fan is off, air circulation is reduced.
Compared to a multifunctional forced ventilation system, the disadvantage of combined ventilation is the inability to clean, heat, or cool air flows due to the lack of a recuperator.
Standards and calculations for garage ventilation systems
According to SNiP 21-02-99, for each parking space for a passenger car in a garage, an air exchange of 180 m must be provided.3/h. A complete cycle per unit of time is called a frequency. The recommended temperature in winter is +5OWITH.
For large garage premises of service stations (technical maintenance stations), where repair and maintenance of vehicles is carried out, multiplicity standards are established with an increasing coefficient from 6 to 10.
To calculate ventilation, first calculate the room's volume by multiplying the width by the length and height of the building. If you have a service station, additionally multiply the result by a coefficient corresponding to the appropriate air exchange rate.
Once you've calculated the required air exchange rate, calculate the duct cross-section. Professional engineers use formulas, tables, and computer programs. For a home garage owner, simple calculations using an online calculator are sufficient.

Let's use a 100 mm pipe as a basis. A normal air flow rate for natural ventilation is considered to be 0.5-1 m/s. By inserting the larger value of 1 into the calculator window, you will obtain the air flow rate calculation for a 28 m circular duct.3/h.
Read also: formulas, calculations and air velocity standards in the air duct, what influence does the channel cross-section have and other information on the topic.
For a channel with a square cross-section of 100x100 mm, the indicator will be 36 m3/h. To ensure multiple ventilation of the entire garage, increase the number of air ducts or use larger diameter pipes.
In a forced-air system, the air flow rate is increased by the operating fans. The exact value depends on the equipment parameters. When calculating, use data for specific fans, which can be found in the manufacturer's technical documentation.
Knowing the airflow rate of the fan, enter the value into the online calculator. For example, with an airflow rate of 10 m/s, the airflow rate in a 100 mm round duct will be 283 m3.3/h, square – 360 m3/h.
What is needed for ventilation installation?
Forced ventilation systems are complex to calculate and install. The equipment is expensive and is more suitable for service stations and luxury garages with several cars. Natural ventilation is easier to install yourself.
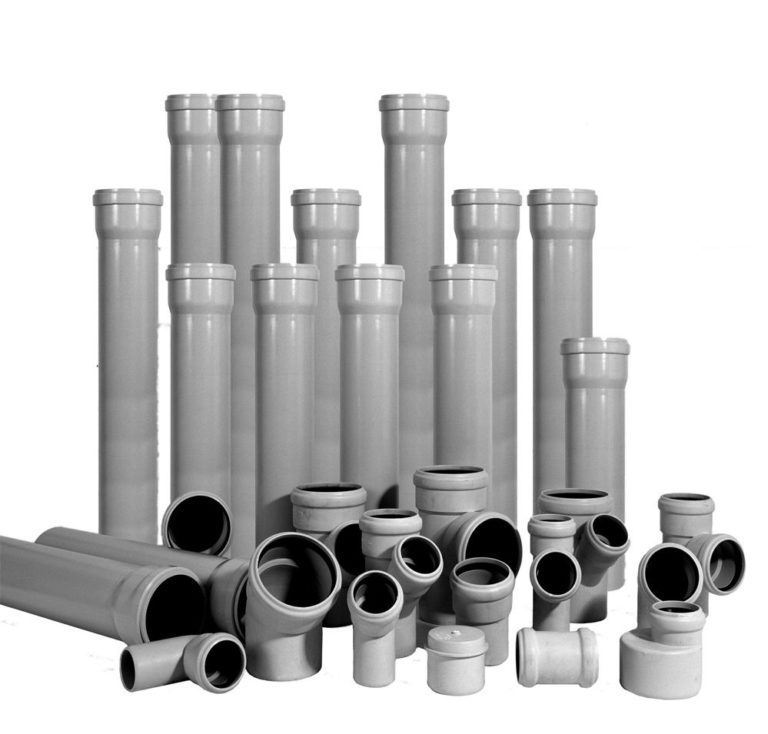
The materials you will need are:
- PVC sewer pipe;
- shaped elements: tees, elbows, plugs;
- Clamps for fastening pipes to walls and ceilings.
 The following tools will be required:
- hammer drill with drilling function;
- drills for concrete, metal, diamond core drill for cutting holes in reinforced concrete;
- tape measure, pencil or marker;
- sealant or mounting foam;
- hacksaw for metal or grinder for cutting pipes.

You can install exhaust risers from metal or asbestos-cement pipe. However, they are difficult to work with, and connecting bends and branch lines is difficult. Metal pipe corrodes from moisture. The duct quickly becomes clogged with rust, requiring frequent removal.
Of all the options, choose PVC pipes. The plastic is lightweight, non-corrosive, and easy to cut with a hacksaw.
If you opt for a combination system, you'll need to purchase a fan in addition to the materials. You'll also need anchors, copper wire for the wiring, and a circuit breaker with protection or a standard switch.
Assembling a combined ventilation system in a garage with an exhaust fan
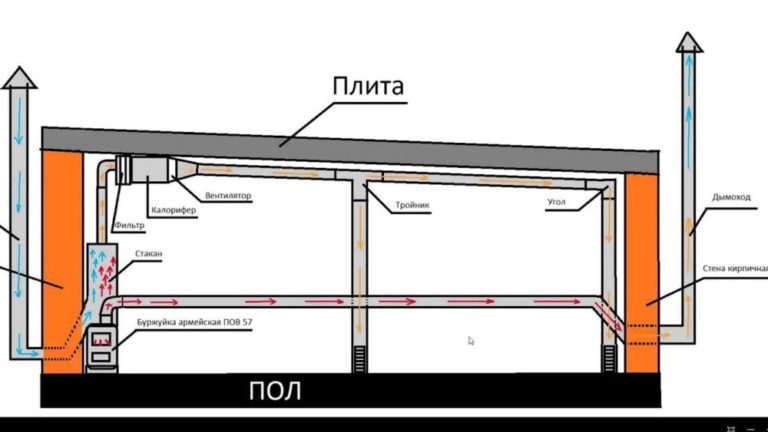
You can ventilate a heated garage using a supply fan installed outside. Organize the air flow through the intake duct running under the stove. Lower an air conditioning pipe from the fan mounted on the upper wall, connecting it with a tee to the supply duct.
The drawback of this design is the complexity of its implementation. You'll need to insulate the outdoor duct and create a mounting and moisture-protective structure for the fan. To simplify the task, take a different approach:
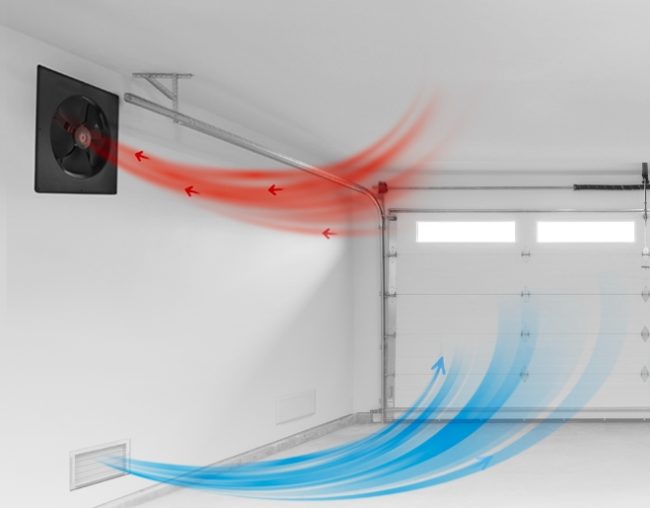
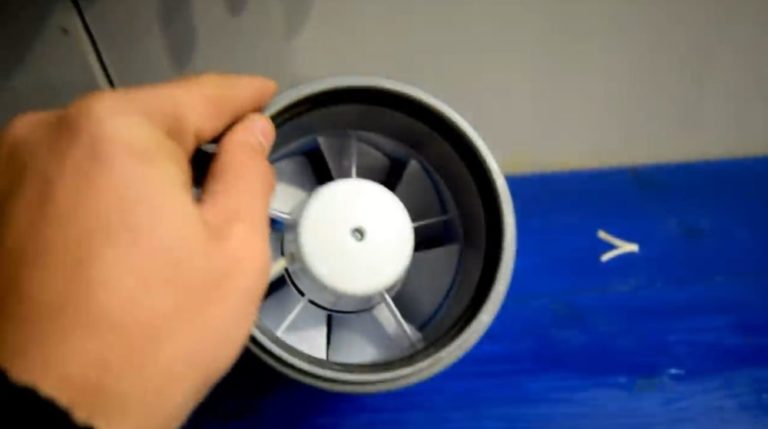
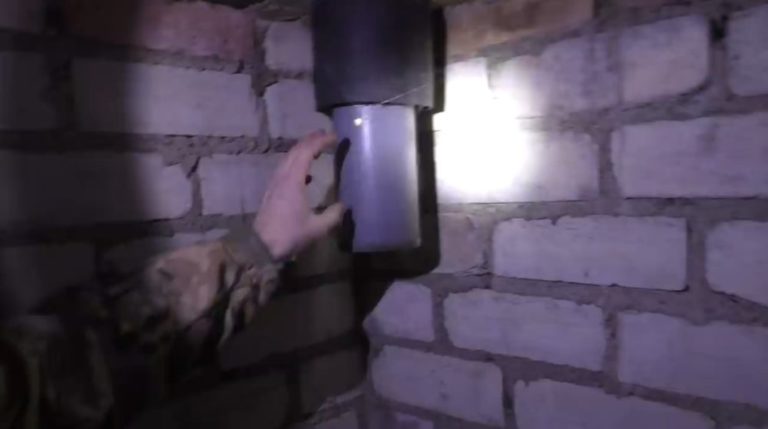
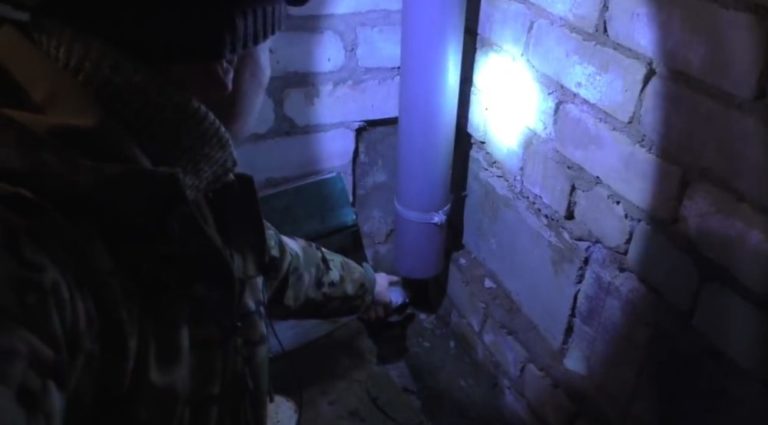
- Install the exhaust fan indoors. Select a model that fits within the PVC fitting for the drainage system. Securely fasten the fan housing inside the wide section of the sleeve. Route the electrical wires. Make sure the unit is turned on and blowing air toward the exhaust hood.
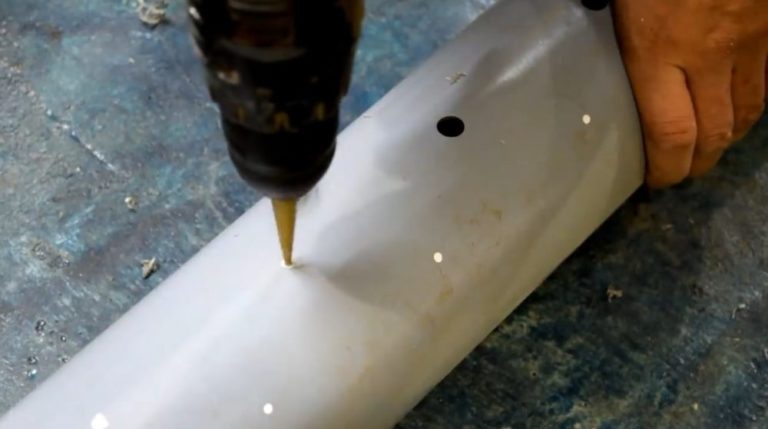
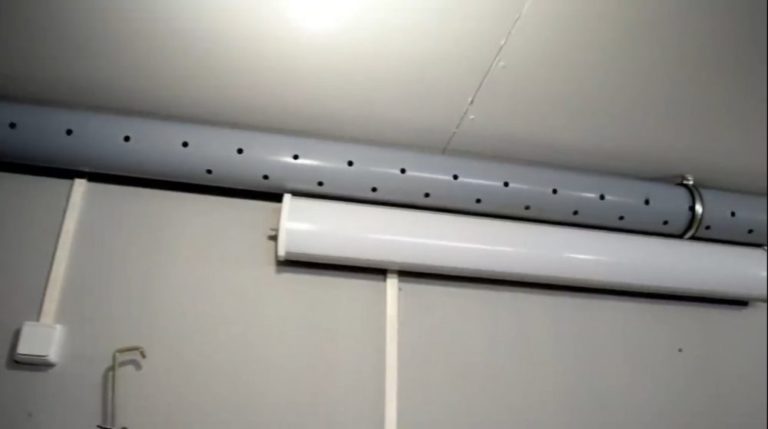
- For the exhaust duct, take a 3-meter-long PVC sewer pipe with a diameter of 110 mm. Use an electric drill to drill exhaust holes. Make the holes staggered, spaced 10 cm apart. Drill two rows of holes along the entire length of the pipe on one side.
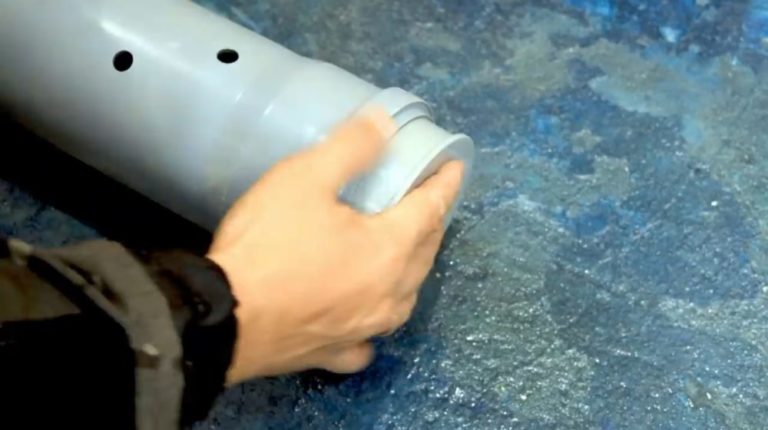
- Close the dead end of the exhaust duct with a plug.
- Secure the perforated duct to the ceiling with clamps. Position the duct with the openings facing down above a table or other area where maximum removal of stale air is required.
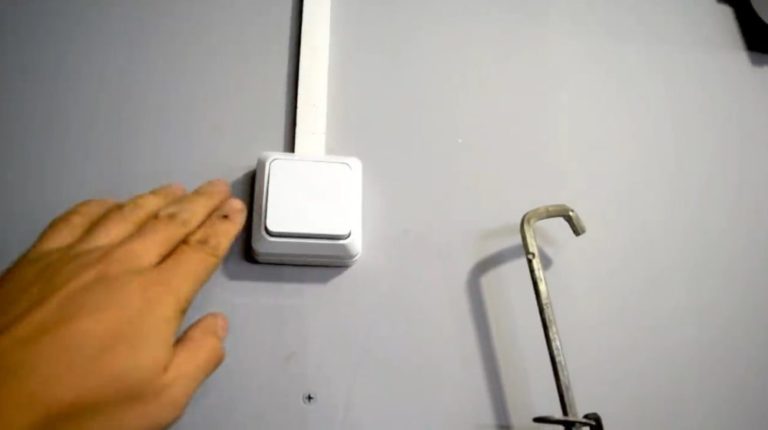
- Install a switch on the wall to control the operation of the exhaust fan.
- To the free end of the pipe, where there is no plug, connect a pre-prepared PVC sleeve with fans inside through a shaped bend.
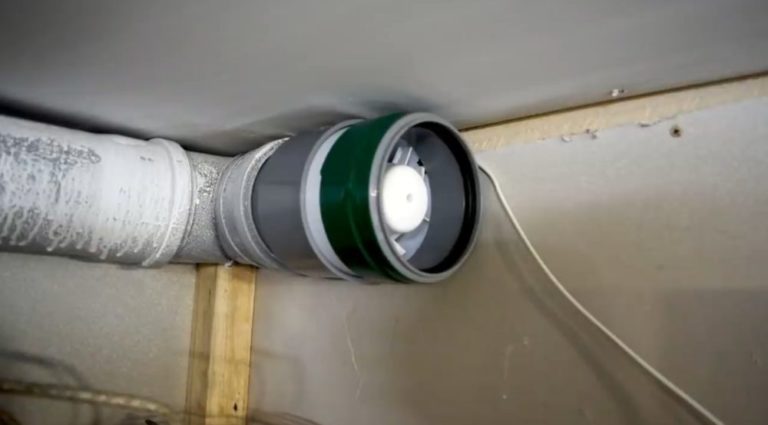
- Using shaped adapters, connect the air duct with the fan to the exhaust pipe that goes through the roof of the garage to the street.
- Provide fresh air intake through cracks in the doorway. In winter, these cracks can be sealed for insulation. The seals won't affect the air intake; small cracks will still remain.

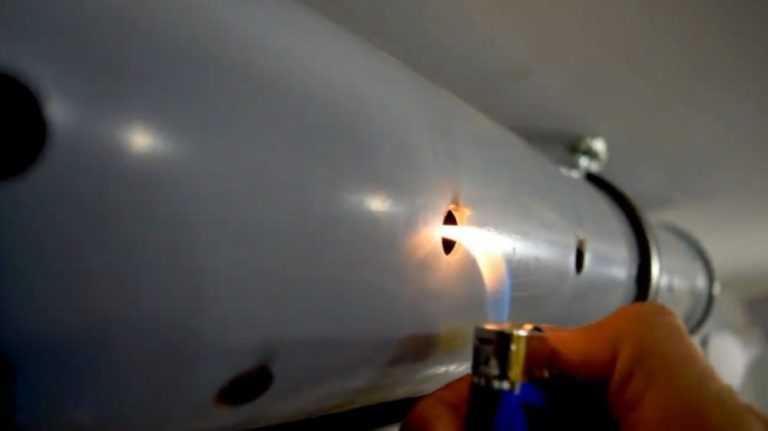
- Turn on the fan and test the draft with a lighter flame. The flame should be drawn into the duct through the perforations.
Forced ventilation reliably removes dirty air, but condensation can freeze inside the riser pipe during winter outdoors. To prevent ice buildup, insulate the pipe on the garage roof.
Assembling natural ventilation in a garage with a basement
Find out how make ventilation in the basement With one and two pipes - many diagrams, tips for selecting the air duct diameter, etc.
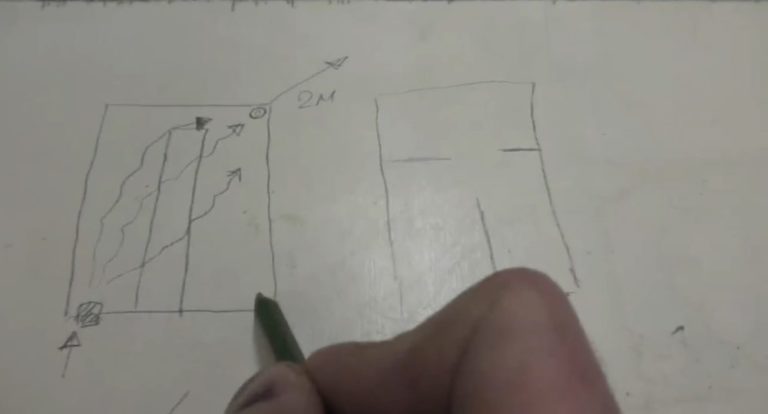
The second option I propose is a simple natural ventilation system. It's complicated by the need to provide air exchange in the basement beneath the garage. For clarity, let's review the installation process step by step:
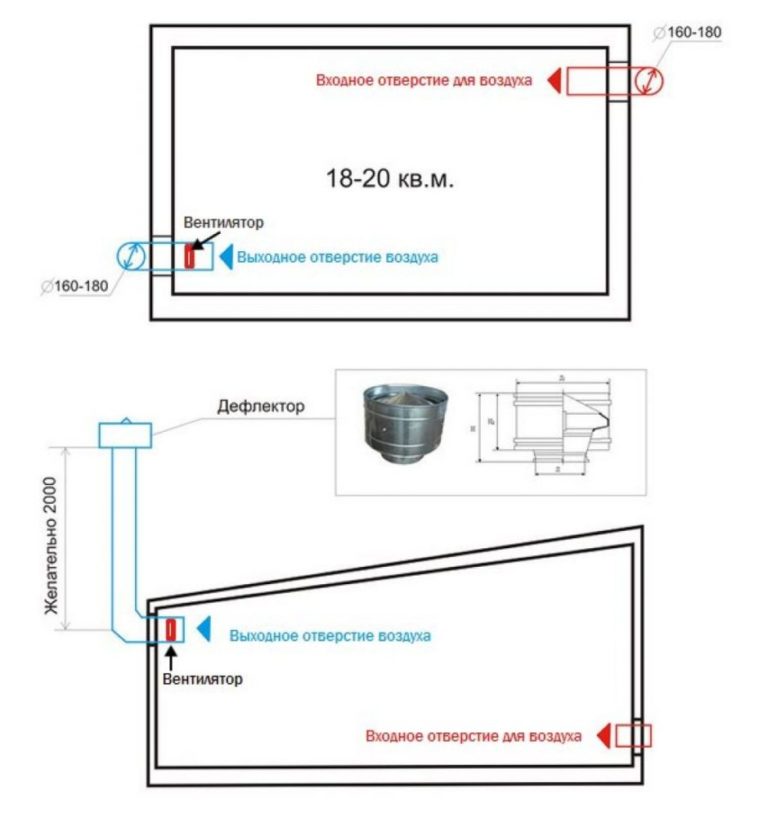
- Draw a diagram of the garage and basement. Mark the locations of the exhaust and intake openings and the ducts.
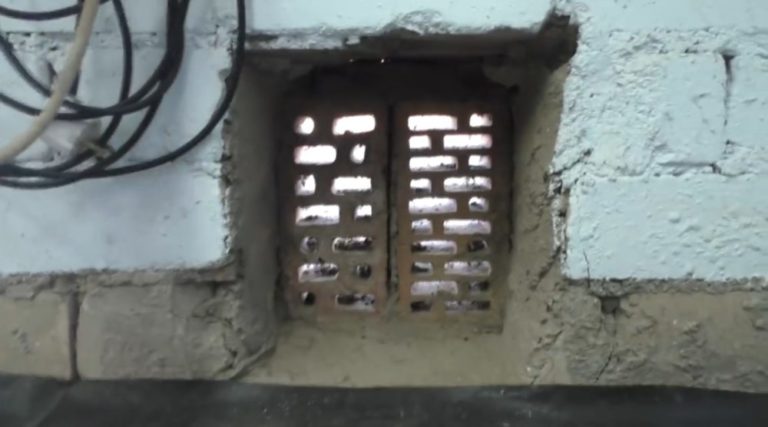
- Use a hammer drill to punch two air inlets into the lower part of the wall. Cover them with a grate to prevent pets from entering the room.
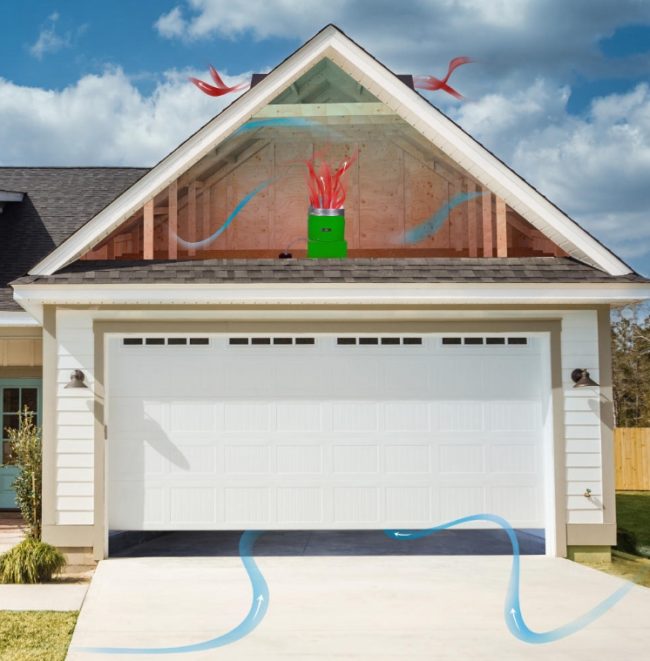
- From the garage, in the corner opposite the air intake, route the exhaust duct through the roof to the outside. Lower the bottom end of the duct 20-30 cm below the ceiling.
- Install an exhaust pipe in another corner of the garage to ventilate the basement. Cover it with insulation to create draft. Route one end through the roof to the outside. Route the other end of the exhaust pipe through the garage floor into the basement, where a 20-30 cm long extension should be left near the ceiling.
- Install a separate supply duct inside the basement in the corner opposite the hood. Lower the bottom end of the duct to the floor, leaving a gap of approximately 20 cm.
- Bring the upper end of the air vent through the ceiling into the garage. Using fittings, extend the vent along the floor through the wall to the outside, where a second vent with a grate has been prepared.
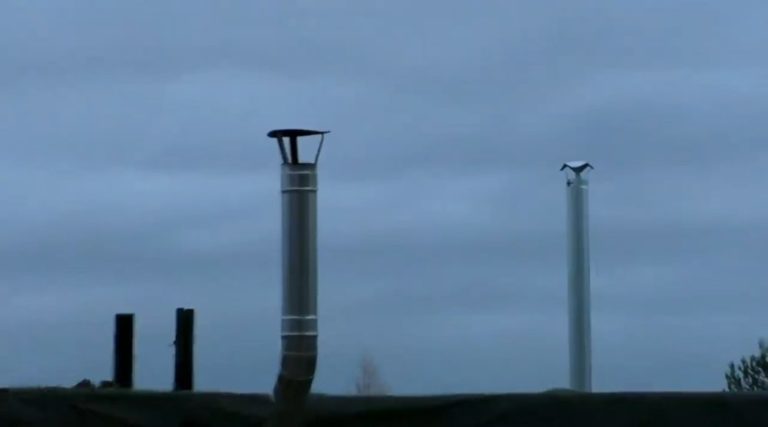
- Install on each hood on the roof deflectorIn total, there should be two pipes: one from the garage and one from the basement.
Test the draft near the intake and exhaust vents with a lighter or a piece of paper. Install dampers to regulate the air flow rate. Seal the gaps where the ducts pass through the walls with sealant or foam.
Answers to the most pressing issues
Find out the approximate thickness of the garage floor screed. Using a diamond core drill, cut a hole at the calculated distance from the top of the inspection pit. Use extension bits to dig out the soil to create a through-hole under the floor screed. Insert a 100 mm diameter pipe into the prepared channel.
Install the pipe vertically in the pit. Extend the lower end with a bend 20 cm above the inspection pit floor, beyond the boundaries of the future wall. Extend the upper end outside with bends and straight sections. After the inspection pit walls are erected, the vertical channel will remain outside the brick or blockwork. Cover the resulting vent at the bottom with a grate to prevent contamination by large debris.
Ducts become clogged with dust, insects, rodents, and other contaminants. Clean the air ducts at least once a year and test the system for proper operation.
For a home garage, provide natural air exchange with damper control.


